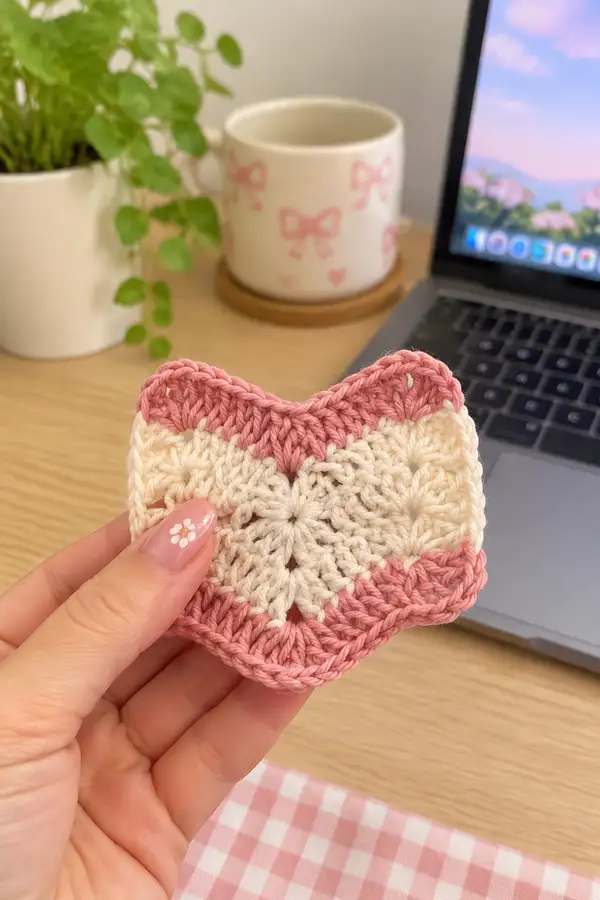
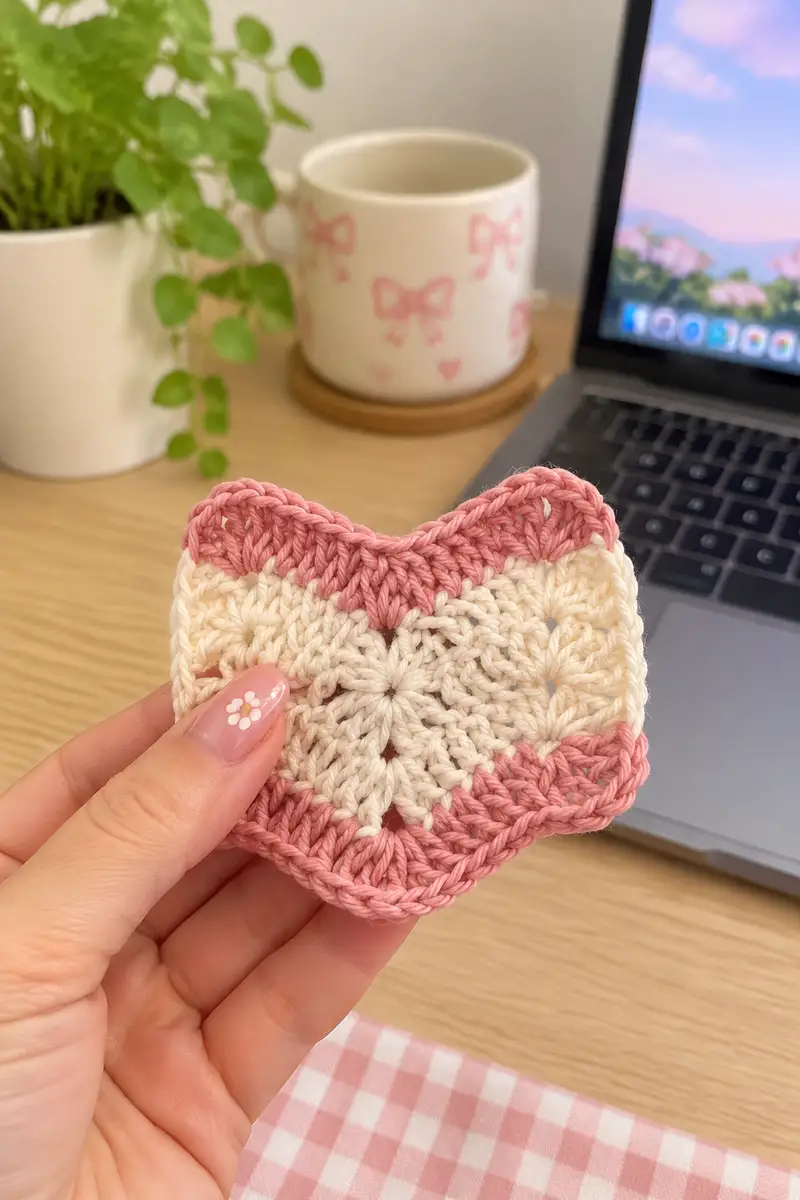
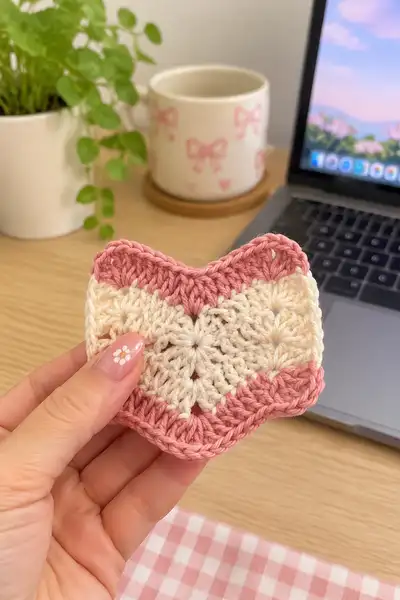
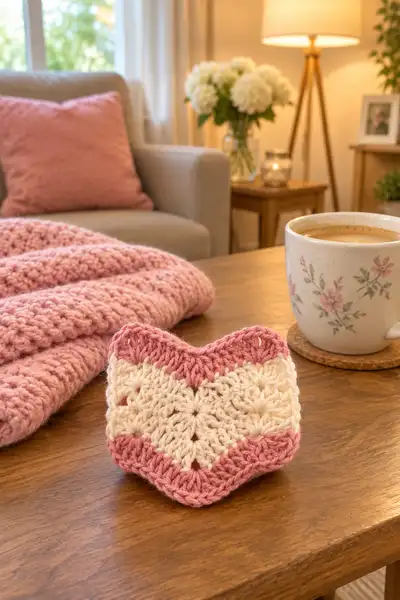
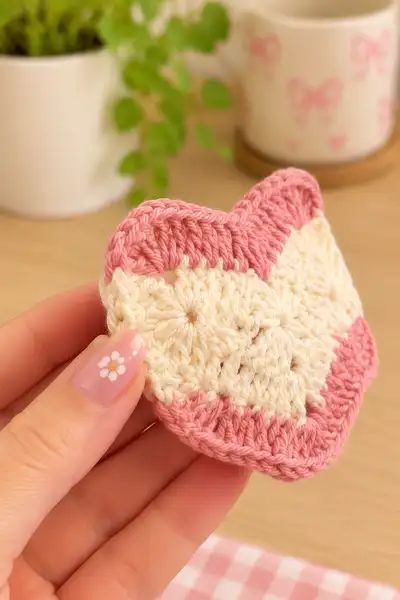
Create a soft, romantic bedspread built from heart-shaped granny motifs in dusty pink and warm cream. This pattern teaches a lacy heart square motif, as-you-go joining and a scalloped blanket border so you can make a cozy, ripple-style bedspread. Each motif stacks two pink chevrons framing a cream heart centre — perfect for a sweet, cottagecore bedroom.
Progress Tracker
0% Complete
— Overview and Notes :
Info :
This pattern is written in US terms. Each small motif is worked in two colors to create a centered heart-shape. Work motifs flat in rounds (continuous spiral is optional). Motifs are joined using an as-you-go slip-stitch join method described in the Joining section. The pattern gives a motif template and then explains repeating rounds, joining, and a multi-pass border to finish an elegant bedspread.
Info :
To achieve consistent size, make a 4–6 motif sample, wet-block or steam-block to match gauge, then measure before committing to full blanket quantities. The instructions below are intentionally detailed and include many small Info sections to help with assembly and tension.
— Motif (Granny Heart Square) :
Gauge :
One finished motif (after blocking): approx 9cm / 3.5in square when worked with 3.5mm hook and DK yarn. Gauge will vary; adjust hook as needed.
Color Key :
CC = Cream (center/main color). AC = Accent dusty rose (top and bottom points and outer border).
Round 1 :
Make a magic ring. Ch 1, 6 sc in ring. Pull tight. (6 sc)
Round 2 :
2 sc in each st around. (12 sc)
Round 3 :
(1 sc, 1 inc) x 6. (18 sc)
Round 4 :
(2 sc, 1 inc) x 6. (24 sc)
Round 5 :
(3 sc, 1 inc) x 6. (30 sc)
Info :
Rounds 1–5 build a firm centre. Keep these rounds in CC to form the cream heart middle. Place a removable stitch marker in the first stitch of Round 5 to help orient the heart 'north' during later shaping rounds.
Round 6 :
(4 sc, 1 inc) x 6. (36 sc)
Round 7 :
(5 sc, 1 inc) x 6. (42 sc)
Round 8 :
(6 sc, 1 inc) x 6. (48 sc)
Info :
At this point you have a nicely even circular base with 48 sts. The remainder of the motif shapes those 48 base stitches into a soft square with heart impressions. Keep counts accurate; the next rounds convert sc rows into textured stitches.
Round 9 :
Switch to AC? Not yet — remain in CC. Ch 2 (counts as hdc). Hdc in each st around. Join with sl st to top of ch-2 if you prefer joined rounds, or continue in spiral for a seamless look. (48 hdc)
Round 10 :
1 hdc in each st around. (48 hdc)
Round 11 :
1 hdc in each st around. (48 hdc)
Info :
These hdc rounds add body and height to the motif so the later shell rounds sit neatly. If you prefer a lacier result, replace hdc with dc and note your final motif will be slightly larger.
Round 12 :
1 hdc in each st around. (48 hdc)
Round 13 :
Begin shaping the heart top lobes. *Working into the next 6 stitches: [hdc, 2 dc cluster (3 dc worked into same st), hdc]*. Repeat from * x6. (48 base stitch positions; 6 decorative clusters inserted into 6 of those positions; maintain 48 working positions)
Info :
In the notation above each bracket describes work into a single base stitch or stitch cluster; for counting, treat the decorated position as one stitch location to keep the 48 counts accurate. The 2-dc cluster makes fuller lobes for the top heart.
Round 14 :
1 sc in each st around to add definition to the new texture. If you used dc clusters, work sc into the middle of the cluster to anchor. (48 sc)
Round 15 :
Change to AC (dusty rose). Info : Change to dusty rose yarn now. Join with a standing hdc into the same stitch to avoid loose floats. Carry CC inside motif using minimal yarn or cut and weave in later.
Round 16 :
With AC, work *(ch1, 3 dc shell into next st, ch1, skip 1 st, sc into next 2 sts) x 6* — this creates the beginning of the top scalloped heart shape. (Maintain 48 stitch positions)
Round 17 :
1 sc in each st around in AC to tidy edges and make the outer pink band sit flat. (48 sc)
Info :
Round 16 places the first pink scallop across the top and bottom of the motif. When making many motifs, keep the AC bands consistent by always joining AC at the same round number and orientation marker placed earlier.
Round 18 :
Turn the motif orientation so the point you want to be the bottom appears. Work *5 sc, 1 dec* x6 to begin subtle bottom shaping and create the downward heart point. (42 sc)
Round 19 :
(4 sc, 1 dec) x6. (36 sc)
Info :
Begin stuffing? For a flat motif no stuffing is needed. If you plan to use this motif as a small padded coaster or cushion panel, stuff lightly between these rounds. For bedspread, remain flat.
Round 20 :
(3 sc, 1 dec) x6. (30 sc)
Round 21 :
(2 sc, 1 dec) x6. (24 sc)
Round 22 :
(1 sc, 1 dec) x6. (18 sc)
Info :
Fasten off AC if you carried it; weave tails in to the back. At this point your motif will have a cream center, a row of texture, a dusty-rose band across top/bottom and a shaped bottom point. Repeat motif production to make as many motifs as required for your bedspread layout (example layout provided below).
Motif Repeat Guidance :
Make motifs in batches of 6–12 and block them lightly on a flat surface to even their edges. For a single/twin bedspread you will need approx 63–77 motifs depending on motif size and seam allowance (7 x 9 or 7 x 11 grid). For a double/queen, plan more rows and measure as you go.
Info :
When making multiples, keep an inventory table: motifs completed, motifs joined, motifs blocked. This helps with assembly and keeps the pattern symmetrical when alternating colour bands across rows.
— As-You-Go Joining (Continuous Join Method) :
Info :
This method joins a finished motif to previous motifs on its right and below as you work the final AC rounds, so you avoid sewing many seams later. Always work with the motifs right side up and join into the AC rounds to ensure a neat seam.
Join Round 1 :
Lay a new motif beside an already-placed motif so right sides match. With AC attached to the new motif, start at the top right corner. Slip-stitch into the corresponding edge stitch of the placed motif, then sc into the next edge stitch of the new motif, slip-stitch into placed motif, sc into new motif — alternate sc (new motif) and sl st (placed motif) along the touching edge until the edge is joined. Repeat for the lower touching edge if joining two directions. Keep tension even. (Edge seam length equals number of edge stitches; treat as matched pairs)
Info :
For corner joins where four motifs meet, work the join in the order: right, bottom, then slip into the corner of the motif below so intersections are pinned and secure. Use small stitch markers to mark the corner stitch locations before you begin joining to avoid misalignment.
Join Round 2 :
If joining multiple motifs in a row, continue to work the AC outer rounds across the row and join each new motif to its left neighbour only (right-to-left or left-to-right orientation as preferred). After the full row is made, work a joining pass down the length to connect rows.
Info :
When joining, avoid stretching motifs — the seam should lay flat. If you see bunching, unpick a few join stitches and redistribute tension. Pinning motifs prior to joining makes results far neater.
Continuous Join Pattern Steps :
Repeat the following for each motif you attach: position motif, attach AC at the starting corner with a sl st, *sc into new motif edge stitch, sl st into corresponding stitch of placed motif* until the edge is complete. Fasten off at the end of each join or carry AC along for next motif for uninterrupted colour flow.
Info :
If you wish to avoid visible slip-stitches on the right side, work the join with the placed motifs turned to the wrong side and then hide the seam on the back. As-you-go joining on the RS produces a decorative ridge which many makers prefer.
— Layout Planning and Quantity :
Info :
Example single/twin layout: 7 motifs across x 9 motifs long = 63 motifs. Example queen layout: 9 x 11 = 99 motifs. Measure blocked motif width and multiply to reach desired blanket dimensions including seam allowances. Leave extra motifs for testing border effects before committing to full join.
Row Joining Strategy :
Work the first row of motifs in a straight line joining left-to-right. For the second row, start the left-most motif and join across; when you reach motifs that need to join to the previous row, match and connect the bottom edge of the above-row motif with the top edge of the new motif using the continuous join technique — this will create neat intersections.
Info :
If your motif orientation alternates (for a checkerboard effect) maintain orientation consistency so the heart points line up or alternately face each other according to your design. When alternating, pin a 4x4 sample and photograph it for future reference before mass joining.
— Blanket Joining Rounds (numbered continuing) :
Round 24 :
After all motifs are joined into a panel, work a round of sc around the entire blanket in AC to even the outer edges. Work 1 sc in each exposed edge stitch; in corners work (sc, ch1, sc) to keep corners square. (Count equals blanket edge stitch count, variable)
Info :
This sc round evens the outer edge and creates a firm base for the border. If your outer edge is wavy, add or subtract sc in the corner to flatten — it is okay to vary by a few stitches per corner.
Round 25 :
Change to CC. Work 1 hdc in each st around to create a subtle inner band. (Same stitch count as previous round)
Round 26 :
1 hdc in each st around. (Even)
Round 27 :
Switch to AC. Begin ripple scallop border: *[ch2, skip 1 st, 5 dc in next st (shell), skip 1, ch2, sl st in next 2 sts]* repeat around. Adjust shell placement so scallops fall in the middle of motif joins for visual harmony. (Stitch count will vary slightly by number of motif edges, shell count approx equal to motif joins across edge)
Info :
Place shells roughly centered over motif seams — this gives the border a repeating chevron echo that complements the heart points. If the blanket edge length does not divide evenly, adjust with an extra 1–3 sc between shells.
Round 28 :
1 sc in each st and around shells work (sc, ch1, sc) into the center dc of shells to anchor. (Even)
Round 29 :
Change to CC. Work 1 hdc in each st BLO to form a ridge for the next scallop pass. (Even)
Info :
Using BLO on this pass creates a subtle ridge that makes the next shell layer sit raised, producing a layered scallop reminiscent of the motifs' heart lobes.
Round 30 :
With CC, work shells on top of previous shells: *skip 2 sts, (7 dc) in next st, skip 2 sts, sl st* — this creates a larger rounded scallop. Repeat around. (Shells will be fewer and larger than previous round)
Round 31 :
1 sc between shells and 3 sc across shell peaks to anchor. (Even)
Info :
At the far outer edge you may notice corners pull; add an extra sc or ch-2 space at corners to maintain a flat edge. Visual symmetry matters — step back to view entire blanket and adjust evenly on all sides.
Round 32 :
Change to AC. Work a final decorative row: *ch1, sc in next 2 sts, picot (ch3, sl st into first ch), sc in next 2 sts, sc around shell valley* — repeat around to add tiny points that echo the motif hearts. (Even)
Round 33 :
Finish with a neat slip-stitch round in AC across both loops for a tidy edge. Fasten off and weave in tails. (Even)
Info :
Block the blanket after the final round to even shell curves and set the border. Light steaming or wet-blocking works well on cotton and cotton-blend DK yarn. Pin shells into a uniform curve for the best finish.
— Alternate Border Option (for larger, fluffier border) :
Round 34 :
Change to a 4.0mm hook for a looser drape. Work 1 dc in each st around to add a soft frame. (Even)
Round 35 :
Work a V-stitch pass to give an open scallop: *(dc, ch2, dc) in valley between shells, sc in middle of shell* — repeat around. (Even)
Info :
This alternate border is great when you want a cozier, more drapey edge for a throw rather than a structured bedspread. Switch hooks only for border if desired; remember to weave in ends securely because the border stitches are often on heavy use areas.
Round 36 :
Return to 3.5mm hook and AC. Work a final round of sc in both loops to stabilize. Fasten off and weave in ends. (Even)
Info :
If you wish to add embroidered detailing (tiny hearts, initials), plan and mark them now on the flat, blocked blanket using pins or fabric chalk before stitching.
— Optional Raised Heart Puff Row (decorative mid-blanket band) :
Info :
If you want a textured band across the blanket to break up repeated motifs, work one row of 'puff hearts' across the center. This involves crocheting puff stitch clusters in CC or a slightly darker rose to stand out. Add this before final border passes.
Round 37 :
Identify center row of motifs. Working across a single motif seam, insert hook under two loops and work a 5-loop puff stitch (yo, pull through 5 times) then ch1 and sl st to secure between motif points. Repeat to create a line of raised hearts. (Repeat count depends on blanket width)
Info :
Puff stitches are anchored in the join seams to avoid distorting motifs. Work them symmetrically and block after completion so the raised band sits neat and even.
— Finishing Touches and Weaving :
Round 38 :
Weave in all ends on RS and WS, trimming close. Use tapestry needle to weave tails through several rows of stitches creating a secure, hidden finish. For colour changes left long inside the motif, either weave them into the back or snip close if carried minimal length.
Round 39 :
Final blocking pass: evenly pin blanket on blocking surface, shape shells and points. Spray or steam lightly and allow to dry fully. Remove pins and gently press if desired. (No stitch count)
Info :
Take photos facing natural light to document placement of motifs and border treatments in case you want to replicate this finish later. Enjoy the satisfaction of a well-blocked, even bedspread!
Round 40 :
Care tips: Wash on gentle cycle with cool water or spot-clean. Re-block if necessary. Use mild detergent for cotton DK yarns.
Info :
If you used 100% cotton, the blanket will soften after washing but keep its shape well after blocking. For a plusher finish, use a cotton/acrylic blend yarn and tumble dry gently if the yarn label allows.
— Troubleshooting & Tips (extra Info rounds) :
Round 41 :
Tip: If motifs vary slightly in size, steam-block all to the larger size and adjust seam tension during the join to compensate. This yields the least visible difference across a large blanket.
Round 42 :
Tip: When joining, always check that heart points on adjacent motifs align the way you intend (all pointing same direction or alternating) before committing the long seam.
Round 43 :
Tip: For a quicker project, make the bedspread with fewer motifs (smaller cover) or use a thicker yarn and larger hook to maintain motif proportions but increase size per motif.
Round 44 :
Tip: Label your skeins and keep partial skeins together; dye lots vary and you will notice differences on a large bedspread if you mix lots without planning.
Info :
This pattern intentionally includes many small rounds and Info entries to give you step-by-step clarity when making dozens of motifs and performing multiple join methods. If you work methodically you will find the process meditative and the result rewarding.
Round 45 :
Optional: Add a thin backing of cotton flannel for extra warmth and to protect the join seams; baste the backing to the blanket using whipstitch and matching thread for a quilted finish.
Info :
If you add a backing, ensure seams are neat and all yarn tails are fully secured to prevent fraying during use and washing.
This charming heart-granny bedspread brings gentle nostalgia to the bedroom — each small motif is a little love note made in yarn. The dusty-rose scallops and creamy hearts create a soft ripple that feels both vintage and modern. Enjoy the slow, comforting process of making motif after motif until your bedspread comes together in a patchwork of warmth. 🧶💕 When it’s finished, it’s a beautiful, handmade heirloom ready to give or to keep. Happy stitching! 🌙✨