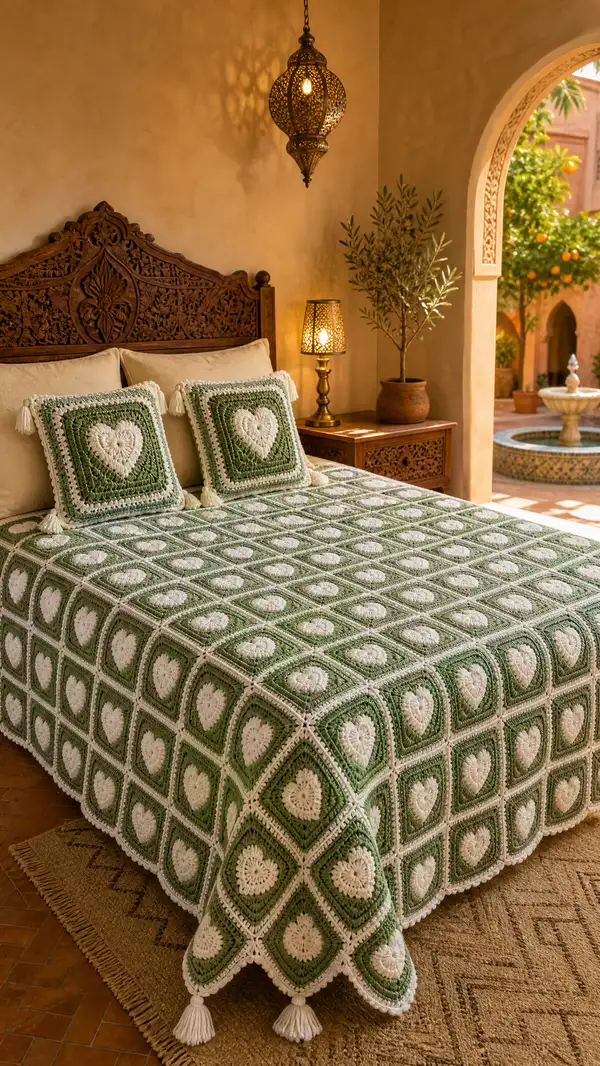
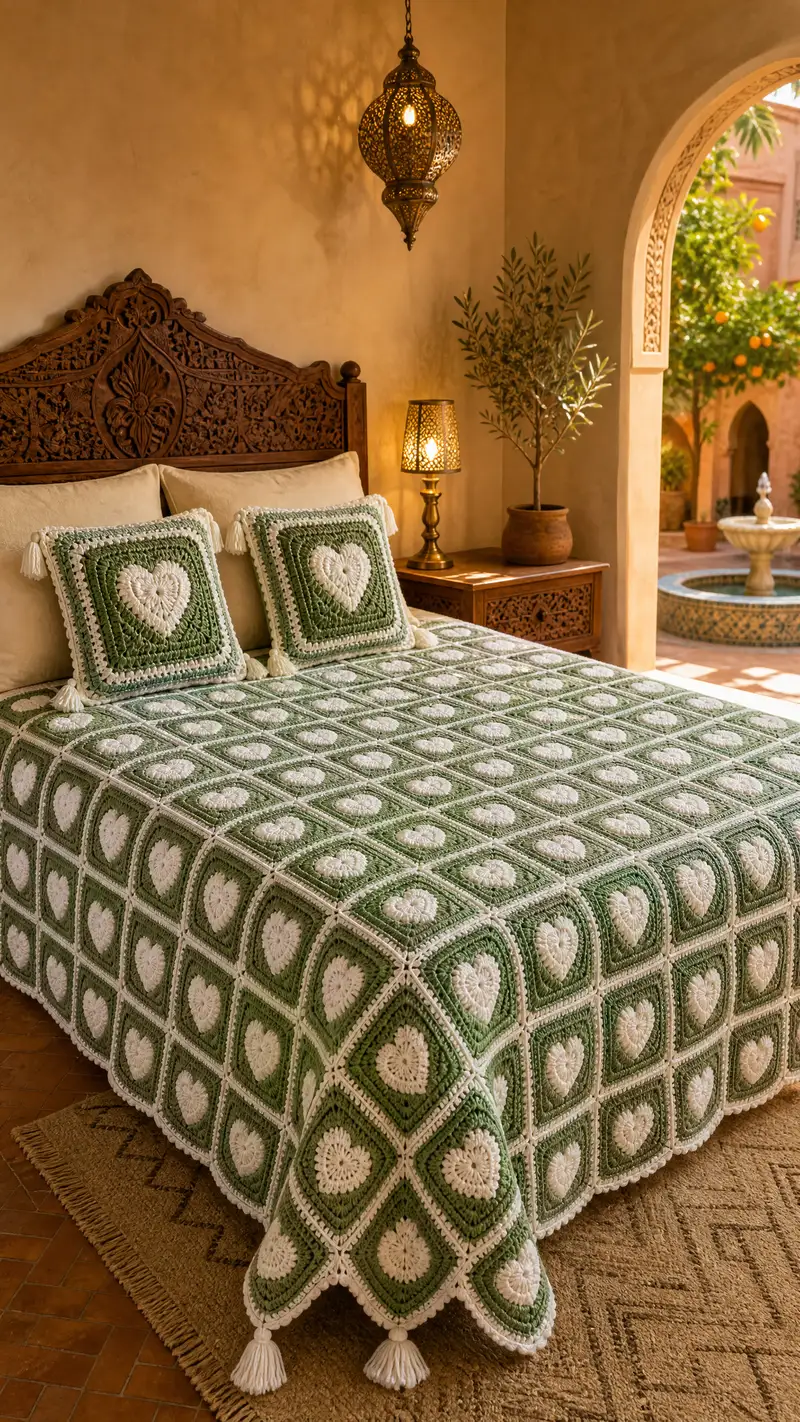
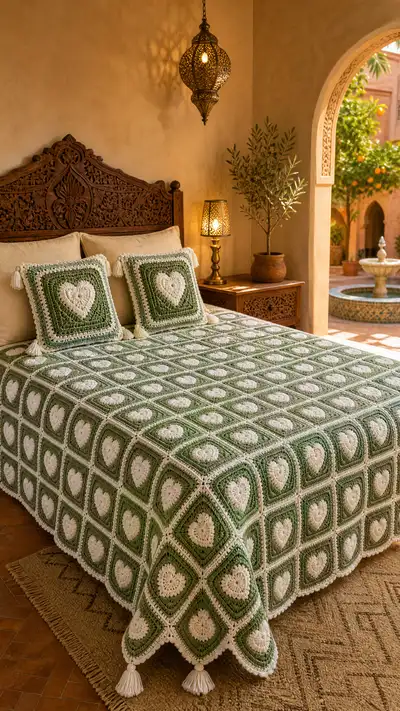
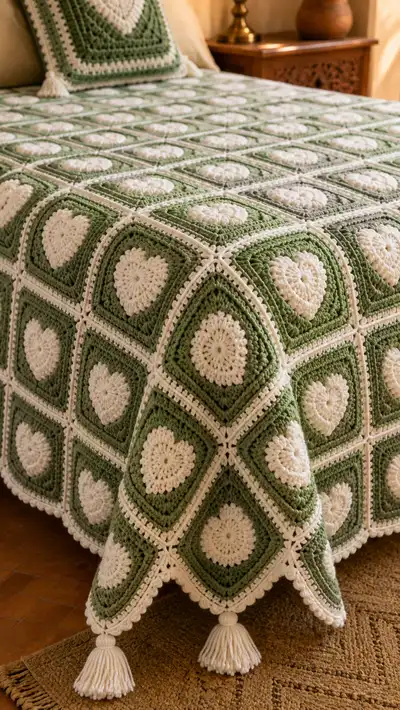
A beautifully textured bedspread made from sage green and cream heart granny squares. Each square features a raised heart motif in cream set against a soft sage background, joined with neat cream join-as-you-go seams and finished with a scalloped edge and tasseled corners. This pattern includes full instructions for the motif, square expansion, joining method, border and matching pillow covers. Perfect for adding a cozy, handmade touch to a bedroom.
Progress Tracker
0% Complete
— Finished Size & Gauge :
Info :
Finished bedspread in photos measures approximately 90 x 96 inches (queen/king overhang). Final size depends on the number of squares joined. Each completed heart square (after blocking and border rounds shown) measures approximately 6.5 x 6.5 inches. Gauge: 12 sts and 6 rows of the outer square rounds = 2 inches with 4.0mm hook. Make a sample square to confirm your gauge before committing to full blanket.
— Notes & Techniques :
Info :
This pattern uses puff stitches to create a raised heart centre. Puff stitch here is worked as yarn over, insert hook in stitch, yarn over and pull up loop (repeat to collect 5 loops), yarn over and pull through all loops, ch1 to close puff. You may substitute cluster or bobble if preferred. The squares are worked from centre out in rounds and then squared off with corner groups. Two joining methods are given: Join-As-You-Go (JAYG) visible cream seam and whip stitch/flat seam for a neater finish. Weave in ends as you go if you prefer fewer tails.
— Heart Center Motif (Make 1 per square) :
Round 1 :
With Cream, make a magic ring, ch1, 8 sc in ring; pull ring tight (8)
Round 2 :
Ch2 (counts as first hdc), 1 hdc in same st, 2 hdc in each st around (16)
Round 3 :
Ch2, (1 hdc in next st, 2 hdc in next st) x 8 (24)
Round 4 :
Change to Sage Green at end of round (carry cream if desired). Ch2, (2 hdc in next st, 1 hdc in next 2 sts) x 6 (30)
Info :
We change color now to build a small circular disk that will be shaped into a heart in the next rounds. Carry the unused yarn loosely along the WS to avoid bulk if you plan to continue in stripes; otherwise fasten off and join when needed.
Round 5 :
With Sage, ch1, sc in same st, *puff in next st (see technique notes) ch1, sc in next 2 sts; rep from * around to create raised clusters(approx 10 puff groups alternating with single sc's) — total stitch count stays 30 when counting sc/puff as one st each for layout (30)
Round 6 :
Ch2, (hdc in next 3 sts, 2 hdc in next st) x 6 (36)
Round 7 :
Ch1, sc in each st around (36)
Info :
Shape the heart: we will define two lobes at the top by working short post clusters and a pointed base by reducing on the lower side. Turn piece so that you can visualize the top and bottom of heart before beginning shaping rows. Place a removable marker in the first stitch of next round to keep orientation.
Round 8 :
Switch to Cream. Ch2, 1 hdc in next 4 sts, (2 hdc in next 2 sts) [this forms a slight outward curve for one lobe], continue to next lobe area: 1 hdc in next 4 sts, (2 hdc in next 2 sts), finish remaining stitches hdc to end — total (42)
Round 9 :
Ch1, sc in next 6 sts, *(puff, ch1, puff) in next st to emphasize lobe crest, sc in next 8 sts, rep from * once to create mirrored lobe; sc remaining to end (42)
Round 10 :
Ch2, (hdc in next 5 sts, 2 hdc in next st) x 6 (48)
Info :
At this stage the center should read as a circular disk with two small bulges on the top edge. We will create the heart silhouette in the next few rounds using controlled decreases on the lower edge and clustering on the upper edge. Keep stitches even and watch pulse of puff placements for symmetry.
Round 11 :
Ch1, sc around working puff clusters at the top lobe area: sc 8, (puff, ch1, puff) in next st, sc 10, (puff, ch1, puff) in next st, sc to end (48)
Round 12 :
Change to Sage Green. Ch2, (hdc in next 6 sts, 2 hdc in next st) x 6 (54)
Round 13 :
Ch1, sc in next 54 sts around (54)
Info :
We will now begin to square the motif. The heart occupies the central rounds; subsequent rounds build a circular field that will be squared with corner increases. Mark the four cardinal points (top, right, bottom, left) with stitch markers before the first square forming round to ensure proper corner placement.
— Squaring Out to Form a Granny Square (Rounds 14-30) :
Round 14 :
With Sage, ch3 (counts as dc), dc in next 6 sts, *(2 dc, ch2, 2 dc) in next st for corner, dc in next 14 sts, rep from * to make four corners — total stitch groups such that you have 4 corner spaces and approx 72 dc total when counting corner groups as 6 sts each (approx 72)
Round 15 :
Ch2, (hdc in next 8 sts) across until corner, in corner work (hdc, ch2, hdc) to maintain corner, continue to end (72)
Info :
Switch to working in rounds that create a square: each corner is (2 dc, ch2, 2 dc) or in smaller gauge hdc equivalents. Keep corners aligned by counting dc between corners; adjust dc count if necessary to keep square edges straight. Blocking will also help the square become perfectly flat.
Round 16 :
Change to Cream. Ch1, sc in each st across each side, in each ch2 corner work (sc, ch2, sc) — maintain stitch count approx 72 (72)
Round 17 :
With Cream, ch2, (hdc in next 10 sts) across; in corner (hdc, ch2, hdc) — stitch count increases slightly if dc spacing changed; expect approx 80 (approx 80)
Info :
At this point alternate Sage and Cream rounds to create a framed heart look. The center heart will stay cream; surrounding field in sage creates contrast. If you prefer a reversed palette, swap color placement now. Always fasten off and weave ends neatly if you are not carrying yarn.
Round 19 :
With Sage, ch2, (dc in next 12 sts, 2 dc in next st) x 4 across sides — this adds width and keeps square proportional (approx 96)
Round 20 :
Ch1, sc around in each st and sc in ch2 corners (96)
Round 21 :
Change to Cream. Ch2, 1 hdc in each st around working (hdc, ch2, hdc) in corners to keep square shape (96)
Info :
Measure your square now. For the bedspread in the photo each finished square after these rounds is approximately 6.5 inches. If your squares are larger or smaller, you can add or reduce rounds in sage/cream until the square measures as desired. Block all squares to achieve uniform size and shape for neat joining.
Round 22 :
With Sage, ch2, dc around working (2 dc, ch2, 2 dc) in each corner; dc evenly between corners to reach approx 108 dc total (108)
Round 23 :
Ch1, sc around in each st BLO to create a slight ridge edge around the square (108)
Round 24 :
Change to Cream. Ch2, 1 hdc in each st around working (hdc, ch2, hdc) in corners (108)
Info :
These two rounds (BLO sc and cream hdc) create a framed border and give a crisp edge for joining. If you prefer less depth at the seam, work the round in regular sc instead of BLO. Mark the center of each side with a stitch marker — these will help align joins when assembling multiple squares.
Round 25 :
With Sage, ch1, sc in next 4 sts, *(skip 1 st, dc 3 cluster in next st to create textured diagonal, sc in next 6 sts) repeat around, finishing corners with sc in corner groups to maintain square geometry (approx 108)
Round 26 :
Ch2, dc around evenly but reduce one dc in each side to shape slightly and prepare for join (approx 100)
Info :
If making pillow squares, stop after Round 24 and work additional rounds described in the pillow section. For bedspread squares continue to outer joining rounds below. Keep a tally of how many squares you make in total and by row to match bed dimensions. Example layout for queen/king in photos: 12 squares across x 14 squares down (168 squares). Adjust as needed.
Round 28 :
With Cream, ch1, sc around to neaten edges and prepare for join-as-you-go method (100)
Info :
Fasten off and block the square on blocking mats, stretching gently to shape square corners. The cream frame will read clearly against the sage. Make all required squares now in batches to ease production; I suggest making 4–8 squares per sitting to maintain rhythm and consistent tension.
— Alternative Heart Center Variation (Optional) :
Info :
If you prefer a more defined heart shape with a carved look, use front post puff rows for the lobes and a tapered decrease on the bottom half. Work two rounds of FPdc around targeted stitch groups to lift the lobe. This requires mapping heart top and bottom before adding post stitches.
— Join-As-You-Go (JAYG) Method for Squares :
Round 30 :
When you have one finished square (Square A) and are about to add Square B to its right, work Square B to its penultimate round and prepare to work the final Cream sc round as join. Join-as-you-go instructions begin on the final round of Square B.
Round 31 :
With Cream on Square B, ch1, sc in first st, sc in next st, *sc in next st of B, then with hook insert into corresponding st on adjacent Square A and sl st to join (or sc through both loops) — continue across side until you reach the corner (work corner as sc in corner of B, sc in corner of A, ch2, sc in same corner of A then continue) — join full side in this manner (counts remain same on each square, approx 100)
Info :
The JAYG method produces a visible cream ridge and helps squares lay flat without bulky seams. If you prefer a less visible join, use the mattress stitch or whip stitch later to join un-joined squares. Keep tension loose while joining to avoid puckering; use the same gauge hook as used for your final rounds.
Round 32 :
Repeat joining for the next adjacent square in the row. When you reach a corner where a square must be joined on two sides (above and left), work corner join as: sc in corner of new square, sc through joined seam of first square, ch2, sc into the corner of adjoining square to anchor (this creates a neat four-way intersection)
Info :
When joining across rows, work in the same way: build a row of joined squares horizontally using JAYG then join each row to the existing blanket vertically by working final rounds of each square and connecting to the row below in the same fashion. Use pins to align corners so grids are square and even.
— Alternative Seaming: Mattress Stitch / Whip Stitch :
Round 34 :
Lay two squares WS together, matching stitches. Using cream yarn and a yarn needle, mattress stitch along the seam by inserting the needle under the horizontal bar of the front square, then the corresponding bar of the back square alternately; pull gently to join. Fasten off and weave ends. Repeat for all seams.
Info :
Mattress stitch gives a flatter join than JAYG and hides the seam on the WS. It is slightly slower than JAYG but creates a more continuous surface. Choose whichever join aesthetic you prefer. Use a common color for join (cream in our sample) to allow the grid to be visible.
— Bedspread Assembly Layout & Square Count :
Info :
Example layout for queen/king bed in photo: 12 squares across x 14 squares down = 168 squares. Each square at 6.5 inches gives an overall coverage of approximately 78 x 91 inches before drape. Add an extra border round to each outer edge for additional overhang. Adjust number of squares if your gauge differs.
Round 37 :
Make squares in batches until you reach the required number for layout. Join horizontally to create rows then join rows together. Check alignment frequently and block each joined row before proceeding to full assembly.
— Outer Scalloped Border (Worked after assembly) :
Round 38 :
With assembled blanket laid flat, attach Cream at any corner. Ch1, sc in same st and evenly around entire perimeter working 3 sc in each corner space to round seam; place sc approximately every 0.25–0.5in depending on density; approximate stitch count around full blanket will be large — estimate 1400–1800 sc depending on size
Round 39 :
Ch1, (sc in next 3 sts, skip 1 st) around to create a slight scalloped indentation base (maintain even rhythm) — counts reduce slightly because of skips
Info :
Working the border on the assembled blanket requires careful handling. Work on a large table and check that the blanket lays flat. Keep a comfortable tension in border rounds to avoid drawing in the edges. Use blocking pins after border is complete to set scallops.
Round 40 :
Change to Sage. Round of (dc, ch2, dc) in each space created by previous round to lift scallops slightly, placing these at regular intervals around entire edge. Keep corners as (dc, ch3, dc) for a pronounced curve.
Round 41 :
With Cream, work a decorative shell: *skip 2 sts, (5 dc) in next st, skip 2 sts, sc in next st; rep around. This creates pronounced scallops. Fasten off and weave ends.
Info :
If you prefer a softer scallop, substitute 3-dc shells instead of 5-dc. For a tighter edge for beds that will be washed often, use hdc shells. Make sure to block scallops after finishing to give them uniform curve.
— Decorative Picot Ridge (Optional Final Edge) :
Round 43 :
With Cream, attach in the back loop of the last round and work (sc, ch3, sl st in 3rd ch) every 6 sts to create small picot peaks across shell edges; this creates a crisp vintage finish.
Info :
Picots can be subtle; practice on a swatch to ensure they are evenly spaced. If picots pull the blanket edge, remove and widen spacing or omit this round.
— Tassels & Corner Treatment :
Round 45 :
Make 4 large cream tassels or one tassel at each corner: wrap cream yarn around a 6-inch card approx 25–35 times (for chunky tassel), tie a small strand at top to finish and cut the bottom to free tassel strands. Attach to corner by looping through stitches and secure with knot and a few whip stitches in the seam. Trim tassels evenly.
Info :
Tassels will add visible weight to corners and help the bedspread drape softly over edges. Use a yarn needle and a few secure stitches to prevent tassels from coming undone in use and wash.
— Pillow Sham Squares (Make 2 or more for pair) :
Round 47 :
Make motif square following rounds 1–24 and stop after Round 24 (neat cream frame). Measure to fit pillow size: for 18 x 18 in sham, make central square to approx 16.5 in and add two rounds of border to reach final measurement (number of rounds will depend on final square size). Use same join and border techniques for sham as for bedspread.
Round 48 :
To create a closure, make two identical squares for front and back or make single square with zipper/back panel: sew three sides of two squares WS together leaving one side open and insert pillow form, then sew closed or insert zipper along opening.
Info :
For a professional sham, work a separate backing in plain sage color and join with invisible whip stitch. Alternatively use an envelope-style overlap by making the back slightly smaller in height and overlapping inside the front panel.
— Blocking, Washing & Care :
Info :
Blocking is essential. Wet-block each square or use a steam iron to set shape. Pin squares to exact size on blocking mats, allow to dry fully before joining. For care, machine wash gentle cold in a laundry bag, or hand wash; reshape while damp and dry flat. Avoid high heat to prevent fiber distortion.
Info :
Finishing touches: after joining and borders, give the whole bedspread a final light steam blocking to settle seams and scallops. Trim any stray fibers and ensure tassels are even and securely attached.
— Production Tips & Batch Workflow :
Info :
I recommend making squares in color batches — for example, work all cream centers first for 20–30 squares, then switch to sage rounds in a second sitting. This speeds work and keeps color changes efficient. Use a small baggie to store bundles of finished squares to avoid tangles.
Info :
If you need to adjust final size, add an extra outer round of sage or cream evenly around the assembled blanket to increase coverage. Keep in mind each extra round will require additional yarn; plan accordingly.
— Troubleshooting Common Issues :
Info :
If squares curve up at sides, you may be crocheting too tightly in rounds that require chain-2 corners; loosen tension and block squares. If corners flop, add an extra chain or stitch in corner to stabilize. For visible gaps at joins, pick a slightly smaller hook for the final join round to close holes, or add a row of sc around assembled blanket to mask them.
Info :
For color bleeding concerns, pre-wash yarn skeins if dye-lot info is unknown. Test a small swatch with a wet cloth and heat to see colorfastness before committing to whole project.
— Extended Decorative Options (Extra Rounds If Desired) :
Round 56 :
Option: Add a 2-round lace insertion every 6 squares in both directions by working a spacer round of ch-3 loops and a shell round overlay — this creates a more openwork bedspread look for warmer climates.
Round 57 :
Option: Add embroidered vines between heart centers across joined seams by using surface slip stitches in sage, moving diagonally across seam intersections to create a subtle lattice embellishment.
Info :
These additional decorative rounds will increase project time and yarn requirements significantly. Plan and test on a small sample of joined squares before committing to the whole bedspread.
— Finishing & Quality Check :
Info :
Walk around the blanket and inspect joins, block edges if any irregularities appear, and secure any weak joins with additional whip stitches. Trim and hide all ends thoroughly to prevent unraveling after washing and handling.
Info :
Enjoy the process — making a full bedspread is a long but rewarding project. Pace yourself and take breaks; batch work and consistent blocking will produce the neatest result.
Completing this bedspread is such a satisfying journey—each heart square adds a little dose of handmade warmth to your room. The raised hearts, sage-and-cream contrast, and scalloped border make it a beautiful heirloom piece you’ll be proud to display. Take your time, enjoy the repetitive relaxation of making squares, and celebrate the finishing tassels that give the bedspread its charming final flourish. 🧶💚