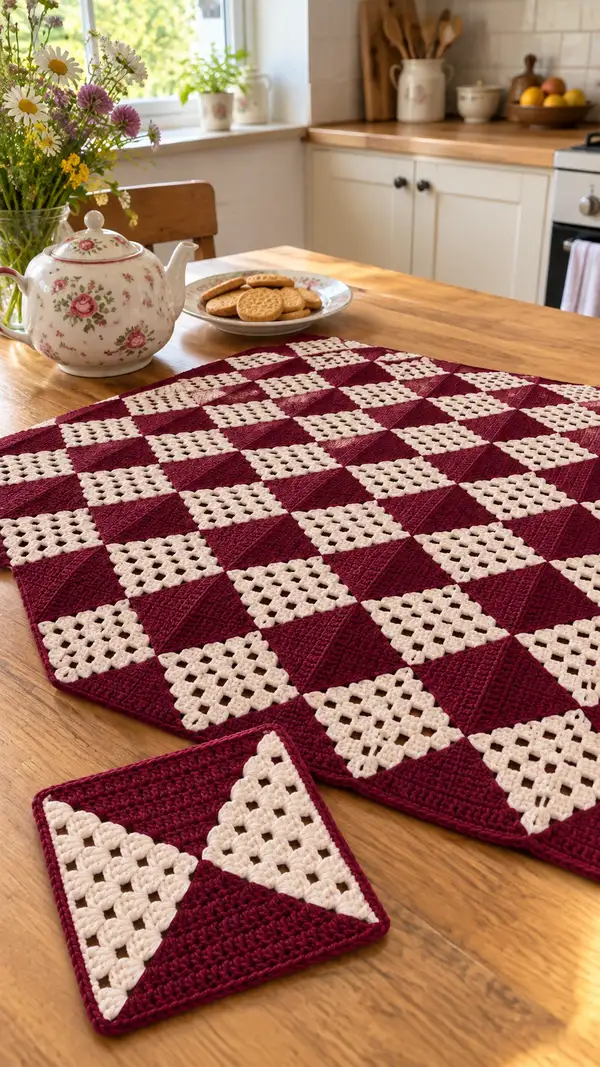
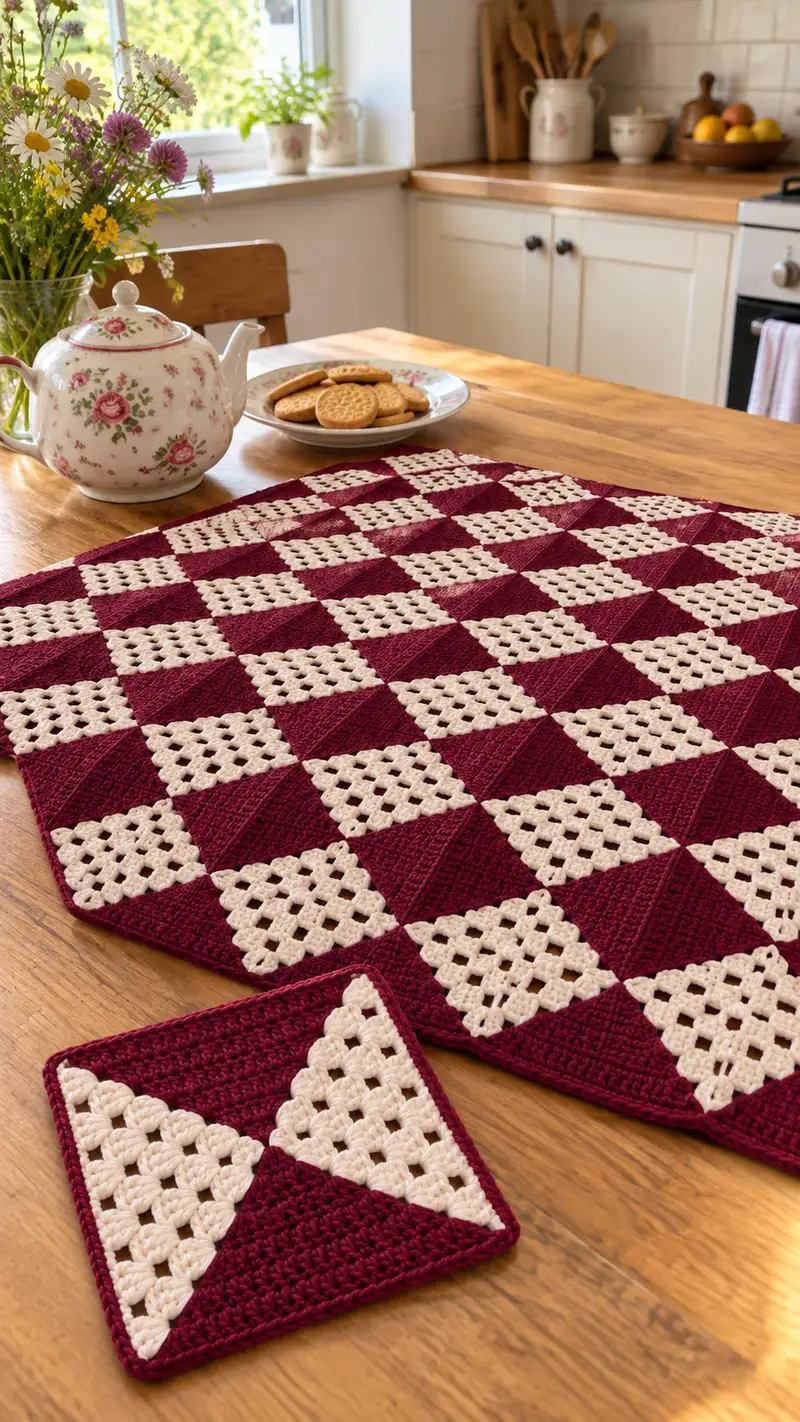
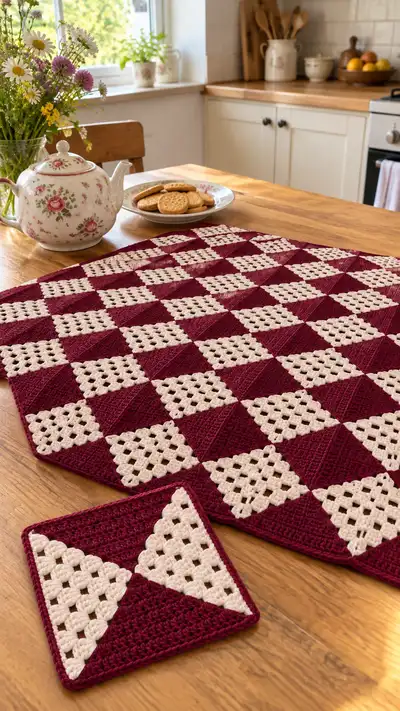
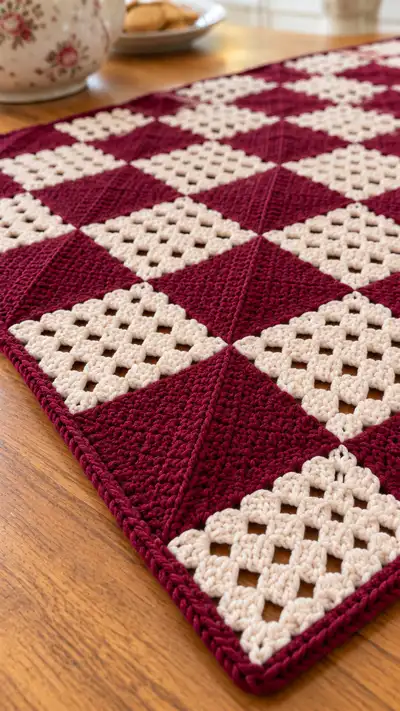
A warm, vintage-inspired checkerboard table runner and matching coaster worked in alternating lacy granny squares and textured solid squares. The runner features deep burgundy and soft cream tiles set on the bias to create a diamond checkerboard effect. Perfect for dining tables, tea trays, or seasonal décor — the finished project has a crisp border and a tidy join-as-you-go construction for a clean, professional finish.
Progress Tracker
0% Complete
— Overview & Gauge :
Info :
This pattern makes a runner using a grid of squares set on the bias so the joined squares read as diamonds. The sample runner is 7 squares across by 5 squares down (35 squares total). You can change the number of tiles to lengthen or shorten. Gauge: 10 cm x 10 cm (4" x 4") = one finished square (after blocking) using 5.0 mm hook, worked in sc rounds for solid squares or granny-style cluster rounds for lacy squares.
Info :
Work tightly for the granny cluster tiles so stuffing or table items don’t show through holes. For the border, use the same hook or one size smaller for a neat edge. Place a stitch marker at the first stitch of every round to keep your place.
— Materials & Layout :
Info :
Make 35 squares total for the runner in a checkerboard arrangement: 18 cream lacy cluster squares and 17 burgundy solid textured squares. Make 4 small tiles for the coaster (2 cream, 2 burgundy), or work the coaster as separate small 2 x 2 joined squares.
Info :
Suggested layout: Alternate cream and burgundy so that each cream square is surrounded by burgundy on all four sides (a chessboard layout). Turn tiles so diagonal textures align with the runner's length to create the diamond pattern.
— Cream Lacy Square (Make 18) :
Round 1 :
16 sc in magic ring (16)
Round 2 :
(1 sc, inc, 1 ch) x 4 around; join with sl st to first sc (20 sc + 4 ch1 corner sps)
Info :
Work the small chain spaces as corner turning spaces. We count only sc stitches in the running stitch count; corner ch1 spaces create the openness that later rounds accentuate into lacy holes by replacing sc groups with chain loops.
Round 3 :
(2 sc, 1 ch, inc, 2 sc) at each side across (24 sc + 4 ch1 corners)
Round 4 :
(3 sc, ch2, 3 sc) into each designated corner space; place (3 dc cluster, ch1) into corner ch1s to begin lacy holes if you prefer a granny cluster feel (alternate option). After work join with sl st (28 sc equivalent)
Info :
For the lacy, classic granny appearance, on Rounds 4 and 6 replace blocks of sc on the sides with 3-dc clusters separated by ch1. The pattern below provides an sc-version with regular ch spaces so stitch counts remain consistent.
Round 5 :
(4 sc, 1 inc) x 4 (32)
Info :
Begin adding the lacy hole pattern: in the center of each side of Round 5, work 'ch3, skip 3 sc, sl st' to create an open window that will be emphasized in the next round. Keep overall sc count consistent by replacing 3 sc with the ch3 loop (counts unchanged for side symmetry).
Round 6 :
1 sc in each st and 1 sc in each ch-space (32) — where you placed ch3 loops, work (3 dc cluster, ch1, 3 dc cluster) into loop to create a lacy block if you prefer a stronger granny motif.
Round 7 :
(5 sc, 1 inc) x 4 (36)
Info :
Now shape the square: on this round adjust spacing so the 4 corner increases sit exactly at the corners. Count carefully — each full round increases the total sc by +4. If using clusters you will keep the same corner increases but replace middle sc sequences with cluster/ch patterns to create the openwork.
Round 8 :
1 sc in each st around, working into FLO on this round if you want a subtle ridge at the next seam (36)
Round 9 :
(6 sc, 1 inc) x 4 (40)
Info :
If you need to reach the target finished square size for your runner, continue rounds using the pattern (N sc, 1 inc) x 4 where N increases by 1 each round producing +4 sc per round. Work until the cream square measures the same as the burgundy square after blocking (see sample below—typically 10-12 rounds total for each tile depending on yarn).
Round 10 :
1 sc in each st around (40)
Round 11 :
(7 sc, 1 inc) x 4 (44)
Round 12 :
1 sc in each st around (44)
Round 13 :
(8 sc, 1 inc) x 4 (48)
Round 14 :
1 sc in each st around (48)
Info :
Fasten off leaving a 30-40 cm (12-16") tail for joining if you will seam these squares later. If you prefer join-as-you-go, hide the tail and use it as the join yarn when connecting adjacent tiles. Block gently to square each tile — the lacy holes will open up slightly when steamed.
— Burgundy Textured Solid Square (Make 17) :
Round 1 :
16 sc in magic ring (16)
Round 2 :
(3 sc, 1 inc) x 4 (20)
Round 3 :
(4 sc, 1 inc) x 4 (24)
Info :
We will build a square by adding +4 stitches each round (one extra stitch between corner increases). This keeps the four corners equidistant and gives an even square expansion. To create diagonal texture, work every second round in BLO. That subtle rib will read as the diagonal lines shown in the photos.
Round 4 :
1 sc in each st BLO (24)
Round 5 :
(5 sc, 1 inc) x 4 (28)
Round 6 :
1 sc in each st (28)
Round 7 :
(6 sc, 1 inc) x 4 (32)
Round 8 :
1 sc in each st BLO (32)
Round 9 :
(7 sc, 1 inc) x 4 (36)
Round 10 :
1 sc in each st (36)
Round 11 :
(8 sc, 1 inc) x 4 (40)
Info :
To accentuate the diagonal ridges, choose either: (A) work BLO on Round 4, 8, 12 etc so the ridge 'steps' diagonally as the round count increases, or (B) alternate between BLO and normal sc every round. The sample piece uses BLO on even numbered texture rounds and normal sc on odd rounds to create subtle diagonal ribs.
Round 12 :
1 sc in each st BLO (40)
Round 13 :
(9 sc, 1 inc) x 4 (44)
Round 14 :
1 sc in each st (44)
Round 15 :
(10 sc, 1 inc) x 4 (48)
Round 16 :
1 sc in each st BLO (48)
Info :
Work the burgundy squares until they match the cream squares in finished measurement after blocking; for the sample, both tile types are worked to Round 14-16 (approximately 44-48 sc) depending on yarn thickness. Fasten off leaving long tail for join-as-you-go (approx 30-40 cm).
— Join-as-you-go Method (Use when connecting tiles) :
Info :
We recommend joining tiles as you complete them to create a flat, tidy seam. Work one full tile, then for the next tile place it oriented correctly and join along one side on the last round using sl st or single crochet between corresponding stitches. Use a tapestry needle and tail for a sewn join if preferred.
Round 1 (Join) :
When you reach the final sc round of a tile adjacent to a completed tile, align edges. Work 1 sc into first stitch of working tile, then sl st into the corresponding stitch on the completed tile; continue alternating (sc in next st of working tile, sl st into next st of completed tile) across the side until the side is joined. Do not join corners until both adjoining sides are attached to avoid puckering.
Info :
If using join-as-you-go with sl sts, keep tension slightly loose for flexibility; if you prefer a firmer seam, use sc instead of sl st for the join. When joining lacy cream tiles to textured burgundy tiles, match orientation so the open holes line up neatly at seams.
Round 2 (Corner Join) :
For corner points where four tiles meet, use a neat corner join: after joining two sides, on the corner st work (sl st into corner of adjoining tile, ch1, sl st back into next corner) to avoid bulky clusters of stitches. Tidy the corner by slightly tightening the tail when finished, weaving the tail toward the center of the tile.
— Coaster: Small 2x2 Tile Square (Make 1 or 2) :
Round 1 :
Make 4 small tiles: follow the cream and burgundy tile patterns but stop at Round 8 (approx 36 sc) for a smaller square — you will need 2 cream and 2 burgundy tiles for the 2x2 coaster layout.
Round 2 :
Join tiles as described above into a 2 x 2 layout. Once joined, work one round in burgundy around the whole coaster in sc to tidy the seam (approx stitch count varies by size).
Info :
The coaster in the photos uses a bias arrangement where two opposing triangles of cream meet two opposing burgundy squares; you can rotate tiles before joining to achieve the same diagonal look in micro-scale.
— Runner Assembly Layout & Joining Sequence :
Info :
Lay out tiles in rows on a flat surface in the intended pattern (7 across x 5 down). Work left to right; join coins of the first row together edge-to-edge. When joining the second row, attach each tile to the tile above along the top edge as you join along the side edges to tiles already in the row. This reduces handling and keeps tension consistent.
Round 1 :
Join Row 1 first: make first tile fully and leave it as the anchor. Make second tile and use join-as-you-go along one side to attach to the anchor tile as you complete its final round. Continue along the row until you have row of 7 tiles connected.
Round 2 :
When starting Row 2, make the first tile and join it to the tile directly above by joining along the top edge first, then continue joining across the row so each tile is attached to its left neighbor and the tile above.
Info :
For a perfectly even seam, align the center points of the sides and use the same stitch count; if counts differ slightly, ease the fabric and adjust the join by spacing sl sts or sc slightly closer or wider as needed. Pin tiles before joining if you prefer to sew them later.
— Full Runner Border & Finishing Rounds :
Round 1 :
With burgundy, join yarn at any corner of the assembled runner. Work 1 sc in each edge stitch around the entire runner to create a neat outer edge. Note: stitch count will equal the sum of the outer edge stitches of all joined tiles (no single number provided since runner size may vary).
Round 2 :
1 sc in each st BLO around (this creates a slightly raised ridge on the outer edge) — keep marker at the first st to track rounds
Round 3 :
(3 sc, dec) x around sides where needed to maintain neat corners; work 2 sc in corner turns for a square finish
Info :
For the angled diamond edge shown in the photos, after the first full sc round, you can work an additional decorative round of (sc, ch1) clusters at corners to create a slanted corner appearance. Alternatively, keep corners squared for a rectangular runner.
Round 4 :
Work one round of reverse single crochet (crab stitch) around for a neat finishing edge: reverse sc in each st (this will slightly curl the edge and give a clean bind-off).
Round 5 :
Fasten off and weave in all ends along the ridge and into post stitches of the border; trim close when secure.
Info :
Optional: Add a second decorative round in cream to highlight the checkerboard. Work (sc, ch2, sc) in each corner and sc along sides to float a contrasting colour frame. Fasten off and weave ends.
— Blocking & Final Assembly Tips :
Info :
Block the assembled runner gently: pin to shape on a blocking mat and steam lightly or spray with water until the tiles relax. Avoid heavy stretching—just shape the diamonds and ensure the seams lie flat. Let dry fully before use. This will open the cream lacy holes slightly and flatten the joins.
Info :
Weave in ends toward the center of each tile and secure them under border rounds. If you prefer invisible finishing, use mattress stitch with matching yarn and hide ends in the back of the border rounds.
— Troubleshooting & Adjustments :
Info :
If your cream tiles are larger than burgundy tiles, either reduce rounds on cream or add texture rounds to burgundy until sizes match. Keep consistent hook and tension during production of all tiles for uniformity.
Info :
If corners puff up after joining, block and then add a single round of sc in the border to flatten the corner. If seams are too loose, remove and re-join using sc instead of sl st along those sides.
Putting the final border on this checkerboard runner is such a satisfying step — it transforms separate squares into a cohesive, heirloom-worthy piece! The lacy cream tiles bring a light, airy contrast to the deep burgundy solids and the finished edge gives a polished, professional look. Whether you use it daily or for special occasions, this runner brings immediate charm to any table. 🧶✨ Happy stitching and enjoy your new handmade centerpiece! 🍽️