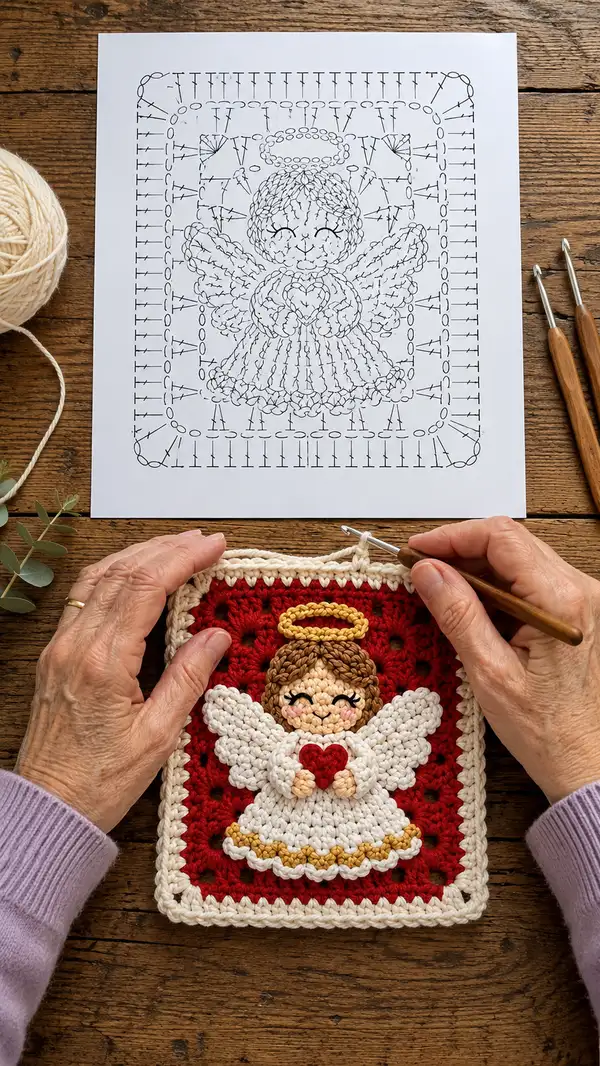
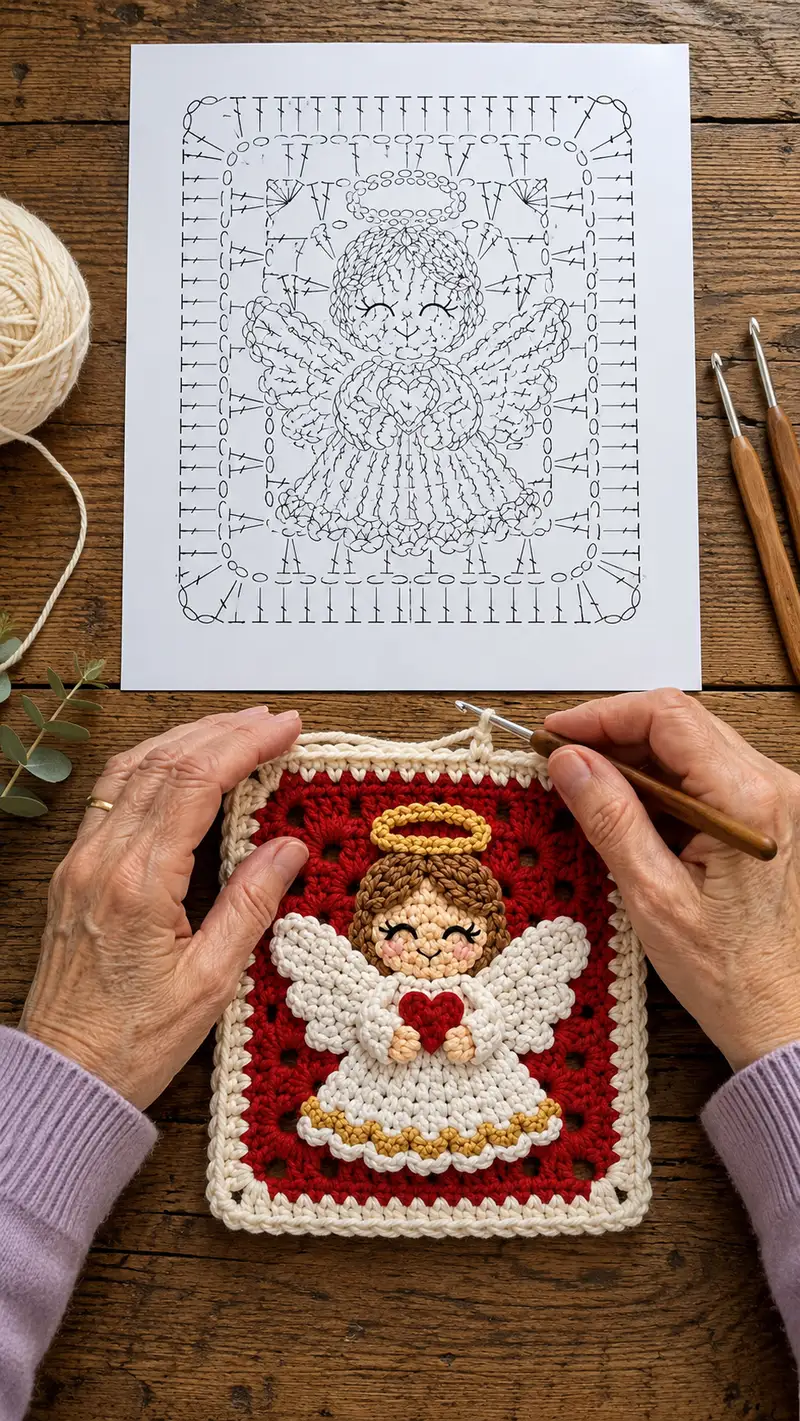
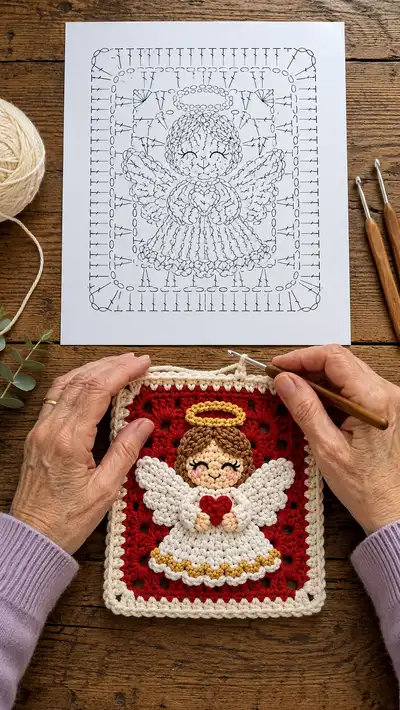
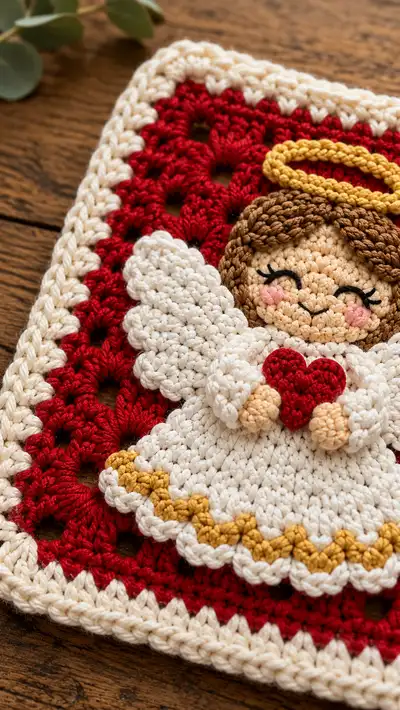
A charming layered applique angel worked onto a cozy granny square — soft cream halo, warm brown hair, white puffy wings and dress with a little red heart at the center. Beautiful for holiday decorations, festive blankets or framed wall art. This pattern explains every piece step-by-step so you can recreate the textured, 3D appliqued angel exactly as shown.
Progress Tracker
0% Complete
— Notes :
Info :
This project is constructed as multiple small amigurumi-style parts which are sewn and appliqued onto a traditional granny square background. Work each part tightly, use stitch markers for round starts, and stuff small pieces lightly to maintain a flat appearance when sewn onto the square. All rounds are worked in continuous rounds unless otherwise noted. Adjust hook size to obtain the density you prefer.
— Granny Square Background :
Round 1 :
With red yarn, ch4, join with sl st to form a ring. Ch3 (counts as first dc), 2 dc into ring, ch2, (3 dc into ring, ch2) x3, join with sl st to top of ch3. (4 clusters, 4 ch-2 spaces)
Round 2 :
Sl st into first ch-2 space, ch3, 2 dc, ch2, 3 dc in same space (corner made). *Ch1, in next ch-2: (3 dc, ch2, 3 dc); rep from * around for 3 more corners. Ch1, join with sl st to top of ch3. (4 corners, clusters separated by ch1)
Round 3 :
Sl st to corner ch-2 space; ch3, 2 dc, ch2, 3 dc in same space. *Ch1, across the side work (3 dc, ch1) in each ch-1 space; in next corner work (3 dc, ch2, 3 dc); rep from * around. Join with sl st. (Square now grows evenly)
Round 4 :
Repeat Round 3 but increase side repeats to maintain square proportions: in side ch-1 spaces work (3 dc, ch1) into each space between corner clusters. Join. (Square approximately 6-7cm across at this point depending on tension)
Info :
Work 1 dc cluster groups as your standard granny cluster. Keep your tension slightly firm so the appliqued parts will sit nicely on the surface. Pin the first round of the angel to establish its center on the square before creating many additional rounds if needed.
Round 5 :
With red yarn, repeat increases symmetric to Round 4 to reach your desired square size (we suggest 6 total rounds of granny clusters for the red background). Finish round and fasten off, weave ends to the back.
Round 6 :
Info : If you prefer a deeper background, add a 7th granny round repeating the formula (3dc in corner, ch2, 3dc; side clusters across). For the sample image, 6 rounds create a lovely frame for the angel.
Round 7 :
Switch to cream yarn for border: join with sl st to any side ch-1 space. Work 1 dc in each stitch along the sides and work (3 dc, ch2, 3 dc) into each corner ch-2 space to create a neat square border. Join and fasten off. (This forms the base frame for applique)
— Border Finishing :
Round 1 :
With cream yarn, join in any corner, ch1, sc evenly around the square working 3 sc into each corner space. Join with sl st. This gives a firm edge for sewing applique pieces.
Round 2 :
Work a decorative round in BLO using hdc or dc depending on your preferred look: ch2, *sk next st, 3 hdc in next st (shell), sk next st, 1 hdc; rep around. Join and weave in ends. The background is now ready for the angel to be applied.
— Head :
Round 1 :
With light skin/tan yarn, mr, 6 sc in magic ring (6)
Round 3 :
(1 sc, 1 inc) x 6 (18)
Round 4 :
(2 sc, 1 inc) x 6 (24)
Round 5 :
(3 sc, 1 inc) x 6 (30)
Round 6 :
(4 sc, 1 inc) x 6 (36)
Round 7 :
(5 sc, 1 inc) x 6 (42)
Round 8 :
(6 sc, 1 inc) x 6 (48)
Round 9-12 :
1 sc in each st (48)
Info :
Place safety eyes (if using) between rounds 11-12, spaced about 7-8 sts apart for the sweet expression shown. Embroidered eyes can be added later with black yarn. Mark the center front before placing eyes so they are centered on the face.
Round 13 :
(6 sc, 1 dec) x 6 (42)
Round 14 :
(5 sc, 1 dec) x 6 (36)
Info :
Begin stuffing head firmly but not overstuffed; you want a smooth rounded face that will flatten slightly when seamed onto the body. Use small amounts of stuffing between decreases for an even profile.
Round 15 :
(4 sc, 1 dec) x 6 (30)
Round 16 :
(3 sc, 1 dec) x 6 (24)
Round 17 :
(2 sc, 1 dec) x 6 (18)
Round 18 :
(1 sc, 1 dec) x 6 (12)
Round 19 :
6 dec (6). Fasten off leaving long tail for sewing. Close the hole with tapestry needle and weave in end inside. Finish shaping face with a few gentle pulls to close the top if necessary.
Info :
Facial embroidery: With black yarn and a small yarn needle, embroider closed eyes as two small curved lines with three tiny eyelash stitches at ends. Sew a small smile with black or dark brown yarn centered beneath the eyes. Add blush with light pink yarn or fabric blush if desired, using two small whip stitches for cheeks.
— Hair Cap :
Round 1 :
With medium brown yarn, mr, 6 sc in ring (6)
Round 3 :
(1 sc, 1 inc) x 6 (18)
Round 4 :
(2 sc, 1 inc) x 6 (24)
Round 5 :
(3 sc, 1 inc) x 6 (30)
Round 6-8 :
1 sc in each st (30)
Info :
Work the hair cap slightly smaller than the head circumference so it sits snugly on the head. Fasten off leaving a long tail for sewing. The style pictured features a side-swept fringe and gentle waves created by surface slip-stitch rows and small 3-4 ch loops sewn into place for a natural curl look.
Round 9 :
Optional decorative rows: surface slip stitch around crown to create parting and add short chains (3-5 ch) anchored with a sl st to create textured bangs and side waves. Fasten off.
— Face Hair Details (Bangs & Side Wave) :
Round 1 :
With brown, at front center of hair cap, attach yarn and ch4, sl st back into the base to create a loop. Repeat loops across front to form bangs (about 5-7 small loops). Secure and fasten off. Use blunt tapestry needle to sew loops flat as desired creating the sweet curled bangs.
Info :
Trim loop ends selectively or leave small loops intact to mimic gentle ringlets. The sample uses short loops for a soft, doll-like hair texture.
— Halo :
Round 1 :
With gold yarn, ch16, join with sl st to form loop (16)
Round 2 :
Work sl st all around the chain loop to create a tight cord (16 sl st). Join and continue around twice to produce a thick halo (work 2-3 rounds of sl st around the chain). Fasten off leaving long tail for sewing the halo top of head.
Info :
For a more dimensional halo, work around the chain with single crochets or half double crochets instead of slip stitches; keep the cord tight and coil slightly before sewing so it sits above the hair.
— Small Heart (Holdable) :
Round 1 :
With red yarn, mr, 6 sc in ring (6)
Round 3 :
(1 sc, 1 inc) x 6 (18)
Round 4 :
1 sc in each st (18)
Round 5 :
(1 sc, 1 dec) x 6 (12)
Round 6 :
6 dec (6). Leave long tail for sewing. Stuff lightly before final decreases so the heart has a little plumpness; close and stuff carefully to avoid puckering.
Info :
To create a symmetrical heart shape when sewn between hands, pinch the top center slightly and tack the seam with a few invisible stitches first, shaping the lobes as you attach.
— Hand (Make 2) :
Round 1 :
With skin/tan yarn, mr, 6 sc in ring (6)
Round 3 :
(1 sc, 1 inc) x 6 (18)
Round 4-5 :
1 sc in each st (18)
Round 6 :
(1 sc, 1 dec) x 6 (12)
Round 7 :
6 dec (6). Fasten off leaving long tail for sewing. Stuff hand firmly but keep shape relatively flat at the palm so it will sit with the heart.
Info :
Hands are sewn so the palms face each other holding the heart; sew hands onto side of dress at the proper level and then tack the heart between them with a few stitches to anchor it in place.
— Arm Sleeve (Make 2) :
Round 1 :
With white yarn, join to the top of the hand (at wrist area) and sc evenly around to form a small cuff — approximately 12 sc around. Join and continue.
Round 2-5 :
1 sc in each st (12) to create short sleeve. For the puffy sleeve look, switch to BLO on Round 3 and crochet a round of sc in BLO to form a ridge. Fasten off and leave tail for sewing to dress bodice.
Info :
Sew the finished sleeve to the dress bodice edge so arms appear tucked under the sleeve. You can slightly stuff the sleeve with tiny amounts of fiberfill for a soft puff look before closing.
— Wings (Make 2) :
Round 1 :
With cream yarn, ch7, sc into 2nd ch from hook, sc across to end (6 sc). Turn to work along the other side of chain: 4 sc back along chain base, join to first sc (10)
Round 2 :
Ch1, sc in same st, (2 sc in next) across tip to increase curvature, continue sc along opposite side, add extra sc at base to shape. Aim for 14 sts after shaping. (14)
Round 3 :
Ch1, (sc, inc) repeated across top arc to produce scallops. Work symmetrical increases to reach approximately 20 sts to create a rounded wing. (20)
Round 4 :
Ch1, work puff stitch clusters around the wing edge to create the layered puffy feather look: *ch1, skip 1 st, puff in next st (yarn over, insert, pull through 3 loops, repeat 3 times and draw through all loops), ch1, sc in next st*; rep across edge. This will produce a scalloped fluffy border. Fasten off but leave tail for sewing. (Wing now puffy with scalloped edge)
Info :
Arrange the wings so their bases overlap slightly behind the body. Sew through the base ridges using small hidden stitches; avoid catching the body front so the wings remain stand-off and dimensional.
Round 5 :
Optional: Add a short inner row of sc to flatten base and ensure a firm seam (work sc into base stitches where wing will attach). Fasten off.
— Dress Bodice & Skirt :
Round 1 :
With white yarn, mr, 6 sc in ring (6)
Round 3 :
(1 sc, 1 inc) x 6 (18)
Round 4 :
(2 sc, 1 inc) x 6 (24)
Round 5 :
(3 sc, 1 inc) x 6 (30)
Info :
These rounds form the bodice. Position the bodice under the head on the square and pin to check scale before adding the skirt. The bodice should be centered vertically under the head and slightly overlapped by the hands to hold the heart.
Round 6 :
1 sc in each st (30). Work 2 rounds even to build a short bodice height (Round 6-7). This gives a defined waist for the skirt join.
Round 8 :
Change to skirt shaping: (4 sc, 1 inc) x 6 (36) to begin flare. Change to gold yarn for the first accent scallop at the skirt hem after Round 9.
Round 9 :
1 sc in each st (36)
Info :
Change to gold yarn now if you want the decorative trim at the hem. Carry white yarn up the inside if you will continue with white for the outer scallop. The sample image uses a gold scalloped trim set into the base of the skirt.
Round 10 :
With gold yarn, work a decorative scallop round: *sk 2 sts, 5 dc in next st, sk 2 sts, sl st in next st* repeat around to create small gold scallops. Join and change back to white for the skirt body. (36 scallops)
Round 11 :
With white yarn, ch1, sc in each st around to secure scallops and continue skirt. (36)
Round 12 :
(5 sc, 1 inc) x 6 (42) — flaring the skirt
Round 13 :
1 sc in each st (42)
Round 14 :
Work shell row to create scalloped fullness: *in next st work (dc, ch1, dc) skip 2 sts, sc in next st* repeat around. This forms decorative vertical texture look for skirt pleats. Join and fasten off or continue with another decorative round as desired.
Info :
The skirt in the sample is made slightly three-dimensional by working a round of tall stitches (dc groups) and then finishing with a round of slip-stitch scallops to create a layered look. You can add light stuffing behind the skirt top so it lifts slightly from the background for depth.
— Dress Skirt Scallop Edge (Optional Additional Rounds) :
Round 15 :
With white yarn, create a final scalloped edge by working (sc, ch2, sc) in every 3rd stitch along the hem to produce soft ruffles. Fasten off and weave in ends. This completes the dress as an appliqued piece.
— Assembly Prep and Pinning :
Info :
Before sewing any pieces, pin the head, hair cap, halo, body, wings, hands, and heart onto the granny square to find the perfect placement. The angel sits centered vertically and slightly above the square center. The halo sits top-center of the hair cap, wings spread symmetrically behind the bodice, and hands meet at the skirt midline holding the heart.
— Sewing Head to Bodice/Background :
Round 1 :
With long tail from head or a new strand, use mattress stitch or whip stitch to sew the head to the bodice, aligning head center with bodice center top. Stitch through the bottom row of head and the top row of bodice to create a secure join. Weave in tail inside the bodice after sewing.
Info :
Make small, evenly spaced stitches to keep the seam invisible. Slightly flatten the bottom of the head where it meets the bodice so the seam is smooth; reinforce with an extra pass for durability.
— Attaching Hair & Halo :
Round 1 :
Sew the hair cap onto the front and sides of the head using the hair cap tail. Arrange bangs and side waves before sewing; tack them down with small stitches to secure curls and keep them from shifting.
Round 2 :
Sew the halo to the top back edge of the hair cap: position the halo so it sits above the hair rather than directly on the face. Use the long tail from halo and sew through a few stitches on the hair cap to secure ring. Reinforce with several stitches so the halo does not twist.
Info :
When sewing the halo, do not pull the stitches so tight that the halo flattens; keep it slightly raised by leaving a tiny gap between halo and hair, then secure the gap using a couple of stitches underneath.
— Sewing Wings :
Round 1 :
Position the wings so the bases sit just behind the bodice side rows, slightly angled upward. Sew each wing base onto the granny square and bodice back with small whip stitches, stitching only through the wing base and the background/bodice so the wing edge remains free and puffy.
Info :
For added security, tack the middle of each wing down with a single stitch behind the bodice; this keeps wings in place without flattening their scalloped edges.
— Attaching Hands & Heart :
Round 1 :
Place hands at the front of the bodice within the skirt notch so they appear to cup the heart. Sew each hand to the dress with small stitches through cuff area and bodice. Pin both hands first, then sew so placement is symmetrical.
Round 2 :
Place the heart between the hands. Using the long tail from the heart or a new matching strand, tack the heart gently in place through the back so the front remains neat. Add 3-4 secure stitches through the heart base into the bodice to anchor it firmly.
Info :
Check from the front after each stitch and adjust as necessary. If the heart leans forward, add an extra stitch at the bottom to pull it closer to the hands. Avoid sewing through stuffing to keep shape intact.
— Final Embroidery and Finishing Touches :
Round 1 :
Embroider lashes and smile with black thread if not using safety eyes. Add two tiny French knots for dimples or two small blush stitches using pink yarn for cheeks. Secure all ends and weave into the back of the head and bodice.
Round 2 :
Weave all thread ends on the inside of the applique and trim close. Block the entire square lightly by pinning to shape and misting with water if desired. Allow to dry flat. This helps the skirt and wings to lay nicely.
Info :
When attaching the angel to the granny square, make sure the bottom edge of the bodice sits one or two rounds above the lower edge of the square so the decorative border remains visible. The final look should be centered and balanced.
— Extra Finishing Border (Optional) :
Round 1 :
With cream yarn, join at any corner and work a round of sc around the entire square, placing 3 sc in corners and sc along sides to neaten. Join and fasten off.
Round 2 :
For a rope-like edge, switch to a slightly larger hook and work a round of reverse single crochet (crab stitch) around the entire square. This gives a tidy, textured finish like the sample image. Fasten off and weave ends in the back.
Info :
Use a steam iron or gentle blocking to settle the piece if your yarn behaves well with steam. Be cautious with acrylics; use a pressing cloth and low heat if needed.
This cheerful angel granny square combines classic crochet techniques with a playful three-dimensional applique to make a festive, heartwarming decoration. Each carefully worked section — from the halo to the scalloped skirt and puffy wings — comes together to form a piece that feels handmade and special. It's a lovely weekend project and makes a wonderful gift or heirloom block for a holiday blanket. 🧶🎁✨