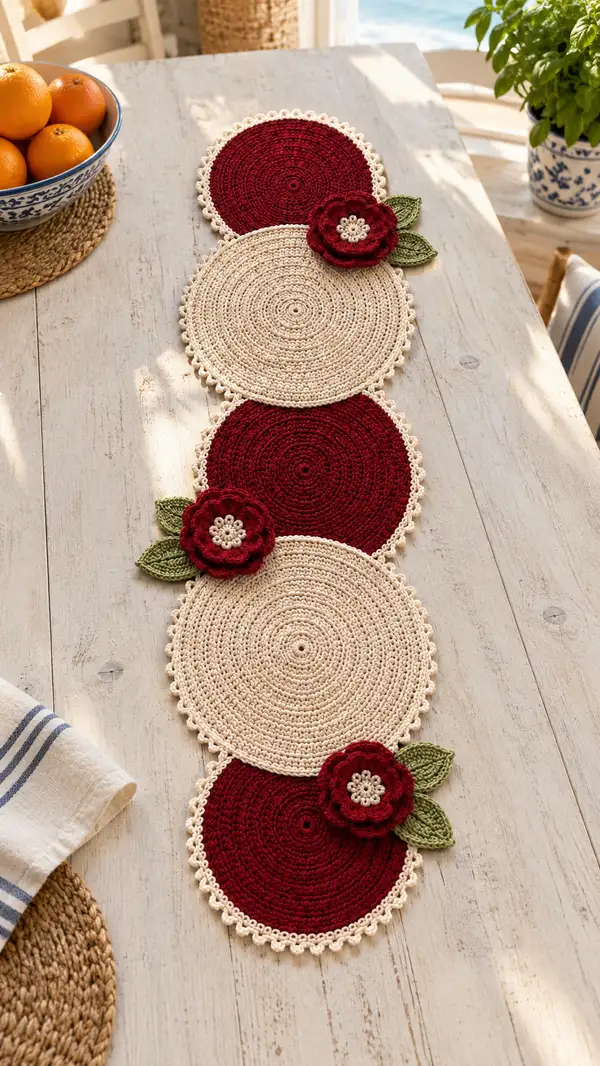
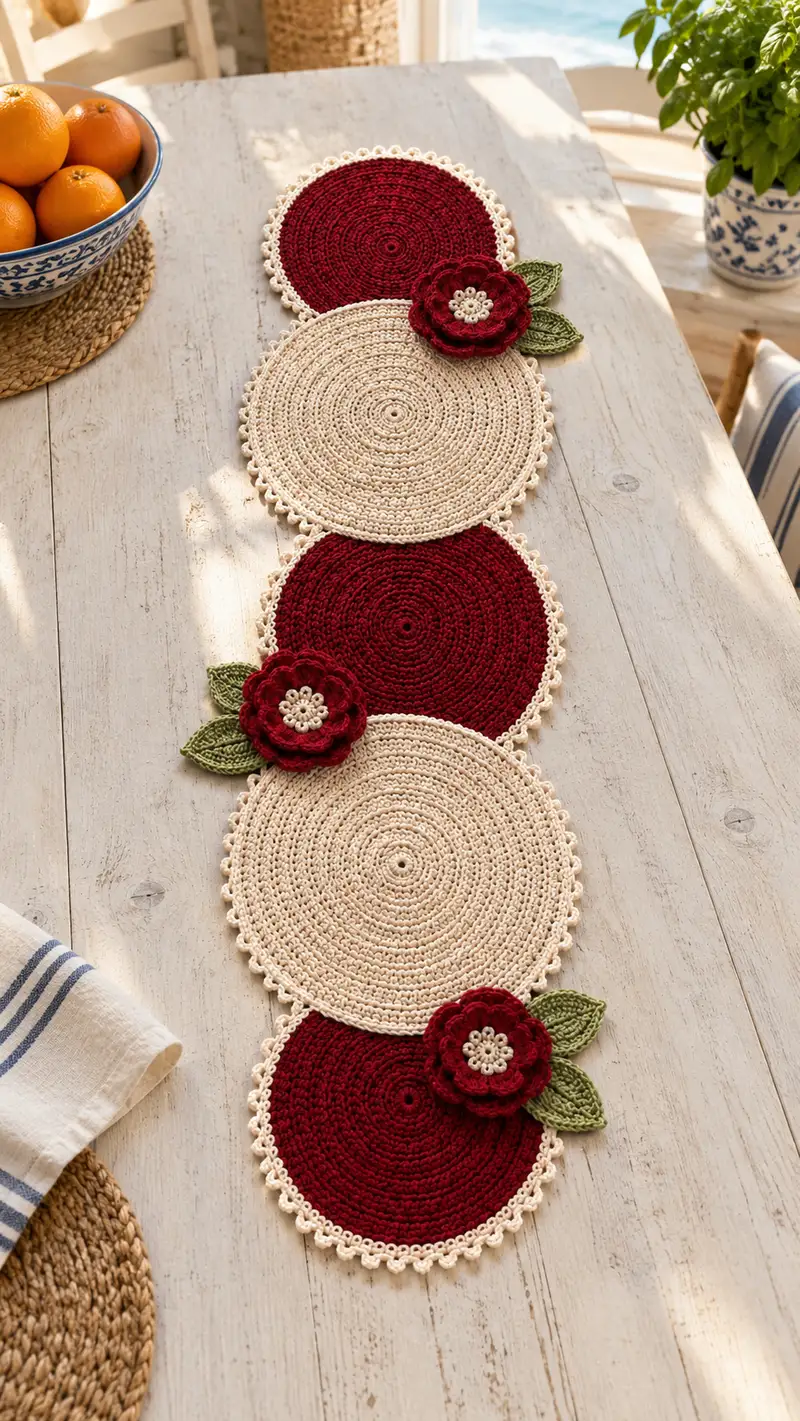
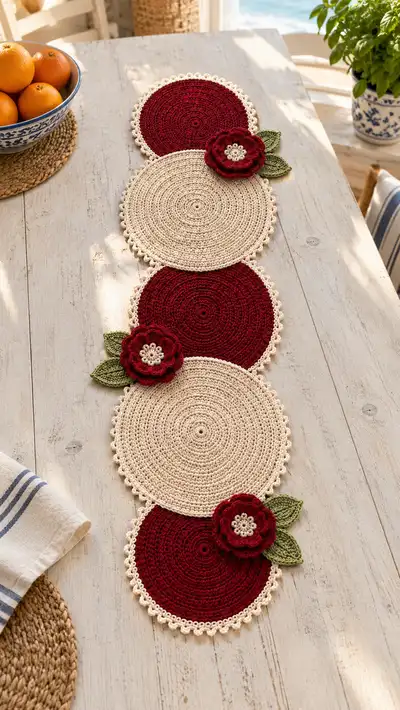
Create a charming circular table runner made from alternating deep red and cream round placemats with delicate scalloped edging. Each round is adorned with layered red flowers and green leaves for a timeless, hand-crafted look. This pattern uses simple rounds and decorative borders to produce a beautiful, cohesive table centerpiece. Perfect for seasonal decor, dining tables, or gift-making.
Progress Tracker
0% Complete
— Round Placemat Circle 1 (Cream) :
Round 1 :
6 sc in magic ring (6)
Round 3 :
(1 sc, 1 inc) x 6 (18)
Round 4 :
(2 sc, 1 inc) x 6 (24)
Round 5 :
(3 sc, 1 inc) x 6 (30)
Info :
Work these early increase rounds in the round without joining; use a stitch marker to mark the first stitch of each round so increases are aligned
Round 6 :
(4 sc, 1 inc) x 6 (36)
Round 7 :
(5 sc, 1 inc) x 6 (42)
Round 8 :
(6 sc, 1 inc) x 6 (48)
Round 9 :
(7 sc, 1 inc) x 6 (54)
Info :
Keep tension even and check that the disc lies flat after each increase round; if it begins to cup, skip an increase in the next round
Round 10 :
(8 sc, 1 inc) x 6 (60)
Round 11 :
(9 sc, 1 inc) x 6 (66)
Round 12 :
(10 sc, 1 inc) x 6 (72)
Round 13 :
(11 sc, 1 inc) x 6 (78)
Info :
At this size you are approaching a moderate placemat diameter; lay the circle flat on a ruler to verify diameter and adjust later rounds if you prefer slightly smaller or larger circles
Round 14 :
(12 sc, 1 inc) x 6 (84)
Round 15 :
(13 sc, 1 inc) x 6 (90)
Round 16 :
(14 sc, 1 inc) x 6 (96)
Round 17 :
(15 sc, 1 inc) x 6 (102)
Info :
If your circle begins to wave upward, stop increasing for a round and work an even round to flatten. If it ripples outward, add an extra increase in the next round
Round 18 :
(16 sc, 1 inc) x 6 (108)
Round 19 :
(17 sc, 1 inc) x 6 (114)
Round 20 :
(18 sc, 1 inc) x 6 (120)
Round 21-26 :
1 sc in each stitch around (120)
Info :
These even rounds build height for the placemat; work 6 rounds of 120 sc to create a stable flat surface. Place the stitch marker at the beginning of round 21 and move it each round
Round 27 :
(2 sc, picot) x 40 (120) where 'picot' = ch3, sl st in first ch to form small loop
Round 28 :
Working in the back of the picot loops, sl st in each picot and in the sc to give a tidy inner joining (120)
Round 29 :
(3 sc, 1 sc in next picot loop) x 30 - work a small scallop over every 4 stitches to emphasize the picot edge (120)
Round 30 :
Finish with a round of sl st through both layers (if desired) or fasten off and weave ends; block flat if needed
Info :
Fasten off leaving a 12-15 inch tail if this circle will be joined to the next. Weave in ends if standalone. Blocking with light steam or wet blocking will even the scallop border
— Round Placemat Circle 2 (Deep Red) :
Info :
Work all rounds below exactly like Circle 1, changing to Deep Red yarn at the start for a rich, consistent color. Begin with a magic ring in deep red
Round 1 :
6 sc in magic ring (6)
Round 3 :
(1 sc, 1 inc) x 6 (18)
Round 4 :
(2 sc, 1 inc) x 6 (24)
Round 5 :
(3 sc, 1 inc) x 6 (30)
Info :
Using deep red will show stitch texture beautifully; if you prefer a tighter fabric use a 3.5mm hook for then rounds involving picots
Round 6 :
(4 sc, 1 inc) x 6 (36)
Round 7 :
(5 sc, 1 inc) x 6 (42)
Round 8 :
(6 sc, 1 inc) x 6 (48)
Round 9 :
(7 sc, 1 inc) x 6 (54)
Info :
Check for evenness; deep dark colors can hide small tension variations—hold yarn so stitches remain consistent
Round 10 :
(8 sc, 1 inc) x 6 (60)
Round 11 :
(9 sc, 1 inc) x 6 (66)
Round 12 :
(10 sc, 1 inc) x 6 (72)
Round 13 :
(11 sc, 1 inc) x 6 (78)
Info :
Adjust the number of even rounds if you want a thicker placemat; add or subtract rounds 21-26 equivalents before edging
Round 14 :
(12 sc, 1 inc) x 6 (84)
Round 15 :
(13 sc, 1 inc) x 6 (90)
Round 16 :
(14 sc, 1 inc) x 6 (96)
Round 17 :
(15 sc, 1 inc) x 6 (102)
Round 18 :
(16 sc, 1 inc) x 6 (108)
Round 19 :
(17 sc, 1 inc) x 6 (114)
Round 20 :
(18 sc, 1 inc) x 6 (120)
Round 21-26 :
1 sc in each stitch around (120)
Round 27 :
(2 sc, picot) x 40 (120)
Round 28 :
Sl st in each picot and base sc around to tidy (120)
Round 29 :
(3 sc, sl st in next picot) x 30 (120)
Round 30 :
Fasten off leaving long tail for joining if needed; weave in ends later
Info :
Make 3 cream circles and 3 deep red circles in total. For consistent sizing, block each circle before joining.
— Round Placemat Circle 3 (Cream) :
Info :
Repeat Circle 1 exactly; ensure yarn color is Cream. Use identical number of rounds and edging as Circle 1 for symmetry.
Round 1 :
6 sc in magic ring (6)
Round 3 :
(1 sc, 1 inc) x 6 (18)
Round 4 :
(2 sc, 1 inc) x 6 (24)
Round 5 :
(3 sc, 1 inc) x 6 (30)
Round 6 :
(4 sc, 1 inc) x 6 (36)
Round 7 :
(5 sc, 1 inc) x 6 (42)
Round 8 :
(6 sc, 1 inc) x 6 (48)
Round 9 :
(7 sc, 1 inc) x 6 (54)
Round 10 :
(8 sc, 1 inc) x 6 (60)
Round 11 :
(9 sc, 1 inc) x 6 (66)
Round 12 :
(10 sc, 1 inc) x 6 (72)
Round 13 :
(11 sc, 1 inc) x 6 (78)
Round 14 :
(12 sc, 1 inc) x 6 (84)
Round 15 :
(13 sc, 1 inc) x 6 (90)
Round 16 :
(14 sc, 1 inc) x 6 (96)
Round 17 :
(15 sc, 1 inc) x 6 (102)
Round 18 :
(16 sc, 1 inc) x 6 (108)
Round 19 :
(17 sc, 1 inc) x 6 (114)
Round 20 :
(18 sc, 1 inc) x 6 (120)
Round 21-26 :
1 sc in each stitch around (120)
Round 27 :
(2 sc, picot) x 40 (120)
Round 28 :
Sl st in each picot around (120)
Round 29 :
(3 sc, sl st in next picot) x 30 (120)
Round 30 :
Fasten off and leave tail for joining. Repeat blocking when all circles are complete
— Round Placemat Circle 4 (Deep Red) :
Info :
Repeat Circle 2 exactly in Deep Red. Ensure the picot/scallop edging uses Cream yarn for the border if you prefer a unified runner edge; otherwise continue in Deep Red
Round 1 :
6 sc in magic ring (6)
Round 3 :
(1 sc, 1 inc) x 6 (18)
Round 4 :
(2 sc, 1 inc) x 6 (24)
Round 5 :
(3 sc, 1 inc) x 6 (30)
Round 6 :
(4 sc, 1 inc) x 6 (36)
Round 7 :
(5 sc, 1 inc) x 6 (42)
Round 8 :
(6 sc, 1 inc) x 6 (48)
Round 9 :
(7 sc, 1 inc) x 6 (54)
Round 10 :
(8 sc, 1 inc) x 6 (60)
Round 11 :
(9 sc, 1 inc) x 6 (66)
Round 12 :
(10 sc, 1 inc) x 6 (72)
Round 13 :
(11 sc, 1 inc) x 6 (78)
Round 14 :
(12 sc, 1 inc) x 6 (84)
Round 15 :
(13 sc, 1 inc) x 6 (90)
Round 16 :
(14 sc, 1 inc) x 6 (96)
Round 17 :
(15 sc, 1 inc) x 6 (102)
Round 18 :
(16 sc, 1 inc) x 6 (108)
Round 19 :
(17 sc, 1 inc) x 6 (114)
Round 20 :
(18 sc, 1 inc) x 6 (120)
Round 21-26 :
1 sc in each stitch around (120)
Round 27 :
(2 sc, picot) x 40 (120)
Round 28 :
Sl st into each picot to tidy (120)
Round 29 :
(3 sc, sl st in next picot) x 30 (120)
Round 30 :
Fasten off and prepare to join to adjacent circles
— Round Placemat Circle 5 (Cream) :
Info :
Repeat same rounds as Circle 1 for the fifth circle in Cream. Maintaining identical stitch counts ensures circles sit flat and join evenly
Round 1 :
6 sc in magic ring (6)
Round 3 :
(1 sc, 1 inc) x 6 (18)
Round 4 :
(2 sc, 1 inc) x 6 (24)
Round 5 :
(3 sc, 1 inc) x 6 (30)
Round 6 :
(4 sc, 1 inc) x 6 (36)
Round 7 :
(5 sc, 1 inc) x 6 (42)
Round 8 :
(6 sc, 1 inc) x 6 (48)
Round 9 :
(7 sc, 1 inc) x 6 (54)
Round 10 :
(8 sc, 1 inc) x 6 (60)
Round 11 :
(9 sc, 1 inc) x 6 (66)
Round 12 :
(10 sc, 1 inc) x 6 (72)
Round 13 :
(11 sc, 1 inc) x 6 (78)
Round 14 :
(12 sc, 1 inc) x 6 (84)
Round 15 :
(13 sc, 1 inc) x 6 (90)
Round 16 :
(14 sc, 1 inc) x 6 (96)
Round 17 :
(15 sc, 1 inc) x 6 (102)
Round 18 :
(16 sc, 1 inc) x 6 (108)
Round 19 :
(17 sc, 1 inc) x 6 (114)
Round 20 :
(18 sc, 1 inc) x 6 (120)
Round 21-26 :
1 sc in each stitch (120)
Round 27 :
(2 sc, picot) x 40 (120)
Round 28 :
Sl st tidy around (120)
Round 29 :
(3 sc, sl st picot) x 30 (120)
Round 30 :
Fasten off leaving long tail for joining to Circle 6
— Round Placemat Circle 6 (Deep Red) :
Info :
Final circle completes the runner; work rounds identical to previous red circles and prepare to join the six circles into the runner layout
Round 1 :
6 sc in magic ring (6)
Round 3 :
(1 sc, 1 inc) x 6 (18)
Round 4 :
(2 sc, 1 inc) x 6 (24)
Round 5 :
(3 sc, 1 inc) x 6 (30)
Round 6 :
(4 sc, 1 inc) x 6 (36)
Round 7 :
(5 sc, 1 inc) x 6 (42)
Round 8 :
(6 sc, 1 inc) x 6 (48)
Round 9 :
(7 sc, 1 inc) x 6 (54)
Round 10 :
(8 sc, 1 inc) x 6 (60)
Round 11 :
(9 sc, 1 inc) x 6 (66)
Round 12 :
(10 sc, 1 inc) x 6 (72)
Round 13 :
(11 sc, 1 inc) x 6 (78)
Round 14 :
(12 sc, 1 inc) x 6 (84)
Round 15 :
(13 sc, 1 inc) x 6 (90)
Round 16 :
(14 sc, 1 inc) x 6 (96)
Round 17 :
(15 sc, 1 inc) x 6 (102)
Round 18 :
(16 sc, 1 inc) x 6 (108)
Round 19 :
(17 sc, 1 inc) x 6 (114)
Round 20 :
(18 sc, 1 inc) x 6 (120)
Round 21-26 :
1 sc in each stitch around (120)
Round 27 :
(2 sc, picot) x 40 (120)
Round 28 :
Sl st in each picot (120)
Round 29 :
(3 sc, sl st in next picot) x 30 (120)
Round 30 :
Fasten off leaving long tail for joining to Circle 5 and for final runner assembly
— Layered Flower Applique (Make 3) :
Info :
Each flower is worked in two red petal layers with a small cream center. Make three flowers to place over the seams as shown. Use Deep Red for petals and Contrast Cream for center beads
Round 1 :
With Contrast Cream, mr, ch1, 6 sc in ring; tighten ring (6)
Round 2 :
Inc in each st around (12)
Round 3 :
(1 sc, 1 inc) x 6 (18)
Info :
This small cream disk forms the center 'bead' of the flower; fasten off and weave tail to the back or leave attached for sewing
Round 4 (First Petal Layer, join Deep Red) :
Join Deep Red in any st. *Ch4, sl st into base st (creating picot loop), ch4, sl st in next st; repeat around to create 9 small loops (18 base sts produce 9 loops). Fasten off and leave long tail for sewing*
Round 5 :
Work petals over the 9 loops: Join Deep Red to loop base; (ch1, 1 sc, ch1, 3 dc, ch1, 1 sc, sl st) into the loop space to form a small petal. Repeat across all 9 loops (9 petals)
Round 6 :
Fasten off and weave in ends or leave tails for sewing. Press petals flat with light steam if desired
Info :
Make the second petal layer slightly larger and offset from the first to get a layered look. Position the cream center on top and sew through center to anchor petals
Round 7 (Second Petal Layer) :
In Deep Red, create a small ring by ch5 and sl st to form a small loop as base for larger petals, then join into spaces between first petals. *Ch1, 1 sc, ch1, (1 dc, ch1, 1 tr, ch1, 1 dc) in same space, ch1, 1 sc; sl st into next space* — repeat for 9 larger petals (9)
Round 8 :
Fasten off leaving long tail for sewing. Layer the cream center disk over petals and sew through all layers with yarn needle using long tail. Pull slightly to cup the petals for dimension
Round 9 :
Optional: Embroider small French knots or create tiny cream picots in the center for added texture. Use contrasting cream thread or thin yarn
Info :
Sew each flower to the seams of adjacent circles so the flower covers the join and secures two circles together; pin placement before sewing
— Leaf Applique (Make 6 — 2 leaves per flower) :
Round 1 :
With Leaf Green, ch8 (foundation), sc in 2nd ch from hook, hdc in next, dc in next two, hdc in next, sc in next, sl st in last to create a tapered base (7 sts along chain)
Round 2 :
Turn to work along opposite side of chain: sc in first base, hdc in next, dc in next two, hdc in next, sc in next; sl st to join to base tip (14)
Round 3 :
*Working along leaf edge: ch1, sc in next 2 sts, hdc in next 2 sts, dc in next 3 sts, hdc in next 2 sts, sc in last 2 sts; sl st at base for neat edge*
Round 4 :
Working in BLO on both edges, make a subtle ridge: 1 sc in each st BLO around the leaf to create a mid-rib edge (14)
Round 5 :
Use tapestry stitch with same green yarn to embroider a center vein: bring yarn up at base, run a line of backstitch up the center and secure at tip
Info :
Make two leaves for each flower and position them slightly off-center; leaves should be lightly starched or blocked to hold shape
Round 6 :
Fasten off leaving long tails for sewing. Make 6 leaves total (2 per flower). For a slightly firmer leaf, add a tiny bit of starch during blocking
— Joining Circles into Runner :
Info :
Layout the circles alternating deep red and cream in a straight column with slight overlap as shown in photo: Red, Cream, Red, Cream, Red, Cream. Use pins to mark overlapping seams and place flowers to cover joins
Step 1 :
Position Circle 1 and Circle 2 with their edges overlapping by approximately 0.75 to 1 inch. Match picot points or scallops so they nest naturally
Step 2 :
With matching yarn (cream for outer seam if you prefer a unified border, or use each circle's color), use mattress stitch or whip stitch through the outermost 8-10 stitches of each overlap area. Sew with even small stitches for a flat invisible join
Info :
Pin the seam and baste with long temporary stitches before final sewing if joining multiple layers at once. This helps maintain spacing and prevents puckering
Step 3 :
Repeat the overlapping seam technique to join Circle 2 to Circle 3, and so on until all six circles are joined into a single runner strip. Double back at each join with a second pass of small stitches for added strength
Step 4 :
Position each layered flower on top of the seam to cover the joint. Use the long tails left from the flower centers to stitch through both circles, catching several rounds of the placemat to anchor securely
Info :
Sew leaves under the flower so they appear to sprout naturally from the seam. Use small, hidden stitches and knot tails on the underside for a neat finish
Step 5 :
After all flowers and leaves are attached, check the runner on a flat surface. Add additional small hidden stitches where circles may separate. Weave in all loose ends and trim close
Step 6 :
Lightly block the entire runner again using steam or wet blocking to settle the joins and shape scallops; allow to dry flat
— Final Edging and Decorative Touches :
Round 1 :
To unify the runner, you may work a continuous cream chain loop border along the outside edge: Join Cream yarn at any outermost picot and sc in each exposed stitch around the perimeter, working across seams where needed (total count varies by runner)
Round 2 :
(sc, ch3, sl st in same st) around every 3rd stitch to create an outer scallop motif; adjust spacing so scallops sit evenly across entire runner
Info :
If you prefer a simpler finish, use a round of crab stitch (reverse sc) around the entire runner in cream for a polished corded edge
Round 3 :
Optional beadwork: use small wooden or pearl beads sewn into the flower centers or along scallops for added vintage charm. Secure beads with matching thread and knot inside the center disk
Round 4 :
Final inspection: weave ends at least 4 inches into the runner for stability and trim excess. Steam block once more for final shaping
Info :
Care: Wash gently by hand in cool water and lay flat to dry. Cotton yarn will soften and relax slightly after washing
This elegant table runner pattern combines classic round placemats with layered floral appliques for a timeless centerpiece. Each carefully worked circle and scalloped edge come together to create a cohesive, handcrafted runner you can treasure. The alternating deep red and cream colors bring warm, seasonal charm to any table, while the layered red flowers and green leaves add dimension and personality. I hope you enjoy every stitch of this project and that it adds cozy beauty to your home! 🧶🌺