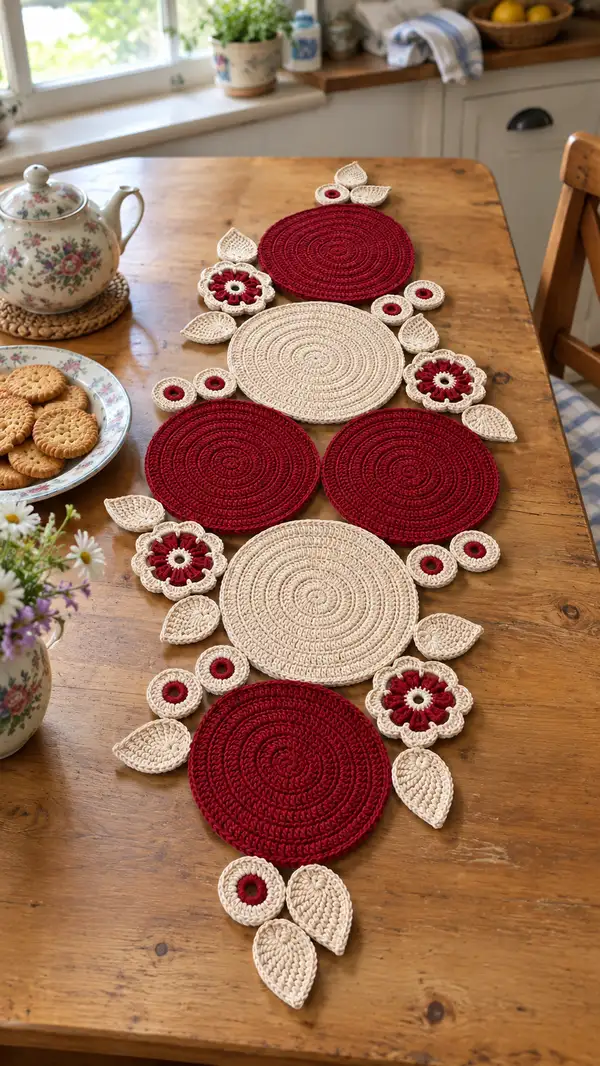
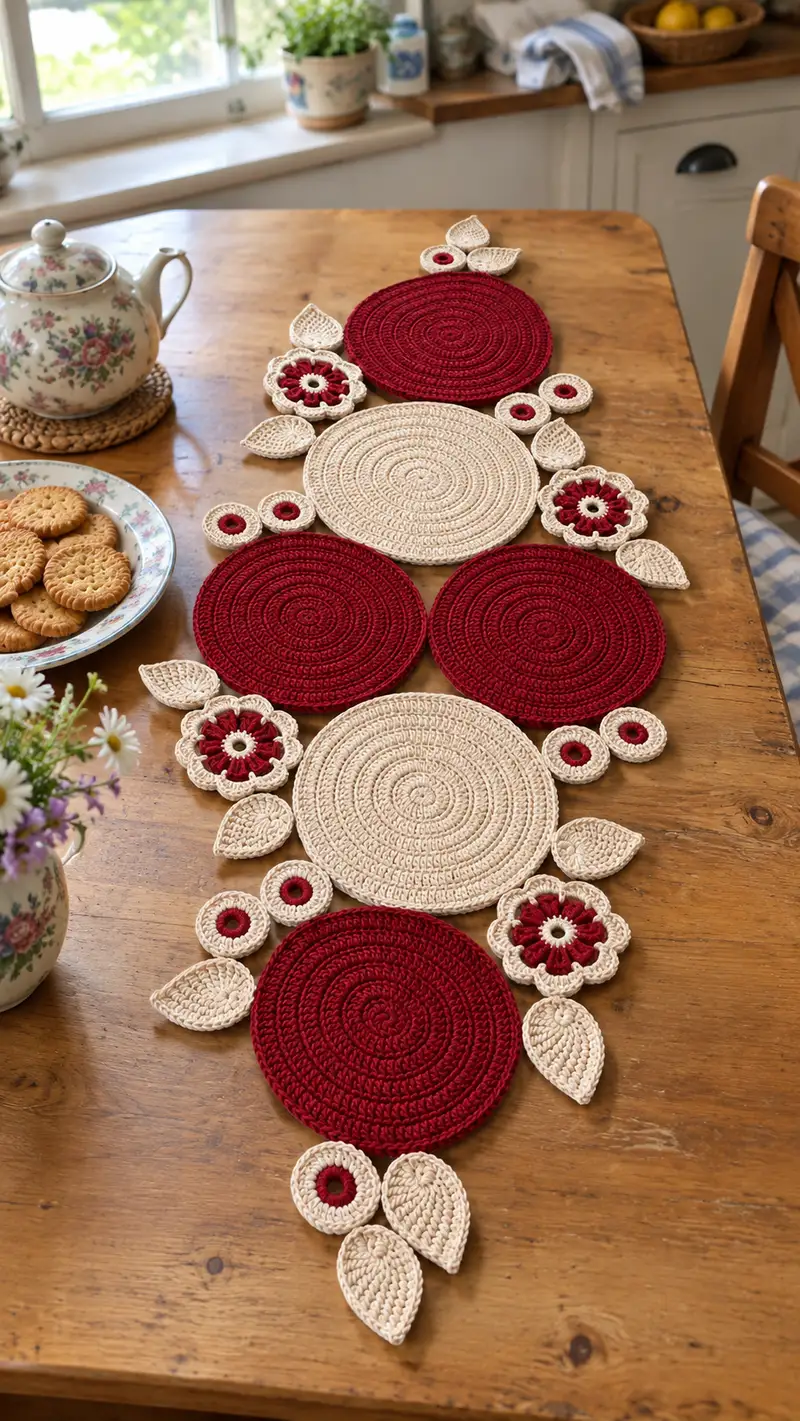
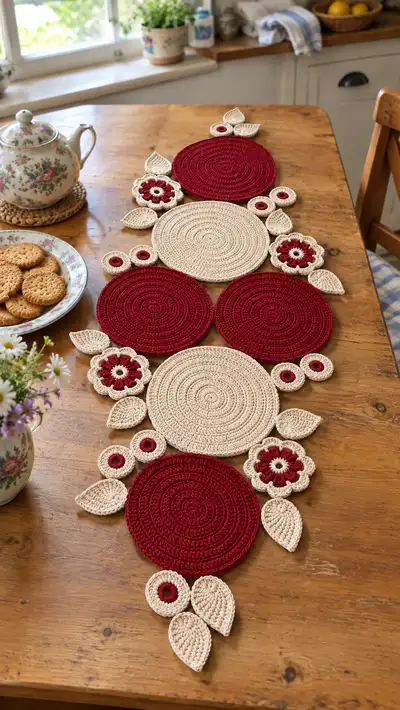
Create a warm, vintage-inspired floral circle table runner built from layered circular motifs, delicate crochet flowers and sculpted leaves. This pattern combines deep wine-red and natural cream cotton yarn for a romantic, country kitchen look. Modular pieces are crocheted separately and seamed into an organic, cascading runner — perfect for dining tables, sideboards or seasonal décor. Detailed step-by-step instructions, stitch counts and assembly tips make this an approachable project for intermediate crocheters.
Progress Tracker
0% Complete
— Notes Before You Begin :
Info :
Work loosely but evenly. This pattern is written in continuous rounds (spiral) unless a join is specified. Use a stitch marker to mark the first stitch of each round. All counts shown assume single crochet (sc) unless otherwise stated. The runner pictured is assembled from modular pieces: large circles (wine-red & cream), medium cream circles, small ring motifs, flowers with red centers and cream scalloped petals, and sculpted leaves. Block pieces lightly for best results.
Gauge :
Gauge is not critical for fit since motifs are modular, but for reference: 12 sc x 12 rows = 2 inches in worsted cotton using 3.5mm hook. Adjust hook to match desired drape — smaller hook yields firmer fabric.
— Large Round Motif (Make 4 — 3 wine-red, 1 cream) :
Round 1 :
6 sc in magic ring (6)
Round 3 :
(1 sc, 1 inc) x 6 (18)
Round 4 :
(2 sc, 1 inc) x 6 (24)
Round 5 :
(3 sc, 1 inc) x 6 (30)
Info :
At this size the circle begins to flatten; keep stitches even and avoid pulling centre too tight. If your circle bulges, reduce hook size by 0.25mm for following rounds.
Round 6 :
(4 sc, 1 inc) x 6 (36)
Round 7 :
(5 sc, 1 inc) x 6 (42)
Round 8 :
(6 sc, 1 inc) x 6 (48)
Round 9 :
(7 sc, 1 inc) x 6 (54)
Round 10 :
(8 sc, 1 inc) x 6 (60)
Info :
At the end of round 10 you should have a flat disc approx 18-20cm depending on yarn/hook. If you prefer slightly larger discs, continue increases to 66 (9 sc, inc x6) then 72 (10 sc, inc x6). For the pictured runner, circles are approx 60 sts circumference round.
Round 11-20 :
1 sc in each st (60)
Info :
Work rounds 11-20 in the same colour to build up height of disc. Use these even rounds to keep a stable flat surface and avoid stretching. Place disc on flat surface frequently to keep flat.
Round 21-26 :
1 sc in each st (60)
Info :
If you want a thick placemat look, continue even rounds; for thinner discs stop earlier. Fasten off and weave in ends after your final round. Make 3 wine-red discs and 1 cream disc for the runner shown.
— Medium Round Motif (Make 2 — cream) :
Round 1 :
6 sc in magic ring (6)
Round 3 :
(1 sc, 1 inc) x 6 (18)
Round 4 :
(2 sc, 1 inc) x 6 (24)
Round 5 :
(3 sc, 1 inc) x 6 (30)
Round 6 :
(4 sc, 1 inc) x 6 (36)
Round 7 :
(5 sc, 1 inc) x 6 (42)
Round 8 :
(6 sc, 1 inc) x 6 (48)
Info :
Medium circles are slightly smaller than large ones and provide contrast in the runner. If using same stitch counts as shown your medium discs will sit naturally next to the large discs.
Round 9-18 :
1 sc in each st (48)
Round 19 :
1 sc in each st BLO (48)
Info :
Working round 19 in BLO creates a subtle ridge useful when assembling motifs so edges cup slightly and overlap neatly. Fasten off and weave ends when finished.
— Small Ring Motif (Make 6) :
Round 1 :
6 sc in magic ring (6)
Round 3 :
(1 sc, 1 inc) x 6 (18)
Info :
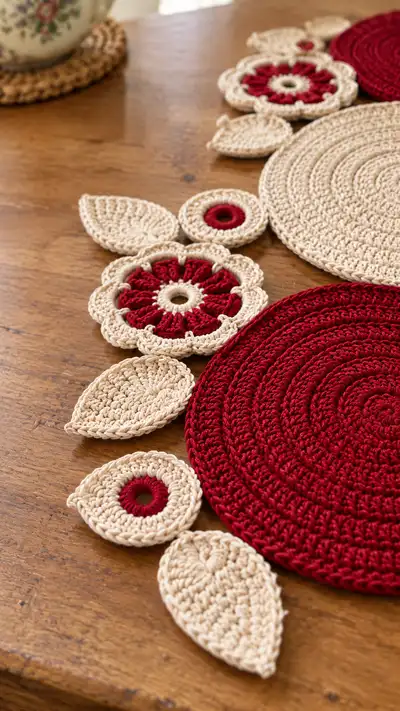
Small rings act as decorative connectors and tiny bud details. The pictured pieces show rings with a contrasting red centre and cream outer rounds. To recreate, make centre using red for round 1-2, then switch to cream for round 3 onwards.
Round 4-6 :
1 sc in each st (18)
Round 7 :
1 sc in each st BLO (18)
Info :
Alternatively create a slightly taller ring by adding one more round of 18 sc (Round 7-8) and finishing with sl st to create a shallow ring effect. Make six rings in the motif ratio shown.
— Flower Motif (Make 4 — red centre, cream petals) :
Round 1 :
Using cream: 6 sc in magic ring (6)
Round 2 :
Switch to red: join red in any st, ch2 (counts as 1 dc), work 11 dc into centre (12 dc total). Sl st to top of ch2 to close into a tight ring. (12)
Info :
This red centre is made of tall dc stitches placed into the centre ring; keep tension moderate so stitches splay slightly and create a textured center. Use 3.0mm hook for tighter centre if needed.
Round 3 :
Switch to cream: ch1, *sc in next dc, ch3, sl st into base of next dc* around to create 6 ch3-loops (work into every second dc). Sl st to first sc to join. (6 ch3 loops)
Round 4 :
Into each ch3 loop: (sc, hdc, 3 dc, hdc, sc) in each loop to form 6 full petals. Sl st to join. (6 petals)
Info :
Petal stitch sequence: sc into loop edge, hdc to build slope, 3 dc for fullness, hdc and sc to taper. Pull petals gently to shape and use stitch marker on first petal if you need to keep track.
Round 5 :
Round of slip-stitch edging: sl st around each petal working 3 sl st across top of each petal to define scallop (approx 18-24 sl st across petal tops total). Fasten off and weave tails in. (decorative edging)
Info :
For a deeper scallop add an extra round of (sc, ch1, sc) across petal tops in cream. Make 4 flower motifs and lightly block so petals sit open and even.
— Leaf Motif (Make 12) :
Info :
Leaves are sculpted teardrop shapes worked back-and-forth from a small centre loop. They are worked flat in rounds to create a slightly curved leaf with vein texture.
Round 1 :
Ch9, 2 sc in 2nd ch from hook, sc across to last ch, 3 sc in last ch; working along opposite side of ch, sc across (7 sc), 1 sc in the first st to join into a small teardrop (total 18 sc). Sl st to join. (18)
Round 2 :
Ch1, sc in same st, 2 sc in next, sc in next 6 sts, (sc, inc) in the three centre tip sts (work 3 sts as sc, inc on each), sc in next 6 sts, 2 sc in last two sts, sl st to join. (22)
Info :
Round 2 shapes and widens the leaf tip. Keep turning corners smooth by spacing increases across the tip stitches evenly. Use cream yarn and 3.5mm hook for a sturdy leaf.
Round 3 :
Ch1, BLO: 1 sc in next 22 sts (22) — working in BLO creates a defined ridge (midrib) that looks like a central vein.
Round 4 :
Ch1, 1 sc in next 2 sts, (hdc, dc, hdc) across the 6 tip sts to create a raised tip, 1 sc in next 2 sts, sl st to join. (22)
Round 5 :
Round of slip-stitch edge: sl st evenly around the leaf edge to tidy shape. Fasten off leaving long tail for sewing. Block lightly with a damp cloth to curve leaf slightly. (finishing)
Info :
For smaller leaves reduce initial chain to ch7 (work counts reduce accordingly). Make 12 leaves and place them in clusters of two or three around the discs when assembling.
— Alternate Leaf (Textured Vein Option) :
Round 1 :
Ch11, sc into 2nd ch from hook and across to end, 3 sc in last ch, sc back along opposite side (total approx 20 sc). Sl st to join. (20)
Round 2 :
Ch1, 1 sc in first 3 sts, (hdc in next 4 sts), 2 hdc in tip 3 sts, 1 hdc in next 4 sts, 1 sc in final 3 sts. Sl st to join. (22)
Round 3 :
Ch1, 1 sc in each st, FLO on this round to create raised rib on top of leaf. (22)
Info :
Using FLO (front loops only) or BLO rounds creates subtle raised veins that catch the light. Choose one leaf style or mix both types across the runner for visual interest.
— Joining Small Motifs to Discs (Technique & Placement) :
Info :
Lay out all motifs on a flat surface in the arrangement you like. The pictured runner alternates large wine-red discs and cream discs with medium cream discs interspersed and clusters of flower+leaf+ring accents where the discs meet. Use pins to secure placement. Sew motifs together by mattress stitch (invisible) or sl st join from the wrong side depending on the look you want.
Info :
Sewing tip: Use a yarn needle and a single strand of the working yarn — do not double. When joining a cream leaf to a wine-red disc, use cream yarn to stitch through the back loops of the disc for a discrete seam. For a decorative raised seam, join with sl st through both layers from the right side using matching yarn.
— Assembly Rounds (Detailed Joining Steps) :
Round 1 :
Position the first large wine-red disc as your base. Place a medium cream disc overlapping the large disc by approximately 1.5cm at the 1 o'clock position. Pin in place.
Round 2 :
Using cream yarn and yarn needle, whip stitch through the outermost 6-8 stitches of the medium disc into corresponding stitches of large disc. Use small, even stitches to create a neat seam; take care not to pull too tight. Repeat for opposite overlapping edges to secure position.
Round 3 :
Attach a flower motif centered on the overlapping area: align flower so petals sit on the cream disc and edges touch wine-red disc. Sew through the petal bases into both discs using cream yarn, making sure the flower sits flat.
Info :
For a clean join hide the knot in the underside: pull yarn through a stitch several times before trimming close and weaving tail into the seam. Pin pieces tightly for sewing to avoid shifting as you work.
Round 4 :
Arrange two small rings and a leaf cluster near each flower to balance the composition. Sew smaller rings first, anchoring them at three points around their circumference into the disc edge for stability. Then sew leaves overlapping slightly and tacking down the tip and base into the disc body.
Round 5 :
Continue across the runner: connect another wine-red disc to the next cream disc using the same method, alternating motif clusters. Keep spacing consistent by measuring the overlap distance on each join to ensure symmetry across the central axis.
Info :
When sewing two motifs of the same colour, you can use a slip-stitch join from the right side to create a visible decorative ridge (approx 3-4 sl st per join). For invisible joins, use ladder stitch or whip stitch on the wrong side.
— Decorative Edging (Optional) :
Round 1 :
With cream yarn, sc evenly around the entire outer edge of the assembled runner — place approximately 1 sc per 5-6 sts of the discs to maintain smooth curve. Use sl st at corners or where discs meet to smooth joins.
Round 2 :
Work a decorative scallop: *skip 2 sts, 5 dc in next st, skip 2 sts, sl st in next st* around entire edge. Adjust spacing to keep scallops even. Fasten off and weave in ends.
Info :
Decorative edging unifies the runner visually and helps cover small gaps between pieces. If you prefer no visible edging, simply tack joins tightly and weave in ends on the back.
— Final Finishing Touches :
Info :
After assembly, block the runner on a flat surface. Pin petal edges and leaf tips into position and lightly steam or wet-block the whole runner to encourage pieces to sit flat. Do not over-wet cotton — press gently if using an iron on low with pressing cloth.
Round 1 :
Weave in any remaining ends by threading them through the backs of adjacent stitches at least 3-4cm before trimming; this helps secure them through use and laundering.
Info :
Spot test any fabric glue on yarn offcuts before using on final piece. Machine washing may slightly relax joins; handwashing in cool water and laying flat to dry will preserve shape best.
This floral circle table runner will bring timeless, handmade charm to your dining table. Each modular motif is satisfying to crochet and delightful to assemble — the rich wine-red discs and soft natural cream blossoms create a romantic contrast that suits many styles. The modular approach makes it easy to work in short sessions and customize size or colorway. Enjoy the slow and peaceful rhythm of crocheting these motifs and watch them come together into an elegant, cozy statement piece. 🧶🌸