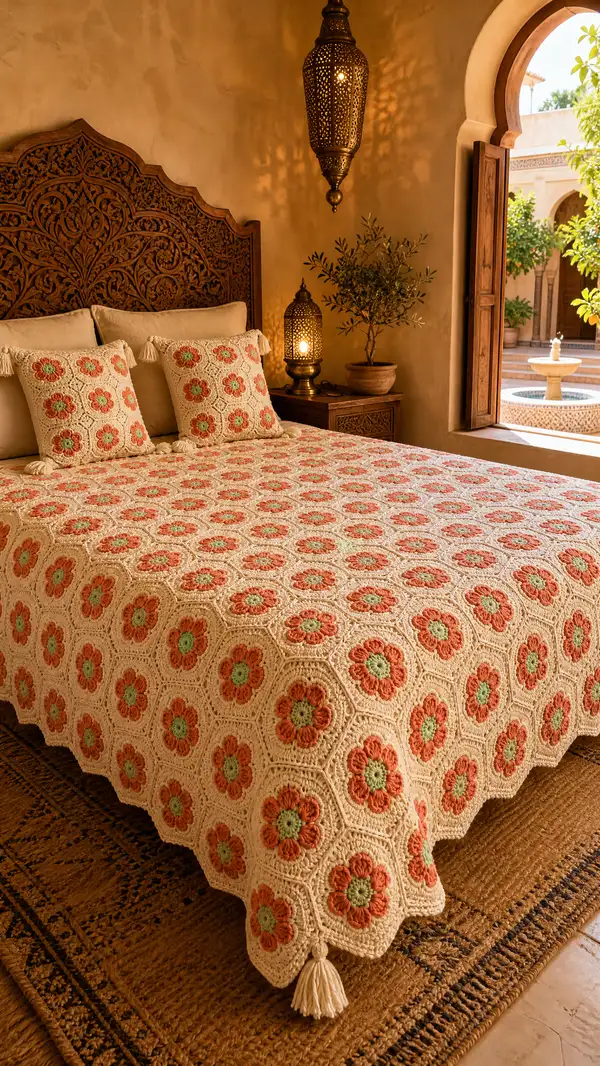
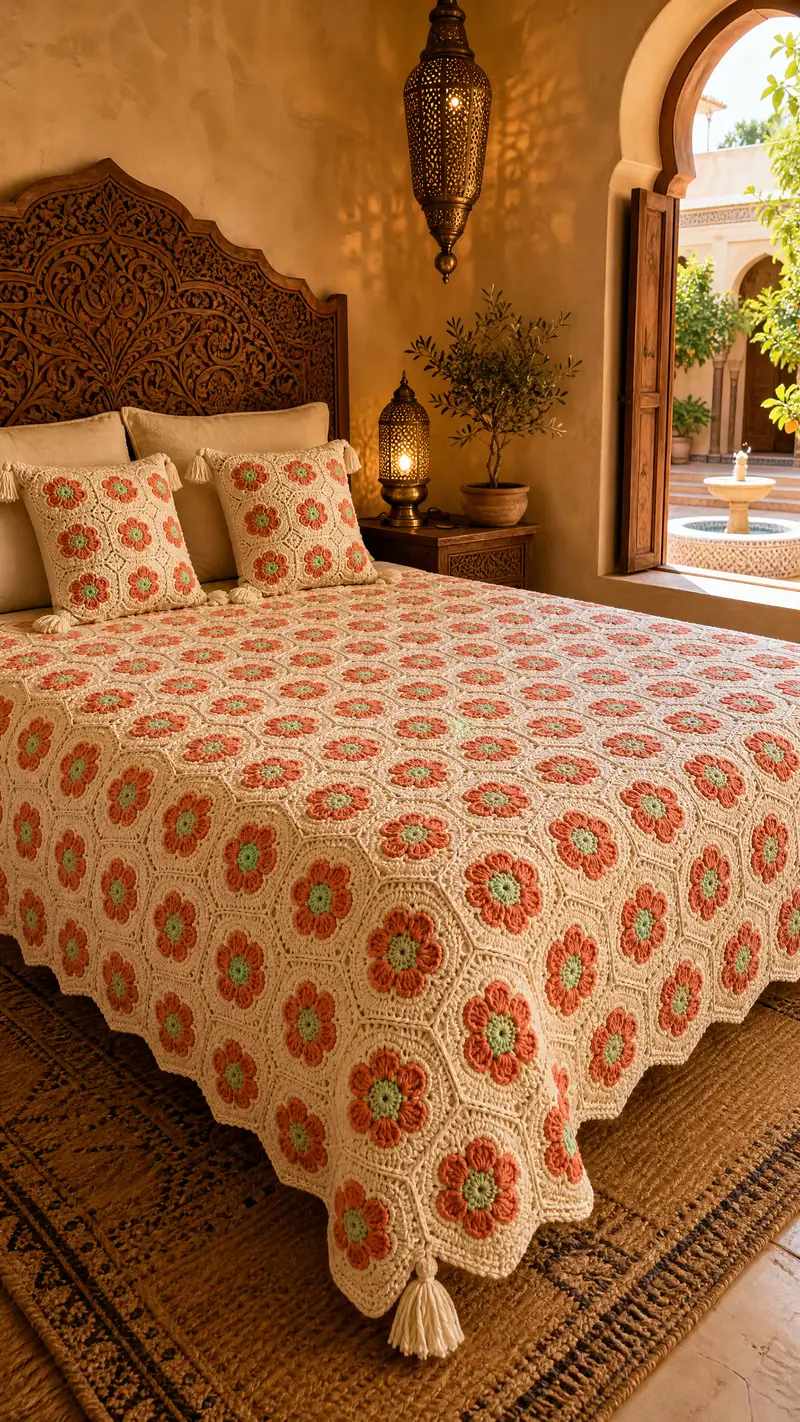
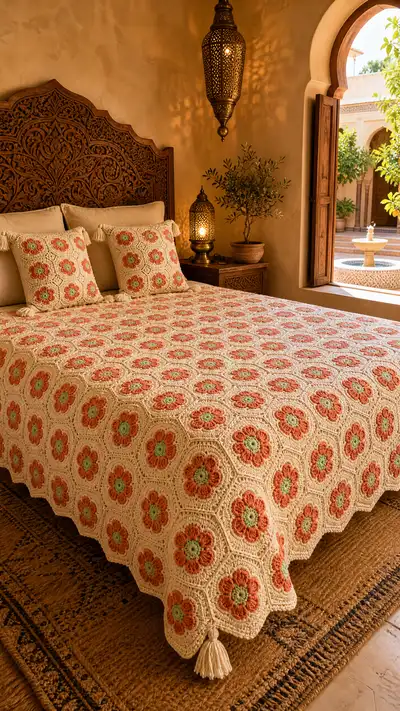
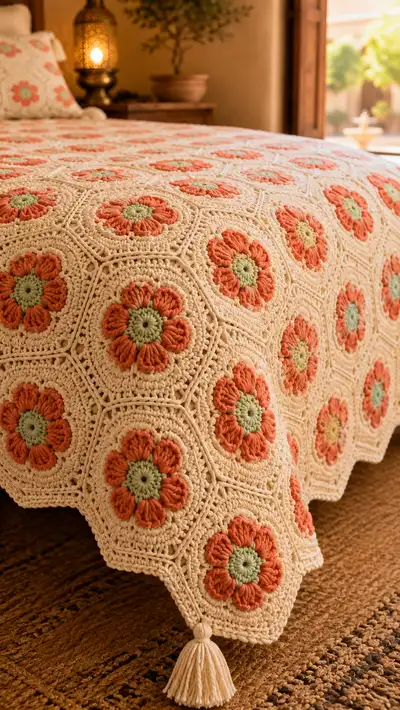
A warm, vintage-inspired bedspread made from large floral hexagon granny motifs in soft cream, terracotta coral petals and a muted sage center. Each motif features raised puff-petal texture and a detailed hexagon frame, joined to form a full bedspread with tasselled corners. The pattern includes motif instructions, joining method, border and pillow cover notes to create the complete coordinated set.
Progress Tracker
0% Complete
— Special Notes :
Info :
This bedspread is made of identical hexagon flower motifs. Each motif is worked in three main colors: center (sage), petals (coral/terracotta) and background/frame (cream). Puff petals are used to create the raised floral texture; each puff is counted as a single stitch for stitch counts. Work tightly to avoid showing stuffing or gaps when the motifs are joined. Gauge and blocking are essential for even joins and a flat finished cover.
— Motif (Flower Hexagon) :
Round 1 :
With color A (muted sage) - MR, ch3 (counts as dc), 11 dc in ring. Join with sl st to top of ch3. (12 dc)
Round 2 :
Ch1, sc in same st, *ch3, skip 1 dc, sc in next dc* repeat around to create 6 ch3 spaces and 6 sc. Join with sl st to first sc. (6 sc + 6 ch3 spaces)
Info :
These ch3 spaces are the petals' foundation. Count them now to ensure you have exactly 6. If you have more or fewer, undo and rework Round 2. Keep tension even; this round sets petal placement.
Round 3 :
Change to color B (coral/terracotta). Join in any ch3 space. Ch2 (does not count as st), puff stitch x6 into same ch3 space, ch2, sl st into same space to close petal. *Move to next ch3 space, sl st, ch2, puff x6, ch2, sl st* repeat for all 6 spaces. Break yarn and fasten off. (6 puff petals - counted as 6 sts)
Info :
Puff stitch: yo, insert hook, yo, pull up loop; repeat yo, insert, pull up loop 5 more times (7 loops on hook), yo and pull through all loops, ch1 to close puff if pattern requires. In this pattern we count each puff as 1 stitch. Keep each puff even in height so petals look uniform.
Round 4 :
Attach color C (cream) in the stitch between two petals (the sl st anchoring the previous petal works well). Ch1, sc in same place, *ch3, sc in top of next puff (through top ch or base as needed), ch3, sc in next space between petals* around to create a small open frame that spaces petals. Join to first sc. (6 sc + chain arches forming 6 arches)
Round 5 :
With cream, work 6 times around each petal cluster to convert petals into round: *In the top of each petal cluster work 1 sc, 1 hdc, 3 dc, 1 hdc, 1 sc into top of puff; in the chain arch between petals work 2 sc* — result: each petal area has 6 stitches and each inter-petal arch 2 stitches. Total stitches at end of round: 36 (6 petals x 6 sts each = 36). (36)
Info :
Work evenly around petals and count at least twice after finishing the round. The 36-st total is the base for shaping the hexagon sides. If you've lost count, stop and recount before proceeding.
Round 6 :
With cream, (6 sc in next 6 sts) around—this is an even round working 1 sc in each stitch. (36)
Round 7 :
Increase round to begin hex shaping: (6 sc, inc) x6 — work sequence: 6 sc, then 2 sc in next st; repeat 6 times. (42)
Round 8 :
(7 sc, inc) x6 — (7 sc then 2 sc in next st) repeat 6 times. (48)
Round 9 :
1 sc in each st around. (48)
Info :
Rounds 7-9 form the beginning of the hexagon bulge; increases are placed at six evenly spaced points to make six sides. Mark the first stitch of each round so you can find corners when joining motifs later.
Round 10 :
(8 sc, inc) x6 — (8 sc then 2 sc in next st) repeat 6 times. (54)
Round 11 :
1 sc in each st around. (54)
Round 12 :
(9 sc, inc) x6 — repeat 6 times. (60)
Round 13 :
1 sc in each st around. (60)
Info :
At this stage the motif is visibly round yet will flatten into hexagon as you work the following framing rounds. Keep counts accurate—these rounds determine the final width of the motif. For a slightly larger motif, you can add another increase round: (10 sc, inc) x6 -> 66.
Round 14 :
Work frame shaping: *In the next st work (sc, ch2, sc) as a corner space, then sc in the next 8 sts along the side; repeat from * across all six sides. When finished you'll have 6 corner ch2 spaces and side stitches amounting to 60. (60 plus corner spaces)
Round 15 :
Round to build hexagon outline: In each corner ch2 work (sc, ch2, sc). Along each side work 1 hdc in each stitch for the side length to create a flat, slightly raised side. Join. (Count: 6 corners + side hdc stitches making a total of approx 66 - count yourself for exact per-side numbers based on prior round totals)
Info :
At the end of Round 15 your motif should lie flat and show six distinct straight sides. If sides puff out, you may need to block the motif flat before joining. Pin on blocking mat, steam or wet block and allow to dry.
Round 16 :
Decorative ridge round: Work 1 sc around the entire motif in BLO to create a subtle ridge and define the hexagon edges. (Same stitch count as previous round)
Round 17 :
Outer frame: *Ch4, sl st in corner ch2 to make a small loop, 1 sc in each side hdc across until next corner* — this sets up the joining loops. Maintain an even number of side stitches to allow symmetric join points. Finish off and weave ends. Final motif should measure approx 10-12 inches across point-to-point in aran cotton with 5.0 mm hook (gauge dependent).
Info :
Make a sample motif and block it to measure your exact motif size. This lets you plan how many motifs you need for your bed size. For a queen bed like the photo you will need around 66-72 motifs arranged in a 6x11 or similar layout – exact count depends on your motif size and desired overhang.
— Making Multiple Motifs :
Info :
Work motifs in batches by color change type: make all centers first, then work petals in rounds, then frame in cream. This reduces frequent color changes and yarn ends. Use a loose tail to weave in later rather than cutting after every color change if you plan to join immediately.
Round 1-20 :
Repeat the motif sequence above for each motif. Aim to make motifs in a consistent order: center (sage), petal (terracotta), frame (cream). Batch process: make 10-12 centers, then add petals to those centers, then frame them into hexagons. This speeds production and keeps color tension consistent.
— Join-As-You-Go/Seaming Method (Whip-and-Arch Join) :
Info :
Two recommended joining options: 1) Whip-and-arch join (used for a flat, visible seam), 2) Invisible slip-stitch join. The pattern below uses the whip-and-arch join for the photo look.
Round 1 :
Lay two finished motifs right sides up, align edges and corners. Using cream yarn, insert hook in the outer loop of both motif edges at a corner and pull up a loop, ch1, then working across the side from corner to corner: *sl st through both motifs in each outer loop 1 time across the side; at corner work (sl st, ch2, sl st) through both motifs* Repeat for each side as you join motifs in a row. The join sequence between two motifs uses sl st through matching outer loops to keep the join flat.
Info :
Pin both motifs together every few stitches to ensure edges match. Work slowly across the first few joins to get comfortable with tension. Too tight a join will pull motifs in, too loose will create gaps.
Round 2 :
Continue joining motifs into strips. Once strips are made, join strips together using the same whip-and-arch technique, matching corners carefully so the hexagon grid remains uniform. After joining each row, steam-block the assembled portion to keep it flat.
Round 3 :
When joining three motifs at a meeting point (where three hexagons meet), take care to align the corner ch2 stitches so that the meeting point sits flat; use a small stitch through all three motif loops to anchor the junction if needed, then disguise with weaving.
— Border Rounds (After all motifs are joined) :
Round 1 :
With cream yarn, pick up at an outer corner. Work 1 sc evenly around the entire bedspread in the outermost loops. At each hexagon corner (where a ch2 sits), work (sc, ch2, sc) to preserve hexagon points. Continue to end. This evens out the edge. (Stitch count varies with motif count)
Round 2 :
Work 1 hdc in each st around to bulk and smooth the border. At corners (ch2 spaces) work 2 hdc, ch2, 2 hdc. Join.
Info :
This gives a firm edge to pick up for subsequent decorative rows and tassels. Measure the spread edge to determine how many additional border rounds you want to reach desired drop length.
Round 3 :
Work a decorative ridge: 1 sc in BLO around the whole border to create a raised line. Join.
Round 4 :
Decorative openwork round: *Ch3 (counts as dc), skip 1, dc in next st* along side; at corners make (dc, ch2, dc). This introduces a subtle openwork to soften the heavy texture and give drape. Join.
Round 5 :
Finish with a neat sc round: 1 sc in each st around, finishing corners with sc-ch1-sc into corner ch2 spaces. Fasten off and weave in ends. This firm final round helps the border hold its shape and provides a place to attach tassels if desired.
Info :
If you prefer a scalloped edge, substitute Round 5 with a shell round: (skip 2, 5 dc in next, skip 2, sl st) to form shells at regular intervals along the side. Make shells centered between hexagon corners.
— Pillow Covers (Coordinating Square) :
Round 1 :
Make 4 motifs sized identically to bedspread motifs. Arrange motifs in a 2x2 square for a standard throw pillow. Join motifs using the same whip-and-arch join. Leave one side unjoined to insert cushion or use an envelope back construction.
Round 2 :
To make a decorative tassel at each pillow corner, prepare tassels using 8-12 strands of cream yarn 6-8 inches long per tassel. Fold in half, tie a small piece at top, attach to corner with a loop and secure using a few stitches. Trim ends evenly. For the photo look use chunky tassels with a small tied head.
Info :
The pillow motif arrangement shows tassels at corners and a central placement of motifs to echo the bedspread layout. For a more fitted cushion make motifs slightly smaller by using a smaller hook for the final rounds, then add a lining fabric if you prefer a more stable pillow.
— Tassels & Finishing Touches :
Round 1 :
To make tassels for bedspread corners: wind yarn around a 4-inch cardboard 40-50 times (for a thick tassel). Remove, tie at top tightly, fold and bind the top with a short piece of yarn to form the tassel head. Attach to pointed corner of the spread by threading the loop through the corner and sewing down the head with several secure stitches. Repeat for all corner tassels (photo shows single tassel per corner).
Round 2 :
Optional: Embroider a small center stitch in the middle of each petal with matching terracotta yarn to emphasize texture. Use ladder stitch and take care not to pull too tight.
Info :
Weave in all ends into the frame rounds where they are less visible. Use a tapestry needle and weave yarn through several rounds of stitches to secure ends. Trim neatly and steam block the entire bedspread again for the final finishing to let it relax and lie flat.
— Scaling & Layout Guidance :
Info :
To estimate motif count: measure your blocked motif across corners (point-to-point). Divide desired coverage width and length (including desired overhang) by motif size and round up. For the pictured queen/large double bed the layout used roughly 6 motifs across and 11 motifs down (approx 66 motifs), producing generous overhang and tasselled corners. Adjust layout as needed for twin, full, queen or king sizes.
Round 1 :
If you want fewer seams and a heavier fabric, work an extra 1-2 rounds of sc around each motif before joining. This increases side length and reduces the number of motifs required.
Info :
Keep a motif map on paper or digital grid. Number motifs as you make them and mark which row they belong to; this prevents orientation or join mistakes when assembling several dozen motifs.
— Care & Maintenance :
Info :
Being cotton or cotton-blend, wash gently by hand or use gentle machine cycle in cool water and dry flat to maintain shape. Re-block if needed after washing. Avoid tumble drying on heat which can shrink or warp motifs.
Info :
Store folded in a breathable cotton bag away from direct sunlight to prevent fading, and refresh tassels by lightly steaming to remove flattening after long storage.
Working this bedspread brings together repetitive, meditative crochet with dramatic visual payoff—each floral hexagon adds warmth and texture to a bed. As you work motif after motif you watch the floral field bloom across the surface, and joining them creates a satisfying mosaic of color and stitch. The finishing tassels add a playful boho touch. 🧶🌸 Completing the spread is a cozy, rewarding project you’ll be proud to display or gift. Happy stitching and enjoy the slow craft journey! ✨