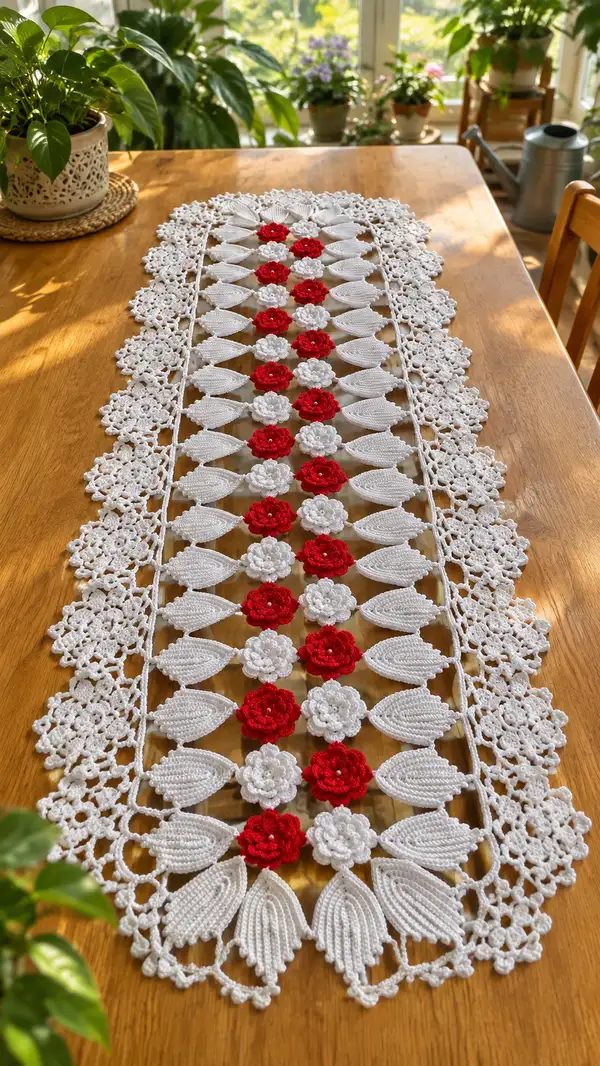
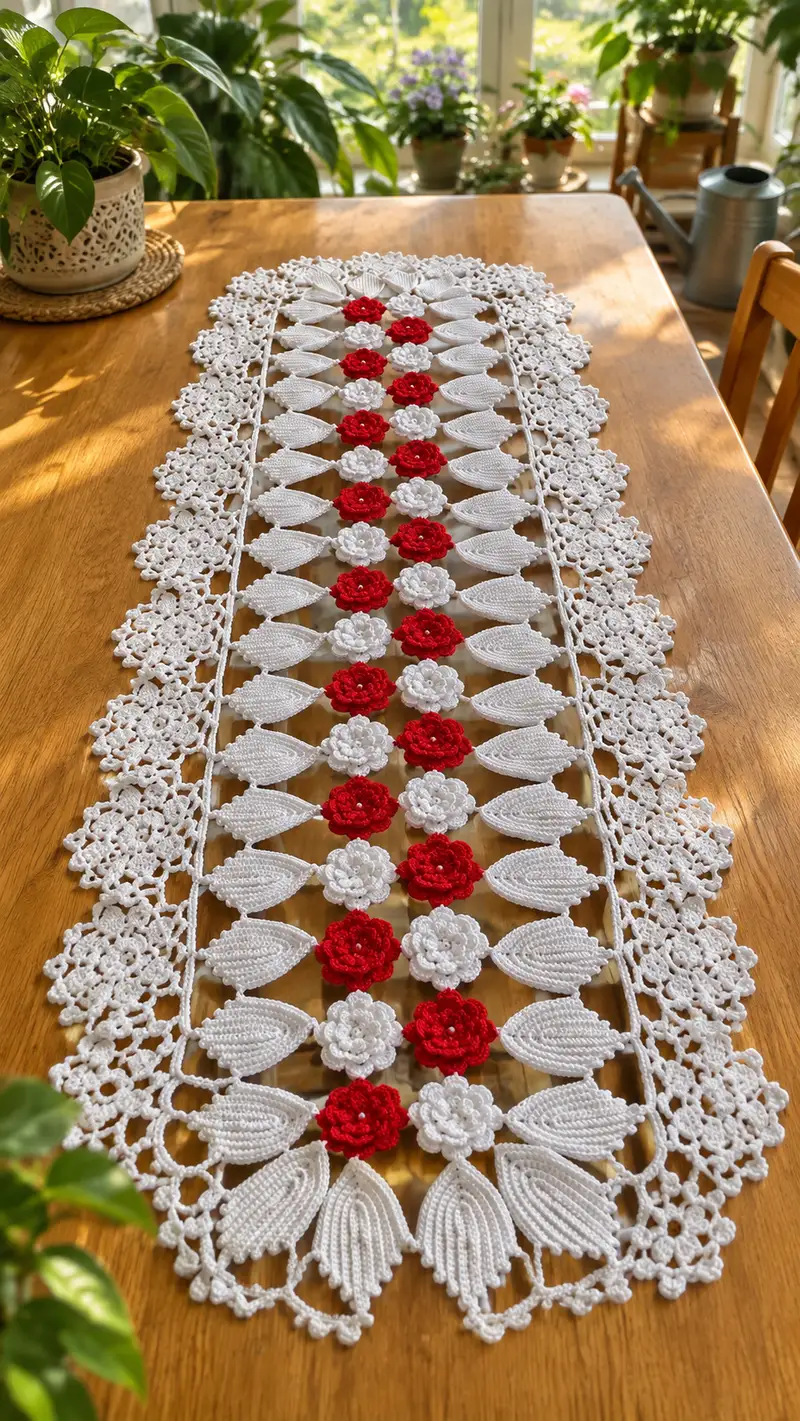
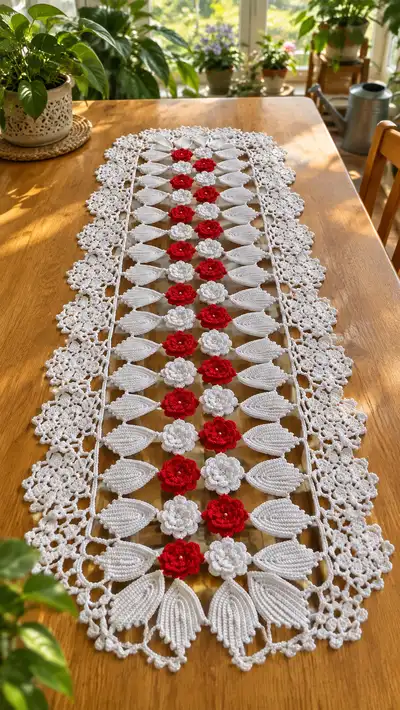
A romantic, vintage-inspired lace table runner featuring alternating red and white crochet roses set between sculpted white leaves and delicate floral lace borders. This long runner is worked in fine cotton thread for a crisp, elegant finish—perfect for a dining table or sideboard. The pattern includes step-by-step instructions for each rose, leaf, connector strip and lace edging so you can recreate this heirloom piece. Finished runner shows alternating red and white roses with pearly centers and scalloped lace edges.
Progress Tracker
0% Complete
— Overview & Notes :
Info :
This pattern is modular: work individual center roses, sculpted leaf motifs, and side floral motifs, then join them with connector chains and finish with a scalloped border. All motifs are worked in size 10 cotton thread with a 1.25mm hook unless you prefer a slightly denser fabric, in which case reduce hook size. Use stitch markers to mark center lines for joining. Final blocking is essential to flatten motifs and create the long rectangular runner shape.
Info :
Throughout this pattern I give rounds/rows for one motif. Repeat the motif the number of times indicated to make the runner length you want—photo shows 12 center roses alternating red/white with 11 leaf-pairs per side. Adjust as desired: add or subtract repeats in multiples of the pattern repeat to maintain symmetry.
— Center Rose (Make alternately in red and white, make 12 flowers for pictured runner) :
Round 1 :
Make magic ring. Ch1, 6 sc into ring; pull tight (6)
Round 2 :
Inc in each st around (6 inc) (12)
Round 3 :
(1 sc, inc) x6 (18)
Round 4 :
(2 sc, inc) x6 (24)
Info :
At this point the small disc forms the rose center. If you plan to add a bead or pearl to the very center later, leave a tail to sew the bead on or sew bead now with matching thread. Maintaining tension here keeps center neat.
Round 5 :
(3 sc, inc) x6 (30)
Round 6 :
Ch1, *sc in next st, ch3, sk next st* repeat around to form 15 ch-3 petals foundation (30 counts across working into alternate sts) - sl st to first sc to join (15 ch-3 loops)
Info :
This round creates loop spaces for petals. Make sure loops are even by keeping consistent tension; use stitch markers to mark every 5 loops if helpful.
Round 7 :
*Work in next ch-3 loop: sc, hdc, dc, 2 tr, dc, hdc, sc; sl st to next loop* repeat around to make 15 full petals. Fasten off and weave tail inside (15 petals)
Info :
For a denser layered rose, after Round 7 work a second layer of smaller petals: join into back of each petal base and work sc, hdc, dc, hdc, sc into the top of the petal to create a raised layered effect. This gives the deep rose look in the photo.
Round 8 :
Optional inner layer: Join at base of every other petal, *sc, hdc, dc, hdc, sc into top of same petal* repeat 8 times staggered for a full layered look. Fasten off. (8 small layered petals)
Round 9 :
For extra definition, use BLO around the petal bases: rejoin and work 1 sc BLO behind each petal base across to form a subtle ridge. Fasten off and weave ends.
Info :
Block each finished rose flat and slightly cupped — spritz lightly and pin on blocking board. The roses will be joined later; blocking now helps maintain uniform size while joining.
— Sculpted Leaf Motif (Make 22 leaves, two on each row between roses) :
Round 1 :
Ch12, sl st to form small ring (or work MR if preferred) (12)
Row 2 :
Along chain foundation: starting in 2nd ch from hook, 1 sc in each ch across (11 sc). Turn (11)
Row 3 :
Ch1, 1 sc in next 3 sts, 1 hdc in next 2 sts, 1 dc in next 2 sts, 1 tr in next 2 sts, 2 dtr in last st — now work evenly on opposite side of foundation chain: 1 tr in next 2 st spaces, 1 dc in next 2, 1 hdc in next 2, 1 sc in next 3. Do not turn; sl st to first sc. (final count reflects shaping edge)
Info :
This establishes the teardrop leaf shape. Work with slightly tighter tension to maintain a sculpted ridge along center; you will add rows of BLO ridges next that echo the photo's ribbed texture.
Round 4 :
Join at leaf tip with ch1, *1 sc in next 2 sts, 1 sc BLO in next 1 st* repeat back toward base (alternating to create ribbing) until base is reached; sl st to join. (approx 18 sc over both sides)
Round 5 :
Work 3 rounds of BLO single crochet ridges: ch1, 1 sc BLO in each st around for 3 rounds to build thickness and raised ribs (18 each round). Fasten off after third ridge.
Info :
For the ribbed look visible in the photo, use BLO ridges heavily: each ridge adds a fine raised line. Add as many ridge rounds as needed to match the thickness in the photo; I use 3-4 short rounds per leaf.
Round 6 :
Edging round: Join and work *picot, sl st, ch3, sl st* along the outer edge at regular intervals (approx every 2-3 stitches) to create small scalloped bead details at the leaf edge. Fasten off and weave tail leaving long tail for joining.
Info :
Make sure left and right leaves are mirror images where you plan to join them across the connector. Block leaves lightly pinned to slightly curved shape so they tuck under roses when assembled.
— Narrow Connector Bars / Runner Grid (Make continuous ladder to join roses and leaves in rows) :
Row 1 :
Work a long foundation chain for runner width: ch to length equal to number of central motif repeats times motif spacing + extra for borders. For pictured runner with 12 roses and spacing, chain 120 (adjustable). Turn.
Info :
Your runner is constructed by joining motifs into this ladder: we will create vertical posts (bars) of double crochet and join motifs between them in alternating rows. Keep chain length long and adjust in multiples so motifs sit centered.
Row 2 :
Starting in 4th ch from hook, ch3 (counts as dc), dc in each ch across to create a turned plank of dc posts. At end, ch3 and turn. (approx 118 dc)
Info :
Work two parallel dc bars by repeating Row 2 on the opposite side of where motifs will join later — these bars will become the vertical posts between rows of leaves and roses. Keep them straight using stitch markers to mark every 10 posts for alignment.
Row 3-6 :
Repeat dc row 4 times more for a total of 5 rows of dc posts to create stable bars (approx 118 dc each row). Fasten off and block flat. These bars will be the structural spine of the runner.
Info :
If you prefer to build the grid as you join motifs, you can create separate short bars between motifs (see assembly section). This pattern uses long bars for clarity and to speed joining.
— Side Floral Lace Motif (Make 24 motifs for border, 12 per side for pictured runner) :
Round 1 :
Make magic ring. Ch3 (counts as dc), 12 dc into ring; sl st to top of ch3 to join (12)
Round 2 :
Ch4 (counts as tr), *sk next dc, 1 tr in next st, ch2* repeat around to form 6 open tr clusters and ch-2 spaces; sl st to first ch top (12 cluster points)
Round 3 :
Work in each ch-2 space: (sc, ch3, 3 dc, ch3, sc) into each ch-2 space to make petal-like lacy loops. (6 petals)
Info :
These small side motifs create the repeating circular lace used along the outer edge in the photo. Keep these motifs flat by pinning and blocking during finishing. Count petals to keep symmetry; each motif should have 6 petal loops.
Round 4 :
Edge round: Join with sl st and work *ch5, sl st in petal tip, ch3, sl st back into same petal tip*, repeat around to form connecting loops. Fasten off with a long tail for joining to runner bars.
Info :
Use longer tails for assembly so you can whipstitch motifs to the outer bars and to each other without additional thread. Blocking ensures loops align neatly to create scallops.
— Assembly & Joining Motifs into Runner Grid :
Info :
Layout plan: center lane is alternating roses (red, white, red, white, etc.). On both sides of the center lane, pair sculpted leaves in opposing orientations so they create a continuous leaf row. Outer sides of leaves are joined to the floral lace motifs to create the scalloped border. Use the dc bars/grid to anchor roses and leaves by slip-stitching or sewing through the long tails left when finishing motifs.
Step 1 :
Pin the long dc bars on your blocking board parallel, spacing them to match motif height and the number of repeats. Pin center rose positions at regular intervals between the bars, leaving space for a leaf pair between each rose. Use a measuring tape and mark positions with pins for accuracy.
Step 2 :
Join roses to connector bars: using the tail left on each rose, sew rose base to the horizontal connector bar at the marked position with sl st or invisible whip stitch. Each rose center should align centrally between the two long bars, approximately two dc posts apart (adjust per your grid spacing). Repeat for entire center lane.
Info :
When sewing motifs, work through the back loops of the connector bars if you want a flatter join. Keep stitches even so the rose does not sit twisted on the bar; pin first, then sew through several anchor points evenly spaced around the rose base.
Step 3 :
Attach leaf pairs to the connector bars on either side of each rose: position two leaves opposite each other with points facing outward and their bases slightly overlapping the rose join. Sew the inner base of each leaf to the connector bar and to the rose base where they meet, using mattress stitch for a nearly invisible seam. Leave outer leaf edges unattached until side motifs are joined.
Info :
For consistent spacing make each leaf pair join to the bars at the same stitch counts e.g., join at bar posts numbered 10 and 12 if using markers — consistency creates a rhythmic look down the runner.
Step 4 :
Join side floral lace motifs to leaf outer edges and outer long bar: with motifs pinned adjacent to the leaf edges, use tails to whipstitch through picot loops and the leaf edge picots. Each side motif will connect to two adjacent leaf pair edges and to adjacent motifs at small chain loops to form the scalloped side.
Info :
Join motifs loosely first to check alignment; tighten joins gradually. It is easier to undo a few stitches than to pull large sections apart; always test join tension on one repeat before committing to the full runner.
Step 5 :
After all motifs are joined along the length, weave in all tails with a fine sewing needle, working through several surrounding threads to anchor. Trim ends close to work. Wet-block entire runner pinned to exact rectangular shape, stretching gently and shaping scallops evenly. Allow to fully dry before removing pins.
Info :
Pin scallops at regular intervals and measure both sides for equal width. Use rust-proof T-pins and a foam blocking board. For a crisper look, steam iron lightly from the back through a press cloth if the thread allows (test on a scrap first).
— Detailed Stitch & Texture Variations (for authentic look in photo) :
Info :
To replicate the photo's sculpted leaf ribs and petal layers, pay attention to BLO ridges on leaves and layered petal rounds on roses. Where petals look dense, add additional small layered petals (Round 8 alternative). Where leaves show multiple ribs, add more BLO rounds to increase thickness and definition.
Round alt :
Leaf extra ridge rounds: rejoin and work 4 additional rounds of 1 sc BLO evenly around to sculpt deeper ribs. Each round increases the apparent rib depth without changing overall shape. Fasten off and block.
Info :
Color transitions are simple: for multi-color effect, switch to red or white thread before Round 6 of the rose and carry color inside petal loops if you prefer no visible join. Tie off securely and weave ends invisibly.
— Alternate Center Rose (Dense Layered Puff Rose) :
Round 1 :
MR, ch1, 8 sc in ring (8)
Round 2 :
Inc around (8 inc) (16)
Round 3 :
(2 sc, inc) x5, (1 sc, inc) x2 to create slightly offset increase (21) — adjust to maintain round geometry
Round 4 :
*Ch5, work 5 dc cluster in next st base to become a puffed petal, sl st to next base* repeat around to form 7 large puff petals. Fasten off and weave tail.
Info :
This alternate rose produces a fuller, puffed flower that stacks visually higher than the flat rose. Use it in place of every other rose to vary texture along the runner if you prefer more dimensional interest.
— Border Scallop Finishing Rounds (After full assembly) :
Round 1 :
With runner fully joined and lying flat, pick up white thread at a corner and work 1 sc evenly along outermost connector bar edges where motifs meet for a tidy baseline (work approx 10 sc per small motif join). Continue around entire edge to prepare for scallop round.
Round 2 :
*Ch6, sl st in 3rd ch from hook to create a small loop (picot-like), ch3, sc in next space between motifs* repeat around scalloped border for uniform loops. Fasten off and weave ends.
Info :
Spacing is critical: make sure each scallop or loop lands centered on your side motifs for a balanced look. If scallops look uneven, adjust by adding or subtracting chains in one or two repeats rather than redistributing across entire edge.
Round 3 :
Optional decorative bobble edge: join and work *sc, 3 dc bobble, sc* into each scallop loop to create tiny pop-out clusters along the edge that catch light and match the picots seen in the photo. Fasten off and block.
Info :
These bobble clusters give a beaded appearance like small pearls along the scallop. If adding beads, stitch them onto rose centers or bobble centers using fine thread and small matching beads for a refined finish.
— Final Blocking & Care :
Info :
Wet-block fully after all joins complete; pin to desired final measurements and allow to dry completely. Use stainless steel pins and a blocking board. If you used beads, ensure they are fully secured before wetting; glue beads lightly if necessary. Press gently from the back with a warm iron and press cloth if desired for extra crispness.
Info :
To launder the runner in future, hand wash gently in lukewarm water with mild detergent, rinse thoroughly, reshape on a flat surface and pin to shape to dry. Avoid machine washing to preserve lace detail.
Info :
Measurements: The pictured runner measures approximately 12 inches wide by 54-56 inches long. Your runner length depends on number of repeats: each rose+leaf pair repeat is approx 4.5" long; plan repeats accordingly.
This rose lace table runner is a delightful combination of small, intricate crochet motifs and patient assembly—the kind of project that rewards slow stitching with a beautiful heirloom. Each rose and leaf comes together in a rhythmic process, and the delicate scalloped border elevates the whole piece. I hope this pattern inspires you to create your own table centerpiece that will be cherished and passed on. Happy stitching and block with pride! 🌹🧶