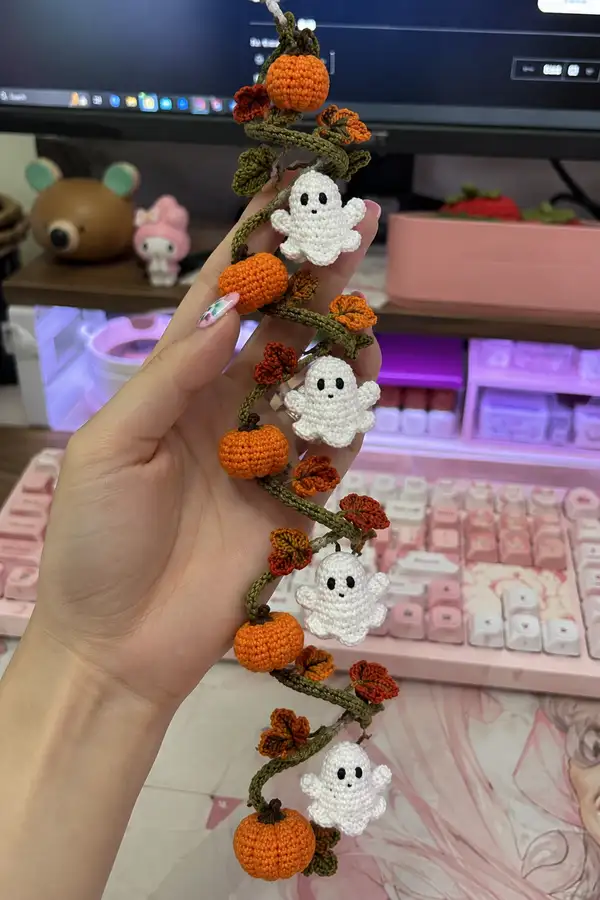
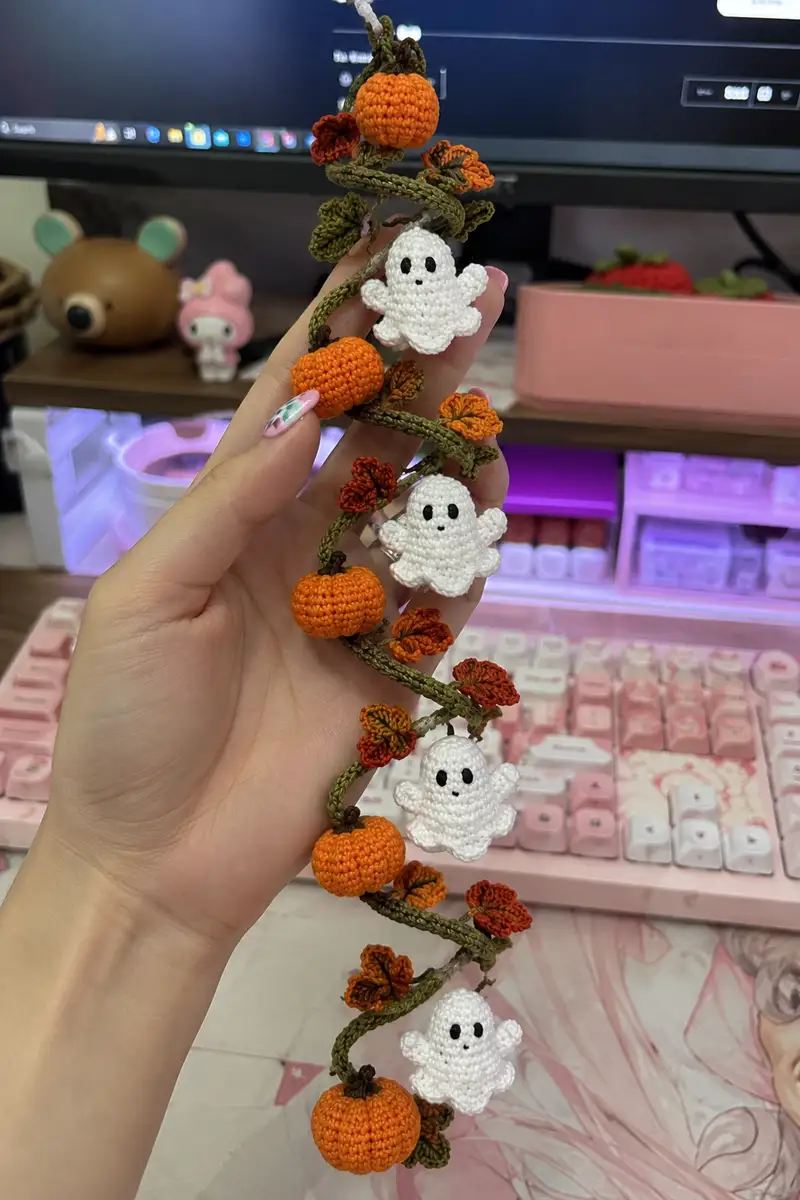
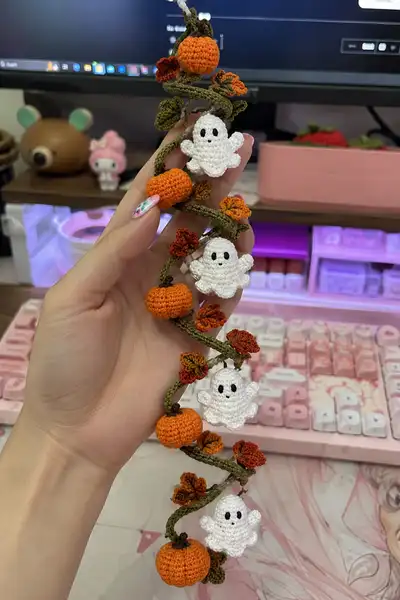
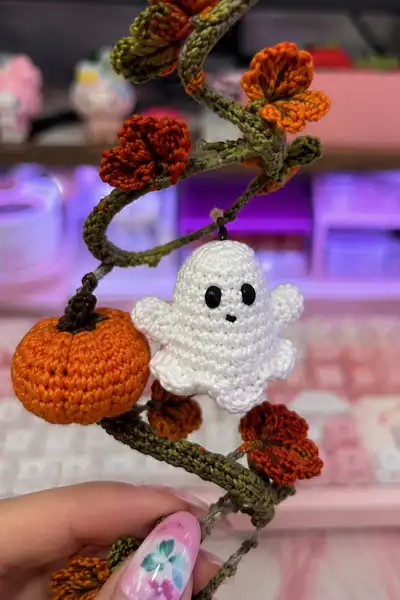
A whimsical spiral garland of tiny crocheted pumpkins, little ghosts, and autumn leaves—perfect for Halloween or fall decor. The garland features a twisted green vine with scalloped ghost skirts, plump pumpkins and multi-colored leaves that wrap into a charming spiral. Small, delicate details and modular components make it a satisfying sew-together project for makers who love miniatures and seasonal decorations.
Progress Tracker
0% Complete
— Overview :
Info :
This pattern is modular: you will make a central spiral vine, then crochet small pumpkins, ghost motifs, leaves and stems, and sew them to the vine. The default garland pictured contains 4 pumpkins, 4 ghosts, and 8 small leaves/flowers. Adjust the number of repeats to lengthen or shorten your garland.
Info :
Use a tight tension and a hook 1–2 sizes smaller than the yarn label suggests to prevent stuffing show-through on tiny motifs. Work consistently with a stitch marker to mark round starts.
— Ghost (Head & Body) :
Notes :
Make 4 ghosts. Each ghost is crocheted in continuous rounds from the top down. The skirt is created using an outer shell round to create the scalloped base. I use white fingering cotton and a 2.25mm hook. Safety (or embroidered) eyes are placed between rounds 10–12.
Round 3 :
(1 sc, inc) x 6 (18)
Round 4 :
(2 sc, inc) x 6 (24)
Round 5 :
(3 sc, inc) x 6 (30)
Round 6 :
(4 sc, inc) x 6 (36)
Round 7 :
(5 sc, inc) x 6 (42)
Round 8-11 :
1 sc in each st (42)
Info :
Place eyes between rounds 10 and 11, approximately 8–10 stitches apart depending on your preference. If using safety eyes, insert the washers now before stuffing. For kid-safe garlands, embroider eyes using satin stitch with black thread on round 11.
Round 12 :
(6 sc, dec) x 6 (36)
Round 13 :
(5 sc, dec) x 6 (30)
Info :
Begin stuffing the ghost head and upper body lightly. The ghost should be softly filled—not stiff. Stuff more firmly around the eye area to create slight projection for the face.
Round 14 :
(4 sc, dec) x 6 (24)
Round 15 :
1 sc in each st (24)
Round 16 :
(1 sc, inc) x 12 (36)
Info :
This round expands the body a touch to make the little ghost bell shape before the scalloped hem. Make sure stuffing is even; add a little more fiberfill so the skirt will hang nicely.
Round 17 :
1 sc in each st (36)
Round 18 :
1 sc in each st BLO (36)
Round 19 :
1 sc in each st (36)
Info :
We will create a scalloped hem. The stitch count around the body remains 36 as each scallop is worked into a base stitch. Ensure the last full stuffing is completed now; the scallop rounds will be decorative only.
Round 20 :
*sc in next st, (ch2, 5 dc in next st, ch2, sl st in same st) to form shell*, rep from * to * around (36 shells) — work sl st to join (36)
Round 21 :
*sl st into center of next shell, ch3, 3 dc in same shell center, ch1, sl st* rep around (36 shells)
Round 22 :
*sc into space between shells, picot (ch3 sl st into 3rd ch) atop shell center* rep around (36 picots)
Info :
If you prefer a simpler hem, skip rounds 21–22 and instead work one round of sc around the edge to create a neat finish. Picots and shells give the skirt its whimsical ruffle.
Round 23 :
Fasten off leaving a 20 cm tail for sewing (no change in decorative count). Weave tail into body and secure internal stitches. Add final shaping by gently pulling and distributing stuffing.
Round 24 :
Embroider mouth: use black embroidery thread and stitch a small 'O' mouth between rounds 10–12. Or attach small seed bead for mouth. (Info: mouth placement approx 3 rows below eyes centered)
Info :
Make 4 ghosts. For a hanging loop, before finishing, leave a 6–8 cm loop of green slipknot at the top of round 1 area and secure—this will be how you tie the ghost to the vine. Alternatively, sew a thread loop after assembly.
— Pumpkin (Body) :
Notes :
Make 4 pumpkins. Each pumpkin is crocheted in rounds and then vertical grooves are sewn to imply pumpkin ribs. Use orange cotton and a 2.25mm hook. The pumpkin measures approximately 2.5–3 cm across when finished.
Round 3 :
(1 sc, inc) x 6 (18)
Round 4 :
(2 sc, inc) x 6 (24)
Round 5 :
(3 sc, inc) x 6 (30)
Round 6 :
(4 sc, inc) x 6 (36)
Round 7-9 :
1 sc in each st (36)
Info :
These rounds build the full width of the pumpkin. Adjust one round more or less depending on desired plumpness. Stuff lightly as rounds progress but reserve most stuffing until after round 11 so the shape remains even.
Round 10 :
(5 sc, dec) x 6 (30)
Round 11 :
(4 sc, dec) x 6 (24)
Round 12 :
1 sc in each st (24)
Info :
Begin stuffing the pumpkin firmly but not rock-hard. Aim for a round shape; add fiberfill through the opening so the pumpkin remains plump at the midpoint then continue rounds to close the top.
Round 13 :
(3 sc, dec) x 6 (18)
Round 14 :
(2 sc, dec) x 6 (12)
Round 15 :
(1 sc, dec) x 6 (6)
Round 16 :
6 dec (0) — leave a 15–20 cm tail and close using tapestry needle; do not over-tighten
Info :
After closing, use the long tail to sew 6 or 8 vertical ribs by threading the tail from top to bottom and pulling snugly. Repeat rib stitching around the pumpkin to create the grooved look. Sew tail securely and tuck inside.
Stem :
With brown yarn: MR6, rnd1:6 sc (6); rnd2:(1 sc, inc) x2 (8); rnd3:1 sc in each st (8); rnd4:(1 sc, dec)x2 (6); fasten off leaving tail; sew to top center of pumpkin. Trim and tuck tail. (Shape stem by adding a tiny yarn knot and a couple backstitches around base.)
Info :
Make 4 pumpkins. For each pumpkin, before final stitching of stem, create a small loop of thread at the stem base so you can easily hang or stitch the pumpkin to the vine. Reinforce with a few extra stitches for security.
— Ghost Arms (Make 8: 2 per ghost) :
Notes :
Each ghost has two tiny puckered arms. They are worked in rounds or a short flat oval then sewn to the sides.
Round 2 :
1 sc in each st (5)
Round 3 :
(1 sc, inc) x (as needed) to make an oval shape: *1 sc, inc* twice (7)
Round 4-6 :
1 sc in each st (7)
Round 7 :
(1 sc, dec) x 2, sc remaining (5)
Round 8 :
Fasten off leaving a 10 cm tail. Make 8 arms total and sew each pair to rounds 13–15 of each ghost body, slightly forward for a waving look.
Info :
Position arms symmetrically: mark the join points using pins then sew through the body stitches for stability. Stuff arms very lightly or not at all to keep them floppy.
— Leaf Motifs (Small Leaves & Flowers) :
Notes :
Make 8–12 leaves in variegated autumn tones. These are worked flat and use shells to create petal shapes. Leaves are small—approx 1.5–2 cm—worked with cotton thread and a 2.0–2.25mm hook.
Leaf Round 1 :
ch 6, sc in 2nd ch from hook, hdc in next, dc in next 2, hdc in next, sc in last (7) — turn to work along opposite side of foundation ch: sc, hdc, dc, dc, hdc, sc — join to first st (14)
Leaf Round 2 :
*sl st to next st, ch2, 3 dc in next st (petal), ch2, sl st* rep 3–4 times along edge to create small petals (approx 4 petals)
Info :
Work leaves in a mix of rust, burnt orange, and deep red. Slightly block by pinning onto a cork board and misting; this gives crisp petal shape. Leave a 6–8 cm tail to sew to vine.
— Spiral Vine (Main Cord / Tail) :
Notes :
The vine is a tubular cord made by crocheting around a foundation chain which is then twisted into a spiral. You can optionally insert floral wire inside to make the spiral hold its shape firmly. Make one vine the length you desire; my sample is approximately 30 cm long including loops for hanging motifs.
Method A - Crocheted Tube (recommended) :
Ch 65 (adjust length for your garland—each extra 10 ch adds ~4 cm). Join slip stitch to first ch to form ring (do not twist). Rnd1: sc in each ch around (65). Rnd2-8: 1 sc in each st (65) — this builds a short tube. For a tighter tube, work in BLO on rounds 2–4 to create a ridge you can twist around. After desired tube length, fold tube in half and single crochet through both layers for 1 complete round to close and form a cord 1–1.5 cm in diameter. Fasten off leaving a long tail for sewing to motif loops.
Method B - Chain & Single Crochet Rope :
Ch 65, sc in 2nd ch from hook and each ch across (64 sc), when you reach end continue working sc into base of chain and around to create a spiral rope (work approx 6–8 rounds of sc in the same chain row depending on thickness). Fasten off and stuff with a bit of fiberfill or thread for body if desired. Insert floral wire if you want poseable spiral.
Info :
To create the visual spiral, wrap the cord around a dowel or pencil and steam lightly or mist and let dry in coil shape. If using wire inside, bend the coil to a spiral form and secure by sewing a few stitches through the coil at sparse points so it holds the shape.
Vine Finishing Round :
With the vine coiled, attach a short loop at the top by folding a 6 cm length and securing with 6 sl st to create a hanging loop. Weave ends in securely.
— Small Pumpkin Buds & Stems :
Notes :
Each pumpkin has a short brown stem and sometimes a green curly tendril. Make 4 tendrils: ch 12, sl st back across chain tightly to create a spiral tendril; fasten off leaving tail and sew to stem base.
Stem Rnd 2 :
1 sc in each st (6)
Stem Rnd 3 :
Working in BLO, sc in each st once more to thicken (6)
Info :
Fasten off with a long tail for sewing. Twist a short tendril of green by chaining 10–14 and working tight slip stitches back along the chain to create a curly vine for visual interest. Sew to top of pumpkin stem base and to vine cord.
— Assembly & Spacing :
Info :
Layout your vine on a flat surface in the spiral shape you want. Arrange pumpkins, ghosts and leaves in the order you like. Typical spacing in the pictured garland: pumpkin, leaf cluster, ghost, leaf cluster, pumpkin. Aim for roughly 5–6 cm between each large motif on a 30 cm vine.
Step 1 :
Sew small hanging loops onto top of each pumpkin stem and on top of each ghost head (you either left a loop earlier or sew a short piece of thread through top stitches to form a hanging loop). Use long tails so you can position motifs and then cut to length once secured.
Step 2 :
Use the vine tail and thread to stitch motif loops to the vine cord. Double-check placement by draping the coil on a dowel or pencil to preview the hanging drape.
Step 3 :
Secure each motif with several back-and-forth stitches through the motif loop and the vine cord. Knot on the inside then weave ends into the motif to hide them.
Info :
For extra security on high-traffic placements (doorways), use a tiny drop of fabric glue where loop meets cord in addition to sewn stitches. Allow glue to dry fully before hanging.
— Final Touches & Troubleshooting :
Info :
Once all pieces are attached, gently shape the ghosts and leaves. Use a blunt needle to nudge stuffing for a smoother silhouette. If any motif hangs crookedly, rotate it around the vine and re-sew the loop to adjust balance.
Care & Storage :
Store garland flat in a resealable bag or box to avoid crushing shells. Lightly spot clean with damp cloth if needed; avoid machine washing to preserve shape. For cotton threads, a very light steaming (from a distance) can help reshape scallops after storage.
This cozy autumn garland brings little moments of Halloween charm into your home—tiny pumpkins, sweet phantoms and curled leaves combine into a spiral of seasonal delight. Each small motif is a joy to crochet and assemble, and the modular layout lets you make it as long or short as you like. 🍂🧶 Enjoy the rhythmic stitching, the crisp cotton texture, and the smile you’ll get every time you pass it on the mantel. Happy crocheting and have fun sharing your handmade harvest decor! 🎃