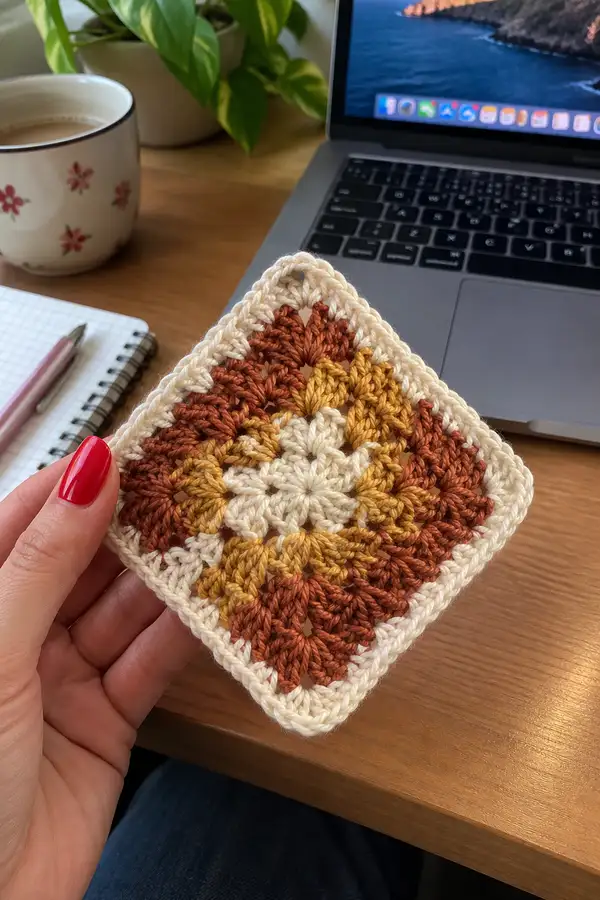
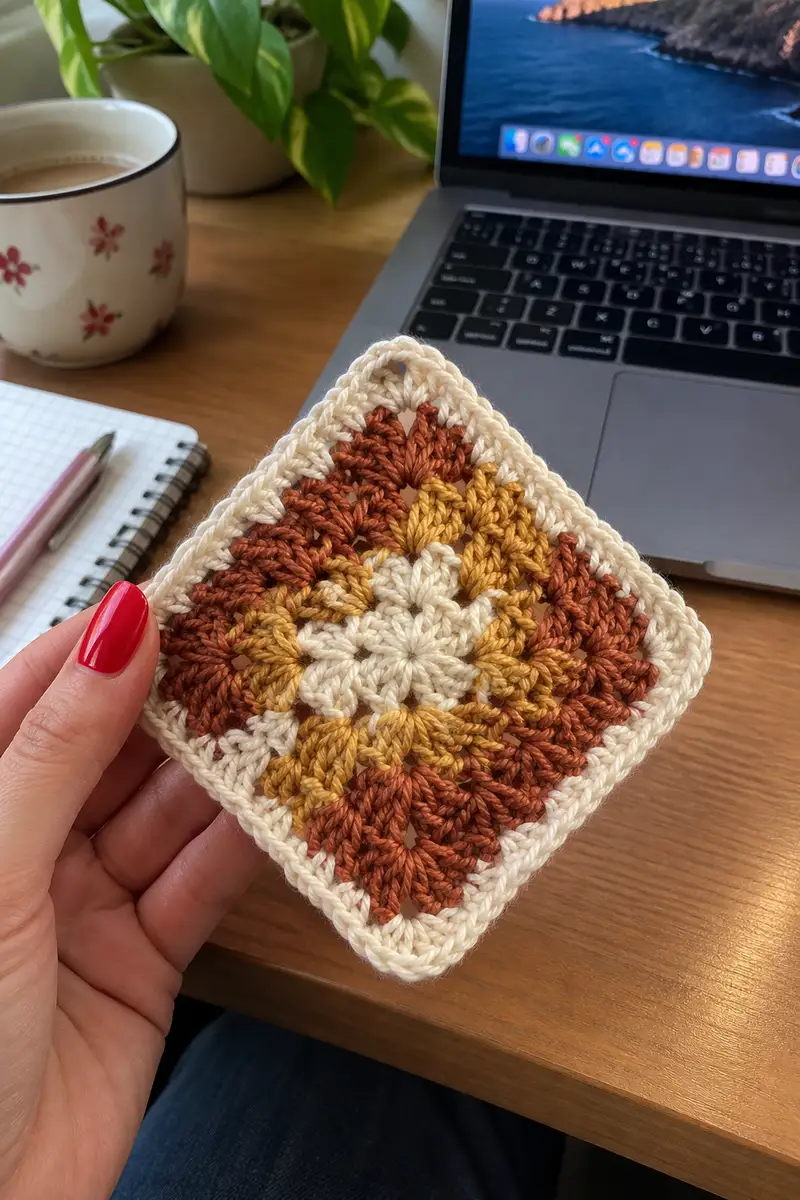
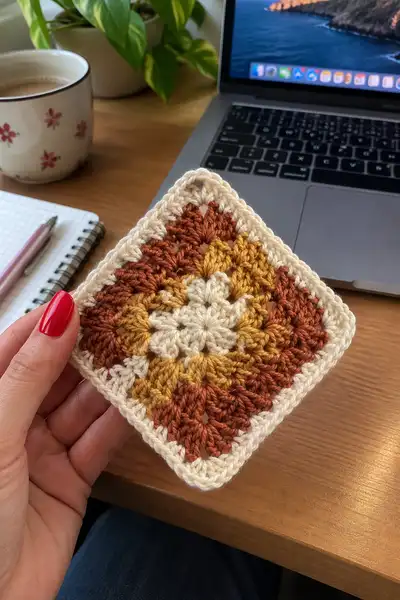
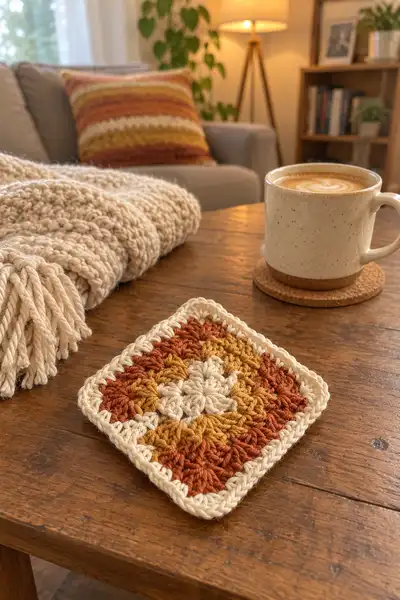
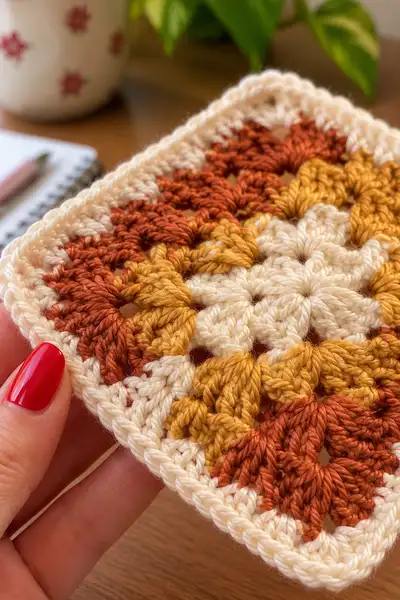
Create a warm, vintage-inspired granny square with rich autumn tones and a soft cream frame. This cozy rustic square features a textured puff-flower center, three rounds of classic granny clusters in warm variegated colors, and a neat rounded cream border. Perfect for coasters, cushions, or joining into a seasonal blanket, the stitch textures and colorwork create a charming handmade accent.
Progress Tracker
0% Complete
— Notes & Gauge :
Info :
This pattern is written in US terms. Gauge for one finished square (with 3.5mm hook and DK cotton): approximately 10.5 cm / 4.1 in square after blocking. You may get a slightly larger or smaller square depending on yarn and hook. The square in photographs measures roughly 10 cm / 4 in. Use a hook 0.25-0.5 mm larger or smaller to adjust if needed.
— Special Stitches :
Puff stitch (puff): yo, insert hook in indicated stitch or ch-space, yo and pull up a loop (repeat yo and pull up loop 3 times total to have 7 loops on hook), yo and pull through all loops on hook, ch1 to close puff. Counts as one puff cluster. Classic granny cluster: (3 dc) in same space. Corner: (3 dc, ch2, 3 dc) all in same corner space.
— Center Motif :
Round 1 :
Using Cream (C): Make a mr, ch2 (counts as first dc for center base), 7 puffs into ring, ch1 between puffs as needed for definition, pull ring closed and sl st to top of starting ch2 to join. (8 puff petals)
Info :
Arrange your puffs evenly as you go. Gently tighten the magic ring so the center sits flat—avoid over-tightening which will flatten the first round of puffs.
Round 2 :
Change to Golden Yellow (G). Join with sl st to any ch1 space between puffs, ch3 (counts as dc), dc in same space, *ch1, (dc, dc) in next ch1 space between puffs; rep from * around to make 8 small dc-pair groups separated by ch1, sl st to top of ch3 to join. (16 dc grouped into 8 pairs)
Info :
We are establishing a small ring of dc pairs to transition from the puff center into the more open granny rounds. Pay attention to the ch1 spaces between puffs — those are your placement points.
— Rounded Granny Cluster Rounds (building the square) :
Round 3 :
Change to Rust Variegated (R1). Join with sl st to any ch1 space, ch3, 2 dc in same space (counts as first cluster of 3 dc), *ch1, 3 dc in next ch1 space; rep from * around—when you reach the start, sl st to top of beginning ch3 to join. (8 clusters; 3-dc groups in a circular arrangement)
Round 4 :
Change to Golden Yellow (G). Work in round as follows: sl st to center ch1 space between two clusters (this becomes corner prep), ch3, 2 dc, ch2, 3 dc in same ch1 space (first corner made), *ch1, 3 dc in next ch1 space (along side), ch1, 3 dc in next ch1 space, ch1, 3 dc in next ch1 space; move to next corner (the next ch1 space from previous corner) and make (3 dc, ch2, 3 dc); rep from * around to make 4 corners. Join with sl st to top of ch3. (You will have 4 corners and a total of 12 side clusters per round—counts scale as the rounds increase.)
Info :
Round 4 introduces corners. The corners are formed by (3 dc, ch2, 3 dc). Count the numbers of clusters per side to keep symmetry: after this round, you will have 3 clusters per side corner-to-corner (including corner clusters themselves).
Round 5 :
Change to Rust Variegated (R2 - same skein or different variegation if desired). Slip stitch to the first ch1 space along a side (not the corner ch2), ch3, 2 dc in same space, *ch1, 3 dc in next ch1 space; repeat across the side; when you reach the corner ch2, work (3 dc, ch2, 3 dc) in the ch2 space; rep from * around for all four sides. Join with sl st to top of ch3. (Each side now contains 4 clusters between corners.)
Info :
Keep turning the square in your hands as you work so each side builds evenly. Check that corners remain defined; if they begin to look stretched, tighten the tension slightly in the corner ch2 space to keep corners crisp.
Round 6 :
Change to Cream (C). Work across each side as: sl st to first ch1 space, ch3, 2 dc in same space (start of side cluster), *ch1, 3 dc in next ch1 space; rep across side. In each corner ch2 space work (3 dc, ch2, 3 dc). Join with sl st to top of ch3. (Each side now contains 5 clusters between corners.)
Info :
At this point your square begins to grow outward quickly. If you're making a single coaster only, you can move to edging rounds now. If making a blanket or cushion panel, continue adding pattern rounds for desired size using the same expansion principles.
Round 7 :
Change to Golden Yellow (G). Work 1 round of classic granny clusters along the established ch1 spaces: slip to next ch1, (3 dc) in ch1, ch1 between groups; at each corner (ch2) work (3 dc, ch2, 3 dc). Join. (Each side increases cluster count by one.)
Round 8 :
Change to Rust Variegated (R2). Repeat Round 7 pattern: work 3-dc clusters in each side ch1 space and corners as (3 dc, ch2, 3 dc). Join. (Square keeps expanding.)
Info :
From Rounds 5-8 we are using alternating colors to create warm stripes; you can carry the unused yarn along the back or fasten off and weave in ends. Carry if working a blanket to reduce ends, but secure carried yarn every 8-10 stitches to avoid long floats.
Round 9 :
Change to Cream (C). Work one round of 3-dc clusters as before in each ch1 space and corners as (3 dc, ch2, 3 dc). Join. (This will create a light band separating the variegated rows.)
Round 10 :
Change to Rust Variegated (R1). Work a round identical to Round 9, increasing counts per side as you go. Join. (Each round adds one extra side cluster between corners.)
Info :
By Round 10 you should visually count roughly 8-10 clusters per side depending on how many expansion repeats you made in the earlier rounds. Your square should remain flat; if it cups, try a slightly larger hook next time or loosen tension on clustered rounds.
Round 11 :
Change to Golden Yellow (G). Repeat the 3-dc cluster round; join. (The square is continuing to expand evenly.)
Round 12 :
Change to Cream (C). Repeat the 3-dc cluster round. Join. (Optional: replace every second cream round with a round worked in BLO to create a ridge texture.)
Info :
If you'd like to add subtle texture, work Round 12 in BLO: 3 hdc or 3 dc in each cluster but worked in back loops only—this will create a horizontal ridge when viewed from the right side.
Round 13 :
Change to Rust Variegated (R2). Continue with standard granny cluster expansion: 3 dc clusters in each side ch1 space, corners as (3 dc, ch2, 3 dc). Join.
Round 14 :
Change to Golden Yellow (G). Repeat cluster round. Join. (Your square may now be the size of a coaster or small motif depending on how many expansion rounds you've done.)
Info :
Decide now if this square will stay as a coaster (stop after Round 14-16 and proceed to edging) or if you'd like a larger throw or cushion panel—repeat color stripes and cluster rounds until you reach target dimensions. For the sample, we will add a detailed 8-round border to create a framed look.
— Framed Border & Rounded Corner Edging :
Round 15 :
Change to Cream (C). Work 1 round of single crochet evenly around as follows: sl st to the first ch1 space, ch1, 1 sc in same space, *sc in each dc across the side (approximately 3 sc per 3-dc cluster), when you reach corner work (sc, ch2, sc) into corner ch2; rep around. Join with sl st to first sc. (This creates a neat framed edge and brings the squareness back.)
Info :
Use this sc round to tidy up uneven edges. Count scs across sides and adjust by adding an extra sc in larger spaces if needed to keep corners aligned.
Round 16 :
Continue with Cream (C). Work one round in hdc around for a slightly raised frame: sl st to first sc, ch2 (counts as first hdc), hdc in each sc around; in corner sc-ch2-sc space work (hdc, ch2, hdc). Join. (This provides a soft ridge before the final border.)
Round 17 :
Switch to a tighter edge: using the same Cream (C), work a round of sc in BLO across the side sc/hdc stitches to create a defined ridge: sl st to first stitch, ch1, 1 sc in each stitch BLO; corners = (sc, ch2, sc). Join.
Info :
Working in BLO will make the outer ridge stand proud of the square and give a clean finished look. This is how the square in the photos achieves that slightly rounded frame.
Round 18 :
With Cream (C), work a crab stitch (reverse single crochet) around for a rounded, rope-like finish: join with sl st, ch1, work crab stitch in each st evenly; when you reach corners, work 3 crab sts into corner ch2 to maintain shape. Join and fasten off. (Crab stitch gives a decorative and slightly anti-clockwise edging.)
Info :
If you prefer a flat border, omit the crab stitch and finish with a plain sc round instead. For a plump rounded border like the photo, crab stitch or a round of front-post hdc worked into the previous row will work beautifully.
— Alternate Detailed Border Option (Textured Ridges) :
Round 19 :
Optional: Change to Cream (C) if not already. Work 1 round of front-post double crochet (FPdc) around: FPdc around each hdc or dc from Round 16 to make a raised border, placing (FPdc, ch1, FPdc) into corner spaces for neat rounding. Join.
Round 20 :
Optional: Work one round of sc in each stitch to tidy the FPdc ridges: sc evenly around, corner = (sc, ch2, sc). Join. Fasten off and weave in ends.
Info :
The optional textured ridge border creates a plush frame that reads like the square in the close-up photos. These extra two rounds will add depth and a more tactile edge to your coaster or blanket square.
— Finishing Touches & Blocking :
Info :
Weave in all ends using a yarn needle. Gently wet-block or steam-block the square to square up edges—pin to a measurement of equal sides on a blocking mat and allow to dry. The blocking step will make your puff center open up slightly and the border lay flat.
Round 21 :
Optional neat top stitch: Using Cream (C), join with sl st anywhere, ch1, sc in the back loop only around the entire square to create a subtle stitched border line. Join, finish off, weave ends. (This final top-stitch visually anchors the cream frame.)
Info :
For the exact look in the photos, use a smooth cotton DK with a slight sheen and ensure your puff stitches are plump and evenly spaced—this gives that cozy rustic vintage vibe.
— Variations & Size Adjustments :
Info :
To make a cushion panel or blanket, repeat the cluster expansion rounds (Rounds 7-14 sequence) until you reach desired width. Keep color repeat rhythm every 2-4 rounds to maintain striping. When joining multiple squares, use whip stitch, mattress stitch, or join-as-you-go with a continuous slip-stitch seam for a flat join.
Variation - Join-as-You-Go :
If making several squares, work up to the last round for each square, then use a join-as-you-go (JAYG) method on the final border round: when at the side where you need to join to a completed square, work (sc, ch1, sl st into corresponding stitch on joined square) as appropriate to create a neat seam. Continue the border normally on free sides. Repeat around and finish the border to lock squares together.
Info :
When joining many squares, use a color that matches either the border or a tone in your variegated yarn to make seams blend in. A neutral cream join creates a soft, vintage look like the styled items in the photos.
— Making a Coaster Set or Pillow Panel :
Info :
Make 4-9 squares for a small pillow panel (arranged in a 2x2 or 3x3 grid). Use a mattress stitch to sew sides together for an invisible seam, then add a backing fabric or crochet a backing panel to enclose stuffing. For coasters, finish as single squares with a sturdy crab stitch edge to help them stand up to frequent use.
Info :
Always block squares before joining to ensure consistent size and flatter seams. If one square is slightly smaller, blocking will usually even it out.
— Troubleshooting Common Issues :
Info :
If corners are collapsing, ensure you worked the ch2 corner space every round; if a corner looks tight, try ch3 instead of ch2 (only in that round) to relieve tension. If sides ripple, your tension may be too loose—switch to a slightly smaller hook next repeat. If the square cups inwards, try a slightly larger hook or relax tension.
Info :
For consistent color pooling, let variegated yarn rest between color change rounds — sometimes twisting the skein slightly can give more even color break-ups, but variegation will naturally pool slightly which contributes to the rustic effect.
This Cozy Rustic Granny Square brings together vintage charm and modern simplicity in each carefully worked round. With its puff-flower center and warm, layered stripes, it makes an irresistible small project for gifting or for building into a cozy blanket or cushion. Enjoy the meditative rhythm of the clusters and the satisfying finish of a neat cream frame—this little square is bursting with autumn warmth. 🧶🍂✨