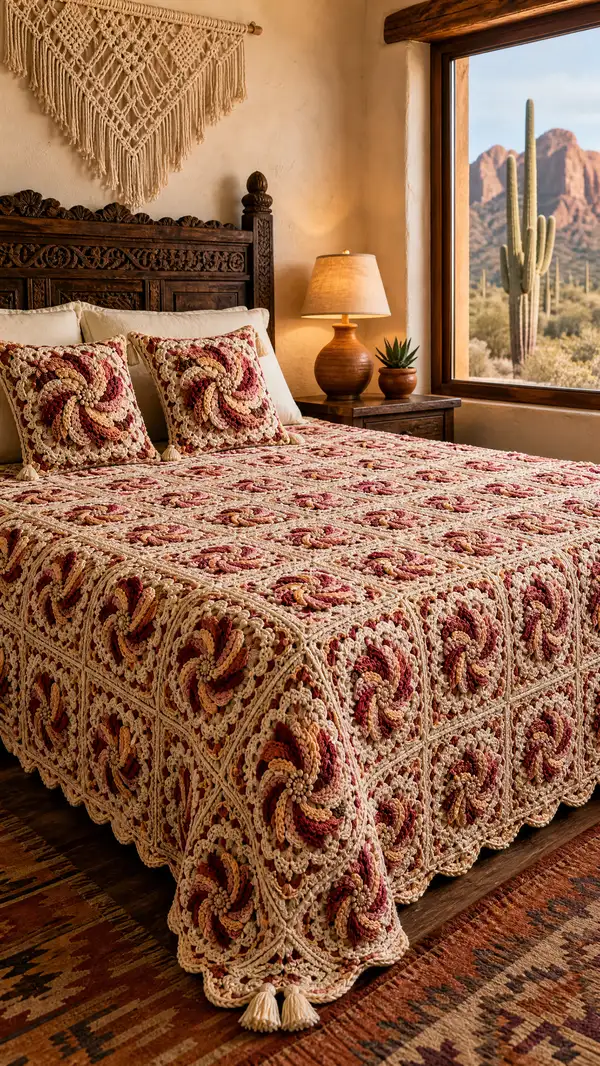
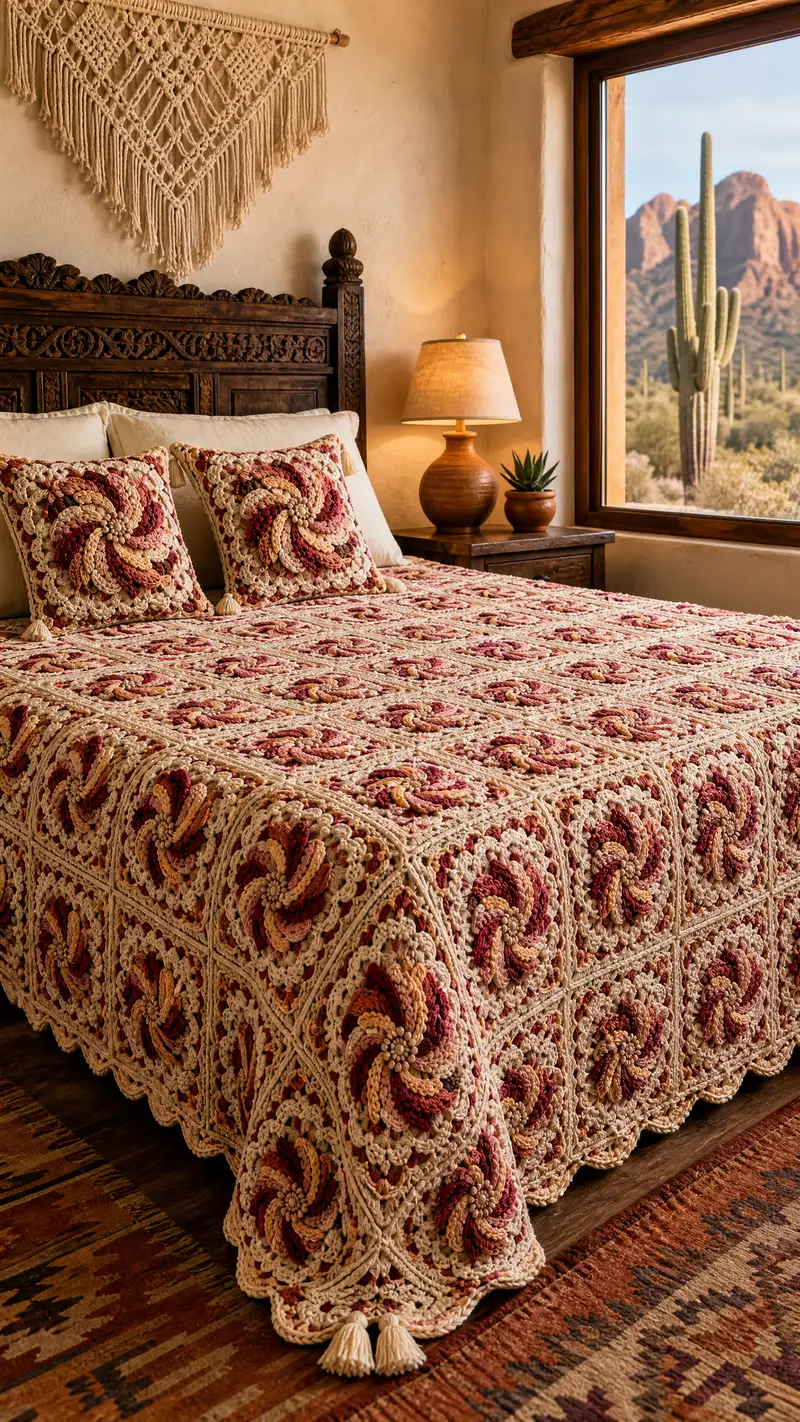
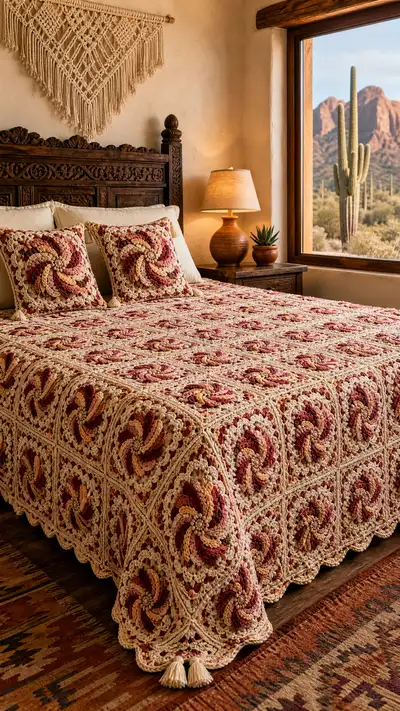
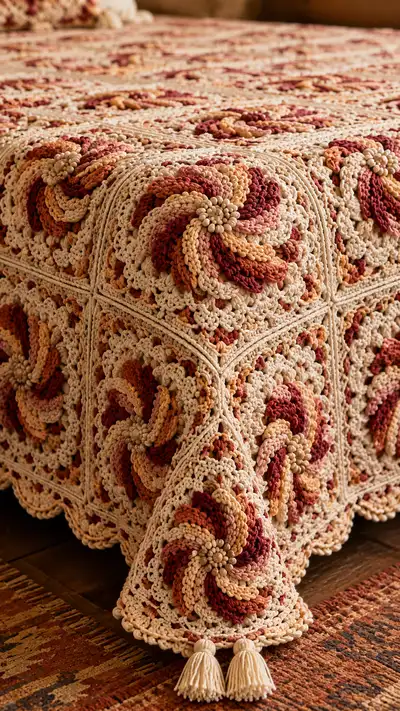
A warm, textural bedspread made of sculpted swirl granny squares in cranberry, rust and cream. This full-sized spread features raised petal spirals, a scalloped joining edge and tassel-trimmed corners. The pattern uses bulky cotton-style yarn worked with generous hook sizes for fast progress and rich stitch definition. Modular squares are made, joined and finished with a wide scallop border to create a cozy, vintage-inspired bedspread.
Progress Tracker
0% Complete
— Overview :
Info :
This bedspread is made from modular 12" (approx.) swirl granny squares assembled into a full bedspread. The sample pictured uses 5 colorway rounds per petal (cranberry, deep rust, clay, peach, cream background) and a final neutral joining and scalloped border. Gauge with bulky (#5) cotton and a 6.5mm hook: each finished square measures approx. 12"; adjust hook or yarn to change size.
Info :
Work squares flat in rounds. The spiral petal effect is created by stacked puff clusters worked in staggered placement; keep loop height consistent. Block squares lightly before joining for best results.
— Swirl Granny Square Motif (make 56 for queen size — adjust count to desired bed dimensions) :
Round 1 :
Using color A (cranberry). Make a magic ring. Ch2 (counts as first dc), 11dc into ring. Join with sl st to top of ch2. (12 dc)
Round 2 :
Ch2, 2dc in same stitch, 2dc in each st around. Join with sl st to top of ch2. (24 dc)
Round 3 :
Ch2, (1dc, inc) x 12 around. Join. (36 dc)
Info :
Keep tension relaxed through rounds 1-3 so the center lies flat and the spiral base has movement. If your rounds cup, try a slightly larger hook for rounds 1-3 only then switch back down.
Round 4 :
Change to color B (rust). Ch2, (2dc, inc) x12. Join. (48 dc)
Round 5 :
Change to color C (clay). Ch2, (3dc, inc) x12. Join. (60 dc)
Info :
These increase rounds establish the flattened circular base. The counts above create enough stitches to spacing puff petals evenly later. Carry unused yarn loosely or fasten off and join in new color ends neatly to hide on WS.
Round 6 :
Change to color D (peach). Ch1, sc in same st, *ch3, sk 4 sts, sc in next st; rep from * around to create stitch markers for petal anchors. Join with sl st to first sc. (12 ch-3 spaces)
Info :
Round 6 forms the petal anchor spaces; count carefully — you should have 12 equally spaced ch-3 loops which will each host a petal cluster. Mark the first ch-3 space for orientation.
Round 7 :
Change to color A. Work into each ch-3 space as follows: *Ch1, (yarn over, insert hook, pull up loop) x3 to create 3 tall loops, yarn over and draw through all loops, ch1 to close — this is a 3-loop puff; ch2, sl st into same ch-3 space to secure; sk to next ch-3 space. Rep around. Join with sl st to first puff. (12 puffs)
Info :
Make every puff identical height — gently pull loops to same size before finishing each puff. Use hook tip to measure loop heights visually. Do not tug loops tightly; keep them loose enough to create texture but secure the final yarn-over drawthrough snugly.
Round 8 :
Change to color B. Ch1, sc around working 2 sc between each puff cluster, and 3 sc around the base of each puff to anchor it (work 3 sc in base st under the puff). Join. (Estimate 48 sc; distribute evenly)
Round 9 :
Change to color C. Ch2, (1dc, ch2, 1dc) in the stitch between each puff to start forming small shell connections: work *1dc, ch2, 1dc* in each designated space around. Join. (12 shells)
Info :
At this stage the spiral is visible — staggered puffs will be expanded in subsequent rounds to read as sweeping petals. Keep counting shells to ensure 12 repeat points.
Round 10 :
Change to color D. Work extended twisted puff rows to create directional petals: In the ch2 of each shell, work a Twisted 5-loop puff: yarn over, insert hook, pull up long loop (approx 2x the height of a dc), repeat 4 more times (5 loops); yarn over and pull through all loops, ch1 to close; sl st to base. Rep into each shell ch2. Join. (12 twisted puffs)
Info :
These twisted puffs will be the raised petals. Keep the loop lengths consistent, and place them all leaning clockwise (or counter-clockwise) by inserting the hook slightly off-center toward the direction you want the petal to curl. Directionality is key for the swirl effect.
Round 11 :
Change to color A. Ch1, sc in each st and around each puff base work 3 sc to fully anchor the twisted puffs. In between anchored areas, work *ch2, sc* to create a gentle open texture. Join. (approx 72 stitches, distributed)
Round 12 :
Change to color B. Ch3 (counts as dc), work (dc, ch1, dc) cluster into the space between petal anchors to increase width and sweep — place clusters so they offset the petal centers. Join. (Estimate 72 clusters/spaces filled)
Info :
From rounds 7-12 you are building the 3D petal layers. Work slowly to maintain symmetry and keep petals stacked so they interlock without bunching in the center.
Round 13 :
Change to color C. Ch1, sc in each st around for 2 rounds to stabilize the petals: Round 13: 1 sc in each st (approx 72)
Round 14 :
Repeat Round 13 (approx 72 sc)
Info :
Stabilizing rounds help square-up the motif before working the square-shaped frame. If your motif is slightly oval, work one more stabilizing round in BLO to create an edge for the square frame to attach to.
Round 15 :
Change to background color (cream). Begin square framing: Ch3 (counts as dc), dc in next 6 sts, ch2, skip 6 sts, dc in next 7 sts, ch2; repeat to make four sides. After completing 4 sides, join with sl st. You will create 4 corner ch2-spaces. (Work is arranged to form the first transition to square)
Round 16 :
Ch3, (dc in each dc across until reaching corner ch2, work (dc, ch2, dc) in corner ch2) x4 around. Join. (Maintain even stitch distribution, approx 88-96 dc depending on exact placement)
Info :
When converting a round motif to a square, the key is spacing increases into the four corner ch2 spaces only so the sides remain straight. Adjust stitch distribution slightly if a side is too long or short — add or omit a dc across a side to even lengths.
Round 17 :
Ch1, sc around working 2 sc in each corner st to reinforce; place sc evenly on sides. Join. (Approx 96 sc)
Round 18 :
Ch2, in same st work (dc, ch1, dc) — create a delicate lacy border around the square: *sk 2 sc, (dc, ch1, dc) in next sc; rep across side; in corner work (dc, ch2, dc). Join. (Lacy round forming shell points)
Info :
Add an Info marker: Change colors every 2-3 rounds as pictured to build concentric ring color bands within petals. The sample alternates accents to create depth: cranberry (color A) then rust (B) then clay (C) then peach (D) then cream. Adjust sequence to taste.
Round 19 :
Ch1, sc around in each st and in each ch-1 space; in corners work 3 sc to square up. Join. (Approx 112 sc)
Round 20 :
Change to a textured round in color A: *Ch1, 1 sc in next st, 1 hdc in next; rep across. In corners work (sc, hdc, sc) to maintain corner structure. Join. (Approx 112 mixed sts)
Info :
At rounds 17-20 the square is stabilised and ready for decorative shell rounds that create the lacy look between squares when joined. Keep counts consistent across all squares so joins align perfectly.
Round 21 :
Change to cream. Ch3, *sk 1, 5 dc cluster (shell) into next st, sk 1, dc in next st; rep around; in corners work 7 dc shell into corner to form roomy corners. Join. (Shells placed evenly around 4 sides)
Round 22 :
Ch1, sc in each st and in each shell space: place 3 sc inside each 5-dc shell to flatten and anchor. Join. (Approx 128 sc)
Round 23 :
Change to color B. Work a picot-applied decorative round: *sc in next 3, picot (ch3 sl st to top of ch3) in next, sc in next 3; rep around. Place 5 sc in corner cluster space. Join.
Info :
Use the picot round sparingly; it adds tiny raised points that echo the beaded center shown in the photo. If you plan to sew small beads into the center, add them after completing the square and before blocking.
Round 24 :
Ch1, sc around evenly to tidy the edge and balance stitch counts. Join. (Final round before blocking)
Info :
Fasten off and weave in ends, leaving a 10-12" tail if you plan to join squares by sewing. Make the specified number of squares for your bed size (sample uses 56 squares for a queen; arrangement pictured is 7 x 8 grid). Block all squares to exact measurements before joining.
— Pillow Cover Variations (Make 2 to match bedspread) :
Round 1 :
Make 4 full motif squares as above for each pillow front and two smaller squares (or half-square pieces) for the back panel, or make 2 full motif squares and one plain cream square for backing. Assemble so front shows full swirl. (Follow motif rounds 1-24 for fronts)
Info :
Pillow size in photo approximates 16" square finished; make smaller or larger by changing yarn/hook. Add a cream tassel at each corner as shown — 4 tassels per pillow.
Round 2 :
For pillow back: With cream, ch the required width and work sc rows to match the height of assembled front, then seam edges. Add hidden zipper or overlap closure.
Info :
Sew pillow pieces together with mattress stitch or whip stitch on WS for neat edges. Insert pillow form and close.
— Joining Squares (choose method) :
Info :
Two recommended methods: Join-As-You-Go (JAYG) using slip-stitch join or seam with whip/stitch. JAYG produces a built-in raised seam similar to the photo; sewing produces a softer, flatter seam. Below is a JAYG slip-stitch joining sequence designed to create the raised ridge between squares.
Round 1 (JAYG join) :
With RS of square A facing you and RS of square B facing down, attach cream in corner stitch of square A. Ch1, sc across side until corner, turn square A; align square B edge and sl st through corresponding stitches on square B and sc on square A to join; at corner work (sc, ch2, sc) through both squares. Continue around side and complete join on three sides for each square until grid formed.
Info :
When joining, maintain slight ease (do not pull too tight). Aim for an even ridge of sc and sl st between squares as pictured. Work join with the same cream yarn to create continuity between squares.
Round 2 (Seamed join option) :
Arrange squares in grid, pin edges matching centers and corners. Using a yarn needle and cream yarn, sew through matching stitches using mattress stitch to create an invisible seam. After seaming, work a single cream round of sc across the entire join line on RS to create the visual raised seam.
Info :
Check that swirl directions align (all spirals rotating the same way) so the bedspread displays a consistent directional flow. If you prefer alternating swirl directions for a checkerboard effect, plan the layout accordingly before joining.
— Joining Rounds & Reinforcement (after entire grid is assembled) :
Round 1 :
With cream yarn, work one round of sc around the entire assembled bedspread edge: sc evenly along each join seam, placing 3 sc in each square corner to keep corners square. (Stitch count varies by grid size)
Info :
Work this reinforcement round to tidy joins and create a base for the border. This also evens out any small discrepancies in square sizing.
Round 2 :
Ch3, (dc, ch1, dc) into the sc round every 3-4 sts around to create the beginning of the scalloped border. In corners work (dc, ch3, dc) to preserve shape. Join. (Scallop anchors placed approx every 3-4 sc)
Round 3 :
Work shell rounds in cream: *sk 2, 7dc shell in next st, sk 2, sc in next; rep around. In corners extend shells to 9dc for graceful turning. Join. (Creates pronounced scallops)
Info :
If the scallops appear too sparse, add an extra shell row for more volume. Blocking after shells will open them up beautifully and create the soft drape shown.
Round 4 :
Ch1, sc around placing 3 sc in the center of each scallop to anchor. Join. (Edge stabilized)
Round 5 :
Optional decorative picot or rope round: *sc in next 2, picot, sc in next 2, rope (front post hdc around shell st) to create rope detail; rep. Join. (Adds a raised braided effect similar to photographed edging)
Info :
Work as many border rounds as desired to reach the finished dimensions; each extra shell round will add approx 1/2" to 1" depth. For a dramatic scalloped finish like the photo, work 3 shell rows before final anchor rounds.
— Scalloped Corner & Tassel Attachment :
Round 1 :
At each corner after finishing the border, attach a cream yarn. Make a large tassel approx 4-5" long: wrap yarn around a 4" template 40 times, tie, cut loops, trim ends evenly. Attach with strong knot and secure by sewing through tassel head 3-4 times. Repeat at all four corners.
Info :
Ensure tassels are of equal length and density. Use a small whip stitch through the knot and secure tail ends through the tassel head to prevent slippage. For extra durability, add a dab of fabric glue inside tassel head knot.
— Beaded Centers (Optional) :
Info :
If you want the small beaded center effect seen in the photo, sew a small wooden bead or cluster of tiny beads into the very center of the swirl. Use a strong upholstery needle and thread through several surrounding stitches to lock bead in place. Test washability if using glue.
— Final Finishing & Blocking :
Info :
Lightly steam-block the whole bedspread on a flat surface: pin scallops and square edges to dimensions, spritz with water, and allow to dry. Avoid aggressive stretching which can distort the poufed petals. Trim all tails and weave in securely on WS, taking extra care where many tails meet along joins.
Info :
For machine washing, this piece is best hand-washed or gentle cycle in a large commercial washer using cold water; reshape and dry flat. Cotton may soften and relax after washing; re-block to maintain scalloped edge.
Info :
Estimated rounds across a single square (for reference): 24 rounds. For a 7x8 grid (56 squares) you will repeat the 24-round sequence 56 times before joining and working approx 5-8 border rounds across the whole spread. This intensive modular work contributes to the overall round count and project complexity.
Info :
TIP: Work one color family at a time across many squares to speed production — for example do color A puff rounds for 10 squares, then color B for the same 10 squares, etc. This batching reduces color changes and speeds progress.
This Cranberry Swirl Granny Square Bedspread is a celebration of texture, color and patient, meditative crochet. Every little puff and shell contributes to a dramatic, tactile surface that turns a bed into a centerpiece. The modular approach lets you make progress in comfortable chunks, and the finishing border and tassels add a polished, handmade charm. Enjoy the rhythm of making each swirl—this project rewards patience with a beautiful heirloom-quality piece. 🧶🌹