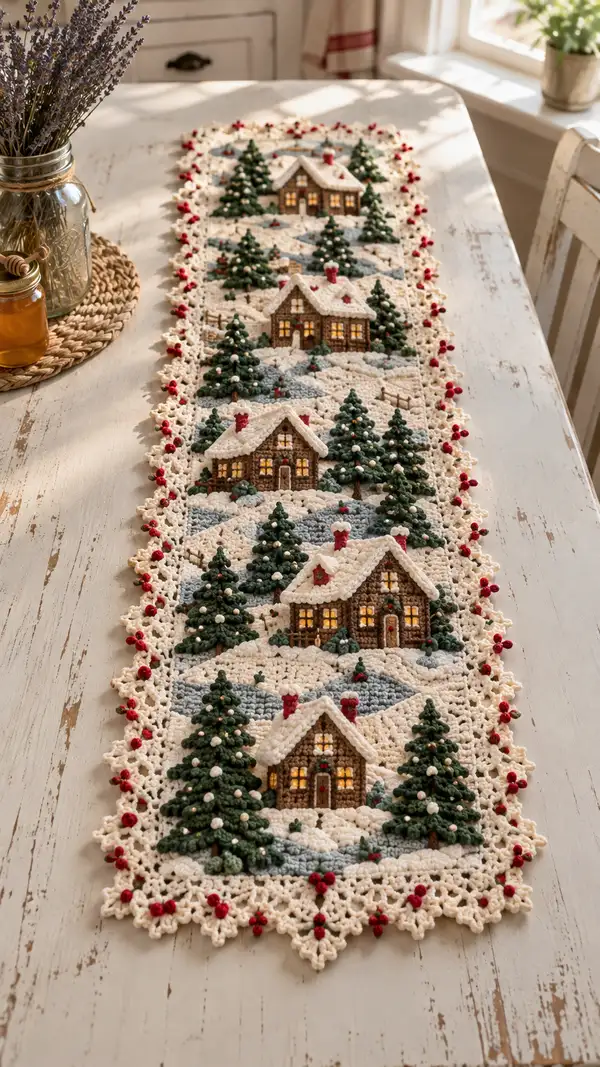
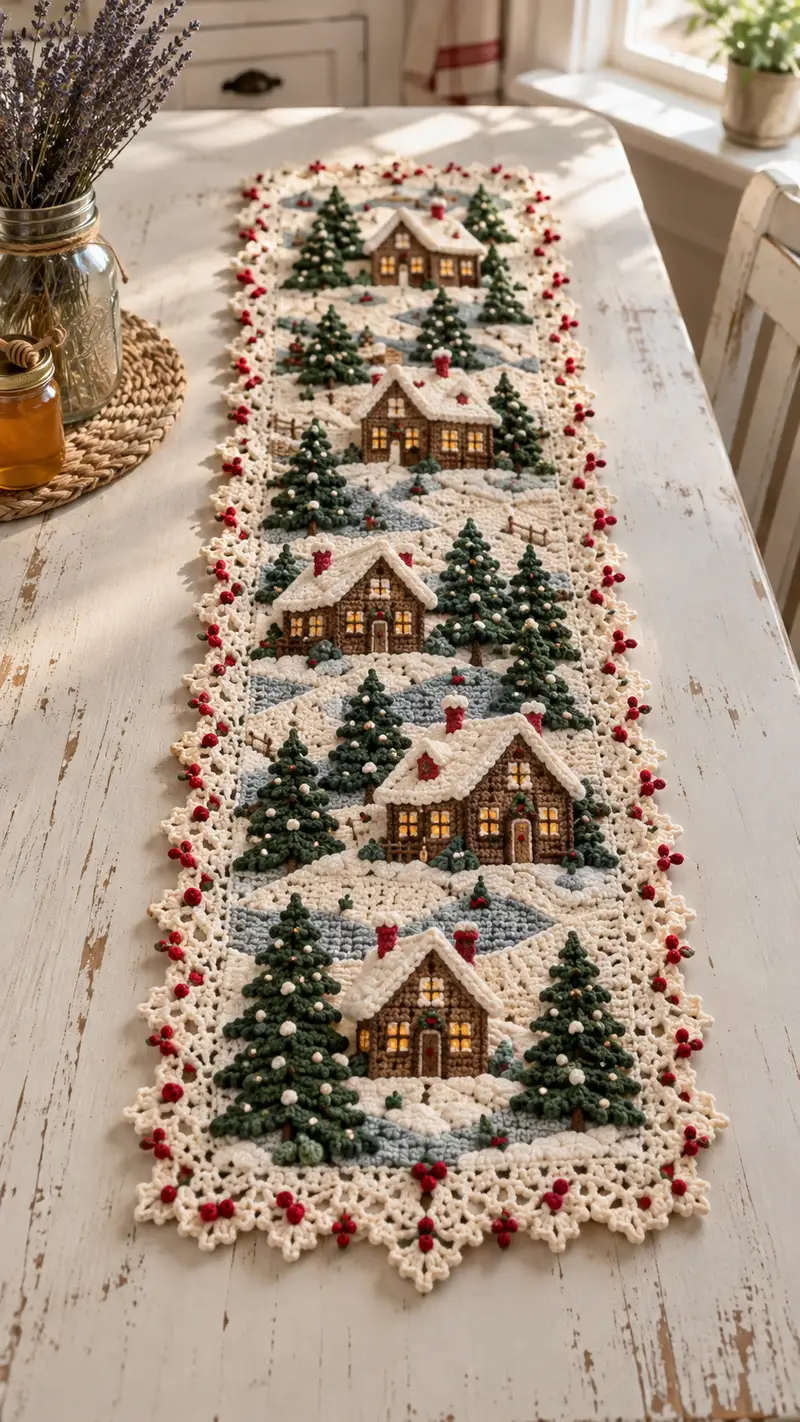
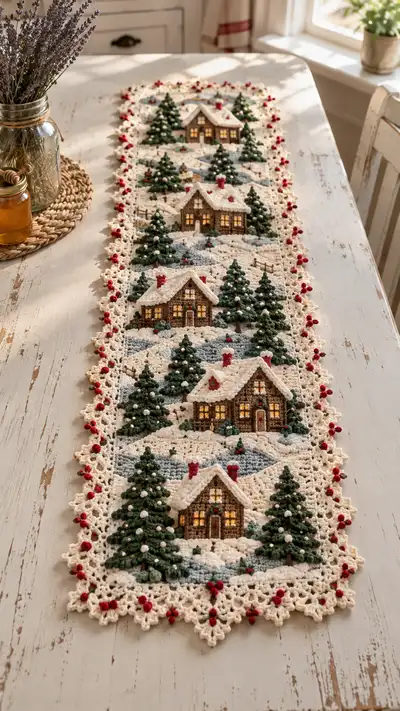
A vintage-inspired winter table runner featuring repeating 3D cabins, layered evergreen trees, and snowy hills worked in cream, forest green, soft blue and warm brown. Each panel is richly textured with raised tree layers, bobble berries and a delicate lacy border edged with red berries. Perfect for holiday displays or cozy winter decor, this runner combines tapestry-style applique with sculpted crochet motifs for a stunning table centerpiece.
Progress Tracker
0% Complete
— Overview :
Info :
This pattern constructs one scenic panel and instructs you to make 4 identical panels (adjust number to suit table length). Each panel contains a square background, a 3D cabin applique, three layered evergreen trees (large, medium, small), small snow mounds and berry bobbles. Panels are joined horizontally and finished with a lacy cream border worked after assembly. Work panels flat in rows and attach appliques by surface sewing and invisible mattress stitch. Use tight tension so texture is crisp and small details hold.
— Panel Background (Make 4 panels) :
Round 1 :
MR, ch1, 6 sc in ring (6)
Round 3 :
(1 sc, inc) x 6 (18)
Round 4 :
(2 sc, inc) x 6 (24)
Round 5 :
(3 sc, inc) x 6 (30)
Info :
Use cream/ivory for all background rounds initially. These early rounds form the compact center of the panel; keep stitches tight to prevent holes showing in snowy areas.
Round 6 :
(4 sc, inc) x 6 (36)
Round 7 :
(5 sc, inc) x 6 (42)
Round 8 :
(6 sc, inc) x 6 (48)
Round 9 :
1 sc in each st (48)
Round 10 :
1 sc in each st BLO (48)
Round 11-14 :
1 sc in each st (48) for 4 rounds (48)
Info :
Rounds 11-14 build a stable flat square to accept appliques. Mark the center front at round 12 with a removable marker for house placement reference.
Round 15 :
(6 sc, inc) x 6 (54)
Round 16 :
1 sc in each st (54)
Round 17 :
1 sc in each st (54)
Round 18 :
1 sc in each st (54)
Info :
This wider area provides room for snow hills and lower tree placement. Work this full round using even tension so the panel remains flat.
Round 19 :
(7 sc, inc) x 6 (60)
Round 20 :
1 sc in each st (60)
Round 21 :
1 sc in each st (60)
Round 22 :
1 sc in each st (60)
Info :
At the end of Round 22 fasten off cream. The finished background for one panel measures approximately 20cm square with this yarn and hook (adjust if your gauge differs).
— Snow Drifts & Distant Hills (worked as surface crochet)
Info :
Use soft blue/grey to surface crochet rolling hills across the panel beginning at the lower third and again across the middle third. These are worked as raised chains and hdc/dc patches following simple curve charts. Start by anchoring a chain across 18-22 sts then work in hdc clusters to create hill texture.
Round 1 :
Join soft blue in a st at lower-left quadrant, ch1, sc in same st, sc in next 10 sts, hdc in next 6 sts to form rise, dc in 4 sts for peak, hdc down next 6 sts, sc next 10 sts, join with sl st (approx 38 sts covered)
Round 2 :
Along the inserted row work 1 sc in each st for 2 rounds to flatten and define the drift; in places work 1 sc, 1 hdc in single st to create gentle texture (approx 38)
Info :
Follow photo placement: have one drift near the bottom edge and one across the panel midline. Keep edges irregular for natural look. Fasten off and weave ends behind the work.
— Cabin Applique (Make 1 per panel) :
Walls - Round 1 :
With warm brown, MR, ch1, 6 sc in ring (6)
Round 3 :
(1 sc, inc) x 6 (18)
Round 4 :
1 sc in each st (18)
Round 5 :
1 sc in each st (18)
Round 6 :
Switch to textured log effect: *fpdc around next st, bpdc around next st* rep across for 18 sts (18)
Info :
The fpdc/bpdc row creates the log-cabin texture on the wall. Maintain direction so the raised ridges read horizontally on the house's face.
Round 7 :
1 sc in each st (18)
Round 8 :
1 sc in each st (18)
Round 9 :
Work an extension to form the house rectangle: ch1, turn, 6 sc along first 6 sts edge, ch1, sc same foundation to extend height (create rectangle 6 sts wide x 8 rows high)
Info :
After Round 9 you should have a flat rectangular wall piece approximately 6 sts wide and 8 rows tall. Fasten off and weave ends. This forms the main wall face to which windows and doors will be added.
— Roof (Make 1 per house) :
Round 1 :
With cream, ch 14, sc in 2nd ch from hook and across (13)
Round 2 :
Ch1, turn, sc in each st (13)
Round 3 :
Ch1, turn, (sc2tog, sc in next 3) rep across shaping a small slope; end with sc (10)
Round 4 :
Ch1, turn, sc in each st (10)
Round 5 :
Ch1, turn, (sc2tog, sc in next 2) rep across (7)
Round 6 :
Ch1, turn, sc in each st (7)
Round 7 :
Ch1, turn, sc2tog across until 1-2 sts remain, fasten off leaving tail for sewing (approx 3)
Info :
Use light stuffing sparingly between roof layers to create a snow-ridged effect along the ridge line. Sew roof to top of wall with small running stitches; allow roof to overhang sides slightly.
— Chimney & Chimney Cap :
Round 1 :
With bright red, MR, ch1, 6 sc in ring (6)
Round 2 :
1 sc in each st (6)
Round 3 :
(1 sc, inc) x 2 (8)
Round 4 :
1 sc in each st (8)
Info :
Fasten off leaving a tail. Stuff lightly so the chimney sits proud when sewn onto the roof. Cap the chimney top with one or two white-starred sl st to simulate snow.
— Windows & Door Details :
Info :
Use golden yellow for windowpanes and dark brown or cream for frames. Windows are formed by small rectangles (3 sts x 3 rows) sewn into wall. Create window frame by surface slip stitching a square and then embroidering muntins with tapestry needle and contrasting yarn.
Window 1 :
With golden yellow, ch4, sc in 2nd ch from hook and next 2 chs (3), ch1, turn, sc in 3 sts for 3 rows (3x3 square). Fasten off and sew to wall at even spacing.
Door :
With dark brown, ch5, sc in 2nd ch from hook and across (4), ch1 turn, sc 4 sts for 6 rows. Use contrasting cream to stitch an arch on top and a little wreath in tiny green and red dots.
Info :
Position windows and door centered on wall face. Add small embroidered light glow with a few stitches of golden yarn extending onto surrounding snow to simulate warm light inside.
— Tree (Large - Make 1 per panel) :
Trunk - Round 1 :
With dark brown, MR, ch1, 6 sc in ring (6)
Round 2 :
1 sc in each st (6)
Round 3 :
Fasten off leaving tail for sewing to panel base. Trunk height is 3 rows tall before branch layers.
Info :
Sew trunk down so it protrudes slightly from the snow; trunk should be narrow and sturdy. Place trunk approximately 4-6 sts left of the cabin for the large tree in photo reference.
Layer 1 - Round 1 :
With forest green, ch 9, sc in 2nd ch from hook and next 7 chs (8) - this is the bottom branch layer base.
Round 2 :
Ch1 turn, sc in each st (8)
Round 3 :
Attach this strip to trunk across 6 sts by sewing the center to the trunk top, leave the edges free to curl slightly (creates triangular silhouette).
Layer 2 - Round 4 :
Make a second shorter strip: ch7, sc6 across, ch1 turn, sc6 across. Sew above Layer 1 centered, offset to give a tiered look.
Layer 3 - Round 5 :
Make ch5 strip, sc4 across for the apex, sew centered.
Round 6 :
Optional bobble ornaments: With cream or red, make 4-6 small bobbles to stitch onto layers. Bobble: (Yarn over, insert, pull up loop) 4 times in same st, yoh, draw through all loops, ch1 to secure. Fasten off small tail and sew in place.
Info :
Stuff lightly between layers with a pinch of fiberfill where layers meet so branches read three-dimensionally. Build tree so the edges of each tier lift off the panel slightly.
— Tree (Medium - Make 1 per panel) :
Trunk :
As per large tree but 4 sts MR, 2 rounds height (4)
Layers :
Bottom: ch7 sc6, middle: ch5 sc4, top: ch3 sc2. Sew centered and add 3-4 cream bobbles. Light stuffing between layers as before.
Info :
Place medium tree slightly to the right of the cabin and stagger heights for visual depth.
— Tree (Small - Make 1 per panel) :
Trunk :
2 rounds MR 3 sc (3)
Layers :
Bottom: ch5 sc4, top: ch3 sc2. Add 2 cream bobbles. Sew near foreground next to fence or rock features for variety.
Info :
Small trees add balance to the panel and help lead the eye to the cabin. Use slightly different placements for each panel so the assembled runner looks hand-arranged rather than repeating identically.
— Snow Mounds & Little Rocks :
Round 1 :
With cream, MR, 6 sc (6)
Round 2 :
(1 sc, inc) x 3 (9)
Round 3 :
1 sc in each st (9)
Info :
Flatten small mounds slightly and sew them in place along the lower edge of the panel to form snow drifts. Use soft blue slip-stitched highlights to simulate shadows.
— Berry Bobbles (Multiple) :
Round 1 :
With bright red, MR, ch1, 6 sc in ring, sl st to close tightly (6)
Round 2 :
Do not stuff; fasten off leaving long tail to sew. Attach bobbles around border and to tree tips as in photo.
Info :
Make many bobbles — about 12–18 per panel for the border plus 5–8 for tree decorations depending on desired density.
— Assembly: Sewing Appliques to Panel :
Info :
Block each background panel lightly to flatten. Pin the cabin centered at lower third of panel, pin three trees according to photos (large left of cabin, medium right, small foreground). Place snow mounds and rocks as seen and secure each applique with small whipstitches through the panel's rows, taking care to minimize visible stitching on the front. Use color-matching yarn for invisible seams.
Step :
Sew roof first, then walls, then chimney. Add window rectangles and door afterward. Attach bobble berries and small embroidered wreaths last so no threads are trapped underneath.
Info :
Use small running stitches to anchor trunk centers and invisible mattress stitch for straight edges of the house. Add a tiny dab of craft glue behind chimney if it needs extra hold before sewing.
— Panel Repeat Instructions :
Info :
Complete four identical panels following the above sections. For an extended runner make as many panels as needed and plan to join them edge-to-edge using a flat join described below.
— Joining Panels (Join 4 into Runner) :
Round 1 :
Lay two panels with right sides facing, align edges and work a mattress stitch through corresponding stitches of the outermost rounds; join across entire edge. Repeat to join all panels in a single row.
Info :
Block each seam after joining to encourage the join to lay flat. Use a length of cream yarn for seams so they blend into surrounding border later.
— Border Foundation (work around whole assembled runner) :
Round 1 :
With cream, join at one corner, ch3 (counts as dc), work 2 dc evenly across the outermost edge along entire runner to create a uniform base (adjust number so you have a multiple of 6 along each side). Aim for 1 dc per 1-1.5 cm.
Round 2 :
Ch1, sc in same st, sc in each dc across to next corner, at corner work (sc, ch3, sc) to turn, continue around until corner (approx counts will vary with runner length)
Round 3 :
Ch5, skip 2 sts, sc in next, rep around to create openwork chain-lace; at corners ch7, sc anchor. This sets spaces for picot clusters and berries.
Info :
Ensure lace spaces are regular. If your stitch count is off at the end, adjust spacing by adding or skipping a single chain in early repeats rather than reworking panels.
— Scalloped Edge and Picot Points :
Round 4 :
In each ch-5 space work: (sc, hdc, dc, hdc, sc) to create a scallop. At corner ch-3 and repeat to form pointed corner shell. This will give the lacy snow edge pictured.
Round 5 :
Working into the center dc of each scallop, make a picot cluster: (sc, picot (ch3 sl st to top), sc) to create a tiny peak point. Space evenly around.
Info :
Picots form delicate peaks reminiscent of snow stars. Work them carefully and test one scallop before proceeding to entire runner to ensure visual harmony.
— Berry Edge Embellishment :
Round 6 :
Using bright red, in every third scallop attach one red bobble with the long tail from bobble pieces: whip through the scallop center and knot on reverse. Secure with a few small stitches so they stand proud.
Round 7 :
With green scrap, add tiny leaf clusters (3 tiny sc per cluster) adjacent to some berries for a holly-like effect.
Info :
Berries and leaves should be attached after the border is complete so you can place them visually rather than at pre-marked intervals. Use pins to try a layout first.
— Finishing Touches :
Step :
Weave in all tails on the reverse, stitch any loose applique points, and press lightly on blocking mats to flatten lace without crushing raised appliques. Add tiny stitches of golden yarn behind windows to create an internal glow if desired.
Info :
For optional window illumination cut small squares of warm yellow felt and secure inside the house window openings before mounting the house on the panel; add battery tealight behind when displaying on table.
— Pattern Notes & Gauge :
Info :
Gauge will vary with yarn/hook. The sample runner photographed is made with worsted yarn and a 3.5mm hook. One finished panel is roughly 20cm wide by 24cm tall; four panels joined produce a runner approximately 80cm wide by 24cm long. Adjust panel count to fit your table length. Because this design is textured and dimensional, aim for tight, consistent tension for best results.
This cream and forest green cabin table runner brings a hand-stitched winter village to your table, full of texture and tiny details. From the layered evergreen trees to the warm glowing windows and bright berry-studded border, every stitch builds atmosphere and charm. It makes a delightful holiday heirloom or a thoughtful gift for someone who loves cozy home decor. I hope you enjoy the meditative process of creating each panel and the joyful reveal when you join them into a long, vintage-inspired scene. 🧶❄️