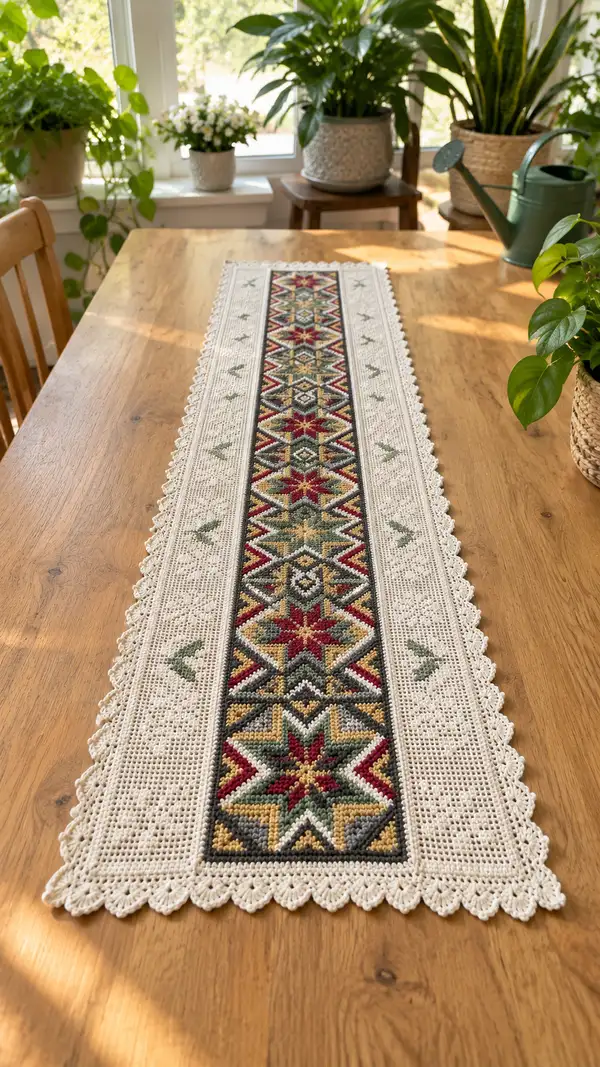
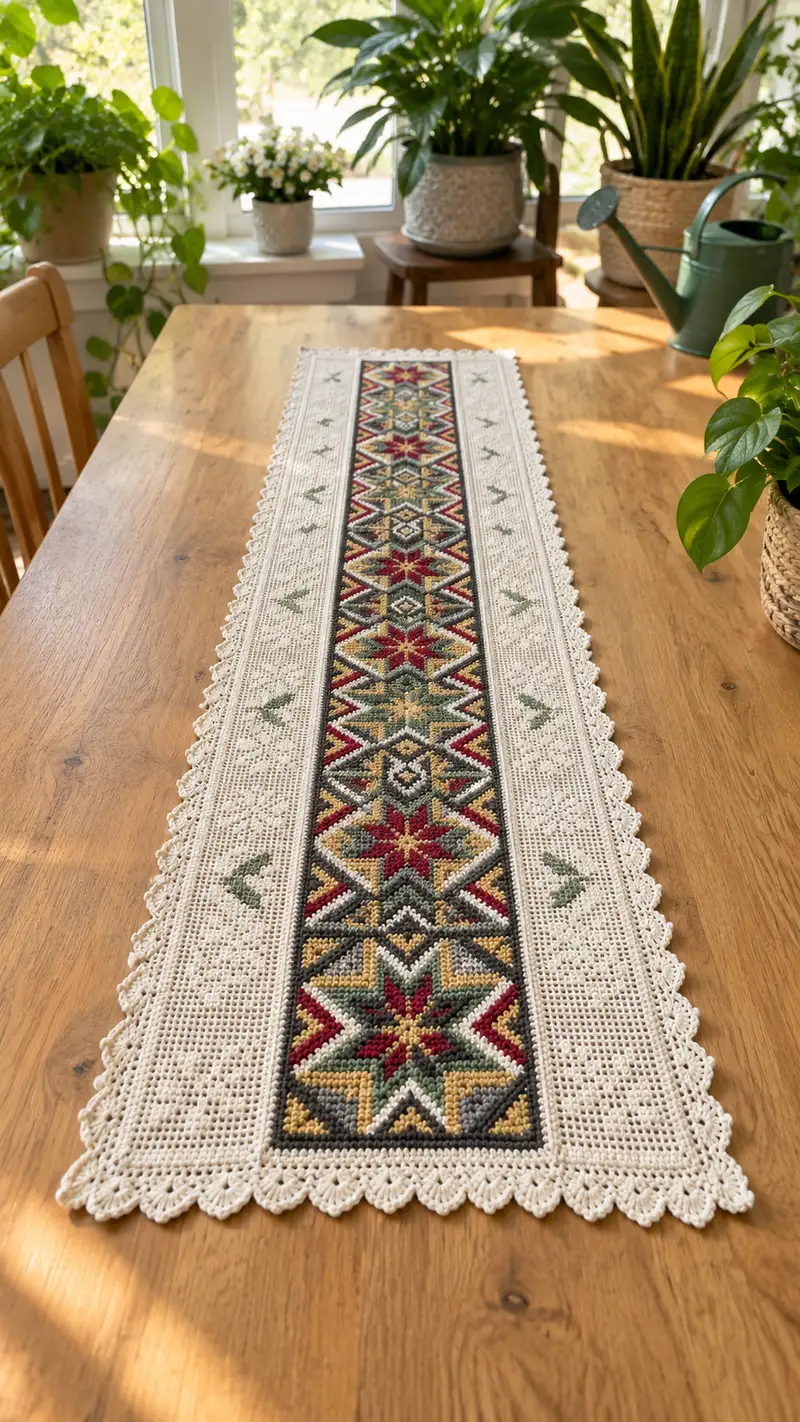
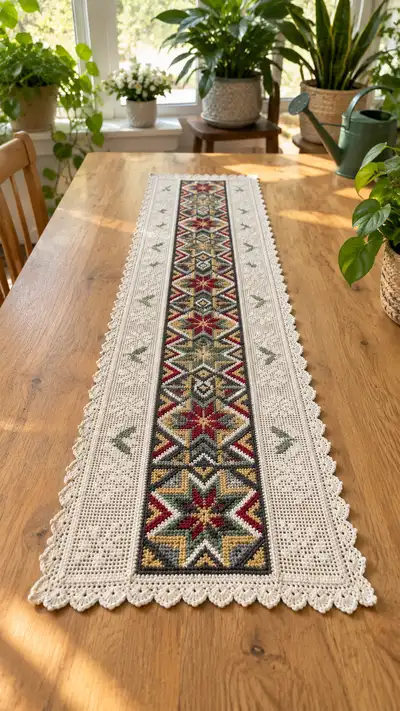
A long, elegant table runner with a bold central geometric motif framed by delicate cream filet panels and a scalloped lace edge. The center band features star-like medallions in deep red, muted green, mustard and charcoal set against a dark ground, while the sides and border are worked in a soft cream for a warm, vintage-inspired look. This runner is perfect for a sunlit kitchen table, a holiday centerpiece, or an heirloom gift. Detailed colorwork and a pretty scalloped border bring handcrafted polish to any dining room.
Progress Tracker
0% Complete
— Overview & Gauge :
Info :
This pattern recreates the pictured runner using tapestry crochet for the central geometric band, separate filet mesh side panels in cream, and a scalloped edging joined to the fully assembled flat piece. Finished sample measures approximately 13" (33 cm) wide x 60" (152 cm) long. Gauge for central tapestry: 18 sc x 24 rows = 4" (10 cm) using DK cotton and 3.5mm hook; gauge may vary by individual tension, so swatching is essential.
Info :
Before you begin: make a 10cm x 10cm (4" x 4") tapestry swatch in single crochet, carrying colors in the back (or using the tapestry float method) so you can judge how dense your fabric will be and adjust hook size if necessary. Blocking will improve finished dimensions.
— Materials & Preparation :
Info :
Prepare color cards and bobbins for tapestry sections to avoid long floats. Wind small cakes or use bobbins for red, green, mustard, charcoal and highlight colors. Keep the cream background separate for side panels and the final border. Label bobbins to reduce color-change confusion while working long charts.
Info :
Print or enlarge the chart for the central motif so you can read each row while crocheting. Use removable stitch markers to mark every 10th stitch along your hook or a clip-on counter to track motif repeats.
— Foundation & Overall Stitch Count :
Info :
The central tapestry panel in the sample is worked 121 stitches wide (this yields a finished width of roughly 6.5" for the center band; combined with side panels the total width is ~13"). If you wish a wider or narrower center band, adjust foundation chain in multiples of the chart width. The sample foundation chain for the center panel: ch 122, turn, sc in 2nd ch from hook and across to make 121 sc.
Info :
Side panels (left and right) are worked separately in cream mesh/filet. Each side panel is 36 stitches wide in the sample; if you change center width you must change side panel counts to keep total runner width consistent.
— Central Tapestry Panel (Work Flat, Rows = Rounds) :
Round 1 :
Foundation: ch 122, turn. 1 sc in 2nd ch from hook and in each ch across (121 sc). (121)
Round 2 :
1 sc in each st across (121). Change color where chart indicates; carry unused colors along the top of the previous row, catching floats every 4-5 sts to secure (121)
Round 3 :
1 sc in each st across, working tapestry color changes as charted (121)
Round 4 :
1 sc in each st across, keep tension even; watch color floats at motif edges (121)
Info :
Place a marker at the beginning of each row to track RS/WS. For the tapestry center, you will work all rows in single crochet, turning at row end. Keep stitches tight enough so stuffing or table surface won’t show through; tapestry crochet should be firm for crisp color definition.
Round 5 :
1 sc in each st across, follow chart for first row of star motif, beginning color A (charcoal) for the background unless chart indicates otherwise (121)
Round 6 :
1 sc in each st across, change to red for star center where chart indicates; carry charcoal behind stitches and catch floats every 4 sts (121)
Round 7 :
1 sc in each st across, shift to green and mustard for secondary motif sections following chart (121)
Round 8 :
1 sc in each st across, maintain color carries neatly and complete first 8 rows of the motif segment (121)
Info :
Every 8-12 rows, stop and inspect your floats on the WS. If floats exceed 10-12 stitches, break yarn and start a new bobbin to avoid bulk. Secure any long floats by crocheting over them or using a tapestry needle.
Round 9 :
1 sc in each st across, continue chart motif—this will build the first medallion; keep notes of row numbers on chart margins (121)
Round 10 :
1 sc in each st across, check motif alignment—if a stitch count error has occurred, correct before proceeding (121)
Round 11 :
1 sc in each st across, continue colorwork (121)
Round 12 :
1 sc in each st across, continue colorwork (121)
Info :
When changing dominant background color (charcoal) to accent color rows, make the switch at the last yarn-over of the last stitch in the old color to keep clean color joins. Carry the background yarn loosely to avoid puckering.
Round 13 :
1 sc in each st across; this and the next several rows will establish the top half of the first star medallion (121)
Round 14 :
1 sc in each st across; use red and green bobbins per the chart (121)
Round 15 :
1 sc in each st across (121)
Round 16 :
1 sc in each st across (121)
Info :
At the first motif repeat boundary (after row 16 in sample), insert a removable marker to note motif center. This makes vertical repeats alignment easier across a long runner.
Round 17 :
1 sc in each st across (121)
Round 18 :
1 sc in each st across, finish first medallion rows per chart (121)
Round 19 :
1 sc in each st across (121)
Round 20 :
1 sc in each st across (121)
Info :
After completing rows 1-20 you should have the first complete medallion and start of connecting diamonds. Compare your row by row color placement to the printed chart and correct any shift before proceeding.
Round 21 :
1 sc in each st across; begin second medallion sequence (121)
Round 22 :
1 sc in each st across (121)
Round 23 :
1 sc in each st across (121)
Round 24 :
1 sc in each st across (121)
Info :
If you prefer to work the central panel on a slightly smaller hook for tighter stitches and then block to size, do so; just be consistent for all motif rows for even texture.
Round 25 :
1 sc in each st across (121)
Round 26 :
1 sc in each st across (121)
Round 27 :
1 sc in each st across (121)
Round 28 :
1 sc in each st across (121)
Info :
At row 28 you've completed two full medallions in the sample. Continue repeating the 20-row vertical motif repeat until the center panel reaches desired length. In the pictured runner the center band contains 6 full medallions and partial end motifs for a total of 120 tapestry rows; you can repeat motifs more or less to alter length.
Round 29-48 :
Continue 20-row medallion repeats twice (or as many as needed) maintaining 121 sc each row and following chart exactly for color placement. (121 each row)
Info :
When you reach the number of repeats required (sample used 6 full medallions across the length), fasten off center panel and weave in ends on the WS. Trim floats to about 1-2 stitches and tuck under stitches with tapestry needle if desired to reduce bulk.
Round 49-80 :
Optional: If you want a longer central band, continue repeating the motif. Each motif repeats over approximately 20 rows in the chart; ensure end motifs are symmetric by finishing with half motif rows at both ends if desired. (121 each row)
Info :
Block the central panel gently to flatten and square the piece before sewing side panels. Use a damp cloth and pin the edges on a blocking board to match the exact width needed for seaming to side panels.
— Side Panels (Make 2 Identical) :
Info :
Side panels are worked in cream as a simple filet/micro-mesh to echo the airy sides in the photo. Each panel in the sample is 36 stitches wide and matches the center panel length. You can work these as one continuous panel (left and right joined) or two separate panels to be seam-joined to the center later. Working separate panels gives easier blocking control.
Round 1 :
Foundation: ch 37, turn. 1 sc in 2nd ch from hook and across (36 sc). (36)
Round 2 :
Ch 3 (counts as first dc for height if using filet mesh with dc mesh), turn. *skip 2 sts, dc in next st, ch 1, skip 1, dc in next st* rep across to create small mesh rows. For a simpler single crochet mesh use sc-ch1-sc pattern across. Maintain tally to match center length. (36)
Round 3 :
Repeat mesh pattern across. If using dc mesh version, each vertical row should align for filet squares used in chart. Continue until side panel reaches same number of rows as center panel. (36)
Round 4 :
Repeat mesh pattern across. Count rows frequently and match to center panel after blocking. (36)
Info :
Filet vs single crochet mesh: choose what you prefer visually. The sample uses a finely worked mesh that looks like a grid (dc-based filet). If you choose sc-based mesh, the texture will be denser but still delicate. Make sure the final panel width equals the summed height of center panel vertically to make a straight seam when attaching.
Round 5-120 :
Continue the chosen mesh pattern until side panel reaches the same number of rows as the center tapestry panel. Keep stitch count constant at 36 across for a clean seam. Fasten off and block. Make a second identical panel for the opposite side. (36 each row)
Info :
For the decorative small green arrow motifs seen on the cream sides in the photo, you can embroider a small V/arrow into the mesh after assembly using stranded embroidery or duplicate stitch in green. Place them centered vertically between scallops approximately every 8-10 mesh rows as seen in the image.
— Assembling the Panels :
Info :
Lay the blocked center panel flat, RS up. Position side panels on each side with RS up so that the outer edges align. There should be no gap; if there is, block more or adjust by adding 1-2 rows to side panels. Pin carefully every 2-3 inches (5-8 cm) along seams to hold placement.
Round 1 :
Using cream yarn and tapestry needle, seam center panel to side panel with whipstitch or mattress stitch, picking up corresponding top loops to create an invisible seam. Sew the entire length, knotting and weaving ends as you go. Repeat on the other side. Ensure tension is even and panels lie flat. (Seaming)
Info :
If you prefer a crocheted seam, use slip stitch seam: RS facing and slip stitch through both pieces' top loops, 1 sl st into each st across to join. This will form a small ridge on the RS which can be incorporated into the border design.
— Inner Border (Framed Line Around Center) :
Round 1 :
With RS facing, join charcoal yarn at a corner using sl st. Work 1 round of sc evenly around the entire assembled runner, working 3 sc in each corner to maintain flat corners. Keep stitch count even along edges - aim for approximately (center width + 2*side width + 4 corners) ≈ 121+36+36+? for the length; simply work sc evenly spaced and use 3 sc in corners to turn. The exact stitch count will depend on your final assembled size. (Even sc round)
Info :
This framed charcoal line around the central band in the photo creates a neat separation between the busy center and the cream filet. Make this 1-2 rounds wide depending on preference. Work the second round in charcoal if desired or switch to cream for the base of the scalloped edge.
— Scalloped Lace Edge (worked around entire runner) :
Info :
The scalloped cream lace edge is worked last in cream. We will work two rounds of foundation sc (if you used a dark inner border, switch to cream now) and then a repeating scallop motif along the perimeter. Count the perimeter stitches and divide by scallop width to space the scallops evenly—sample used scallops every 10-12 stitches to create a neat curve.
Round 1 :
Join cream yarn in any side-round stitch with sl st. Round of sc evenly around, working 3 sc in each corner to keep rounded corners. (Even sc round)
Round 2 :
Round of sc in BLO to create a slight ledge for scallops: 1 sc in each st BLO around, 3 sc in corner stitches. (Even sc round)
Info :
Working the second round in BLO gives a neat ridge under the scallops similar to the image. Keep this round consistent so scallops sit uniformly.
Round 3 :
Scallop repeat: *skip 5 sts, in next st work (5 dc, sl st) all in same st to form a shell, sl st in next st; rep from * around. Adjust skip count to fit perimeter—they must be evenly spaced. At corners, work 7 dc shells to round out the corner. Fasten off and weave ends. (Scallop round)
Round 4 :
Optional extra lace row: join cream under each shell and work (1 sc, ch 3, 1 sc) across the shell top to add a picot lace trim as seen in delicate scalloped finishes. Fasten off and weave in ends. (Decorative picot round)
Info :
If your perimeter stitch count does not divide evenly by the shell width, increase or decrease by 1-2 stitches in the initial sc round to even it out. It’s better to adjust here than to force scallops irregularly later.
— Embroidered Side Motifs :
Info :
The small green arrow-like motifs on the cream panels can be added after assembly using duplicate stitch or simple embroidery. Use stranded yarn and it's easiest to mark positions with pins and stitch on the WS or RS depending on preference. The sample places them centered in each side panel every ~8-10 mesh rows vertically and approximately 6 stitches in from the scalloped edge horizontally.
Round 1 :
Using a tapestry needle and green yarn, work small V shapes: bring needle up at base stitch, go down 2 rows up and 1 stitch over to create the left wing, come up one stitch above center, then down 2 rows and 1 stitch over to create right wing. Repeat to create small chevrons. Secure ends neatly on the WS. (Embroidered motif)
Info :
Placement tip: count mesh squares from the center seam to ensure mirrored placement on both side panels. Use a row counter to locate exact vertical positions so the repeated motifs line up across the runner length.
— Finishing & Final Blocking :
Info :
After all panels are joined and the scalloped border worked, perform a final blocking. Pin scallops carefully into semi-circular shapes and steam or spray gently. Allow to dry completely before removing pins. Weave in all tails on the WS and trim close.
Info :
For extra stability, you may sew a lightweight interfacing or thin cotton fabric on the underside of the runner—this helps the runner lie flat on a table and prevents curling but will make it less flexible to fold.
— Alternate Size & Color Options :
Info :
To lengthen the runner, add additional medallion repeats to the central panel before blocking and seaming side panels. To change width, adjust the center panel stitch count and correspondingly change side panel widths, ensuring all three panels sum to the desired final width before seaming.
Info :
Color swaps: use any four-color palette for the central stars—seasonal ideas include soft pastels for spring, warm rusts for autumn, or jewel tones for the holidays. Keep the side panels neutral to let the center shine, or invert contrast for a bolder look.
Info :
Care instructions: Hand wash gently in cool water with mild detergent and reshape while damp; dry flat. Cotton yarn may shrink slightly—account for this in your blocking stage. If you plan to use the runner regularly, choose a washable cotton yarn designed for home goods.
Completing this Nordic geometric runner is such a satisfying project—watching the bold central stars emerge row by row is truly rewarding. The contrast of dense colorwork with airy cream filet and a delicate scalloped border creates a timeless piece you'll be proud to display. Whether it becomes a holiday centerpiece or a year-round accent, each stitch brings personality to your table. 🧶✨ Enjoy the relaxing rhythm of tapestry rows and the finishing flourish of the lace edge—happy crocheting! 🎨