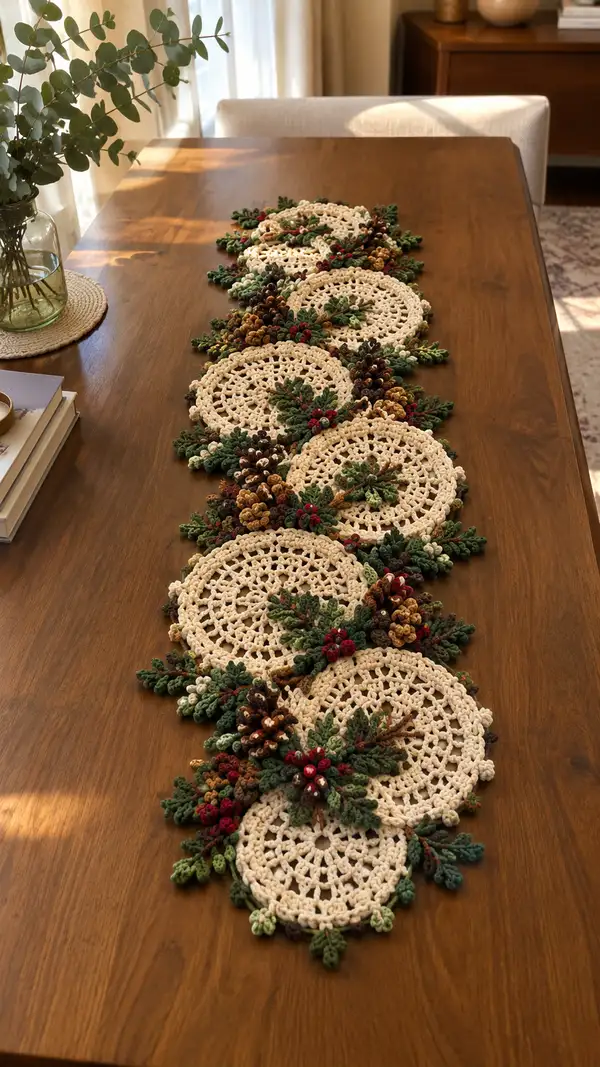
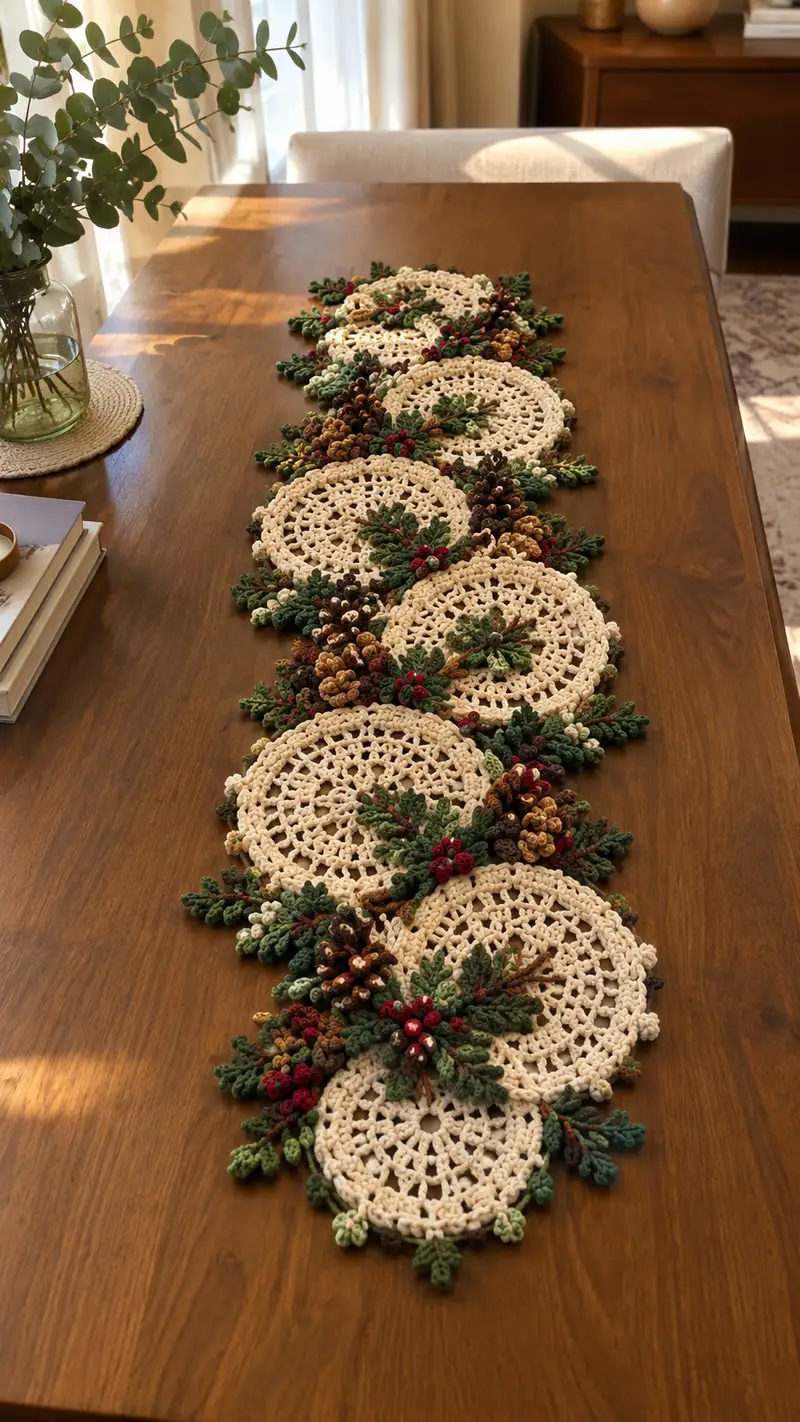
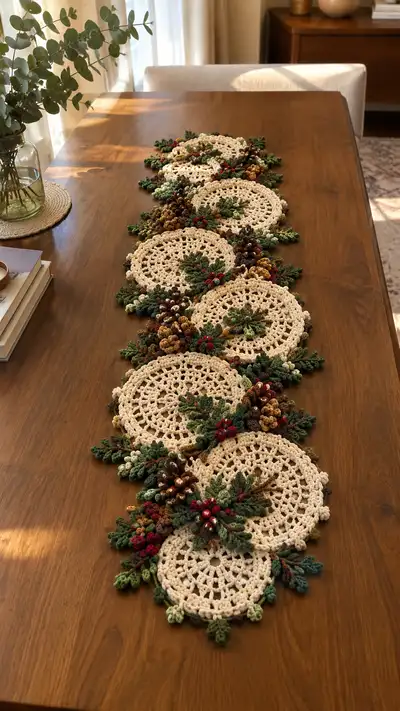
Create a warm, rustic table runner composed of interconnected cream doilies decorated with 3D pinecones, layered evergreen sprigs and tiny red berries. This pattern recreates a delicate lacy circle base in cream yarn with richly textured pinecone clusters in forest greens and browns. Perfect for seasonal display, the runner is built from repeated motifs joined and edged with leafy details for a natural, handmade centerpiece.
Progress Tracker
0% Complete
— Overview :
Info :
This table runner is constructed from repeat circular lace motifs (make as many as needed for your table length). Each circle is embellished with a cluster of 3D pinecones, layered leaf sprigs, and tiny berry bobbles. The pattern below gives a detailed recipe for one large circle motif, pinecone unit, three leaf types, berry clusters and joining/edging instructions. The stitch counts are calibrated for worsted weight yarn; adjust hook size if using other yarn weights.
— Materials & Gauge :
Info :
Gauge is not critical for this decorative runner, but each finished large circle measures approximately 13.5-14 cm (5.5") across when worked with worsted weight yarn and a 3.5mm hook. Make a test circle if precise sizing is needed. Keep consistent tension across motifs for even joins.
— Main Lacy Circle (Make repeated motifs) :
Round 3 :
(1 sc, inc) x 6 (18)
Round 4 :
(2 sc, inc) x 6 (24)
Round 5 :
(3 sc, inc) x 6 (30)
Round 6 :
(4 sc, inc) x 6 (36)
Info :
Keep rounds worked tightly and place a stitch marker at the start of each round. This foundation of increasing sc rounds establishes a compact center for later lacy rounds.
Round 7 :
(5 sc, inc) x 6 (42)
Round 8 :
(6 sc, inc) x 6 (48)
Round 9 :
1 sc in each st (48)
Round 10 :
Ch 4 (counts as tr), *skip 1 st, tr in next st, ch 1; rep from * around, join with sl st to top of ch-4. (24 tr, 24 ch-1 sps)
Info :
Round 10 creates the first ring of openwork. Keep stitches consistent and do not over-tighten joins; the lacy look depends on evenly tensioned treble stitches.
Round 11 :
Sl st into the first ch-1 space, ch 3 (counts as dc), (2 dc, ch 2, 3 dc) in same ch-1 sp [shell], *skip next tr, (3 dc, ch 2, 3 dc) in next ch-1 sp; rep from * around, join to top of ch-3. (12 shells)
Round 12 :
Sl st into center of first shell, ch 1, *sc in ch-2 sp, ch 3, sc in center of next shell; rep from * around to form picot walkway between shells (24 sc, 12 ch-3 sps)
Info :
Use Round 12 to gently shape the circle and create attachment points for later leaf clusters. If your circle cups, block it flat with pins and a light spray of water or steam.
Round 13 :
Ch 1, sc in each sc and sc across center of shells, and in each ch-3 sp work [sc, ch 2, sc] to create small loops for texture. End with total stitch count 48-54 depending on exact placement. (Approx 48-54)
Round 14 :
1 sc in each st BLO around to create a neat ridge (keep count even; if needed, adjust by adding a few evenly spaced sc). (48-54)
Round 15 :
Ch 3, *skip 1, dc in next, ch 1; rep around to create lacy ring; join. (24 dc, 24 ch-1 sps)
Round 16 :
In each ch-1 space: (sc, ch 3, sc) to build small loops suitable for attaching leaf bases. Join. (24 sc pairs, 24 ch-3 sps)
Info :
If making more than 7 motifs, repeat these rounds exactly to maintain uniformity. Block each circle to 13.5-14 cm once finished and cooled before adding 3D elements.
Round 17 :
Ch 1, sc in each st and in each ch-3 sp work (sc, picot) to add a tiny decorative edge. (48-54)
Round 18 :
Ch 1, 1 sc in each st BLO to further tidy the edge and provide a sturdy base for sewing on embellishments. (48-54)
Round 19 :
Work a shallow scallop: *skip 2, 5 dc in next st, skip 2, sl st in next; rep around. This will produce an outer edge texture (12 scallops approx). Join. (count varies by spacing)
Info :
Leave a long tail (approx 30-40 cm) when fastening off at the end of the circle for sewing the motif to its neighbor and for anchoring embellishments. Make all circles before moving to the pinecone/leaf stages for best color and placement consistency.
— Pinecone Unit (Make 2-4 per motif depending on desired fullness) :
Info :
Pinecones are built from a small cone body worked in rounds, then covered with layered 'scale' petals made with popcorn or cluster stitches for a realistic dimensional effect. Use slightly smaller hook (3.0mm) for tighter textured scales. Each finished pinecone is approx 3.5-4 cm tall.
Round 3 :
(1 sc, inc) x 6 (18)
Round 4 :
(2 sc, inc) x 6 (24)
Round 5 :
1 sc in each st (24)
Info :
Rounds 1-5 create a small cone base. Keep tension firm so the final cone holds shape. Do not stuff yet; stuffing will be added lightly after scale rows are in place.
Round 6 :
*In next st pop(5 dc worked into same st, drop loop, pull through all loops to close) - this is a 5-dc popcorn (pop); skip next st; rep from * around. You should get approx 12 popcorns. Join. (12 pops)
Round 7 :
Rep Round 6 but offset the pops so they sit between previous pops (work pop into the stitch between two pops below). Join. (approx 12 pops)
Info :
After two rows of popcorns, start to see the pinecone scale texture. To keep the cone tapered, work the next rounds with slightly fewer popcorns by spacing them with intervening scs.
Round 8 :
*sc in next st, pop in next st; rep around. (12 sc, 12 pops)
Round 9 :
Work a final tighter round: *dec with sc2tog over base stitches between pops (to draw top closed), then sl st around to shape. (Count reduced to approx 18-20)
Info :
Lightly stuff pinecone from the bottom with a small pea-sized amount of fiberfill so the cone keeps shape but remains compact. Finish by closing the small opening with a few sc and pass yarn tail through center to hide and secure.
Round 10 :
Fasten off leaving a 25 cm tail for sewing to motif base. Weave tail into cone base and leave until assembly.
Info :
Create pinecones in two shades of brown for depth: darker brown main cones and smaller golden-brown cones to tuck around larger cones. Cluster them when attaching to a motif for a natural look.
— Tiny Acorn / Mini Cone Alternative (Optional, Make several) :
Round 3 :
1 sc in each st (10)
Round 4 :
Work 1 row of small popcorns: *pop in every other st, sc in between. (5 pops, 5 sc)
Round 5 :
Fasten off leaving 15 cm tail. Lightly stuff and set aside for cluster assembly.
Info :
Use these smaller units to fill gaps between larger pinecones for a fuller clustered appearance.
— Evergreen Leaf Sprig - Type A (Large Layered Leaf) :
Info :
These layered leaves are built from a short chain with increases and decreases to create a tapered shape. Work in forest green with 3.0mm hook. Make 6-8 per motif to build outward sprays.
Round 1 :
Ch 7, sc in 2nd ch from hook, hdc in next, dc in next 2, hdc in next, sc in last (bottom) (6 sts excluding turning ch)
Round 2 :
Turn; working along opposite side of foundation chain: sc in first, hdc in next, dc in next 2, hdc in next, sc in last; sl st to join at base. Fasten off leaving a 20 cm tail for sewing. (6 sts each side, leaf complete)
Info :
Make some leaves in a moss green shade and some in a darker forest green for layered variation. Stagger leaf sizes by changing chain length: ch5 for small, ch9 for larger leaves.
— Evergreen Leaf Sprig - Type B (Split Sprig with Central Vein) :
Round 1 :
Ch 10, sc in 2nd ch from hook, hdc in next 2, dc in next 3, hdc in next 2, sc in last. (9 sts)
Round 2 :
Turn and work back along chain: sc, hdc, dc x3, hdc, sc; sl st to join at base. Fasten off leaving long tail for sewing. Make 4-6 per motif.
Info :
To make twig details, leave a short piece of brown yarn and tack a thin strand under leaf cluster to mimic twig shape when assembling.
— Tiny Curled Leaf / Sprig Tip (Type C, small details) :
Round 1 :
Ch 4, sc in 2nd ch from hook, hdc in next, dc in last; (3 sts)
Round 2 :
Turn and sl st in each stitch across back to base to create a curled effect; fasten off leaving long tail for sewing. Make many (8-12) per motif to dot around pinecone clusters.
Info :
Work some Type C leaves in lighter moss and some in deep green to mimic natural variation. Slightly damp-block if they want to lie flat before stitching on.
— Berry Cluster (Make several per motif) :
Round 1 :
With berry red, mr, 6 sc in mr, sl st to join (6)
Round 2 :
Fasten off leaving 12-15 cm tail. Using tail, stitch cluster of 3-5 of these tiny berries together by stitching through their bases to form a small berry bunch. Optionally attach a tiny bead to center of each berry for sheen.
Info :
Make many berry clusters in single units of 3-5 berries. Place them at focal points of each pinecone cluster to mimic holly/rowan berries.
— Assembly of Single Motif (One lacy circle plus embellishments) :
Info :
Pinning is crucial. Place your blocked cream circle flat on a work surface. Decide the focal quadrant for embellishment—photo reference shows clusters offset about 30 degrees from center. Arrange pinecones, then tuck leaves and berries around them. Pin every element before sewing to check density and balance.
Step 1 :
Position the largest pinecone 3-4 stitches inside the outer scallop edge so its sewing tail can be passed under the scallop for secure attachment. Use the long tail to sew through the circle base: whip or ladder stitch through both pinecone base and motifs' inner rounds until secure.
Step 2 :
Sew smaller golden and dark brown pinecones clustered beside the main cone, overlapping scales slightly for a natural arrangement. Add tiny acorn cones into gaps to fill bulk.
Info :
When attaching, keep stitches hidden: sew into the BLO ridge or into the ch-3 loops worked in round 16 to maintain a secure, subtle join. Use varied stitch lengths to tilt pinecones upward or slightly outward.
Step 3 :
Arrange and sew down Type A leaves first directly under and behind cones to form a base spray. Add Type B leaves for length and Type C small curled leaves as outer tips. Secure each leaf with 2-3 neat stitches through the leaf base to the doily.
Step 4 :
Tuck berry clusters between leaves and in front of cones. Secure by sewing through the berry bases into the doily. Ensure the berries sit on top of leaves for visual pop.
Info :
Attach twig details (short strands of brown yarn) behind leaf clusters by sewing in a few stitches; wrap and knot ends neatly and hide inside leaves. Trim stray ends very close after weaving them through several stitches.
Step 5 :
Make 2-4 clusters per motif depending on fullness: one dominant cluster with 2-3 large cones and 2 smaller filler cones plus berries, and one or two modest filler clusters of 1-2 cones plus leaves and berries.
— Joining Motifs Into Runner :
Info :
Layout: arrange motifs in a row so clusters alternate left and right along the runner’s centerline for a flowing asymmetric look as shown. Overlap circle edges by one scallop so decorations cascade into the next motif.
Step 1 :
Place two completed circles overlapping by approximately 1-1.5 cm (one scallop). With cream yarn and a blunt tapestry needle, sew through the outermost rounded scallop and the adjacent inner ring in the neighbor motif, working neat whip stitches every 4-5 stitches. Aim for 6-8 stitches of attachment between motifs for firm join.
Step 2 :
Continue adding motifs in the same fashion, alternating cluster directions to create a braided cascade of greens and cones along the runner. Check alignment by periodically laying the runner on your table and adjusting spacing before final finishing stitches.
Info :
If desired, sew a thin backing fabric strip along the inner seam area to add stability and protect table surfaces; this is optional and best done after all motifs are joined and pressed flat.
— Final Edging & Finishing Touches :
Round 1 :
With cream yarn and 3.5mm hook, pick up stitches evenly around entire runner outer edge working through both motif edges where joined: *sc, ch 2, sc in next 2 sts; rep around to create a unified edging. Count will vary; work evenly spaced stitches to lie flat.
Round 2 :
Work small picot scallops: *sc in next st, ch 3, sl st in top of sc (picot), skip 1; rep around. Join and fasten off. Weave in ends securely.
Info :
Add any additional tiny leaf tips or berry clusters to fill visual gaps along the joined seams. Sew them so threads and knots are hidden under leaves or the doily underside.
Blocking :
Lightly steam-block the entire runner on a clean surface using pins to maintain scallop edges and flatten seams. Do not over-wet the 3D elements; use minimal steam focused on cream doilies only. Allow to dry completely before use.
Info :
Final weight and drape depend on the number of pinecone clusters you attach. Heavier runners will need extra secure sewing where motifs join to prevent shifting under mild handling.
— Variation Ideas :
Info :
Use deeper jewel tones for a winter holiday version (deep red berries, emerald leaves) or soft pastels for spring. Replace pinecones with crocheted flowers for a non-seasonal runner. Scale the runner by adding or removing circle motifs; each additional circle increases length by ~14 cm.
Info :
If you desire a firmer pinecone look, incorporate a small rolled paper cone inside when forming popcorn layers, then remove after the outer shell is sewn, or leave for permanent structure.
Completing this Cream and Forest Green Pinecone Table Runner is such a rewarding project — every stitched circle and clustered pinecone adds to a beautiful, cozy centerpiece. The textured pinecones and layered leaves make the runner feel like a living wreath that stretches the length of your table. Whether it graces holiday dinners or everyday breakfasts, it brings a handcrafted warmth to any room. 🧶🌿 Enjoy the calm, creative process and be proud of every detailed stitch. ✨