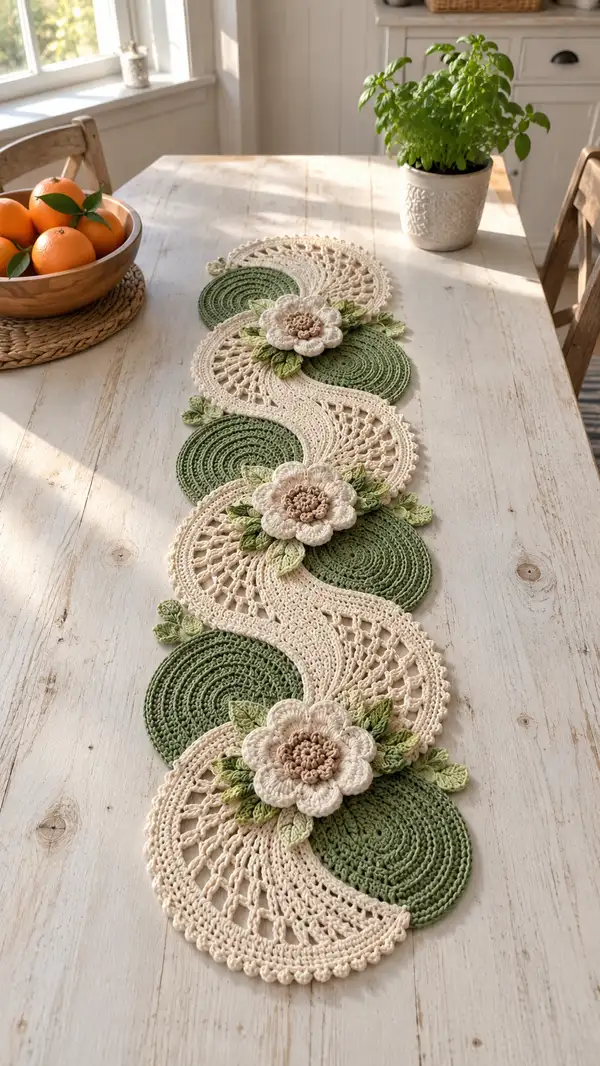
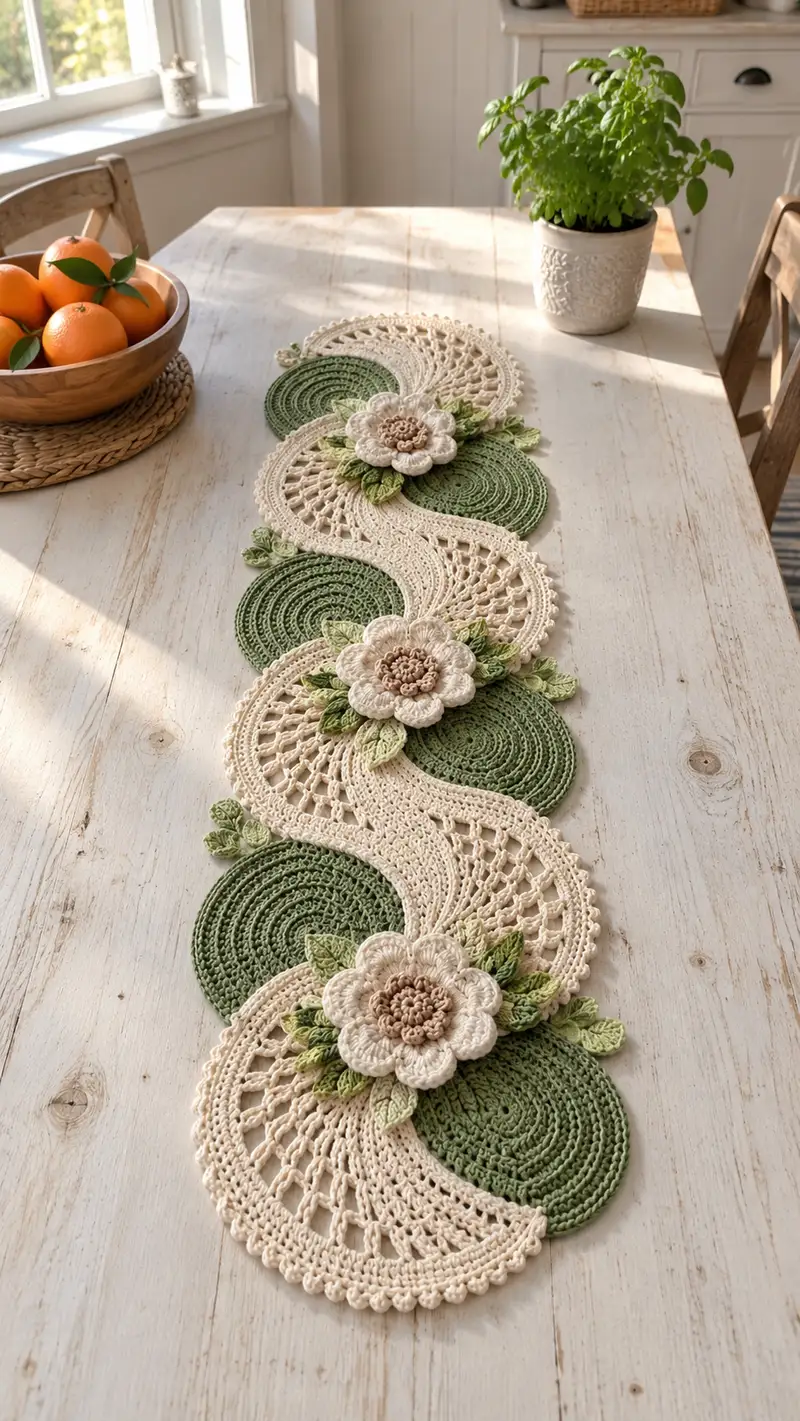
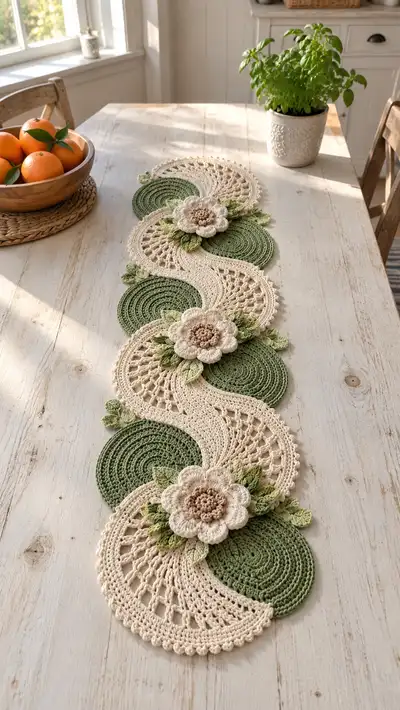
Create an elegant S-curve table runner featuring sage green circular motifs, cream lace semicircles, and layered 3D flowers with leafy accents. This decorative runner blends textured spirals and delicate lacework for a modern-vintage look. Designed to be worked in modular motifs then joined, it lays beautifully on a wooden table for a fresh, botanical centerpiece. The pattern includes step-by-step rounds, joining instructions, and finishing tips.
Progress Tracker
0% Complete
— Full Circle Motif (Make 6) :
Info :
All full circles are worked in sage green using a 3.0mm hook. These flat spiraled discs form the background of the S-curve. Work tightly to prevent cupping; keep center slightly firm then relax tension as rounds progress. Make 6 identical discs for the photographed runner.
Round 1 :
6 sc in magic ring (6)
Round 3 :
(1 sc, inc) x 6 (18)
Round 4 :
(2 sc, inc) x 6 (24)
Round 5 :
(3 sc, inc) x 6 (30)
Info :
Check for flatness: place your circle on a flat surface; if it cups, switch to a slightly larger hook for next round or reduce tension. If it ruffles, slow increases by repeating the previous round once more before continuing increases.
Round 6 :
(4 sc, inc) x 6 (36)
Round 7 :
(5 sc, inc) x 6 (42)
Round 8 :
(6 sc, inc) x 6 (48)
Round 9 :
1 sc in each st (48)
Round 10 :
1 sc in each st (48)
Info :
These two rounds create a firm band so the circle keeps shape when joined to a semicircle. Place a stitch marker at the first stitch of Round 11 to keep track during joining.
Round 11 :
(7 sc, inc) x 6 (54)
Round 12 :
1 sc in each st (54)
Round 13 :
1 sc in each st (54)
Info :
For a deeply defined spiral texture, work Rounds 12-13 in BLO to create a slight ridge that catches light nicely. If you prefer a smooth disc, work in both loops.
Round 14 :
(8 sc, inc) x 6 (60)
Round 15 :
1 sc in each st (60)
Round 16 :
1 sc in each st (60)
Round 17 :
1 sc in each st (60)
Info :
Fasten off leaving a long tail (approx 20-25cm) for joining. Weave the tail along the back in a spiral and trim. Make sure all six discs measure the same diameter (approx 11-12cm depending on yarn tension); block if needed.
Round 18 :
Optional decorative round: *sl st into next st, ch1, (sc, ch1) across for coarse picot texture* - adapt to desired look (60)
— Lace Semicircle (Make 6) :
Info :
Semicircles are worked in cream and will sit over half of two adjacent green discs to form the S-curve. The semicircle begins as a three-quarter disc built from a small arc and expands into lace mesh rows. Use 3.0mm hook; block semicircles flat with slight curvature matching discs.
Round 1 :
ch4, sc in 2nd ch from hook, 2 sc, 3 sc in last ch, rotate to work on other side of foundation: 2 sc, sc in first ch (11) — forms small arc base
Round 2 :
ch1, work 2 sc in each st around arc and both side edges to widen: (22)
Round 3 :
(1 sc, inc) x 11 (33)
Round 4 :
(2 sc, inc) x 11 (44)
Info :
At this point your semicircle should look like a third-to-half disc. We now begin lace rows that create the open fan effect. Keep counts precise to allow matching to full circles when joining.
Round 5 :
1 sc in each st (44)
Round 6 :
*ch5, skip 3 sts, sc in next st* repeat across arc (approx 11 ch5-spaces) — adjust so final sc lands into end st
Round 7 :
Into each ch5 space: *(sc, ch2, 3 dc, ch2, sc)* — forms small fan shells (11 fans)
Info :
Count the fan units carefully. The number of fans should match the semicircular width so that when matched to the circle, fans align across the seam. Block gently to open fans.
Round 8 :
ch1, sc across base row, placing 3 sc across the center of each fan to anchor (44)
Round 9 :
*(ch3, skip 1, sc in next) across arc; at fan peaks work sc in ch2 spaces to stabilize* (44)
Round 10 :
Work a decorative mesh: *(sc, ch3, sc) in every 4th st; sc in remaining sts* — aim for 44 sts total when counted
Info :
Work Rounds 6-10 keeping stitch counts consistent; use stitch markers to map fan centers so joining points match circle stitch counts. If necessary, add or remove small ch-spaces to maintain symmetry.
Round 11 :
1 sc in each main st (44)
Round 12 :
(2 sc, inc) x 11 (55) — slight increase along outer arc to create a wider semicircle edge
Round 13 :
1 sc in each st (55)
Round 14 :
Edge scallop row: *sc in next 2 sts, (ch3, sl st in 1st ch to make picot), sc in next 2 sts, picot* repeat to end (creates picot scallop) (55)
Info :
Fasten off leaving long tail for joining. Block the semicircle to exact shape matching the diameter of two half-circles of the green discs it will overlay. Make 6 semicircles.
Round 15 :
Optional lace variant: Replace Round 10 with an open mesh of ch5-spaces and 2-dc fans for an airier look (counts will vary; keep total anchors even).
Round 16 :
Optional reinforcing row: sc around in BLO to create a subtle ridge for attachment (55)
— Flower Center (Make 3) :
Info :
Each 3D flower is composed of three parts: the knotted/tufted center (worked tightly), two petal layers, and a small backing disc for stability. Use cream for petals and light beige/taupe for the center. Work flower centers on a 2.5-3.0mm hook for compactness.
Round 1 :
6 sc in magic ring (6)
Round 3 :
(1 sc, inc) x 6 (18)
Round 4 :
1 sc in each st (18)
Round 5 :
Work popcorn/bobble cluster row: *(ch1, 4 dc in same st, remove hook, insert hook in top of that cluster, pull loop through to form bobble), sl st to secure* repeat across 6 clusters to create textured center (18 clusters)
Info :
If you prefer a softer center, substitute with a tightly packed spiral of sc worked across three rounds and then tuft with a small bit of fibrefill. Fasten off leaving long tail for sewing into petal backing.
Round 6 :
Work a reverse single crochet (crab stitch) round around the edge for sturdiness: 1 crab st in each st (18)
Round 7 :
Fasten off leaving long tail (approx 25cm) for sewing to petal layer. Make 3 centers.
— Flower Petals Layer 1 (Make 3; 8 Petals Each) :
Info :
Petals are worked around a small foundation ring or attached individually to the backing round. We will work them in a joined round around a 20-st backing disc so that the eight petals are evenly spaced. Use cream yarn and a 3.0mm hook.
Round 1 :
Make a small backing disc: 6 sc in magic ring (6)
Round 3 :
(1 sc, inc) x 6 (18)
Round 4 :
1 sc in each st (18)
Info :
We will anchor eight petals around this disc; mark eight evenly spaced stitches (every 2-3 sts depending on count) so petals sit nicely. Insert stitch markers at petal anchor points (every 2nd st for 9 anchors or adjust to 8 anchors by spacing).
Petal Round A :
*At marked st: ch1, (sc, hdc, 2 dc, tr, 2 dc, hdc, sc) in same st; sl st to next marked st* — repeat 8 times to make eight petals
Round 5 :
Work 1 sc in base of each petal and 1 sc between petals to tidy edge (total approx 40-44 depending on petal size)
Info :
Block petals slightly to open them and shape the rounded outer edge. Keep petals lying flat; a light spritz of water and pinning helps set shape. Make three petal layers in cream.
Round 6 :
Fasten off leaving long tail for sewing. Attach the beige center by sewing through backing disc - ensure center is centered and sewn tightly.
— Flower Petals Layer 2 (Optional Accent Layer) :
Info :
This second layer adds depth: work slightly smaller petals and offset them between the first layer petals. Use same cream or a slightly lighter shade for a dimensional look.
Round 1 :
6 sc in magic ring (6) — small backing
Round 3 :
1 sc in each st (12)
Petal Round B :
*At each of 6 markers: ch1, (sc, hdc, 2 dc, hdc, sc) in same st; sl st to next marker* — creates smaller secondary petals (6)
Round 4 :
Work a tidy round of sc across all petal bases and join to backing disc (approx 28-30 sc)
Info :
Sew this layer beneath the top petal layer so the larger petals sit above and overlapping. Fasten off and weave in tails through the backing disc; attach the beige center through both petal layers for stability.
Round 5 :
Optional: add a decorative centre stitch of surface slip stitches in spiral using contrasting taupe yarn to mimic stamen detail (approx 8-12 spiral stitches)
— Leaves (Make 18 assorted sizes) :
Info :
Leaves come in three sizes: small (6 rounds), medium (8 rounds), large (10 rounds). Use light and medium greens to echo the photo. Leaves are worked flat and slightly cupped; add BLO rounds sparingly to add a ridge if desired. Make approx 3-4 leaves grouped under each flower (approx 18 total for 3 flowers).
Small Leaf Round 1 :
ch9, sc in 2nd ch from hook, hdc, 2 dc, 3 dc in next ch (tip), then continue on other side: 2 dc, hdc, sc, sl st to base — creates small symmetric leaf (approx 8 sts per side)
Small Leaf Round 2 :
Work edging: *sc across leaf edge, picot at tip (ch3, sl st in 1st ch)* to define (approx 20-24 sc)
Medium Leaf Round 1 :
ch11, sc, hdc, (2 dc) x2, 4 dc at tip, mirror back: (2 dc) x2, hdc, sc, sl st (longer leaf)
Medium Leaf Round 2 :
Add one round of 1 sc in each st BLO to create a central ridge and gentle cupping (approx 30 sc)
Large Leaf Round 1 :
ch13, sc, hdc, (2 dc) x3, 6 dc at tip, mirror back, sl st (largest size)
Large Leaf Round 2 :
Work 1 sc in each st, then add decorative veins by surface slip stitch: draw 3 - 5 veins from base to tip with contrasting green (optional)
Info :
Semi-stiffen leaves by using a light paste of water and craft glue or by starching lightly prior to blocking if you want them to hold shape permanently. Otherwise block damp and shape to lie slightly under the flower petals.
Leaf Round 3 :
Fasten off leaving long tails for sewing. Make 18 leaves in mixed sizes and shades.
— Joining & S-Curve Assembly :
Info :
Lay your six green full circles and six cream semicircles out on a blocking mat in the S-curve arrangement before joining. The runner alternates: full circle — semicircle — full circle — semicircle, with slight overlap where the semicircle sits atop two adjacent circles. Pin into final S shape carefully to maintain even spacing (approx 3cm overlap between elements).
Round 1 :
With cream yarn and 3.0mm hook, place a semicircle RS up atop the seam between two adjacent circles; line up outer edges and begin slip-stitch joining at the marked anchor points across the base where semicircle meets circle. Work sl st through the back loops of circle and the inner join points of the semicircle. Continue across entire arc to attach one semicircle to two circles (work approx 44 sl st anchors to match semicircle count).
Round 2 :
Reinforce joins: with cream yarn, using a yarn needle, sew a neat whip stitch every 6-8 sl st across the seam on the WS to secure. This prevents stretching and keeps the S-curve smooth. Weave and secure tails.
Info :
When joining subsequent semicircles, offset them so that the cream lace edge creates the S-shape visually. Work one join at a time and block the piece as you go to ensure curvature remains consistent. Use pins liberally and tack each section before permanent sewing.
Round 3 :
Place the next semicircle and align; join using the same slip-stitch join method, ensuring circular spirals line up with the plasticity of the lace. After joining all six semicircles, the runner will form an S with six green discs underlaid and six cream lace overlays.
Round 4 :
Once all semicircles are attached, join adjacent full circles along their outer rims where they meet with small whip stitches through back loops only to keep joins invisible; stitch every 8-10 sts (approx 24-30 stitches per seam depending on spacing).
Info :
Check overall runner flatness and symmetry. If one side curves more than the other, adjust by easing stitches at the join or adding a small tacking stitch to pull the seam in slightly. The goal is a smooth S without tight puckers.
Round 5 :
Attach one flower unit at each major meeting point of semicircle and circle: center flowers above the overlapped seam where the semicircle meets the circle. Pin flower backing disc to runner and sew through backing into both semicircle and circle with long tail—use ladder stitch for invisible finish. Make 3 flower placements (spaced evenly along runner).
Round 6 :
Sew leaves beneath and around each flower: arrange 3–6 leaves in a natural cluster under each flower (mix small, medium, large). Use yarn needle and long leaf tails to sew through the backing disc and into the runner, positioning leaves to fan out and enhance the S-curve flow. Sew each leaf at two anchor points (base and mid) for stability.
Info :
Take time to pin, view from different distances, and ensure that flowers and leaves sit flat and do not lift. If a flower wants to tip up, add a small hidden tacking stitch to the runner beneath its center to lock it in place.
Round 7 :
Secure any loose edges of semicircles where the lace fans may gap by using small invisible whip stitches along the outermost fan peaks into the circle beneath.
Round 8 :
Optional stabilizer: for a table runner that will receive heavier use, stitch a narrow strip of cotton fabric to the underside across each seam line before final finishing. This will keep the runner flat and prevent stretching while remaining invisible from the top.
— Edging and Finishing Rounds :
Info :
Finishing the outer edge creates a polished look. We will work a unifying border in cream around the entire outer perimeter of the runner to tie motifs together visually. Use 3.0mm hook and work from the right side, joining at an unobtrusive seam point.
Round 1 :
Attach cream yarn at a starting point on an outermost circle edge. Work 1 sc evenly around the outside edge of that circle, then follow the outer curve of the adjacent semicircle and next circle, working 1 sc in each outer stitch. When transitioning between motifs, make 1 sc in the outermost st of seam and continue. Maintain consistent spacing — stop and count frequently. Aim for approximately 260-320 sc total around entire runner depending on spacing.
Round 2 :
Work *(sc in next 4 sts, picot: ch3 sl st in 1st ch)* around to create a scalloped decorative edge. Adjust repeat to match total st count evenly (for example with 280 sts, pattern repeats every 7 sts: (sc x6, picot) x40)
Round 3 :
Work a tidy reverse single crochet (crab stitch) round along the final edge to create a corded finish: crab st in each st around.
Info :
After edging, weave all ends in on the underside and trim. Lightly steam or wet-block the runner to set lace and scallops. Pin into final S shape while damp and allow to dry completely for best results.
Round 4 :
Optional beaded edge: if desired, add a small bead at each picot point by threading bead onto yarn before making picot and securing with sl st; be mindful of table protection from bead edges.
Round 5 :
Final inspect: press lightly on wrong side with cloth if needed and check for loose tails. Trim stray fibers and re-tension any seams that look loose.
Info :
For long runners: repeat module sets (one circle + one semicircle + circle + placement) to lengthen. Each module pair adds roughly 20–25 cm to length depending on tension and block size. Make extra motifs as needed, maintaining consistent blocking for an even look.
— Optional Reinforcements & Variations :
Info :
Want a different effect? Substitute the sagely discs with multi-tonal spirals (2 shades of green worked in concentric rounds) or make the semicircles in lace-weight for a more ethereal runner. Add embroidered veins on the petals, or use a slightly smaller hook if you want a denser runner.
Round 1 :
To lighten runner, substitute 2.5mm hook for semicircles and flowers only, keeping discs at 3.0mm so texture contrasts subtly (tension permitting).
Round 2 :
For a placemat instead of runner, create 2 or 3 module repeats and finish edges as above for a centered decorative mat of moderate size.
Info :
Care instructions: hand-wash gently in cool water with mild soap, reshape on a flat surface and dry flat. Avoid machine washing to preserve lace. If ironing, use a cloth and very low heat; better yet, steam gently to revive blocking shape.
This S-Curve Floral Table Runner brings handcrafted elegance to any table with soft sage spirals, airy cream lace, and dimensional blooms. Every motif is a tiny labor of love that comes together in a flowing, organic composition. The modular construction makes it easy to customize length and color — perfect for gift-giving or seasonal updates. Enjoy the slow, satisfying process and the beautiful centerpiece you'll be proud to display. 🧶🌿