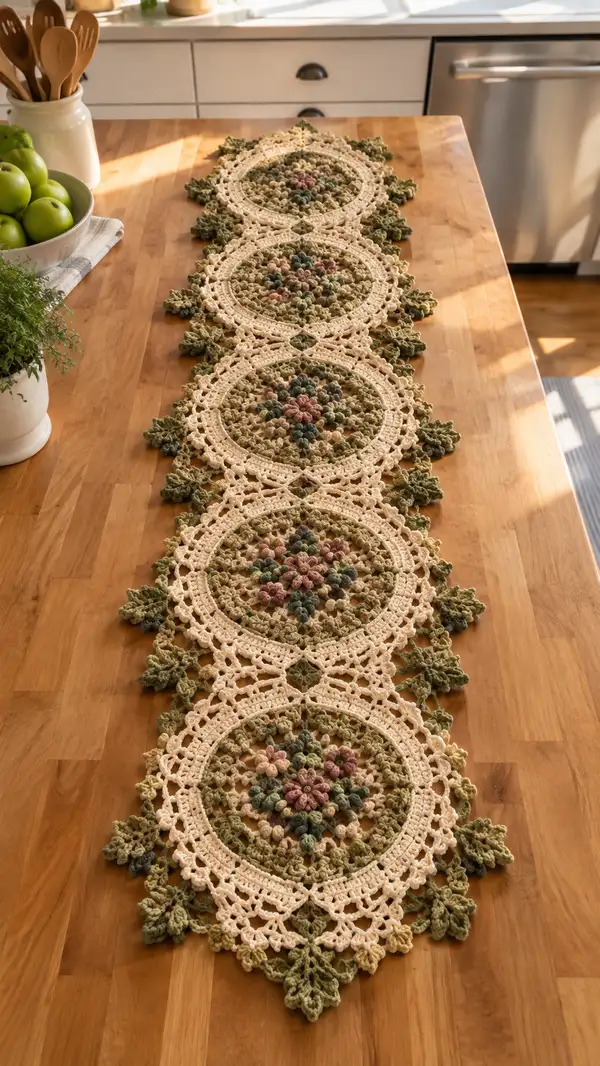
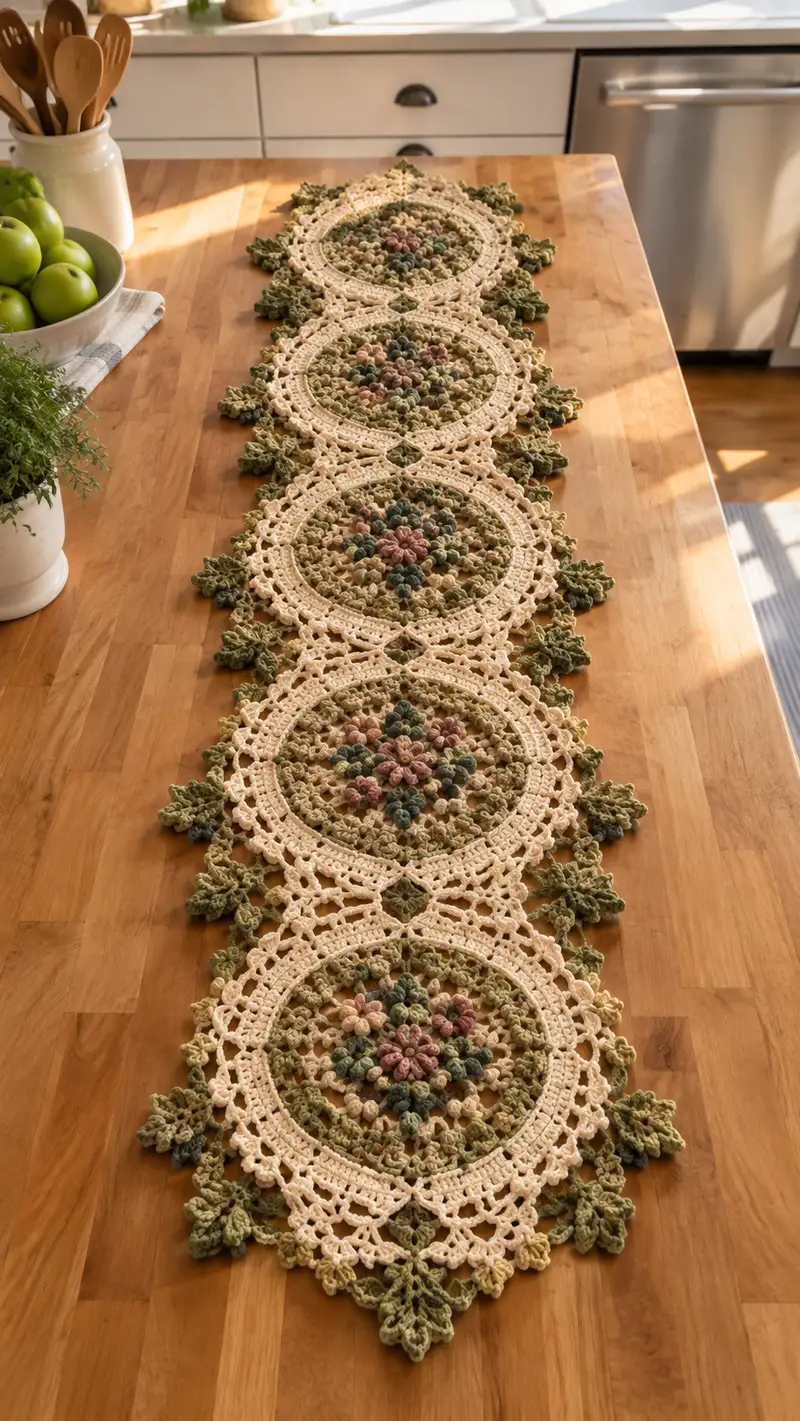
A vintage-inspired table runner made from linked round floral motifs in soft cream and mulled sage tones. Each motif features a textured puff-flower center, a layered textured ring, and a delicate cream lace frame finished with leafy sage edging. This elegant runner is perfect for a dining table, sideboard, or dresser — a charming handmade accent that blends rustic and romantic styles.
Progress Tracker
0% Complete
— Overview :
Info :
This pattern describes a single floral circular motif that is worked in rounds and then joined to create a table runner. Make 4 motifs for the look shown (or make more or fewer to adjust runner length). The motif is worked from the center out in multiple colors: a mixed-color puff cluster center, a textured field in sage/olive, a cream decorative lace frame, and separate leaf motifs joined to the frame. Block each motif to exact shape before joining for best results.
Finished motif size :
Each completed motif measures approximately 10-11 inches (25-28 cm) across after blocking. The runner pictured is four motifs long and measures about 40-44 inches (102-112 cm) excluding leaf tips; total width including leaves is about 12-13 inches (30-33 cm).
— Center Flower (Make 1 per motif) :
Round 1 :
6 sc in magic ring (6)
Round 3 :
(1 sc, inc) x 6 (18)
Round 4 :
(2 sc, inc) x 6 (24)
Round 5 :
(3 sc, inc) x 6 (30)
Info :
Change to Dusty Rose or center highlight color now if you want a different colored central puff flower. Work the puff stitches with a slightly looser tension than your regular sc so they sit raised and soft.
Round 6 :
1 sc in each st (30)
Round 7 :
[ch1, puff (yarn over, insert hook, pull up loop) 3 times into same st, yarn over and pull through all loops, ch1, sc in next st] x 10 around center (30 puff clusters; counts remain 30 'positions')
Info :
Each puff is worked in a single stitch and counts visually as a raised petal. Keep the loops even and do not pull the final yarn through too tightly. After making your puff, secure with a small sc in the next stitch to anchor.
Round 8 :
1 sc in each st (30)
Round 9 :
Change to Sage / Olive multi yarn. (sc 2, ch2, skip 1) x around to create small chain spaces: *2 sc, ch2, skip next st* repeat until round end and join (30 sc + 15 ch2 spaces)
Info :
These chain spaces will act as anchors for the next textured layer; they also give you small open bits for the motif to breathe. Place a stitch marker at the start of this round to keep even spacing.
— Textured Field and Puff Cluster Expansion :
Round 10 :
Working into previous chain spaces: *(sc in ch2 space, ch1, puff in next sc, ch1, sc in next ch2 space) repeat around; join (30 sc positions, 10-15 puff positions depending on spacing)
Round 11 :
1 sc in each st and in top of each puff cluster (count as 30 sc positions; treat puffs as single positions) (30)
Round 12 :
(4 sc, inc) x 6 (36)
Info :
Round 12 increases the motif size and places points for the inner ring to sit. If your motif looks slightly small or large, adjust hook size here by +/- 0.25 mm and re-evaluate tension.
Round 13 :
1 sc in each st (36)
Round 14 :
(5 sc, inc) x 6 (42)
Round 15 :
1 sc in each st (42)
Info :
Begin lightly stuffing the central puff area with a small scrap of fiberfill to help the puffs remain rounded. Use tiny pieces so the center does not become too bulky.
Round 16 :
(6 sc, inc) x 6 (48)
Round 17 :
1 sc in each st (48)
Round 18 :
Work 48 dc around, placing 1 dc in each st (48)
Info :
The dc round builds a smooth platform for the inner lace ring. Keep stitches even and gently block the center by pinning it round if the circle seems wavy.
— Inner Decorative Ring :
Round 19 :
ch3 (counts as dc), *ch2, skip 1 st, dc in next st* repeat around to create open chain spaces between dc (48 dc positions remain visually)
Round 20 :
Work into chain spaces: *(sc, ch3, sc) in each ch2 space; dc in each dc below* around; this creates small arch spaces (48 dc + 24 small arches)
Info :
These arches will later be framed with the cream lace. Keep counts accurate: you should have an arch about every 2 dc positions — use stitch markers at the first two arches and at regular intervals to maintain symmetry.
Round 21 :
1 sc in each st and in each chain space around (count 48 sc positions + 24 arch sc = 72 small positions)
Round 22 :
(2 sc, ch3, 2 sc) in every 6th stitch to pick up a wide arch anchor: *work (2 sc, ch3, 2 sc) in next st every 6 sts* around resulting in 12 larger arch anchors spaced evenly (72 base positions)
Info :
This round sets up the scallops that will be outlined by the cream frame. Count carefully — you should end with twelve evenly spaced anchoring clusters that align with future frame corners.
— Transition to Frame Color (Change to Cream) :
Info :
Change to Cream yarn with a secure join in the last sc of Round 22. Carry the sage color inside the work if you prefer to avoid weaving many ends; otherwise fasten off and weave in tails before proceeding.
Round 23 :
With cream: ch4 (counts as tr), *skip 2 sts, 3 tr cluster in next st, ch2, sl st in center of previous arch (where you made ch3), ch2, 3 tr cluster in same st* repeat around working into the 12 anchors you created (each anchor becomes a decorative tr cluster) (12 major clusters + linking chains)
Round 24 :
1 sc in each stitch and in each chain space around to create a firm foundation for next lace row (approx 12 clusters + 72 base sc = ~84 counts visually)
Info :
This foundation round evens the fabric so the decorative openwork that follows sits neatly on top. Keep the cream tension slightly looser to allow the lace to arch naturally when blocked.
Round 25 :
*(ch5, sc in base to form big loop), sk 3 sc, sc in next sc* repeat around producing 12 big loops framed around the inner ring (12 large loops)
Round 26 :
Work into each ch5 loop: *(sc, hdc, 3 dc, hdc, sc) in loop* repeat around creating raised scallop shells (12 scallops)
Round 27 :
1 sc between scallops and 1 sc at each side of scallop peaks to maintain even attachment (count approx 48-60 depending on your stitch count)
Info :
Take your time on the scallop shaping; they create the motif's feminine lace look. If you see gaps appear, slip in an extra sc between scallops to stabilize the curve.
— Outer Lace Frame (Cream) :
Round 28 :
ch1, sc around in each st and scallop edge making sure to place 3 sc at scallop peaks to keep a stable ring (approx 60 sc)
Round 29 :
*ch3, skip 2 sc, sc in next sc* repeat around creating airy arches (20-24 small arches depending on exact stitch count)
Round 30 :
Work into arches: *(sc, ch5, sc) in each ch3 arch* creating larger arched panels around the motif (20-24 larger arches)
Round 31 :
Into each ch5 arch: *(sc, 2 dc, 2 tr, 2 dc, sc) to form shell picot-like panels* repeat around (20-24 shell panels)
Info :
Shell panels are decorative and should be symmetrical. Use blocking pins to shape each panel to the same depth during blocking. If your shells pull in too much, go up a hook size temporarily and work the next round loose, then switch back.
Round 32 :
1 sc in each stitch around (keep count to maintain the same number of shells). (approx 80 sc)
Round 33 :
*ch7, sl st in shell center (creates decorative open loop between shells)* repeat around (20-24 decorative loops)
Round 34 :
Work 1 sc in each ch7 loop and along the shell sides to firm the loops: *(sc, ch3, sc) in each loop; sc along sides* (approx 100 unified positions)
Info :
Round 33-34 form the airy openwork and make the cream frame feel lofty. Keep the cream floats tidy on the wrong side; weave in short tails as you go if not carrying.
Round 35 :
*(sc 2, ch4, sc 2) in every 3rd shell intersection to create points for leaf attachments* repeat around (12 leaf anchor points)
Info :
These are the anchor points where you'll attach separate leaf motifs — mark these 12 spots clearly. They should line up with the smaller scallop anchors you made earlier so everything stacks neatly.
— Motif Finalizing Rounds :
Round 36 :
1 sc around entire outer frame to tidy the edge and prepare leaf attachments. Fasten off cream and weave ends. Count should read approx 100 sc positions visually.
Info :
Fasten off leaving a 6-8 inch tail for weaving if joining motifs immediately; otherwise weave in the tail and press the motif lightly with steam during blocking.
Round 37 :
Optional: For a slightly raised beaded look, using cream, work small cluster picots around edge: *(sc, ch2, sl st in same st) repeat at 8-10 evenly spaced points* (approx 12-14 picots)
Info :
If you prefer a flatter motif for table use, skip Round 37. The picots add a delicate frame when the runner is used decoratively rather than under heavy dishware.
— Leaf Motifs (Make 12 per motif; small cluster leaves) :
Round 1 :
With Sage: ch6, sc in 2nd ch from hook, hdc in next, dc in next 2, hdc in last, sc in base to form narrow leaf (approx 6 stitches across leaf)
Round 2 :
Turn and work back along starting chain: sc in first, hdc in next, (dc, dc) in center to form leaf tip, hdc, sc; join at base with sl st (symmetrical leaf shape)
Round 3 :
Edge the leaf: sl st around leaf edges, then in the base ch1 and sc to produce a neat edge and a small stem tail for sewing (fasten off leaving long tail)
Info :
Make 12 leaves per motif (one for each anchor point). Leaves are small so keep tension tight enough to hold shape but not so tight they pucker. Slight blocking helps define the central vein.
Round 4 :
Optional: Add gentle vein details with surface slip stitch lines using a contrasting moss or olive yarn. Use the long tail to whip-stitch the leaf to the cream frame at anchor points.
— Joining Motifs & Connector Blocks (Make 3 connectors for 4-motif runner) :
Info :
Motifs are joined by small square connectors worked in cream that sit in the negative space between two adjacent motif frames. Each connector is worked separately and then sewn in place to hold motifs with even spacing. Make one connector for each place two motifs meet (three connectors for the 4-motif runner pictured).
Connector Round 1 :
With cream, make mr, ch3, 8 dc in mr, join to form small 9-dc round (9)
Connector Round 2 :
Ch1, sc around into each dc (9)
Connector Round 3 :
Ch4, (sc in next, ch4) x 4 to create four little loops around the small round; join and fasten off leaving tail for sewing
Info :
Sew connectors into the square negative space created when two cream frames meet. They act as neat visible ties and keep the motifs spaced evenly. Pin motif edges first to confirm placement.
— Assembling Runner (Join motifs with connectors) :
Info :
Layout motifs in final arrangement on a blocking mat. Place connectors between each adjacent motif where the cream frames create small square voids. Use rust-proof pins to hold everything in place and check symmetry before sewing.
Joining Step 1 :
Sew connectors to the first motif's cream frame using mattress or whip stitch through the connector tail to a central sc stitch at the frame corner. Use the tapestry needle and the connector tail, then sew the other side to the adjacent motif in the same location. Repeat for each connector.
Joining Step 2 :
For more secure joins, tack through adjacent arches (the ch5/ch7 decorative loops) with small, neat stitches to keep the seam lying flat. Avoid pulling the join so tight that it pucker the cream lace panels.
Info :
When joining three or more motifs in a straight runner, use the same connector points for each join so the pattern remains linear. For wider tablecloth variants, consider alternate joining patterns with connectors at additional points.
— Leaf Attachment and Final Edging :
Attachment Step 1 :
Using the long tail left on each leaf, stitch each leaf to its marked anchor point (Round 35 anchors). Position leaf stems to point outward so the runner gets a botanical fringe. Secure by stitching across the base of the leaf to the cream foundation and then wrap the tail through 2-3 stitches and tie on the wrong side.
Attachment Step 2 :
Arrange leaves in pairs at each anchor for a fuller look matching the photo. Slightly overlap pairs to create a continuous leafy border along each side of the runner.
Info :
Use pins to place leaves symmetrically before sewing. The leaves are delicate; use short secure stitches and weave tails neatly on the wrong side to avoid snags when the runner is in use.
Final Edge Rounds :
With remaining cream yarn, work a light sc round around the entire runner edge to unify seams and anchor leaf stems into the final edge. Work evenly, placing 3 sc into any particularly dense spots to avoid pulling in. Fasten off, weave ends.
— Blocking and Finishing :
Info :
Wet-block each motif to exact dimensions using a blocking mat and pins; block the cream arches to sit open and the leaf edges to fan outward. Pin connectors in place while blocking to ensure consistent seam spacing. Allow to dry completely before removing pins.
Final Step :
Once dry, press with low steam if desired and trim any visible ends. Optionally apply a light coat of fabric stiffener to the cream frame if you prefer a crisper lace edge for display purposes.
Info :
For everyday use, avoid heavy objects on top of the runner to preserve the raised puff centers. Rotate and hand-wash with gentle detergent to maintain colors and shape.
Completing this Cream and Sage Floral Motif Table Runner is a delightful mix of texture and lacework — from the soft puff-flower centers to the airy cream frames and delicate leaf fringe. Each motif joins to the next like a string of little garden wreaths, creating a statement piece that feels handmade and timeless. Enjoy the calming palette and the satisfaction of blocking and pinning the lace into elegant curves. 🧶🌿🌸