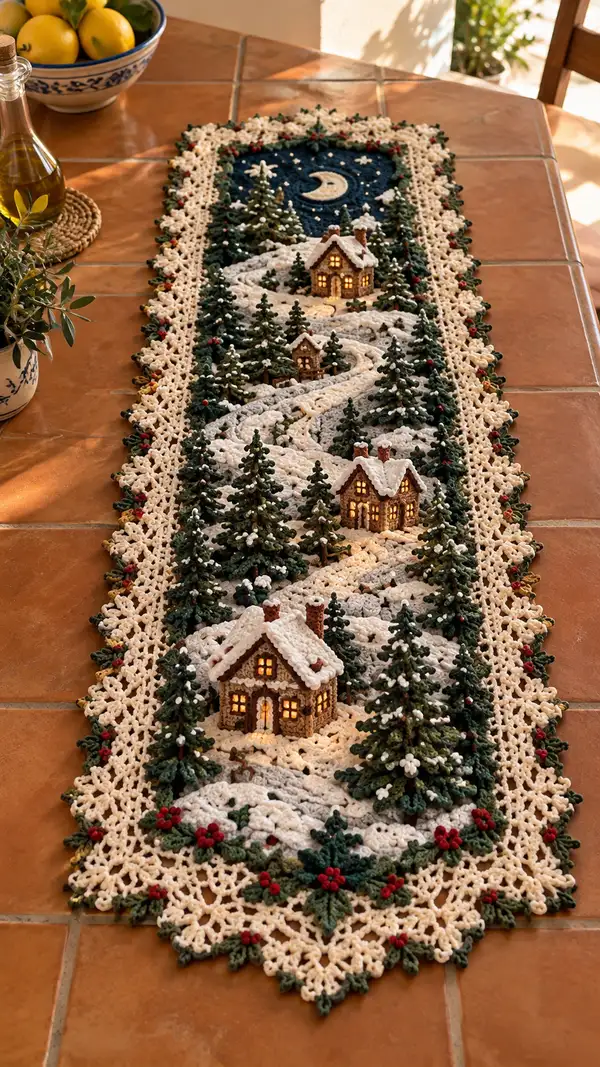
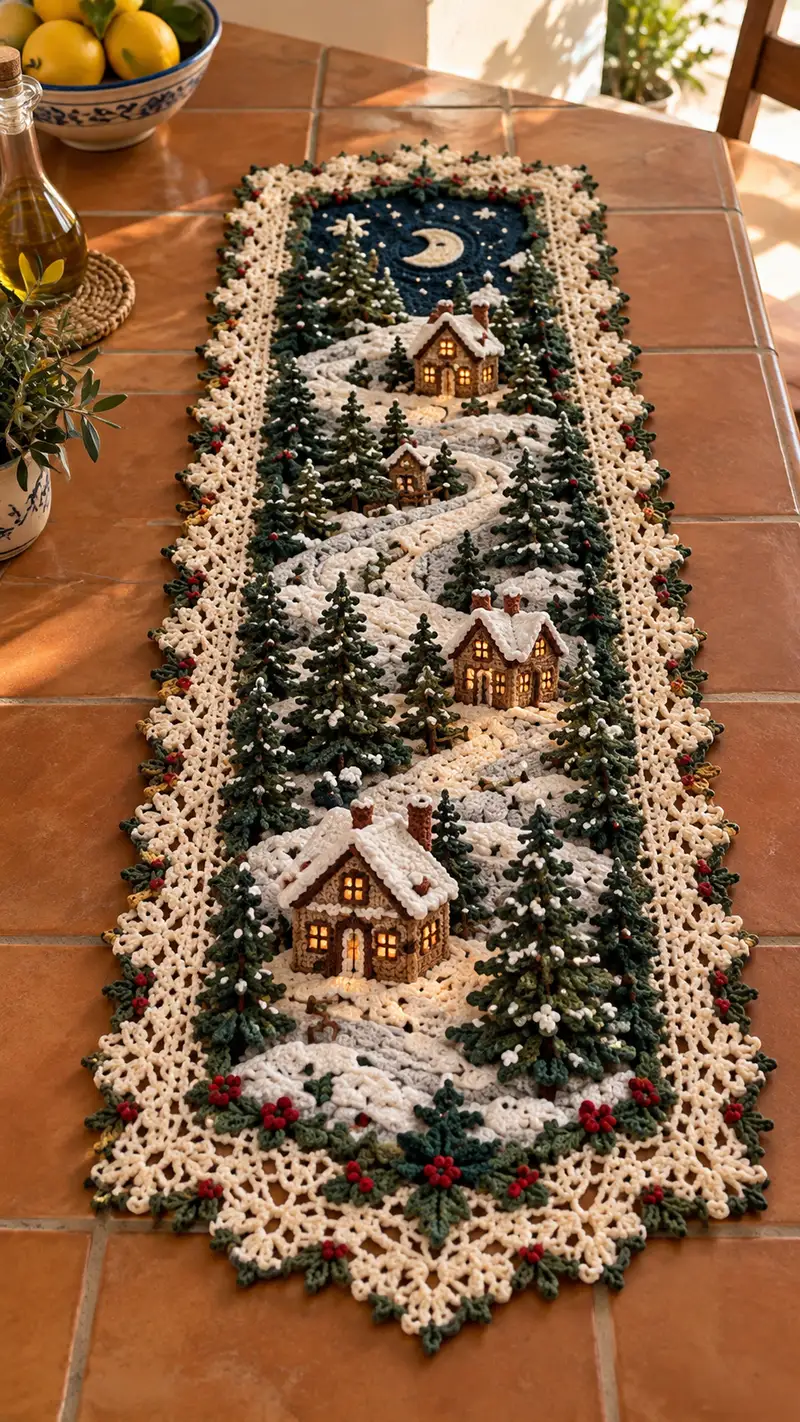
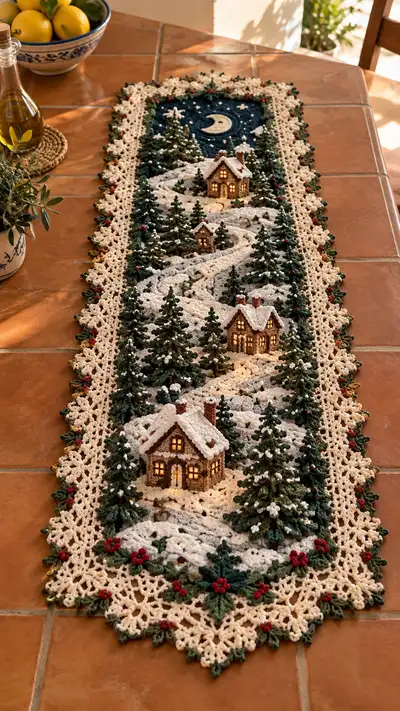
A richly textured table runner that brings a cozy winter village scene to your holiday table. Cream lace borders frame a deep forest-green night sky with a crescent moon, winding snowy path, tiny lit cottages and layered 3D evergreen trees. The design uses layered motifs, bobbles and surface crochet to build realistic snowdrifts and foliage. This pattern includes detailed motifs and step-by-step assembly to recreate the three-dimensional village scene.
Progress Tracker
0% Complete
— Center Night Sky Medallion :
Round 1 :
Using Deep Navy, make a magic ring. Ch1, 6 sc in magic ring. Pull tight. (6)
Round 2 :
Inc in each st around (2 sc in each st). (12)
Round 3 :
(1 sc, inc) x 6. (18)
Round 4 :
(2 sc, inc) x 6. (24)
Round 5 :
(3 sc, inc) x 6. (30)
Round 6 :
(4 sc, inc) x 6. (36)
Round 7 :
(5 sc, inc) x 6. (42)
Round 8 :
(6 sc, inc) x 6. (48)
Round 9 :
1 sc in each st (48)
Info :
At the conclusion of Round 9 you have a compact circle about 3.5-4 inches across (depending on tension). This will become the moonlit background. If you wish a larger medallion, continue increase pattern (7 sc, inc) x 6 for Round 10 etc.
Round 10 :
(7 sc, inc) x 6. (54)
Round 11 :
1 sc in each st (54)
Round 12 :
Begin texturing: *1 sc BLO in next 3 sts, 1 sc in next 3 sts* rep around. (54)
Info :
Surface stars and moon will be applied later. Use a small tapestry needle to embroider tiny star dots after assembly; place stars in odd-numbered rounds for depth.
Round 13 :
(2 sc BLO, 1 sc FLO) x 18 to create alternating ridges. (54)
Round 14 :
1 sc in each st (54)
Round 15 :
Using cream yarn, change color: sl st to join, ch1. 1 sc in each st in cream for two rounds to form inner halo. (54)
Info :
Change to cream carefully with an invisible join. Carry navy inside if you plan to applique the medallion later to avoid a visible tail.
Round 16 :
1 sc in each st (54)
Round 17 :
(1 sc, dec) x 18. (36)
Info :
Begin shallow decreases if you prefer the medallion to dip slightly. Otherwise stop increases and work even rounds until it meets the path module width.
Round 18 :
(4 sc, dec) x 6. (30)
Round 19 :
1 sc in each st (30)
Round 20 :
Fasten off long tail for sewing. Block lightly to flatten and set the medallion shape.
— Crescent Moon Applique :
Round 1 :
With cream on 3.0mm hook, ch6, join with sl st to form loop, ch1, 6 sc into loop. (6)
Round 2 :
(1 sc, inc) x 3. (9)
Round 3 :
(2 sc, inc) x 3. (12)
Round 4 :
1 sc in next 6 sts, then shape crescent: (sc2tog) twice, 1 sc in next 2 sts. (10)
Round 5 :
Work 1 sc around to refine shape, then flatten slightly and fasten off leaving tail for applique.
Info :
Sew the moon to the navy medallion before joining medallion to runner center. Position on the upper third for the photo-accurate composition.
— Snowy Path Module (Make 4 to join into long runner) :
Round 1 :
Using Light Gray, ch30, turn. Row counts are written as rounds for consistency: Row 1: sc in 2nd ch from hook and across (29). This creates a narrow foundation strip.
Round 2 :
Ch1, turn. 1 sc in each st BLO across to form a slight ridge (29).
Round 3 :
Ch2 (counts as hdc), turn. *hdc in next 4 sts, bobble in next st, hdc in next 4 sts* across, ending with hdc to balance. (29)
Info :
Bobble stitch: yo, insert hook, pull up loop, yo, pull through 2 loops — repeat 4 times total on same stitch then yo and pull through all loops. Bobbles simulate snow lumps along the path.
Round 4 :
Ch1, turn. 1 sc in each st across, working around bobbles carefully (29)
Round 5 :
Reverse-row shaping to create a gentle curve: ch1, sl st in first 2 sts, 1 sc in next 25 sts, ch1 and turn — this shortens the left edge slightly to begin curl.
Round 6 :
Ch1, 1 sc in next 24 sts, dec at end to guide curve. (24)
Round 7 :
Work 1 sc even for 3 rounds to fix width. (24)
Info :
Make two mirrored strips for left and right edges of the path. Joining will be done with surface slip-stitching for a raised center path.
Round 8 :
Shape raised center: using cream, chain 3 along one long edge and sc into edge every 3rd stitch to form a raised ridge; repeat on opposite strip so that when placed together the ridge forms a sinuous path (24).
Round 9 :
Join two strips using slip stitch through both edges but work only through the back loops of each, leaving front ridge raised. Fasten off and weave ends. Repeat to make 4 modules of length ~10-12" each; these join end-to-end with a small overlap to make the runner's winding path.
— Snow Drifts (applique, make multiple pieces) :
Round 1 :
With cream, ch8, sl st to form ring. Ch1, 8 sc in ring. (8)
Round 2 :
(1 sc, inc) x 4. (12)
Round 3 :
(2 sc, inc) x 4. (16)
Round 4 :
1 sc in each st (16)
Round 5 :
Using bobble clusters: *sc in next 3, bobble in next st* rep around to create a lumpy edge. (12 sc + 4 bobbles effectively)
Info :
Create drift shapes of varying sizes and flatten slightly by sewing onto path module. These are not heavily stuffed; a tiny dab of fiberfill in the center gives a raised look.
Round 6 :
Fasten off and make 8–12 drifts in various sizes to place along the runner path and near houses.
— Evergreen Tree (Make 18-24) :
Round 1 :
Using Forest Green on 3.0mm hook, mr, ch1, 6 sc in mr. (6)
Round 2 :
Inc in each st (12)
Round 3 :
(1 sc, inc) x 6. (18)
Round 4 :
(2 sc, inc) x 6. (24)
Round 5 :
Change to BLO for first layer of branches: 1 sc BLO in each st (24)
Round 6 :
Layered branch round: *ch3, skip 1 st, sl st in next st* rep around. This forms small points to attach leaf clusters. (24)
Round 7 :
Return to regular sc: 1 sc in each st (24)
Round 8 :
Begin tapering: (3 sc, dec) x 6. (18)
Info :
Attach small surface loops of cream using single loop clusters to simulate snow perched on branches. Use white or cream carried on a tapestry needle to tack tiny dots into place.
Round 9 :
(2 sc, dec) x 6. (12)
Round 10 :
(1 sc, dec) x 6. (6)
Round 11 :
Fasten off leaving a 12" tail for sewing. Optionally insert thin floral wire through center before final closing to allow gentle poseability. Lightly stuff base of tree with tiny bit of fiberfill to make it sit upright.
Round 12 :
Make smaller and larger trees by repeating rounds but stopping increases earlier (for small tree stop at Round 4, for tall tree repeat up to Round 6 before tapering).
— Tree Branch Variation (Layered Leaves) :
Round 1 :
Make a small leaf cluster: ch4, 1 dc in 2nd ch from hook, 1 hdc in next ch, sl st to base. Leave tail for sewing. Make 8–12 clusters per tree and sew them in concentric rings over the base cone for a fuller look.
Info :
Sew clusters overlapping slightly, then tack tiny cream bobbles on tips to mimic snow. Use small red beads or embroidered french knots for holly berries on some trees.
— Cottage House (Make 3 detailed cottages) :
Round 1 :
Using Dark Brown on 3.0mm hook, ch6, join to form loop, ch1, 6 sc in loop. (6)
Round 3 :
(1 sc, inc) x 6. (18)
Round 4 :
(2 sc, inc) x 6. (24)
Round 5 :
Form house base walls: work even rounds in sc for 6 rounds to create a rectangular block (24)
Round 6 :
Begin marking door and window positions on the next round: sc across until position for window, ch4 for window opening (do not skip a st — this ch4 creates window aperture), continue sc to end. Fasten off and use tapestry needle to define window edges using tan yarn.
Info :
Houses are worked flat for easiest shaping: you will create two wall panels and a roof that are sewn together. Mark windows on one panel and doors on another. Add window frames with tan yarn using running stitch for a framed look before assembly.
Round 7 :
Roof panels (make 2): With Tan yarn, ch12. Row1: sc in 2nd ch from hook and across (11). Row2: ch1, turn, dec at each end to create slope: dec, 1 sc until last 2 sts, dec. Continue decreasing on each RS row until 3 sts remain; fasten off leaving tail for sewing. Make second panel mirrored.
Round 8 :
Chimney: With Dark Brown, ch4, join to form ring. 6 sc in ring. Work 4 rounds even and then sl st top; leave tail for sewing. Add a tiny cream bobble to chimney top for snow.
Round 9 :
Roof snow: With cream, make a scalloped trim: attach at base of roof, *(ch3, sl st in same st) skip 1 st* repeat across to form scallops. Sew roof panels to top of house walls, then tack chimney in place.
Info :
Light the cottages: if you would like the glowing window effect as in the photo, place a tiny battery tea light inside the assembled cottage and leave a small opening at the base to insert it. Alternatively, use a folded gold tissue paper behind windows for glow and sew securely.
Round 10 :
Finishing house: Sew bottom edges together using whip stitch, stuff lightly if desired, and tack roof on top. Add cream bobbles and white surface stitches to simulate snow on roof and windowsills.
— Holly and Berry Cluster (Make 12-16) :
Round 1 :
With forest green, ch5, join with sl st to form ring. Ch1, 5 sc in ring. (5)
Round 2 :
Create 3 pointed leaves around the ring: *ch6, 1 sc in 2nd ch from hook, 1 hdc, 1 dc, 1 hdc, 1 sc, sl st to ring* rep 3 times. Fasten off and add 3 small red bobble berries. (3 leaves)
Info :
Sew these clusters into border corners and near snow drifts as photographed. Use a few clusters along the lace border to add color pop and holiday feel.
— Lace Border Panel (Work 2 long panels and 2 short end panels) :
Round 1 :
With Cream on 3.5mm hook, ch80 (for long side) or ch32 (for short end), turn and Row1: sc across. This sets base length. (79 or 31)
Round 2 :
Ch3 (counts as dc), skip 2 sts, *dc, ch2, dc* in next st, skip 2 sts — repeat across to create lacy filet repeats. End with dc. This builds the initial lace grid.
Round 3 :
Ch1, *sc in top of dc, ch3, sl st into ch2 space* repeat to create trellis effect. Work even for 6 rows to establish height. (79 or 31)
Round 4 :
Begin scalloped edge: *5 dc shell in ch3 space, sl st to next ch3 space* rep along edge to form decorative loops. Fasten off and block.
Info :
Blocking is critical for lace borders. After finishing each panel, wet block and pin into a straight, even rectangle. This will make assembly precise and the final runner lie flat on the table.
Round 5 :
Edge finishing: With forest green, single crochet along outer edge, adding small picots (ch3, sl st in 3rd ch) every 6 stitches to imitate the green edging in the photo. Add holly clusters at the corners and at intervals along the edge.
— Assembly Preparations :
Info :
Lay out all motifs on a flat surface in the same order as the photograph: bottom cottage (closest to viewer), then two cottages staggered up the path, ending with night sky medallion at the far end. Arrange trees in clusters along either side of the path, leaving room for houses. Place snow drifts and holly clusters last.
Round 1 :
Join path modules: using cream and invisible join, whip-stitch seam of adjoining path strips from wrong side, pulling edges snug so ridged center remains raised. Repeat for all 4 modules to reach desired runner length (approx 40-48").
Round 2 :
Position medallion: place the navy medallion on the far end; seam around with matching yarn using mattress stitch. Ensure moon is centered top third and stitch firmly so medallion lies flat without bunching the path.
Info :
Use pins to temporarily tack motifs in place. View from multiple angles and under table light to check placement before final stitching. This image shows three cottages staggered along the path with denser tree clusters near houses for a storybook composition.
— Attaching Trees and Houses :
Round 1 :
Sew tree bases: with tapestry needle and long tail from tree, whip-stitch base to runner at chosen location through back loops of base stitches. Use 6-8 secure stitches and knot on wrong side. For taller trees, you may anchor two stitches at the trunk then tack clusters to keep tree upright.
Round 2 :
Sew cottages: align cottage base so door faces path. Attach base using whip stitch around foundation edge, adding hidden reinforcement stitches into lace border beneath when needed for stability. If using battery lights, leave a small opening in back to insert and remove the battery pack later.
Info :
Place more trees near the back medallion to create perspective: smaller trees and fewer bobbles in the back, larger trees and fuller branches in the front. Stagger tree heights and rotate tree orientation slightly for a natural look.
Round 3 :
Apply snow drifts and bobble clusters last: position on path edges and sew with small whip stitches. Use short tails to anchor without large visible knots. Add cream surface slip-stitch highlights along path ridges for reflective snow glints.
— Final Border Join :
Round 1 :
With cream, join long lace panels to runner sides using slip-stitch through both edge loops, matching patterns. Work slowly to keep border scallops aligned with medallion and houses. Block the entire runner once assembled to meld seams.
Info :
For a seamless look, attach border with mattress stitch using a long tail and yarn needle, pulling just enough to join edges without puckering. Add small green edging where border meets inner field to camouflage joins.
Round 2 :
Add holly clusters at corners and at even intervals along border edges. Use 3 red bobble berries each cluster and tack firmly. Fasten off and weave all ends into the wrong side of runner.
— Finishing Touches and Snow Highlights :
Round 1 :
Use cream or white embroidery floss to add tiny straight stitches to represent falling snow across the navy medallion. Add a few tiny metallic thread stitches for subtle sparkle if desired.
Round 2 :
Final blocking: lay runner flat, pin into desired rectangular shape and steam or wet block per yarn instructions. Let dry fully before removing pins.
Info :
Double-check all attached elements for secure stitching. Test any battery lights once installed and ensure they can be removed for battery replacement without disturbing the stitches.
Round 3 :
Admire your finished runner and optionally add a thin backing fabric with slip-stitch or whip-stitch if you want to protect table surface from tiny beads or wire ends on the underside.
Completing this Cream and Forest Green Winter Village Table Runner is like painting a miniature snowy landscape stitch by stitch. The three-dimensional trees and cottages give the runner a magical, storybook feel, while the delicate lace border keeps the overall look elegant. Every stitch adds a little more character until your table is dressed in a cozy winter scene. 🎄🧶 Enjoy the slow, satisfying assembly and the delight of seeing your village come to life.