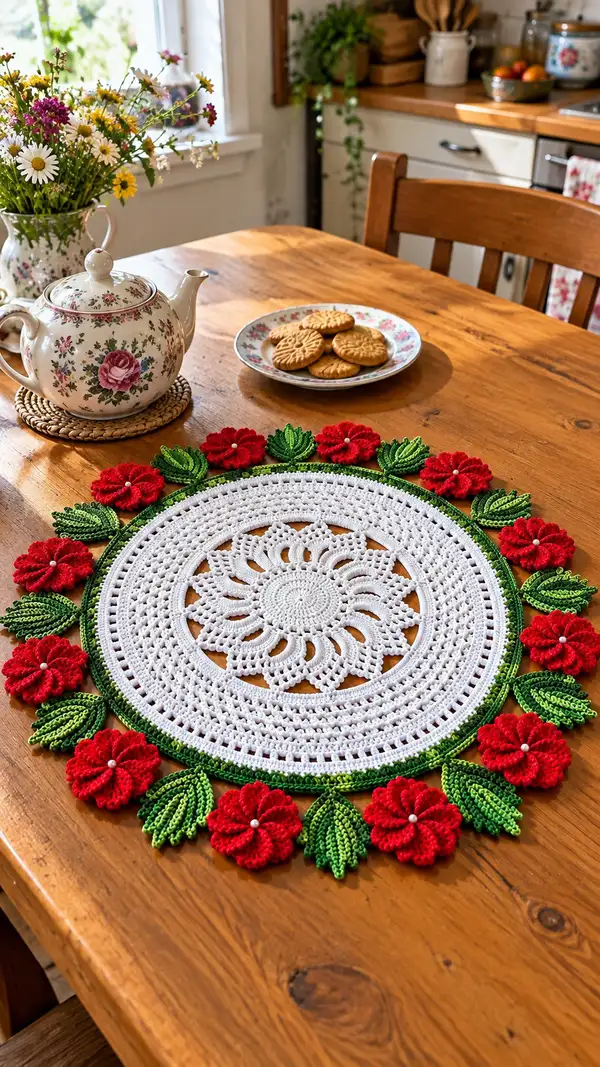
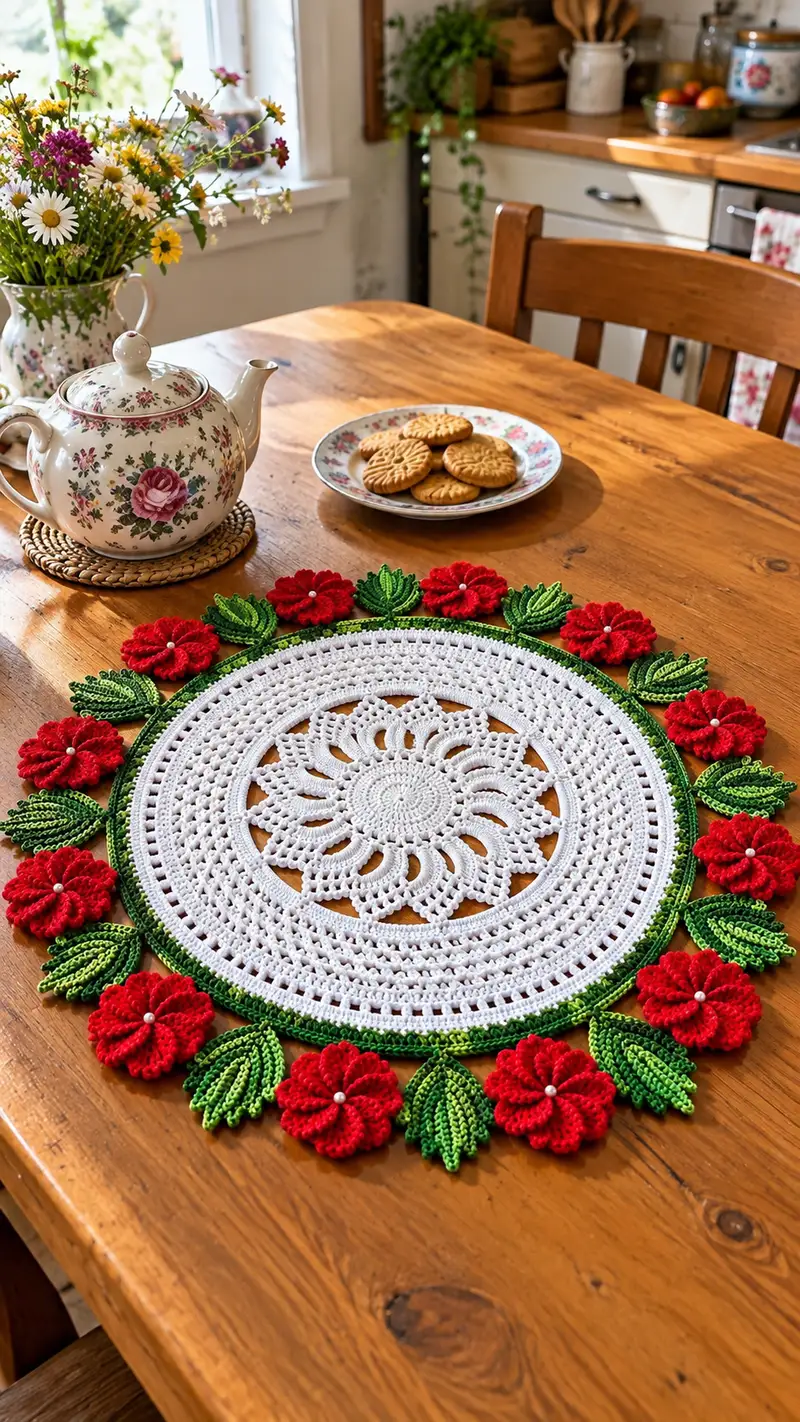
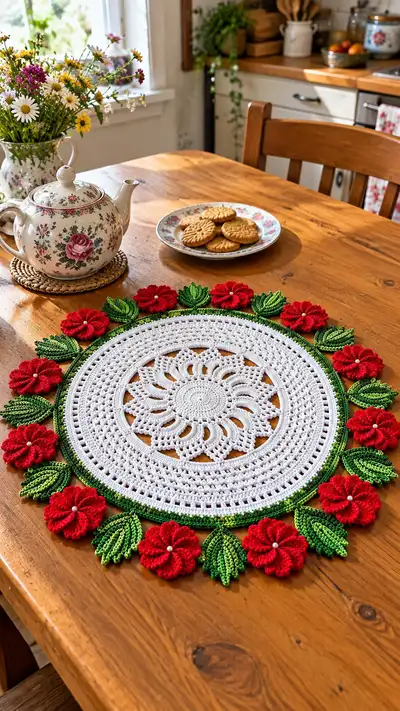
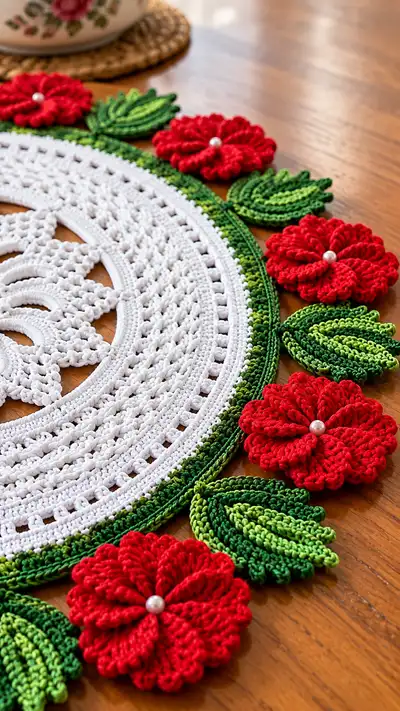
A charming round mandala doily with a crisp white lacy center, rich variegated green border and bold red 3D flowers with pearl centers. This decorative table accent blends classic lacework with dimensional applique9 flowers for a cottage-style look. Use cotton yarn for a crisp finish and block well to achieve the flat, elegant shape. The finished piece makes a beautiful centerpiece or placemat for special occasions.
Progress Tracker
0% Complete
— Center Mandala :
Round 1 :
6 sc in magic ring (6)
Round 3 :
(1 sc, 1 inc) x 6 (18)
Round 4 :
(2 sc, 1 inc) x 6 (24)
Round 5 :
(3 sc, 1 inc) x 6 (30)
Info :
Use a stitch marker to mark the first stitch of each round. Keep tension even and relatively firm for a crisp cotton doily center. Do not join rounds; work in continuous spiral or closed rounds as you prefer; this pattern is written for joined rounds with sl st to join unless otherwise noted.
Round 6 :
(4 sc, 1 inc) x 6 (36)
Round 7 :
(5 sc, 1 inc) x 6 (42)
Round 8 :
(6 sc, 1 inc) x 6 (48)
Round 9 :
1 sc in each st (48)
Round 10 :
1 sc in each st (48)
Info :
Rounds 9-12 build height and provide a firm base for later openwork. Keep your hook size consistent; if your work tightens unexpectedly, switch up 0.25-0.5 mm for these even rounds only.
Round 11 :
1 sc in each st (48)
Round 12 :
1 sc in each st (48)
Round 13 :
*Ch 5, sk 2 sc, sc in next st* repeat around to create small arch spaces (48 sts total base; you will make 16 arches) (16 arches)
Info :
At Round 13 you are creating chain-arch spaces which will take dc clusters in the next round. Keep the arch counts consistent by marking the first arch; if you find you have one extra space at the end, adjust by making one arch ch4 instead of ch5.
Round 14 :
Into each ch5 arch: (sc, ch2, 5 dc, ch2, sc) across each arch (this creates 16 raised petal arches). Slip stitch to join (work returns to 48 base points but with decorative clusters attached)
Round 15 :
Work 1 sc between each arch cluster around (48)
Round 16 :
*Ch 4, dc in top of next arch cluster, ch 3, sk next sc* repeat around forming 16 larger loops for later lacy fans
Info :
These chain loops become the supports for a decorative fan lace. Keep consistent ch counts and gauge to ensure the circle remains flat. If your centre starts to ruffle, reduce chain length by 1; if it cups, increase chain length by 1.
Round 17 :
Into each ch4 loop work: (sc, 3 dc, sc) to form small fans. End with sl st to join (16 fans)
Round 18 :
1 sc in each st and 1 sc into each fan top and join (maintain 48 base spaced points, but fans create decorative height)
Round 19 :
Switch to dc pattern: *dc in next 3 sts, ch2, sk 1* repeat to make openwork mesh around (36 dc + 12 chain2 spaces total pattern equivalent)
Round 20 :
Into each ch2 space work (2 dc, ch2, 2 dc) forming 12 raised 4-dc clusters separated by groups of dc. This starts a radial spoke effect.
Info :
Use these raised clusters to transition from solid center to openwork. If you prefer a denser center, replace dc clusters with groups of 3 dc only and omit ch2.
Round 21 :
1 dc in each dc around and 2 dc in each ch2 space (72 total dc equivalent around)
Round 22 :
*(1 dc, ch1, 1 dc) in next 2 dc, 1 dc in next 4 dc* repeat around to create delicate lacy repeat (pattern repeats 12 times)
Round 23 :
1 dc in each stitch and 1 sc in chain-1 spaces to stabilize (72)
Round 24 :
Switch to hdc: 1 hdc in each st around (72)
Info :
Change to white yarn only if you used a different working yarn earlier. This stretch is a good place to pause and block the center lightly: pin the work to a flat circle to check for flatness before proceeding to larger openwork rounds.
Round 25 :
*(2 hdc, ch2, sk 1) x 12* This creates 12 longer arch points around the center; count carefully (12 arches)
Round 26 :
Into each ch2 arch: (sc, ch3, 3 dc, ch3, sc) making 12 large petal fans. Sl st to join
Round 27 :
1 sc in each st and 1 sc into top of each large fan to lock shape (72 anchors)
Round 28 :
*(3 sc, 1 inc) x 18 (this increases the stitch count for the next band) (90)
Round 29 :
1 sc in each st (90)
Round 30 :
1 sc in each st (90)
Info :
Rounds 28-30 create an even band around the decorative fans, preparing for the first expansive openwork rings. Keep your stitch count accurate; you should have 90 stitches around by round 28 and maintain that count for rounds 29-30.
— Main Openwork Expansion :
Round 31 :
*Ch 4, sk 2 sc, sc in next 3 sc* repeat around forming 30 ch4-arch spaces (30)
Round 32 :
Into each ch4 arch: (sc, ch3, 5 dc, ch3, sc) creating 30 tall fans. Sl st to join
Round 33 :
1 sc in each st and 1 sc into fan tops (90 anchors)
Round 34 :
*(2 sc, inc) x 30 (this increases count gently for broader circumference) (120)
Info :
From round 31 onwards the doily grows quite quickly. If your piece appears to cup, block earlier and allow to dry before continuing. Consistent tension will keep your doily flat. Use a stitch marker at every 10th repeat to verify pattern repeats line up.
Round 35 :
1 sc in each st (120)
Round 36 :
*(3 sc, 1 inc) x 30 (this gives a gentle outward curve) (150)
Round 37 :
1 sc in each st (150)
Round 38 :
*Ch 5, sk 2, sc in next 3* repeat around making 30 long chain spaces for later open lattices
Round 39 :
Into each ch5 space: (sc, ch3, (dc, ch1, dc) x3, ch3, sc) creating 30 lacy motifs; sl st to join
Round 40 :
1 sc in each st and 1 sc in each ch1 to stabilize (150 anchors)
Info :
Check that the open lattice of rounds 38-40 lies flat. Adjust by adding a small increase evenly spaced if the circle starts to curl up at the edges. If it flares, add one less inc in the next increasing round.
Round 41 :
*(4 sc, 1 inc) x 25 (this evens stitch counts into 175) (175)
Round 42 :
1 sc in each st (175)
Round 43 :
*BLO 1 sc in each st around (175)* This creates a subtle ridge starting the border frame
Round 44 :
Switch to FLO for next round: 1 sc in each st FLO (175)
Info :
The BLO/FLO alternation creates two stacked ridges that will visually separate the white center from the green rim. Keep loops consistent and do not change hook size here to preserve edge tension.
Round 45 :
1 sc in each st (175)
Round 46 :
*(5 sc, 1 inc) x 25 (this expands lightly to 200) (200)
Round 47 :
1 sc in each st (200)
Round 48 :
*Ch 3, sk 2, sc in next 2* repeat around creating 50 ch3 spaces for border detail
Round 49 :
Into each ch3 space work (sc, ch2, 3 dc, ch2, sc) - 50 petal arches around the rim; sl st to join
Info :
End of round 49 completes the white center and decorative transition to the green rim. Fasten off white yarn, weave ends neatly on the wrong side. Now prepare to switch to variegated green for the rim; pick up the green yarn at the base of one petal arch.
— Outer Rim and Two-Tone Green Frame :
Info :
Change to Variegated Dark Green yarn now. Carry the white tail to weave in later. If you want a sharper contrast, use solid dark green for the first rim round and light green for leaf mid-tones later.
Round 50 :
Attach green yarn behind any petal base, ch1, 1 sc in same st, *2 sc in next sc, 1 sc in next 3 sc* repeat around to create a firm green band (250 total approx after adjustments) (approx 250)
Round 51 :
1 sc in each st around (250)
Round 52 :
*(4 sc, 1 inc) x 50 (this increases evenly to 300) (300)
Round 53 :
1 sc in each st BLO (300)
Round 54 :
1 sc in each st (300)
Info :
Rounds 50-54 create a wide firm rim to which motifs (leaves and flowers) will be joined. Work BLO on round 53 to create a ridge for attaching leaves; this ridge gives a neat visual separation between center and floral edge.
Round 55 :
Switch to Light Green for accent: *ch2, sk 2, sc in next 3* repeat to form 100 small loop points for leaf placement (100 loop points)
Round 56 :
Into each ch2 loop work (sc, ch3, 5 dc, ch3, sc) to make raised small fans that will sit behind leaf bases. Sl st to join
Round 57 :
1 sc in each st around (300 anchors)
Info :
Finish the rim by weaving in green ends on the wrong side for a tidy finish. Count out 12 evenly spaced placement points for flowers: lay the doily flat, measure circumference and mark every 30-26 stitches depending on your final count (for this pattern we will attach 12 flowers evenly; you may prefer 10 or 14 depending on decoration density).
— Leaf (Make 24 - two leaves per flower) :
Info :
Leaves are made in two tones: first make the light-green inner leaf, then overlay a dark-green outline. Each finished leaf measures approximately 6-7 cm long and is worked flat. Make 24 leaves in total (two leaves for each of 12 flowers).
Round 58 :
With Light Green: ch 8, sc in 2nd ch from hook, hdc in next, dc in next 2, tr in next 2, dc in next, hdc in last, sl st to base to shape a pointed leaf foundation (counts based on chains; leaf base uses 8 chains)
Round 59 :
Turn and work along opposite side: sc in first, hdc in next, dc in next 2, tr2tog (decrease worked as (yo, insert, yo, pull through) across next 2 tr stitches), dc in next, hdc in last, sl st to join. Fasten off light green and weave ends.
Info :
This creates a small single leaf. The leaf curve is achieved by working taller stitches in the center and shorter at edges. Make 24 of these light-green inner leaves. Keep tension slightly looser for the leaf body than the center so the leaf lies flat and slightly cupped.
Round 60 :
With Dark Green: reattach at base of leaf with sl st, *ch1, sc around the entire outer edge of the leaf working 2 sc into the tip and along curves to make a firm outline; in the central spine area work 3 slip stitch ridges by working small 3-stitch ridges using fpdc/bpdc alternately to create veins* Fasten off and leave long tail for sewing (edge is hand-trimmed to fit) (outline stitches approx 20-28 depending on leaf shaping)
Info :
When attaching the dark green outline, work in the BLO of the base stitches where possible to get a lifted edge. Make 24 finished leaves. Press lightly and block on a mat if the leaf edges want to curl; pin into the desired shallow curve and mist lightly then allow to dry.
— Flower (Make 12) :
Info :
Each flower consists of a tight center circle, two layered petal rounds and a final ruffled round for volume. Center beads are sewn on after assembly. Make 12 flowers in total; each flower is approximately 6-7 cm across when finished.
Round 62 :
With Red: mr, ch1, 6 sc in mr (6). Sl st to join and pull ring tight (6)
Round 64 :
(1 sc, inc) x 6 (18)
Round 65 :
1 sc in each st (18)
Info :
Round 62-65 build a small tight center that stabilizes the petals. We are keeping the center firm so the petals sit outward and do not flop.
Round 66 :
*(ch2, sk 1, sc in next, ch2, 5 dc in next) x 6* This creates 6 base petal points around the center. Join with sl st.
Round 67 :
Into each 5-dc petal: work (sc, hdc, 3 dc, hdc, sc) to create a rounded petal (6 petals)
Round 68 :
1 sc in each stitch around and in petal valleys to stabilize (approx 54)
Round 69 :
For second petal layer: *ch3, in top of each petal work (7 dc cluster) separated by sl st to base between petals* repeat around to create ruffled top layer (6 ruffled petals)
Round 70 :
Work 1 sc around entire flower to lock petals and flatten slightly (approx 72)
Round 71 :
Optional ruffle: *(ch2, into each dc of ruffle work sc) around* to add small scallop edge. Fasten off leaving long tail for sewing. Sew pearl bead in center with strong thread and a small knot behind to secure.
Info :
When making the ruffled second layer, use a slightly smaller hook (3.0 mm) if you want tighter, denser petals. The pearl center both hides the join and gives the flower a finished vintage look. Make 12 flowers total and block them slightly to open the petals if needed.
— Decorative Leaf Variation (Optional Shading) :
Round 72 :
For a layered leaf behind each flower, repeat the leaf pattern but make the central spine with 3 small fpdc ridges as pronounced veins then fasten off. Make 12 of these optional larger leaves for extra volume.
Info :
Use this optional larger leaf behind each flower for a fuller border when you want a dense floral wreath. Make sure to keep track of which leaves are larger and place consistently when joining.
— Joining Flowers and Leaves to Rim :
Round 73 :
Lay the doily flat and mark 12 evenly spaced points on the outer green rim. Pin each flower in place before sewing. Each flower will be attached by sewing through the base with yarn tail from the flower and then securing to the green rim by whip stitch through rim and into flower base. Space between flowers should be approx 25-30 stitches depending on final stitch count.
Round 74 :
Sew first flower: position two leaves around it (one on each side). Using the long tail, make small whip stitches through the flower base and the rim ridge, securing every 3-4 stitches to avoid twisting. Knot and weave tails to the wrong side. Repeat for all 12 flowers.
Info :
Pin each flower and leaf grouping before sewing. This ensures consistent spacing and gives you the opportunity to adjust placement for symmetry. Use small hidden stitches and keep tension even so the rim does not pucker when decorated.
Round 75 :
After all flowers are sewn, add small reinforcing slip stitches around each flower base on the rim side using dark green to integrate motifs into the rim. Make 2-4 small sl st anchors under each flower to stabilize.
Round 76 :
Edge decorative border: With Dark Green, attach at any seam and work *(sc in next 3 sts, ch3, sl st in 1st chain to form picot) x around each flower cluster* repeat across the rim to create small picot points between flowers and leaves. This creates contrast and tidy finish.
Info :
Picots add a hand-made finishing flourish and visually tie the flowers into the rim. Keep picots small (ch3) to avoid adding bulk. Alternate dark and light green picots if desired for a subtle striped effect.
— Final Edging and Stabilizing Rounds :
Round 77 :
With Dark Green: 1 sc in each st around rim and around bases of flowers where possible to create a continuous edge (approx 300-340 depending on attachments)
Round 78 :
*(2 sc, 1 picot (ch3 sl st in top of picot), 2 sc) repeat around to create a beaded edge effect. Fasten off and weave ends.
Round 79 :
Optional: Apply lightweight fabric stiffener or starch to underside if you want a rigid placemat. Pin to blocking mat in perfectly round shape and allow to dry completely.
Info :
Blocking is essential to get the round flat and even. Use rust-proof pins and a blocking mat; gently shape each flower petal and leaf during blocking to open them and ensure they lie in the intended direction. If adding heavier embellishments, reinforce their thread with small running stitches behind the bead to prevent detachment over time.
— Reinforcement and Decorative Details :
Round 81 :
Sew in all loose ends carefully on the wrong side using a tapestry needle; weave through multiple stitches and trim close to work.
Round 82 :
Double-check spacing: if any flower sits too far from neighboring motifs, add an extra small hidden stitch under it anchoring into the rim ridge to draw it closer.
Round 83 :
If you wish to add beads between each flower on the rim, hand-sew a small bead with a short length of matching green thread into the rim at evenly spaced points. Reinforce each bead with two passes of thread and a small knot on the wrong side.
Round 84 :
Final inspection: lay the doily on your table, move it slightly to ensure no stitches pull or snag; trim any stray fibers.
Info :
These final reinforcement steps ensure your decorative doily stays beautiful with use. Consider gentle hand-washing in lukewarm water and re-blocking rather than machine washing to preserve shape and decoration.
Completing this floral mandala doily is such a satisfying craft journey—watch the lacy center grow and the vibrant red flowers come to life around the rim! Each pinned flower and leaf brings the design into full bloom. The finished piece makes a lovely centerpiece or gift and will brighten any table setting. Enjoy the relaxing rhythm of stitch-by-stitch progress and the beautiful floral reveal at the end. 🧶🌸