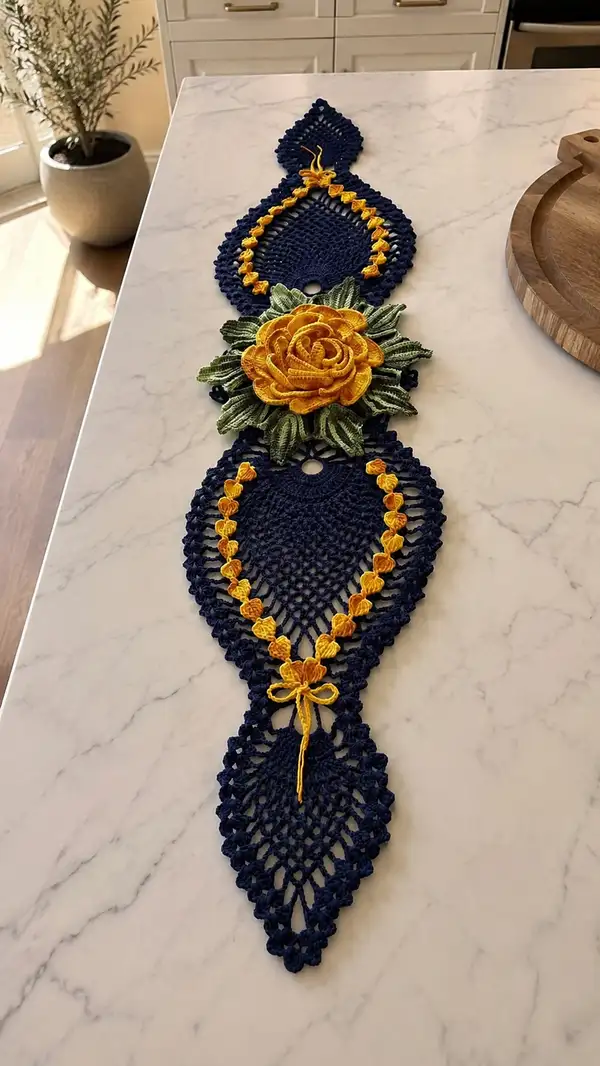
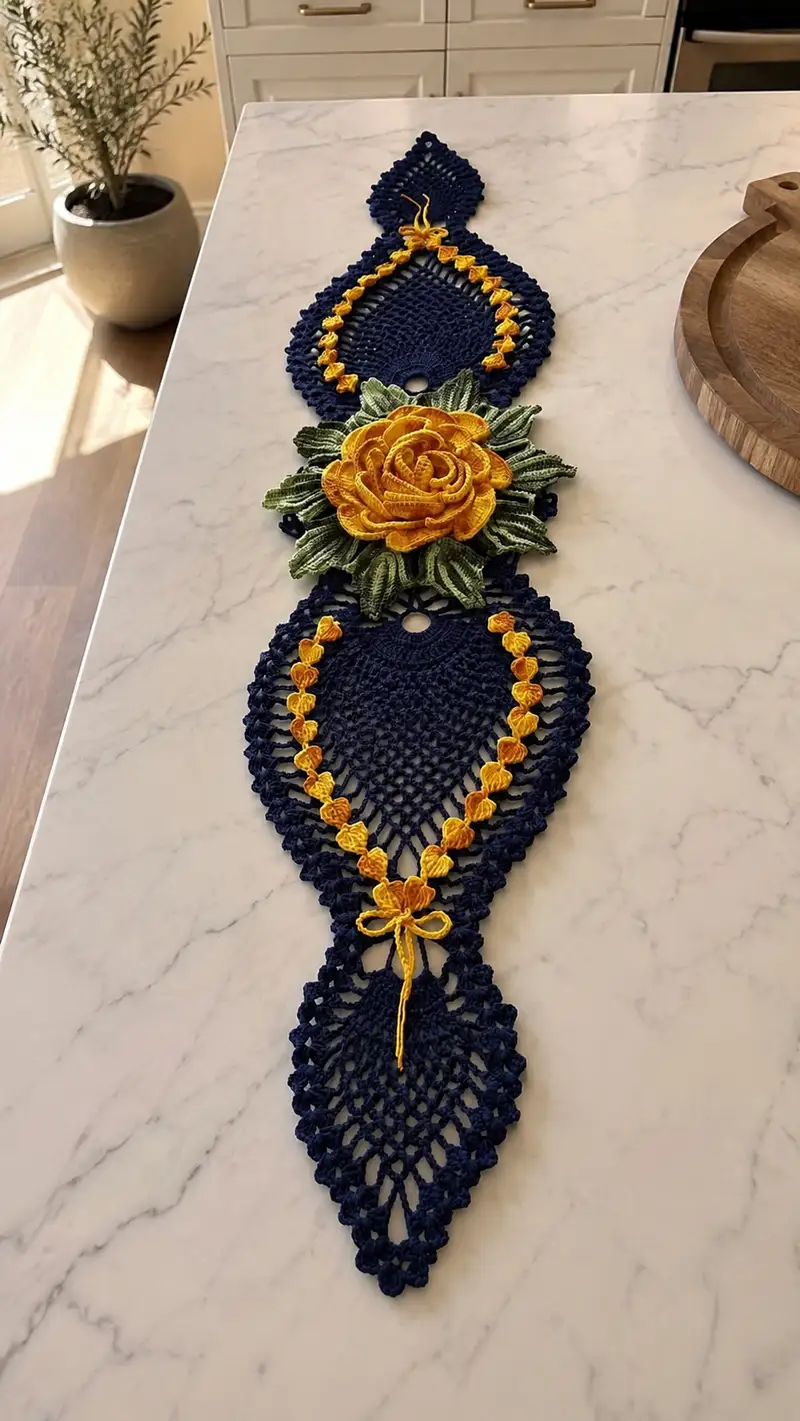
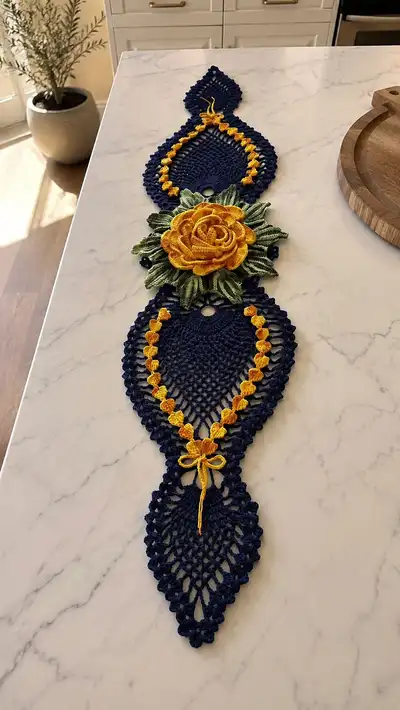
This elegant crochet table runner features three linked teardrop lace motifs in deep navy, highlighted with a chain of golden yellow heart clusters and a dramatic 3D yellow rose with layered green leaves at the center. The design combines openwork mesh, refined shell edging, and sculptural floral elements to create a statement piece perfect for a dining table or sideboard. Detailed step-by-step instructions and assembly guidance make this pattern approachable for advanced crocheters who love decorative lacework.
Progress Tracker
0% Complete
— Materials & Gauge :
Info :
Use mercerized cotton (sport/DK) with a 2.75-3.25mm hook for crisp lace. Gauge is not critical for decorative runner, but 10cm/4" should equal approximately 12 dc x 6 rows in worked lace mesh for proportional sizing. Adjust hook if you prefer a stiffer or drapier fabric.
Info :
Make a sample swatch of the teardrop motif center to ensure your mesh density matches finished proportions. Blocking will widen openwork slightly, so allow for 2-3% expansion when measuring.
— Top Teardrop Motif (Make 1) :
Round 1 :
8 sc in magic ring (8)
Round 3 :
(1 sc, 1 inc) x 8 (24)
Round 4 :
(2 sc, 1 inc) x 8 (32)
Round 5 :
(3 sc, 1 inc) x 8 (40)
Round 6 :
(4 sc, 1 inc) x 8 (48)
Info :
Continue increasing on both sides of the teardrop evenly. The repeat of 8 segments builds a rounded fan that will be shaped into a teardrop by later decreases down one side.
Round 7 :
1 sc in each st around (48)
Round 8 :
*ch 6, sk next 2 sts, sc in next st* repeat around to form tall chain loops (48 ch-loops remain as connecting reference)
Info :
Round 8 creates the tall mesh arches that will later be worked into the teardrop's 'point' and interior lace. Keep chains even and avoid twisting the loops; use stitch markers every 8 loops to mark repeats.
Round 9 :
1 sc in each sc around, working 2 sc into the sc between chain loops to maintain edge count (48)
Round 10 :
*(ch3, dc) in chain arch; sk to base sc and sl st into base sc* repeat across each arch to create vertical mesh (48)
Round 11 :
1 sc in each st around (48)
Round 12 :
Change to mesh shaping: (5 sc, 1 dec) x 8 (40)
Info :
Begin to close one side of the motif to form a teardrop. Work decs evenly across the lower half of the round segments. Place markers at the two apex points (top center and bottom point) to guide decreases.
Round 13 :
(4 sc, 1 dec) x 8 (32)
Round 14 :
(3 sc, 1 dec) x 8 (24)
Round 15 :
(2 sc, 1 dec) x 8 (16)
Round 16 :
(1 sc, 1 dec) x 8 (8)
Round 17 :
8 dec (8) - shape to an elongated point for the teardrop tip
Info :
At this point your teardrop has a solid base. Fasten off the center tightly and weave the tail through remaining 8 sts to form a small closed point. Press lightly while blocking to maintain shape.
Round 18 :
Join back at widest round (Round 11 area) and work shell edging: *sc, ch2, 3 dc in next st, ch2, sc* repeat around (24 shells)
Round 19 :
On shell rows work picot finish: *sc in shell base, ch3, sl st back into 3rd ch (picot), sc in shell peak* repeat around to produce delicate scallop (24 picots)
Round 20 :
Fasten off leaving long tail for joining to center assembly. Block flat, shaping the teardrop so the top center has a small loop/opening (leave that loop clear for later center eyelet)
— Middle Small Diamond Connector (Make 1) :
Round 1 :
ch 6, sl st to form ring, ch3 (counts as dc)
Round 2 :
Work 12 dc into ring evenly (12)
Round 3 :
(1 dc, inc) x 6 (18)
Round 4 :
1 dc in each st (18)
Round 5 :
Change to mesh: *ch6, sl st into next dc* repeat to form 6 open arches around (18 ch-arch foundation)
Round 6 :
sc in each dc and picot the arches top: *sc, ch3, sl st into same sp* repeat across to make decorative join points for the yellow chain (18)
Round 7 :
Fasten off leaving long tail to sew into the larger motifs. This diamond sits above the rose and helps transition between top teardrop and central rose area.
— Lower Teardrop Motif (Make 1) :
Round 1 :
8 sc in magic ring (8)
Round 3 :
(1 sc, 1 inc) x 8 (24)
Round 4 :
(2 sc, 1 inc) x 8 (32)
Round 5 :
(3 sc, 1 inc) x 8 (40)
Round 6 :
(4 sc, 1 inc) x 8 (48)
Info :
The lower motif mirrors the top motif but will have a long tail of mesh graduating into an elongated lower point. Keep counts identical to top motif until shaping starts so both motifs align when joined.
Round 7 :
1 sc in each st around (48)
Round 8 :
*ch 5, sk next 2 sts, sc in next st* repeat around to form mesh arches (48)
Round 9 :
1 sc in each st around (48)
Round 10 :
Begin lace taper: (6 sc, 1 dec) x 6 + (3 sc, 1 dec) x 2 (total 42) - this asymmetric sequence starts the lower narrowing
Round 11 :
(5 sc, 1 dec) x 7 (35)
Round 12 :
(4 sc, 1 dec) x 7 (28)
Round 13 :
(3 sc, 1 dec) x 7 (21)
Round 14 :
(2 sc, 1 dec) x 7 (14)
Round 15 :
(1 sc, 1 dec) x 7 (7)
Round 16 :
7 dec (7) - close to a slender point
Round 17 :
Work decorative clustered edging across the wider top of lower motif where it will meet the rose base: join at that round and sc evenly around then *(ch2, 3 dc in next st, ch2, sc)* for 16 shells
Round 18 :
Finish shells with small picots: *sc in shell base, ch3, sl st into next sc* repeat around (16 picots)
Round 19 :
Fasten off leaving long tail for joining. Block motif flat and shape the long lower mesh into a pointed fanshape by pinning multiple points during blocking.
Info :
Both teardrop motifs should be identical in length when blocked. Lay them together and measure center to center to ensure proper alignment for joining with the rose base and diamond connector.
— Golden Yellow Accent Hearts (Make 24 or more) :
Info :
These small puff/heart motifs are worked individually and then sewn in a chain along the inner sides of the teardrop openings. Make 12 for each side (top and bottom) or adjust to taste. Working small units ensures crisp definition. Use the smaller hook (2.75mm) for firm, tight hearts.
Round 1 :
With yellow, ch 4, join with sl st to form small ring
Round 2 :
Work 6 hdc into ring (6)
Round 3 :
*ch2, 3 dc in same st, ch2, sl st in next st* repeat 3 times to form tiny petal cluster (this creates a tiny heart/petal effect) (6 clusters)
Round 4 :
One round base: sc around base to tidy up and create a small back loop for sewing (6)
Round 5 :
Fasten off leaving long tail for sewing. Shape heart with fingertips wet slightly if needed. Make 24 (or desired number) and block lightly point-side down to preserve petal shape.
Info :
Arrange hearts along the inside edge of the teardrop motifs and pin into desired spacing before sewing. Typically hearts are positioned along the inner sloping lines of the teardrop forming a continuous garland from the top motif down to the central rose and continuing to the lower motif.
— Decorative Bow and Tie Detail (Make 1) :
Round 1 :
Using yellow, ch 30 (or desired length), sl st into first ch to form long cord; fasten off leaving long tail (cord)
Round 2 :
Create bow: ch 8, sc in 2nd ch from hook, sc across (7), fold and wind middle with yarn tail to cinch into bow shape, stitch to secure
Info :
Sew cord and bow at the internal narrow point between the two lower mesh sections to mimic the pictured bow. The cord can be sewn along its length to the inner sc ridges for stability.
— Central 3D Rose (Large) :
Info :
This rose is constructed as a long strip of petals worked in increasing spiral/row widths and then rolled into a spiral, sewing as you go to secure. You will work multiple petals types: small internal petals, medium folding petals, and large outer petals. Use golden yellow yarn and a slightly larger hook for the petal rounds if you prefer the petals to curl outward more.
Round 1 :
Make a foundation chain of 6, join to make ring (or use magic ring), ch1, 6 sc into ring (6)
Round 2 :
Folded petal base: ch 3 (counts as dc), work 2 dc in same st, *sk next st, 3 dc in next st* repeat around to form 3 petals (9 dc in total, 3 petals)
Round 3 :
Increase petal strip: ch6, turn and work along chain: *(sc, hdc, 3 dc, hdc, sc) in chain base* to form first long petal. Repeat to form 3 petals; leave a long tail at beg to use when rolling the rose.
Round 4 :
Extend strip: ch30, then along the chain work a series of petals separated by ch2 spaces: *sc in next ch, (hdc, 3 dc, hdc) in next ch, sc in next ch, ch2* repeat across length - this will produce a petal fringe that later gets rolled to make mid-row petals
Round 5 :
Turn and work back along the same chain with a base row of sc to stabilize the strip: sc across chain spaces, making the strip firm (this completes the first petal strip)
Round 6 :
Now create a second, wider petal strip: ch45, turn and along chain work: *sc, hdc, (2 dc, tr, 2 dc), hdc, sc* repeat to end - the larger central petals will be formed from this row
Round 7 :
Work a finishing base row for the wide strip with sc across to provide a back for sewing. Fasten off leaving long tail. You now have three strips: inner small petals, medium petals, and large outer petals. Block these flat, shaping petals with fingers so they curl slightly up at the edges.
Info :
When assembling the rose, you will roll the inner strip into a tight spiral and use the long tail ends to sew subsequent strips around it. Keep the central roll small and increase circumference by adding the medium then the large strip. Stuff very lightly inside the rolled core if you prefer a depth that rises a little off the runner surface.
Round 8 :
Assembly step 1: With the long tail from the smallest strip, roll the strip tightly into a spiral so that petals face outward and the decorative edges show. Use a tapestry needle and sew a running stitch along the lower edge of the spiral, catching through the back loops of the strip to hold 6-8 stitches per wrap.
Round 9 :
Add medium strip: align the medium strip edge against the outer edge of the small spiral so that petals overlap; wrap around the spiral so that medium petals sit staggered relative to inner petals, and sew with tight whipstitches every 6-8mm. Continue until medium strip is fully wrapped and attached.
Round 10 :
Add large outer strip similarly: wrap and sew in place, shaping each petal outward and tacking discrete points to create a natural layered effect. The outermost petals should remain loose enough to shape later with steam if desired.
Round 11 :
Secure center: sew a few cross stitches through the base of the rose to anchor inner layers; if you wish, add a small bit of fiberfill in the very center before final fastening to give the rose body (use 1-2 grams only).
Round 12 :
Neaten underside: using leftover tail weave a neat running stitch in a circular motion to close any exposed raw edges; clip tails and weave ends into the underside of the rose for a tidy finish.
Info :
If you prefer a different construction method, the rose can also be made from a single long strip of crocheted petals (approx 2m length) arranged and sewn into a spiral; the strip method uses the same petal shapes but is quicker by avoiding multiple separate strips.
— Layered Leaves (Make 8 total: 4 large, 4 small) :
Leaf Set - Large Leaf :
Round 1 : ch 12, sc in 2nd ch from hook and across to last ch, 3 sc in last ch to turn (total 13 sc across chain plus 2 extra for tip)
Round 2 :
Working along opposite side of chain: sc across back loops to base to form a leaf outline (26 sc total if counted both sides including tip)
Round 3 :
Shape leaf with increases along the center: *sc 3, inc* across first half, sc in tip, *inc, sc 3* across second half (approx 32)
Round 4 :
Work ribbing by working BLO rows: ch1, turn and hdc BLO in each st across to create a ridgey texture (32)
Round 5 :
Edge shaping: *sc, ch3, sl st into next st* around to create a delicate scalloped edge (approx 32 scallops)
Round 6 :
Fasten off leaving a long tail for sewing. Block leaf with a slight cupped shape so it forms under the rose naturally.
Info :
Make 4 large leaves and 4 small leaves; small leaves can be built with a chain of 8-10 and mirror shaping across fewer rows (approx 6 rounds per small leaf). Stagger large leaves under the rose and tuck small leaves between petal layers for a full look.
— Sew On Rose and Leaves to Center :
Info :
Pin rose in center of the runner where the two teardrop motifs meet, covering both motif tops and the diamond connector. Arrange leaves underneath in two layers: large leaves first fanning out, small leaves tucked closer to the rose base. Pin, check symmetry from edge and side, then baste-stitch with yarn needle before final sewing.
Round 1 :
Sew rose to motifs by taking running stitches through the underside of rose base and into the solid sc ridges of the motifs and the diamond connector; take 10-12 evenly spaced stitches to secure the central rose (no numeric count applies)
Round 2 :
Sew leaves: stitch each leaf at its base to the motif edges and underside of rose using invisible ladder stitch; add 4-6 stitches per leaf near the base to keep leaves secure and allow tips to remain free.
Info :
Optionally, sew a small unobtrusive button or heavy bead under the rose base to anchor and take stress off the crocheted motifs during use. Glue may be used sparingly but is not necessary if stitches are secure.
— Join Motifs & Attach Yellow Heart Chain :
Round 1 :
Lay top teardrop, diamond connector, rose (with leaves), and lower teardrop in place. Using long tails from motif edges, sew them together with mattress stitch along the sc ridges where they meet. Make sure to attach the top motif to the diamond connector first, then attach the rose base to the diamond and lower motif. Sew carefully so joins remain flexible (approx 12-18 stitches per join area).
Round 2 :
Attach yellow hearts by pinning each heart over the inner sc loops along the teardrop inner ridge. Use the long tails to sew through the heart back loops and the motif chain arch base, spacing hearts evenly (12 per side recommended). Knot and weave tails into the underside.
Round 3 :
Sew bow and cord in place: place the bow at the narrow center point between lower and middle mesh and tack into position using several small stitches; attach cord ends along internal sc ridges so cord lies flat but decorative.
Info :
Check placement with the runner laid flat; the yellow chain should form a V-shape following the inner teardrop edges and meet under the rose. If hearts protrude, re-stitch slightly closer to motif base to reduce bulk.
— Decorative Side Edging & Final Mesh Fill :
Round 1 :
Using navy, work around both long sides of the runner joining edges and adding consistent shells: *sc, ch3, 3 dc in next st, ch3, sc* sew shells along exposed edges connecting motifs and any raw seam edges. Work 24 shells along each elongated side depending on length (adjust to fit spacing).
Round 2 :
Between shells, fill open areas with mesh loops: *ch6, sl st into corresponding sc on adjacent motif edge* to maintain continuous lace and structural stability (this creates a web that ties motifs together). Number of loops will match shell count (approx 24 loops each side).
Round 3 :
Work finishing round: sc around entire runner edge, picking up both front and back edges where motifs meet to create a tidy border. Work 2 sc into each shell base for an even border count. Fasten off and weave all ends into the border to secure.
Info :
After assembly, wet-block or steam-block the entire runner on a flat surface, pinning shells and points to the desired shape. Blocking will set the lace and open the mesh for a finished polished look.
— Finishing Touches :
Round 1 :
Check underside for loose ends and reinforce any join points with extra stitches if runner will receive regular use. Add felt pads under rose base if desired to prevent direct surface wear on delicate yarn.
Round 2 :
Optional: lightly starch or use fabric stiffener if you prefer a more rigid table runner that holds its shape; apply carefully to avoid changing color intensity of mercerized cotton.
Info :
Store flat or gently rolled; avoid hanging as the rose weight may stretch the lace over time. Wash gently by hand in lukewarm water and reshape while damp.
This elegant floral table runner transforms crochet lace into a stunning centerpiece for any table. Each teardrop motif and the sculptural rose combine to create a unique handmade statement that will be admired at every gathering. The detailed instructions guide you step-by-step through intricate lacework and three-dimensional floral construction, giving you a piece to treasure and display. 🧶🌼 Add your personal color palette to make it truly yours — happy stitching! ✨