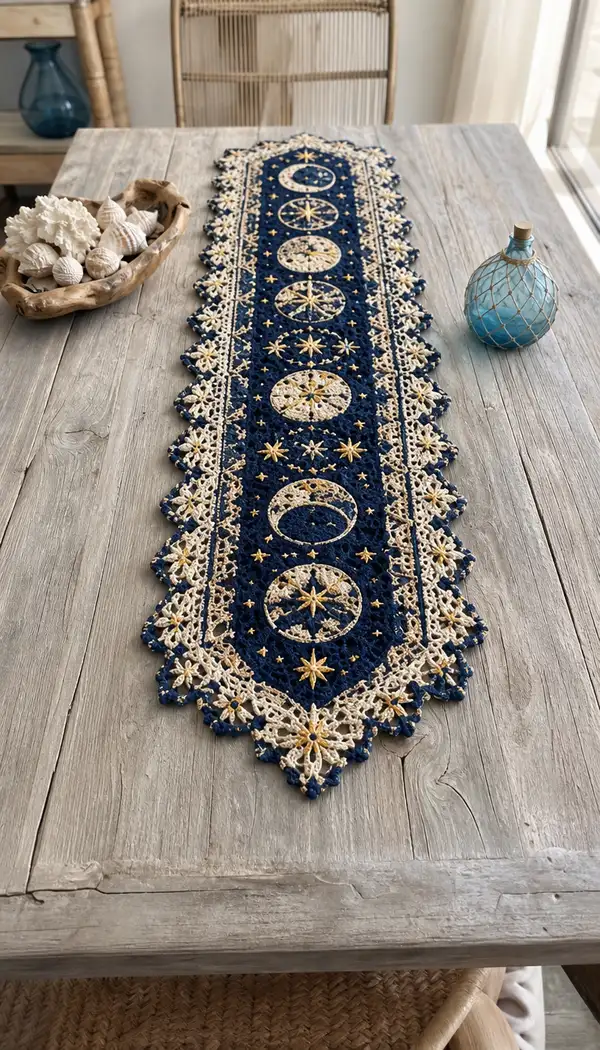
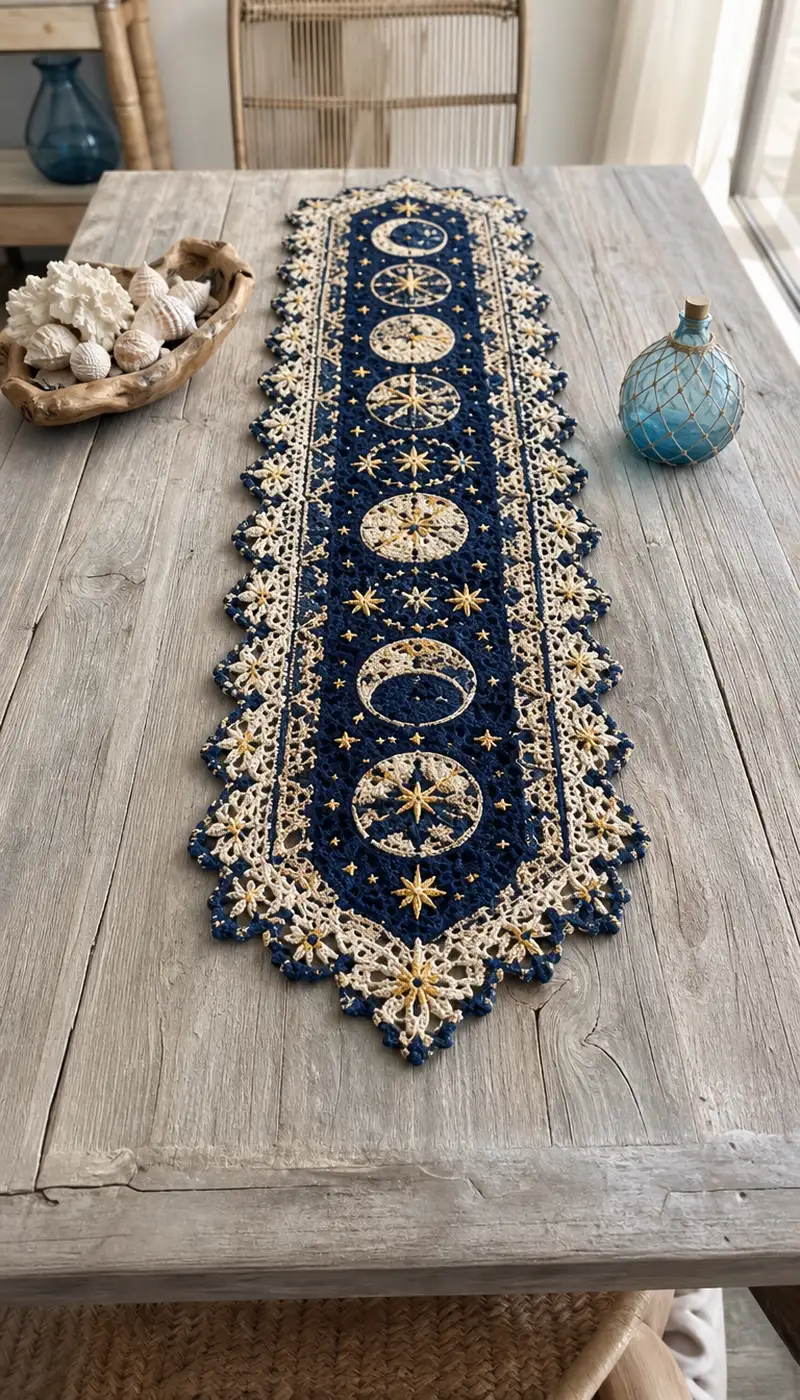
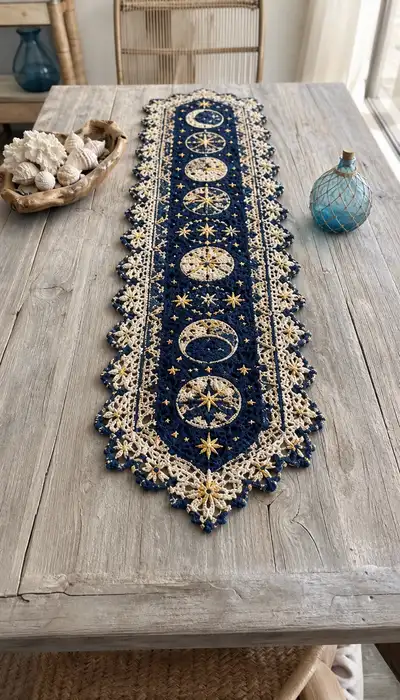
Create a stunning navy and cream table runner inspired by moon phases and star motifs. This lace-style runner features circular moon-and-star medallions set on a rich navy ground, finished with a delicate cream scalloped border and metallic gold accents. The modular construction uses medallions joined with a mesh background and finished with embroidered stars for extra depth. Perfect for a dining table centerpiece or a seasonal statement piece.
Progress Tracker
0% Complete
— Overview & Gauge :
Info :
This pattern is worked in modular medallions (make 7), mesh join strips, and an outer scalloped border. Gauge is flexible for decorative items but aim for 20 dc x 10 rows = 4 inches in pattern sections when using 3.5mm hook with DK cotton. Finished size depends on tension and number of medallions; expected length 42-46 inches and width 9-11 inches.
Info :
Work most rounds in continuous rounds for medallions (use a stitch marker) to avoid visible seams, but border rows will be turned rows worked flat. Block each medallion to exact diameter before join-as-you-go.
— Circular Moon & Star Medallion (Make 7 — alternate moon and star motifs) :
Round 1 :
6 sc in magic ring (6)
Round 3 :
(1 sc, inc) x 6 (18)
Round 4 :
(2 sc, inc) x 6 (24)
Round 5 :
(3 sc, inc) x 6 (30)
Round 6 :
(4 sc, inc) x 6 (36)
Info :
At this stage the medallion is a flat disc; change to cream if you want a two-tone inner disk. Use a stitch marker to mark the beginning of each round when working continuously.
Round 7 :
(5 sc, inc) x 6 (42)
Round 8 :
(6 sc, inc) x 6 (48)
Round 9 :
1 sc in each st (48)
Round 10 :
1 sc in each st (48)
Info :
Rounds 9-12 establish the medallion body. If making a moon-phase medallion, switch to cream at the start of round 11 and carry the navy to create the crescent later with surface sl st or embroidered overlay.
Round 11 :
1 sc in each st (48)
Round 12 :
(3 sc, dec) x 12 (36)
Round 13 :
(2 sc, dec) x 12 (24)
Info :
Using a slightly smaller hook for rounds 12-14 will add subtle cupping allowing the medallion to sit slightly raised in the mesh. Begin planning where the compass/star center will sit; mark the top stitch for orienting embroidery later.
Round 14 :
(1 sc, dec) x 6 (18)
Info :
Fasten off leaving 10-12" tail for weaving and joinder. For medallions that will display detailed stars, leave long tail in cream for embroidered center. Block flat, pinning to a 4.5 - 5 inch diameter for consistency.
Alternate Star Compass Medallion (Make 4) — worked over same rounds with decorative star shaping :
Follow Rounds 1-8 as above in navy. Then:
Round 9 :
Switch to cream. (1 sc in next 6 sts, ch 3, skip 2) around to form 8 small arches; join with sl st (48)
Round 10 :
*In each ch-3 arch: (sc, hdc, dc, tr, dc, hdc, sc) to create a pointed petal* around (48 petals worth, counts distributed evenly)
Round 11 :
Working into petals: ch 1, sc in base of petal, ch 5, sl st in petal top; repeat to create loops between points (48 loops)
Info :
This alternate medallion creates a star-compass look — after blocking, work an embroidered 8-point star in gold using long satin stitches across the points (see Embroidery section).
Round 12 :
1 sc in each st around to stabilize (48)
Round 13 :
(2 sc, inc) x 12 (60)
Round 14 :
1 sc in each st (60)
Round 15 :
(4 sc, inc) x 12 (72)
Round 16 :
1 sc in each st (72)
Round 17 :
(5 sc, inc) x 12 (84)
Round 18 :
1 sc in each st (84)
Info :
Rounds 13-18 expand the circumference so that after join to the mesh the medallion diameter reaches approximately 4.5-5 inches. Adjust by adding/subtracting increases in multiples of 12 to match desired diameter.
Round 19 :
*(2 sc, ch 2, sk 1, 2 sc) repeat around* to create small scalloped rhythm for attaching to mesh (84 elements)
Round 20 :
Sl st into ch-2 spaces and make 3 dc clusters into each ch-2 to create textured points (84 points)
Round 21 :
1 sc in each st (84)
Round 22 :
(8 sc, dec) x 8 (72)
Round 23 :
1 sc in each st (72)
Round 24 :
(5 sc, dec) x 12 (60)
Round 25 :
1 sc in each st (60)
Info :
Fasten off leaving tail for join-as-you-go. Block medallions carefully so outer points are even. Sequence of these rounds can be adjusted; ensure counts remain multiples of plating points for symmetric joins.
— Mesh Connecting Panels (Make 2 strips that run lengthwise between medallions) :
Round 1 :
With navy: ch 70 (adjust to match medallion spacing), join to form a loop with sl st without twisting (70 ch loop)
Round 2 :
Work 1 sc in each ch around (70)
Round 3 :
*ch 4, sk 2, sc in next st* repeat around to make 23 spaces (70)
Round 4 :
In each ch-4 sp: (sc, ch 3, sc) to form loop arches (70 small arches)
Info :
This narrow mesh panel acts as the negative space between medallions. Keep tension slightly looser than medallion edges so the runner lays flat when joined.
Round 5 :
*Into each ch-3 arch: sc, hdc, dc, tr, dc, hdc, sc* (70 lace loops)
Round 6 :
1 sc in each st around to stabilize (70)
Round 7 :
(2 sc, inc) x 23 plus remaining sc distributed evenly (approx 92)
Round 8-12 :
Work 5 rounds of 1 sc in each st for body height so mesh panels have the same depth as medallions (92)
Round 13 :
Switch to cream for a decorative stripe: 1 sc in each st BLO (92)
Round 14 :
Return to navy: 1 sc in each st (92)
Info :
Make two identical strips. The length and number of ch loops can be modified to change runner width and medallion spacing. Block strips gently to match medallion edges.
— Join-As-You-Go Medallions to Mesh (Join positions and placement) :
Info :
Lay out medallions spaced evenly along a central row: medallion, mesh strip, medallion alternating. Use pins to keep orientation consistent. Join as follows: align one medallion edge to mesh ch-3 arches and use sl st or mattress stitch through back loops to invisibly join. Work slowly and count outer points to ensure symmetric joins.
Round 1 :
Attach medallion to mesh: with hook through both medallion ch-3 arch and mesh ch-3 arch, sl st, ch 1, sc into next medallion st, sl st into mesh, repeat around that circumference segment (join 1/2 of medallion first)
Round 2 :
Continue joining the remaining half of the medallion in same manner so medallion sits flush (worked on its final round). Fasten off and weave tails securely.
Info :
For a neater finish, use mattress stitch with yarn tail instead of sl st joins; this produces less bulk. Join medallions alternately to both mesh strips (left and right) if runner design calls for side panels.
— Small Star Appliques (Make 14 - 2 small stars between each medallion) :
Round 1 :
mr, ch 1, 6 sc in mr (6)
Round 3 :
(1 sc, inc) x 6 (18)
Round 4 :
*ch 4, sl st into alternate sts to form 6 points* (6 points)
Round 5 :
Into each ch-4 point: (sl st, ch 3, sl st) to make puffed points. Finish and fasten off leaving tail to sew star into mesh gaps
Info :
Stitch these small stars into open mesh spaces between medallions. Use metallic gold embroidery thread to couch a tiny French knot center for sparkle.
— Large Decorative Border & Scalloped Edge (Worked after all medallions and mesh strips are joined) :
Round 1 :
With cream, join at one narrow end with sl st into outermost mesh st. ch 3 (counts as first dc), dc in same st and around perimeter working 2 dc in each outer medallion point and 1 dc in mesh sts; work evenly to create base row of dc (estimate 700-840 dc depending on runner length)
Info :
Ensure the border base is worked evenly; add or skip dc in less exact places to avoid puckering. Place extra dc into mesh arches where needed to ease fullness into scalloped rows.
Round 2 :
Ch 1, sc in each dc around to flatten (base dc count)
Round 3 :
*(ch 5, sk 2, sc) across each section* to create long loops for scallops (loop count will reflect outer points, approx 140 loops)
Round 4 :
Into each ch-5 loop work: sc, hdc, dc, tr, dc, hdc, sc to build pointed scallop (140 scallops)
Round 5 :
1 sc in each st around to stabilize scallops
Round 6 :
Switch to navy and work 1 sc in each st BLO to create an inner ridge separating border and center (base count)
Round 7 :
With cream: *in every 3rd scallop make a picot cluster: (3 tr into scallop top, ch 3, sl st into ch 3 to make a picot), sk next 2 scallops* repeat around (approx 46 picot clusters)
Round 8 :
1 sc in each st (base count)
Round 9 :
Make outer ornamental layered points: *into each remaining scallop: (ch 3, 5 dc cluster in top, ch 3, sl st) creating a daisy-like point; secure between scallops with sl st loops* repeat around
Round 10 :
Finish with a round of reverse single crochet (crab stitch) in navy to create a neat beaded edge. Fasten off and weave in ends.
Info :
The border rounds above are presented as a sequence you can lengthen or reduce based on runner width. Counts are approximate; adjust cluster frequencies to maintain symmetry along the runner edges. Block heavily after finishing border to open lace and settle scallops.
— Decorative Raised Star Embroidery (Gold accents) :
Round 1 :
Use metallic gold thread and a fine blunt needle. Mark star positions with pins at medallion centers and between medallions where photos show small stars (approx 18-24 positions).
Round 2 :
For each 8-point star: Bring thread up at center, make long satin stitch out to point (about 3/4 of medallion radius), repeat for 4 even points, then fill between with shorter satin stitches to create 8 points total. Secure on wrong side with a few tiny backstitches.
Round 3 :
For small 5-point stars: Use bullion knots or tightly wrapped satin stitches to create dimensional stars; add a tiny gold French knot at each star center for sparkle.
Info :
Do not pull metallic thread too tight or you'll flatten lace. Work all embroidery after a final blocking so stitches sit evenly on the flat surface. Secure thread ends by weaving them back through several stitches on the wrong side and add a dab of clear fabric glue if needed.
— Final Finishing Rounds & Blocking :
Round 1 :
Weave in all tails with tapestry needle, trimming close but not so close that ends pull out. Use blocking wires across straight edges and pins for scallop points.
Round 2 :
Spritz with water or a steam iron from a safe distance and allow to dry fully. Re-tension any scallop points after drying if needed by pressing gently with hands while pinned.
Info :
Final measurements should be taken after blocking. If the runner seems slightly too narrow, slightly stretch between pins then allow to dry; if too wide, unpin and ease tension by removing a few outer dc in the border and rework the scallops accordingly.
— Notes on Assembly, Colorwork & Substitutions :
Info :
You may substitute yarn weight: using fingering weight with a 3.0mm hook will produce a more delicate runner but will increase time and required yardage. For a heavier runner, use a sport-to-worsted blend with a 4.0mm hook. Always check blocked measurements and adjust number of medallions and mesh chain length as required.
Info :
If you prefer the gold to be more subtle, use a muted metallic or a soft champagne cotton thread; for bolder shimmer, use a metallic yarn plied with a fine cream cotton when working the border points.
Completing this runner is a truly satisfying slow-craft adventure — the navy centers and creamy lace points come together like moonlit embroidery on your table. The small gold accents catch light and elevate the entire piece with a subtle glow. Each medallion is a little victory, and the finishing block makes the lace sing. 🧶🌙✨