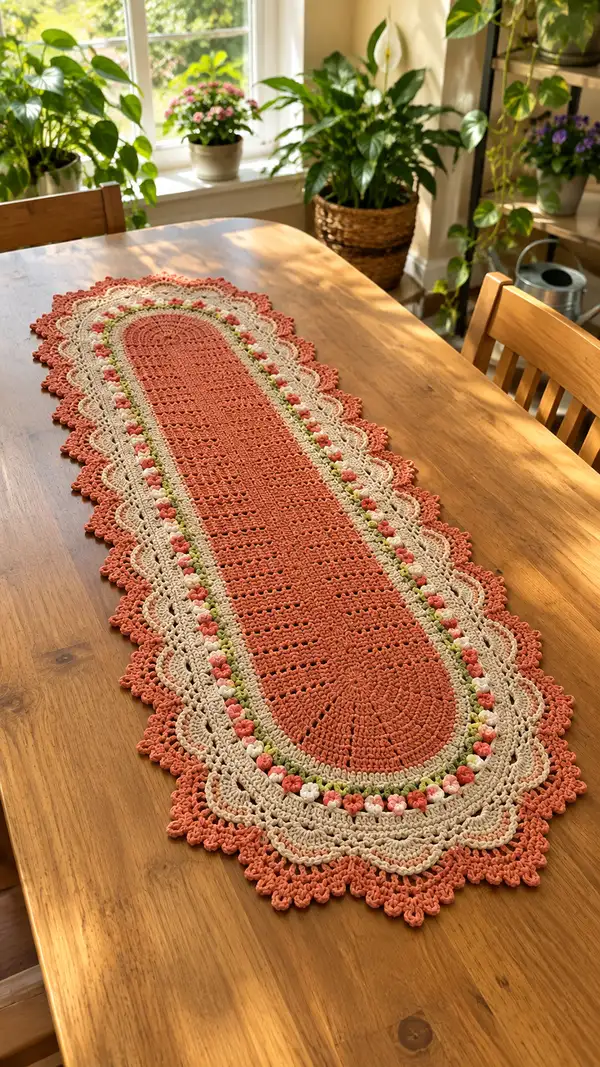
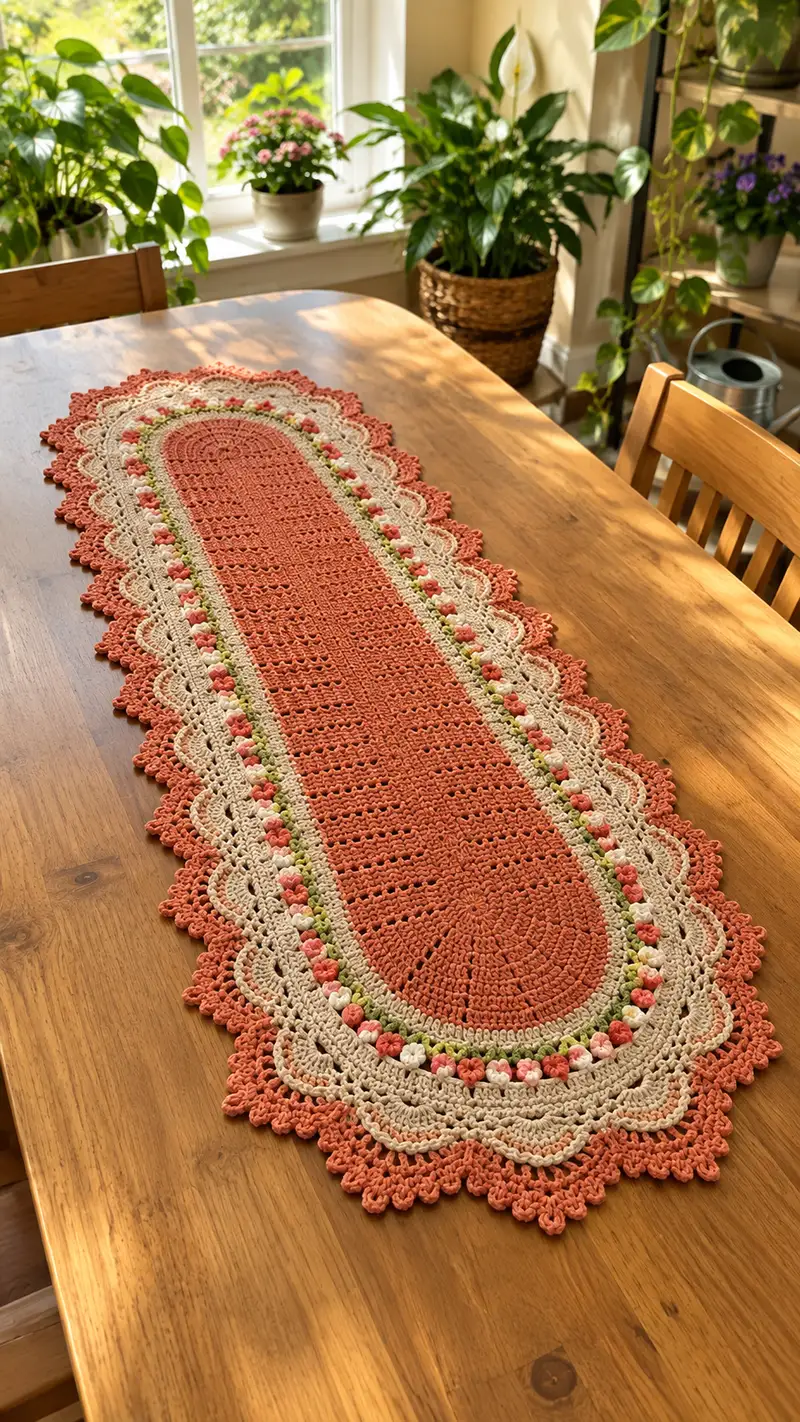
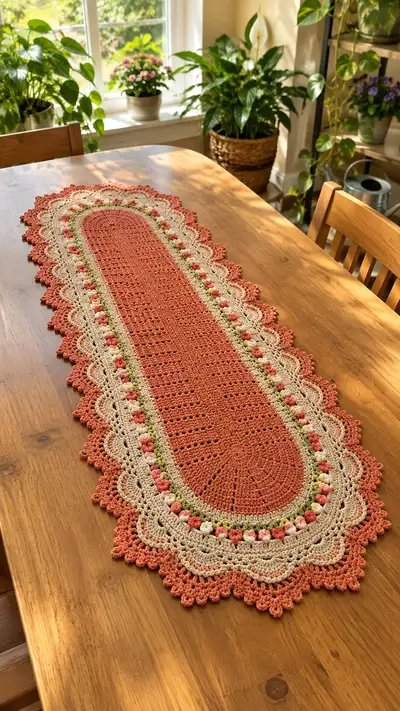
A long, elegant table runner featuring a solid terracotta center, delicate cream lace scallops, and a charming row of tiny pink and white floral bobbles with a soft olive accent. The oval-headed runner sits beautifully down a dining table, combining textured stitches and airy lace for a classic handmade touch. This pattern uses simple stitch repeats, puff/bobble flower clusters, and a layered shell border for a refined vintage look.
Progress Tracker
0% Complete
— Center Oval Base :
Round 1 :
Ch 30, sc in 2nd ch from hook and in each ch across (29). Work 3 sc in last ch, rotate to work along opposite side of chain, sc in each ch back (29), work 3 sc in first ch (3). Join with sl st to first sc (64).
Round 2 :
1 sc in next 8 sts, (inc) in next st, 1 sc in next 8 sts, (inc) in next st, 1 sc in next 8 sts, (inc) in next st, 1 sc in next 8 sts, (inc) in next st — total (8 sc+inc) x4 = 72 sc (72).
Info :
We are shaping a rounded width with four increase zones positioned at the center of each chain end. Place a removable stitch marker at the end of each increase cluster to keep track of these points; this will help line up later floral and shell repeats.
Round 3 :
(2 sc in next st, 1 sc in next 17) x4 — increases are worked by placing 2 sc in the same stitch at the corner zones; total becomes 80 (80).
Round 4 :
(3 sc in next st, 1 sc in next 18) x4 — add an extra sc at each corner to gently widen the ends (88).
Round 5 :
(4 sc in next st, 1 sc in next 19) x4 — continue subtle widening to establish the oval head width (96).
Info :
At the end of Round 5 you should have 96 stitches. This will be the constant stitch count for the main straight-length panel. Place a marker at the stitch that marks the center of one long side; this defines your reference for turning rows later to keep the length straight.
Round 6 :
1 sc in each st around (96)
Round 7 :
1 sc in each st around (96)
Round 8 :
1 sc in each st around (96)
Round 9-12 :
1 sc in each st around (96). Work four rounds even to build a sturdy base before introducing textural patterning for the center panel.
Info :
If you prefer a slightly narrower runner, stop at Round 5 or 6; for wider, add an additional increase round before switching to even rounds. Count must remain divisible by 12 later for shell repeats; 96 is chosen to divide evenly for lace shells.
— Main Center Panel Texture :
Round 13 :
Change to terracotta yarn if not already using it. Ch 1, 1 sc in each st around (96)
Round 14 :
Ch 1, *sc in next 2, dc in next 2 (forming a short vertical texture), rep from * around — maintain 96 sts; place marker at start (96).
Info :
This alternating sc/dc combination creates a subtle ribbed/striped texture down the center. Keep tension consistent to avoid rippling. Use a stitch marker to mark the beginning of each round.
Round 15 :
Ch 1, 1 sc in each st around (96)
Round 16 :
Ch 1, *hdc in next 3, sc in next 1, rep from * around (96)
Round 17 :
Ch 1, 1 sc in each st around (96)
Round 18 :
Ch 1, *sc in next 4, dc3tog cluster over next 3 sts (worked as 3 dc crowded cluster) — for texture, rep from * around. Work cluster into the next 3 sts to create subtle knit-like ribs; overall working remains 96 stitches as clusters replace same number of stitches.
Round 19-40 :
Ch 1, 1 sc in each st around (96) — Work 22 even rounds to lengthen the runner. Place a removable marker at the mid-side stitch every 8-12 rounds to ensure you have two long straight sides and symmetric ends.
Info :
Length: Add or remove even rounds here to adjust finished runner length. Each even round adds approximately 3-4 mm depending on yarn/hook. Aim for the runner to reach your desired length before starting the flower band — commonly 28-40 rounds of even stitching from the center base.
— Narrow Accent Row (Olive) & Transition :
Round 41 :
Change to olive green. Ch 1, 1 sc in each st around (96).
Round 42 :
Ch 1, 1 sc in each st around (96)
Info :
The olive row is a narrow accent that visually separates the dense center from the decorative bobble flower band. Carry unused terracotta yarn inside the work if you plan to use it again, or fasten off and weave ends later.
Round 43 :
Change to cream for working the base for flowers. Ch 1, 1 sc in each st around (96)
Round 44 :
Ch 2 (counts as hdc), *skip 1 st, 1 hdc in next 2 sts, ch 1, skip 1 st, 1 hdc in next 2 sts; rep from * — this creates a subtle cradle row for the little flower bobbles to sit on while keeping the count 96 (work hdc clusters into the same stitch placeholders).
Info :
If you want a narrower flower band, work only Round 43 and proceed to flower placement. This version places flowers very close to the lace edge.
— Flower Bobble Band (small puff flowers) :
Round 45 :
Change to flower color A (coral). For a continuous flower band we will work small puff/bobble clusters spaced evenly. *Ch 1, make bobble: (yarn over, insert hook, pull up loop) 5 times into same st (you should have 11 loops), yarn over and pull through all loops, ch 1 to secure, sl st into next st to anchor; ch 2, skip 3 sts, sl st in next st; rep from * around to place 24 bobbles evenly. Adjust spacing so you end with 24 bobbles; join before next round. (24 bobbles)
Info :
Bobble/puff technique: For an airy little flower, work 5 partial loops into the same stitch, then yarn over and pull through all loops, ch1 to secure the puff. For more pronounced flowers use 6 loops but note this uses more yarn and sits larger.
Round 46 :
Change to flower color B (blush pink). Ch 1, sl st to the base of each coral bobble and work a small sc around the base to tidy and slightly flatten into a flower; between flowers, 1 sc in each filler stitch. Keep total stitch count approximately 96 but focus on even distribution.
Round 47 :
Alternate flower highlight: change to white and place tiny single-loop puff into every other bobble base to create a two-tone flower mix. Work sl st into base, ch1, make a 3-loop puff, ch1 and sl st to secure. Keep spacing even across 24 floral positions.
Info :
Stitch counts will remain visually consistent — aim for 24 flower clusters spaced evenly between the two long sides. If you need to shift placement, remove a filler sc between clusters in earlier rounds to even out spacing.
Round 48 :
Switch back to cream for the foundation of the lace scallops. Ch 1, 1 sc in each st around (96)
— Lace Scallop Base (Cream) :
Round 49 :
Ch 3 (counts as dc), *skip 3 sts, 5 dc in next st (shell), skip 3 sts, dc in next st, rep from * around. To adjust shell spacing evenly, shells are worked over 8-st repeats; with 96 total stitches you'll have 12 repeats (12 shells x 8 = 96). Join with sl st to top of ch3 (96).
Info :
The initial shell row anchors the lace. Place a marker at the first shell to verify you have 12 shells around. If your stitch count differs, calculate shells such that total shells x shell repeat length = total stitch count.
Round 50 :
Ch 1, 1 sc in each st and 1 sc into the top of each shell (work 7-8 sc across shell top to flatten slightly) — keep 96 total and tidy shell tops for the next decorative row.
Round 51 :
Ch 2 (counts as hdc), *skip 2 sts, (dc, ch1, dc) in next st (small picot arch), skip 2 sts, hdc in next 4 sts; rep from * around (96). This builds an open lace line ready for layered scallops.
Round 52 :
Ch 1, 1 sc in each st around to tidy the line (96)
Info :
At the end of Round 52 you have a stable foundation of shells and small arches. Confirm that your shells are evenly spaced and that the bobble band sits nicely inside this line. Adjust tension if shells look uneven.
— Scalloped Shell Border (Cream) :
Round 53 :
Ch 1, *work (sc in next 2, 1 hdc in next, 3 dc in next, 1 hdc in next, sc in next 2) to form an expanded scallop across the shell top area; rep from * around to form 12 full scallops (96).
Round 54 :
Ch 1, 1 sc in each st across the scallop troughs to stabilize (96)
Round 55 :
For each scallop do: in the center dc of the 3-dc group: (ch2, 5 dc cluster in same stitch, ch2) to form a raised shell petal, sc in each between scallop tops. Repeat for all scallops (12 raised petal shells). Maintain the overall 96-st rhythm by working clusters into existing shell center stitches.
Info :
Raised 5-dc clusters add height to scallops and create a pleasing shadow line. Keep clusters worked into the center of each scallop so the edge remains balanced.
Round 56 :
Ch 1, 1 sc in each st around (96)
Round 57 :
Ch 3 (counts as dc), *skip 1 st, sc in next st, skip 1 st, 7 dc in next st (picot-laced rounded shell), skip 1 st, sc in next st; rep from * around to create pronounced scallop points. There should be 12 large scallops around (96).
Round 58 :
Ch 1, 1 sc in each st around to tidy scallop bases (96)
Info :
Check scallop spacing: if scallops are slightly off you can use the earlier stitch markers at the corners to align scallop centers with the oval ends. Pin to blocking mat to check final arrangement before working final picot edge.
— Final Decorative Edge (Terracotta Accent) :
Round 59 :
Change to terracotta (same as center) for a contrasting outer ruffle. Ch 1, 1 sc in each st around (96)
Round 60 :
Ch 1, *in scallop point: (sc, picot, 5 dc, picot, sc) into the top center dc of each scallop; rep from * around — this creates a picot-top ruffle that sits proud of the cream scallop (96 major points).
Round 61 :
Ch 1, 1 sc in each st around (96) to secure ruffle base
Round 62 :
Ch 2, *work (3 tr, ch1, 3 tr) cluster into the center of each scallop top, skip 4 sts between clusters; rep from * around to form a lacy outer rim; join and sl st to top of ch2 (96).
Info :
This outer terracotta ruffle echoes the center color and frames the cream scallop. The ch1 spaces create delicate airiness; adjust the number of treble clusters to make the edge more or less pronounced.
Round 63 :
Ch 1, 1 sc in each st around to stabilize the outer ruffle (96)
Round 64 :
For a deeper final picot trim: *sc in next 2 sts, (picot, sc in next st), rep from * around to create small picot scalloped edging. Join and fasten off; weave in ends (96).
Info :
Fasten off and weave ends carefully. Wet-block or steam-block the entire runner pinned to your desired dimensions, easing scallops into shape. Blocking will open lace and level the scallops for a professional finish.
— Optional Narrowing and Alternate Floral Placement :
Round 65 :
If you prefer smaller space between the center and shell band, unpick Rounds 41-44 and instead add only one olive round then proceed directly to the flower band. For the pictured spacing keep Rounds 41-48 intact. (Optional adjustment)
Info :
You may re-position floral bobbles closer to the scallops or space them farther from the center by adding or removing one or two even sc rounds between the olive row and cream base. Each added round increases distance by about 3-4 mm.
— Stitch & Texture Variations (Tips & Techniques) :
Info :
Use BLO or FLO on straight even rounds to create a stronger ridge line where the floral band sits. Example: work one round in BLO before starting the flower band to create a neat ledge for the bobbles to rest on. This is helpful if using thicker cotton yarns.
Info :
For puff/bobble flowers: keep your puff loops tall but not tight; gather gently, secure with a ch1 then sl st into the anchor stitch. Trim long tails and weave through the base to secure flowers. Changing the number of loops (3-6) varies flower size.
Info :
Adjust runner length by adding or reducing the number of even center rounds (Round 19-40 block). Each round is about 3-4 mm — calculate additional rounds needed for the target finished length.
Info :
Always keep a stitch count check at the end of each round; use a row counter to track long sections when working many even rounds to avoid accidental increases or decreases.
— Finishing :
Info :
Weave all ends on the wrong side with a tapestry needle, then wet-block to required dimensions: pin scallops gently and allow dry. Steam-blocking works too but keep iron a safe distance to avoid yarn scorching.
Info :
After blocking, check scallop symmetry. If one side is slightly off, you can unpick the outermost ruffle row and rework with finer tension or a slightly smaller hook to tighten or loosen as needed.
This vintage floral table runner brings timeless charm and handcrafted beauty to your dining table. The combination of a sturdy textured center, a delicate rose-and-petal floral row, and scalloped lace edges creates a look you'll be proud to display. Block it carefully to set the lace and admire how the layers of stitchwork come together. 🧶🌸 Whether for everyday elegance or special occasions, this piece is a lovely way to showcase your crochet skills. Happy stitching and enjoy the warm glow it brings to your home! ✨