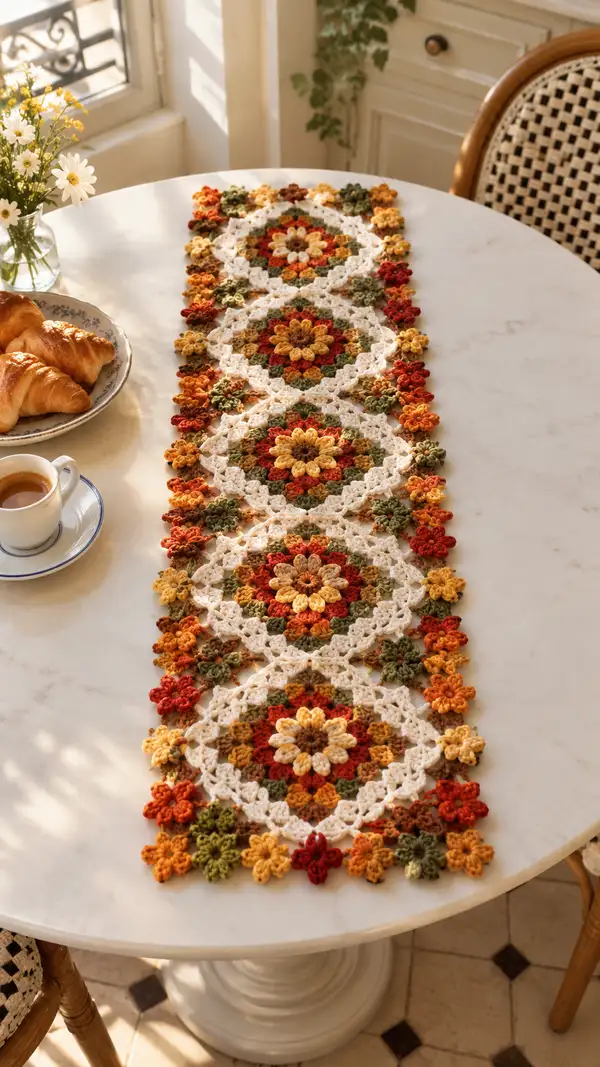
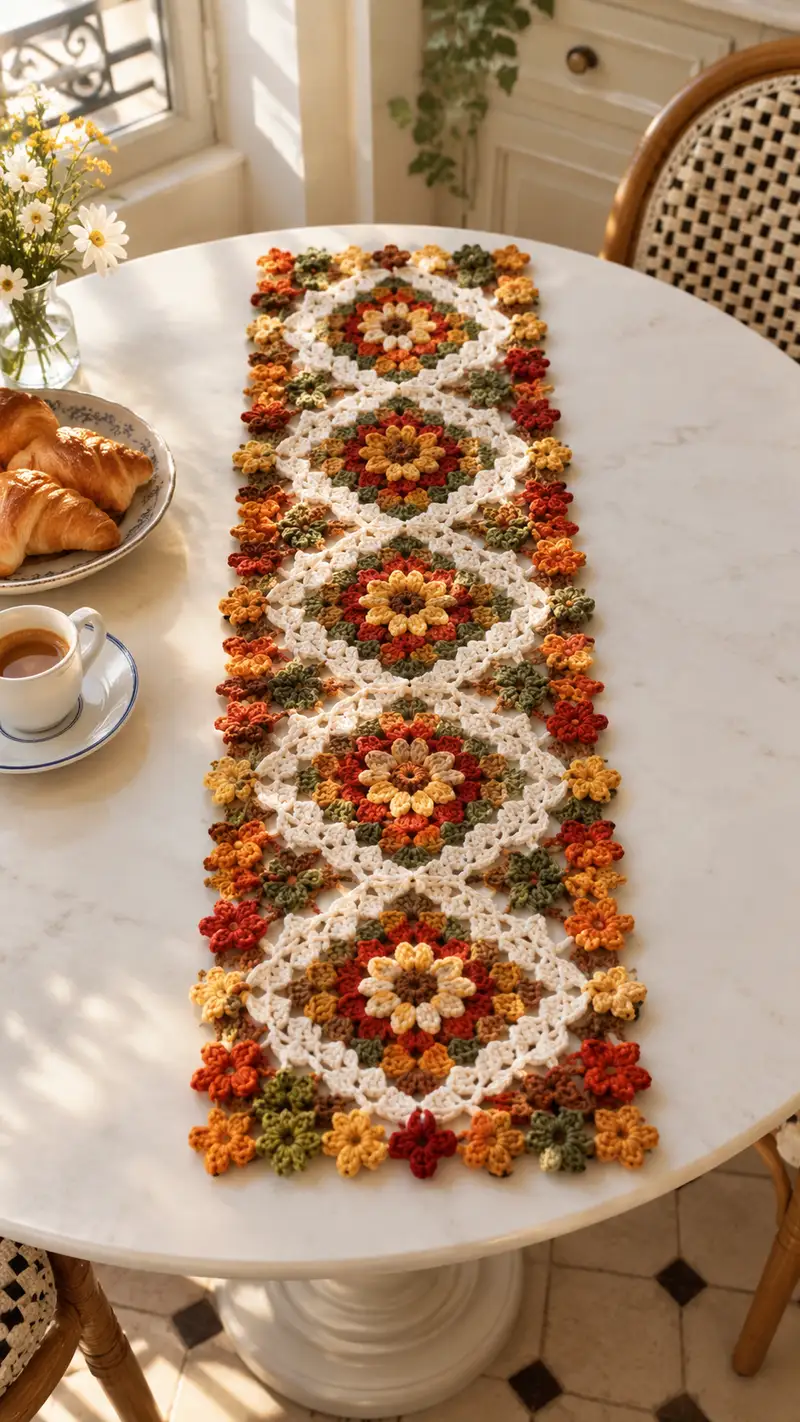
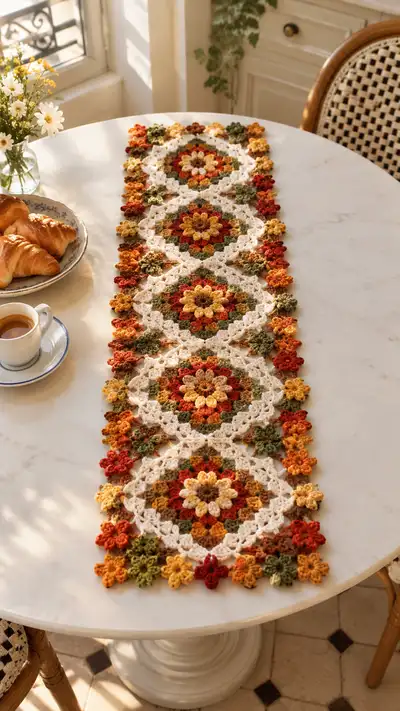
A warm, floral-inspired granny table runner worked in cream with autumn mustard, rust and olive accents. This runner features five large floral medallions joined by lacy cream rounds and finished with a delicate flowered border. Perfect for tabletops, entry consoles or seasonal decor, the runner combines texture, puff petals and join-as-you-go assembly for a beautiful handmade accent.
Progress Tracker
0% Complete
— Special Stitches & Notes :
Info :
Read all notes before starting. This runner is constructed from large floral medallions (worked flat in rounds), small 5-petal flowers used as edging, a join-as-you-go (JAYG) decorative round in cream that both squares the medallion and joins them into a runner, and a final scalloped floral border. Puff stitch used throughout is made as: yarn over, insert hook, pull up a loop, yarn over, insert into same stitch, pull up a loop (repeat 3 or 4 times total to create 4 or 5 loops on hook), yarn over and pull through all loops, chain 1 to close the puff (counts as puff). Adjust puff size consistently through the piece.
— Gauge & Finished Size :
Info :
Gauge: 16 sts and 10 rows in pattern = 10 cm with 4.0mm hook and worsted weight yarn. Finished runner with five medallions ~ 12 x 60 inches (30 x 152 cm). Adjust number of medallions to change length. Blocking will open lacy stitches and increase width slightly.
— Large Floral Medallion (make 5) :
Round 1 :
Make a magic ring. Ch1, 6 sc in magic ring (6). Pull ring closed and join with sl st to first sc if you prefer a closed center (optional).
Round 2 :
6 inc (12) — *sc2 in each st around* (12)
Round 3 :
(1 sc, inc) x6 (18)
Round 4 :
(2 sc, inc) x6 (24)
Round 5 :
(3 sc, inc) x6 (30)
Info :
Rounds 1-5 form a firm, slightly domed center that will act as the base for the first petal round. Keep tension consistent — these rounds are worked in cream or center color if you prefer contrast.
Round 6 :
Change to Warm Brown (center accent). 1 sc in each st (30)
Round 7 :
Change to Mustard. To form inner petals: *(ch2, puff in next st, ch1, sl st in same st) — this creates a small puff petal anchored in single stitches*. Repeat across until you have 15 puff petals evenly spaced — for even spacing do (2 sc, puff) pattern as needed (15 puff petals total). Note: puff uses 4 loops (see special stitches).
Info :
When making puff petals, work the puff into individual stitches evenly. Because the round has 30 sts you can place one puff every two stitches to produce 15 petals: (puff in next st, skip 1 st) x 15. Place a marker at the start of the next round.
Round 8 :
Switch to Rust. In BLO of each non-puff stitch work 1 sc to stabilize the round, and in each puff stitch work (ch2, 3 dc cluster into puff base, ch2, sl st into base) to build taller petals. You will still have 30 base counts but visually 15 taller petals (30 foundational counts).
Round 9 :
Change to Olive. Ch3 (counts as first dc), *skip 2 sts, [3 dc in next st], ch2, skip 2 sts, sc in next st* — repeat to create eight larger clusters and chain loops around the petal area. You should end with a total of 48 conceptual stitches when counting dc and sc positions combined; the open chain spaces act as placement for later rounds. (This round creates 8 large lobes around the petaled center.)
Info :
If small gaps appear, do not worry — later lacy rounds will fill and square the motif. Keep stitch counts conceptually correct: the foundation ring remains approx 48 placements after this shaping step.
Round 10 :
Change to Mustard. Work 1 sc in each of the next 48 placements (48) — if you are counting by foundation sts, maintain even tension across the lacy openings and treat each chain loop as a single placement to maintain shape.
Round 11 :
Change to Rust. Start forming the floral star by working *[ch3, picot (ch3 sl st into first ch)], 2 dc cluster into the next sc, ch2* repeat across to create eight decorative points; total placement count preserved at 48 but eight distinct points appear.
Round 12 :
Change to Cream. 1 sc in each st around (48). This round begins to unify the medallion and prepare for the square-lace join round. Place a stitch marker at the start of the next round. (48)
Round 13 :
Change to Cream. *ch4, skip 3 sc, sc in next sc* repeat 12 times to create 12 chain-4 loop spaces evenly placed around (these will become the points for squaring the motif). After completing the round slip stitch to first sc. This forms the lacy scaffold for the join round. Count: 48 foundation sts remain, 12 chain spaces formed.
Info :
If you are making five medallions lengthwise, mark the opposite sides that will join (top and bottom of each medallion when arranged in a straight line). For the runner in the sample, medallions are joined at two opposite chain-4 spaces per side — note which spaces will meet neighboring motifs.
Round 14 :
Change to Cream. Work into each chain-4 space: *[sc, ch3, sc] in chain-4 sp to form small corner loop* — this rounds the medallion into a soft octagon. Repeat 12 times (count remains the same).
Round 15 :
Change to Cream. 1 sc in each st and in each corner loop (48). Fasten off and weave in the tail if you want to finish the medallion now, or continue to Round 16 if you will use the join-as-you-go method described below to connect medallions directly while working Round 16.
Round 16 :
Info : Change to Cream (join-as-you-go round). This round will both square the medallion and join it to previously completed medallions. If this is the first medallion in the row, work the round as written and do not join; if this is a subsequent medallion, follow the join steps in the directions below. Ch1, start in any sc: *sc in next 3 sts, sc in chain-3 corner, ch3, sc in corner, 1 sc in each of the next 6 sc (or counts to next corner), then when you reach a side that will join to a neighboring medallion, instead of finishing the loop, align your current medallion next to the previously completed one and join by working sl st into the corresponding chain space of the neighbor (see detailed join steps below)*. Continue around until round is complete and join with sl st to first sc.
Info :
Join-as-you-go detailed method: When joining to a completed medallion, align the motifs with right sides up, matching corner loops. When you reach the join point on your working medallion, insert hook into the designated chain space of the neighbor (usually the chain-4 loop or chain-3 corner), yo and pull through, then complete the sc by inserting into your motif's space, yo and pull through both loops to create a neat sc join. Work 1-3 sc joins evenly spaced depending on the width of the join space to ensure a flat seam. Use pictures as reference to ensure join sits flat — pin motifs before joining.
Round 17 :
Info : After joining medallions end-to-end, fasten off cream and weave in ends. If you prefer, continue with a unifying cream lace round to tidy joins: Join cream yarn in any sc and work 1 round of *ch3, skip 1, sc in next* around to add more lacy openness. Fasten off and block medallions square before attaching small flowers to border.
— Small 5-Petal Flower (make 40–48 for edges) :
Round 1 :
With Mustard or chosen petal color, make mr. Ch1, 6 sc in mr (6). Pull ring closed. (6)
Round 2 :
Ch1, 1 sc in same st, *ch2, skip next st, sc in next* around to create 3 chain loops: total 3 chain spaces. End with sl st to first sc. (6 base stitches)
Round 3 :
Change to Rust for petal contrast. Into each chain-2 space work: *(ch2, puff into space, ch2, sl st into space)* to make a petal. Repeat 3 times to make 3 larger petals if you prefer a 3-petal small flower — but for a 5-petal look we will refine below.
Round 3 (alternate) :
To make 5 petals: after Round 2 change to Mustard. Work *[ch1, 3 dc in chain-2 space, ch1, sl st into next base sc]* repeat around 5 times. You now have five raised petals. (Count: 6 base stitches remain but 5 petal clusters form the visual flower.)
Round 4 :
Change to Olive for tiny leaf accents: In each space between petals work (sc, ch2, sc) to create tiny loops for sewing into border later. Fasten off leaving a long tail for sewing. Make the number of small flowers needed to densely fill the perimeter: approximately 40–48 for five medallions depending on spacing.
Info :
Small flowers are deliberately slightly varied in color and two different petal constructions are suggested: three-petal puff flowers or five-cluster petals. Mix and match colors (mustard, rust, olive, brown) to create the textured border seen in the photo. Make extras — you can always skip attaching some for a spaced look.
— Join-As-You-Go (Detailed method when joining medallions in a straight runner) :
Info :
Arrange your medallions in a straight line on a flat surface with cream rounds facing up. Identify the top and bottom side chain spaces designated for joining — in our medallion these are the chain-4 side spaces formed around Round 13. When working the Round 16 JAYG on medallion #2, #3, etc. the side that aligns to medallion #1 will be joined to the already completed medallion using sc or sl st joins as detailed below.
JAYG Step :
When you reach a join side on Round 16: insert hook into the corresponding chain space of the completed neighbor, yo and pull up loop, then insert into your working chain space and complete sc (yo pull through two loops). Repeat 2–3 sc joins evenly spaced across the join area to lock motifs together. Continue pattern round around the medallion until join points opposite are also joined to adjacent medallions. For the runner of five medallions join medallion 1–2, then join 2–3, 3–4, 4–5 in the same manner.
Info :
For flush join lines, block each medallion before joining and always match right sides together. If your yarn is thicker or thinner than the sample, adjust number of sc joins to avoid gaps.
— Optional Reinforcement Round After Joins :
Round 1 :
With Cream: Join in any seam area and work one unifying round: *sc in each st and in each join space across seams, placing 2 sc in each join sl st to reinforce* — this acts as a tidy reinforcement round across all seams. Fasten off and weave in ends. This round's stitch count varies with joins but should remain consistent around each medallion perimeter.
Info :
Reinforcement round gives stability to the runner so it lays flat. Use this if runner will see heavy use or be moved often. Weave ends toward the back loops of stitches for a neater front face.
— Decorative Outer Border (worked after all medallions are joined) :
Round 1 :
With Cream, start at one end of the runner. Ch1, sc evenly along the outer edge of the runner including along the medallion sides and join seams, placing 1 sc every 6–8 mm depending on your tension. Keep a total even stitch count across the entire perimeter — if you end up with 480 perimeter stitches across the runner do not be alarmed; this round is primarily to create a uniform edge (st count depends on tension).
Round 2 :
In Cream: *ch4, skip 2 sc, sc in next sc* repeat around to form chain loops for floral placement. Space loops evenly to accommodate the small edge flowers — aim for one chain-4 loop every 6–10 stitches, or a total of approx 80 loops around the perimeter for the full runner.
Round 3 :
Switch to Mustard and Rust in alternation: Into each chain-4 loop work a small flower base: *(sc, ch3, 3 dc cluster, ch3, sl st)* to build a mini petal cluster. Alternate flower colors across loops for a multi-tonal edge. Leave some loops empty for olive or brown flower placement later to create irregular vintage variation. Fasten off alternately color-wise to prepare for sewing additional 3-D clusters.
Round 4 :
With Cream: Work a delicate picot round to soften edges. *sc in next 3 sts, [picot: ch3 sl st into first ch], sc in next 3 sts, ch1* — repeat around. This will add lacy texture and nestle the small flowers into place. Fasten off.
Info :
Adjust the number of chains and cluster sizes to match the scale of your small flowers. The sample runner's border alternates dense flower clusters with single tiny blooms for a natural look.
— Attaching Small Flowers to Border :
Info :
Using tapestry needle and long tails left earlier, position small flowers over the chain loops or picot clusters and securely sew them in place. Use 6–8 tiny whip stitches through flower base and runner edge, knotting and weaving the tail into the back. Cluster several small flowers together at corners and points where medallions meet to replicate the dense look in the photo.
Attachment Tip :
Place one medium flower every 2–3 chain loops and fill remaining loops with tiny 3-stitch flowers (made quickly using ch2, 3 dc in ring method). Vary colors (mustard, rust, olive, brown) to create movement. Sew carefully and press gently during blocking to set shapes.
— Final Blocking & Finishing :
Info :
Block the entire runner by pinning it to a flat towel or blocking mat, stretching gently to open the lacy rounds and shape the scalloped border. Spray lightly with water and allow to dry completely, or use gentle steam from an iron held just above the fabric. Do not press directly on puffs; use a cloth barrier. After drying, trim any visible ends and secure with a dab of glue if necessary to prevent unraveling.
Round-by-round recap :
This pattern uses approx 17-20 rounds of construction for each large medallion (including decorative JAYG round), 3-4 rounds per small flower, and 3-6 rounds for the final border and reinforcement — in total across motifs, flowers and border you will work well over 90 individual rounds and shaping steps to complete the runner.
Info :
If you would like the runner longer, simply make more medallions — each additional medallion adds approximately 12 inches (30cm) to length before blocking. To shorten, reduce number of medallions. For a table centre size instead of runner, make medallions in a 3x3 grid and join them using the same join-as-you-go technique.
Completing this floral granny table runner is such a satisfying experience — watching five medallions come together with cheerful mustard and rust petals set against soft cream lace is pure joy! The textured petals and clustered flowers add handmade warmth to any table and make a beautiful seasonal centerpiece. I hope you enjoy stitching each bloom and feel proud displaying the finished runner. 🧶🌼