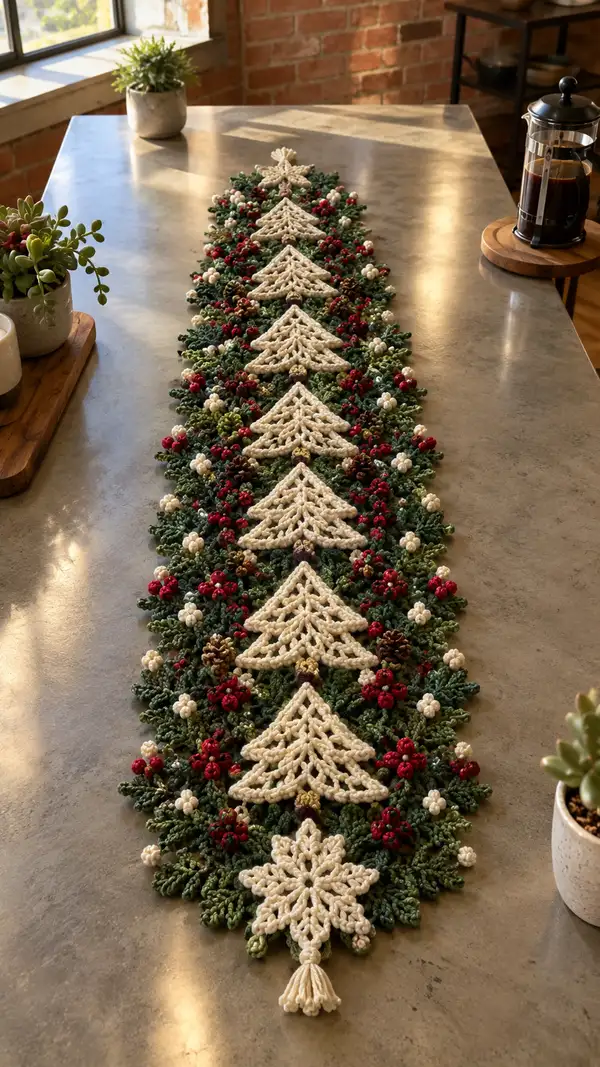
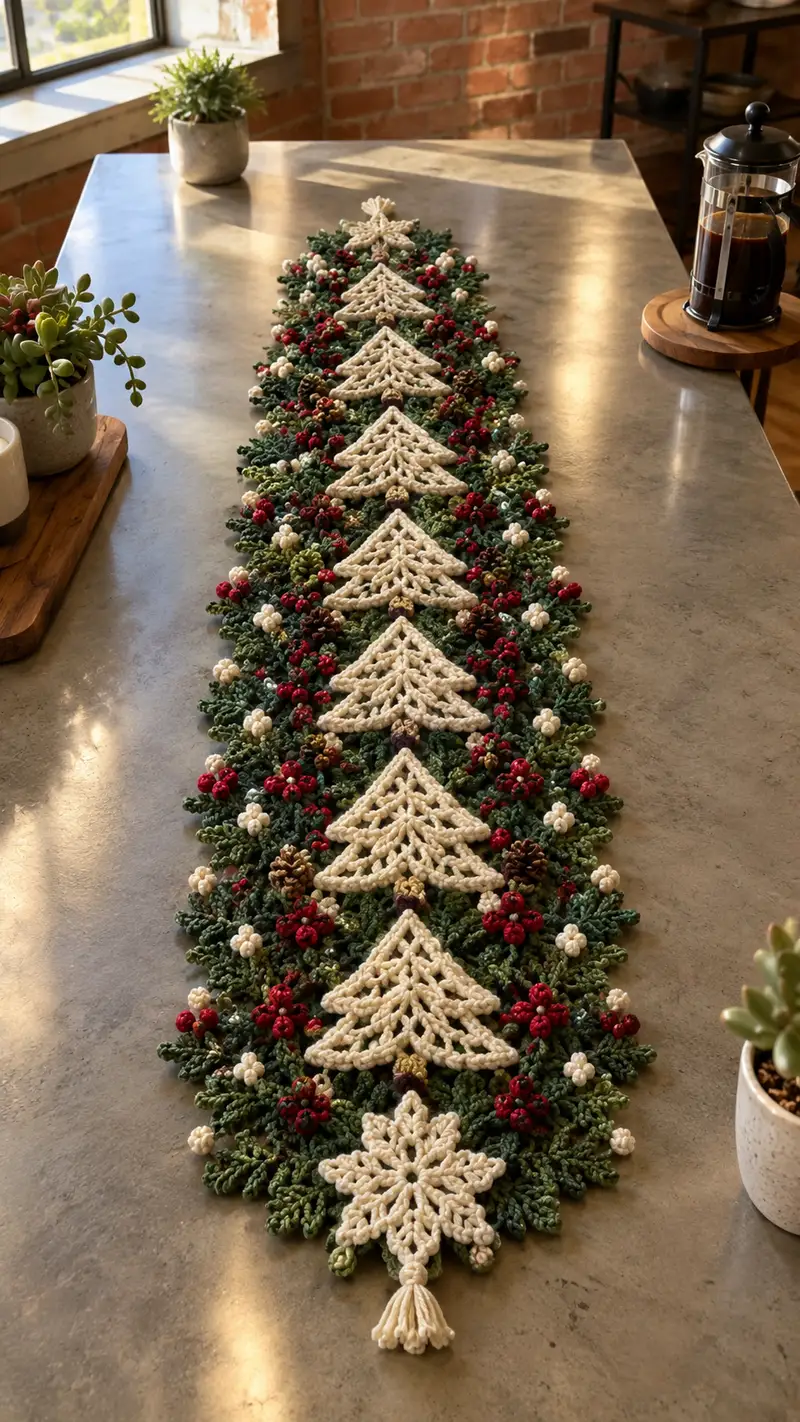
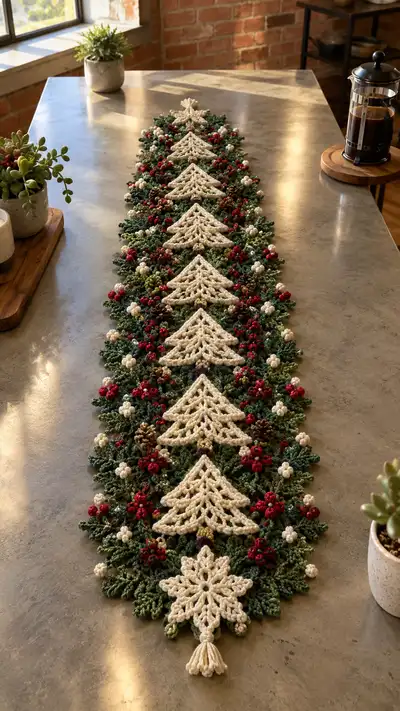
A festive, hand-stitched table runner featuring cream lacy trees, lush green foliage, and clusters of red and cream berries. The layered motifs create a three-dimensional garland effect perfect for holiday tables. This pattern combines textured pine leaves, puff-berry clusters, tiny pinecone accents and a star/snowflake tassel for an elegant seasonal centerpiece. Detailed steps and tips included to guide the assembly and finishing.
Progress Tracker
0% Complete
— Overview :
Info :
This pattern is modular: you will crochet a repeating set of motifs and join them into a runner. The main motifs are: a cream lacy tree triangle, green pine/leaf panels, red and cream puff-berry clusters, small pinecone accents, and a star/snowflake tassel end. Make a sample motif first to check your tension and adjust hook size so that motifs are firm but not stiff.
Info :
Gauge is not strict for this decorative runner; however keeping consistent tension will ensure even joins. The example runner pictured uses 8 tree repeats and measures approximately 40 in (101 cm) long by 8 in (20 cm) wide. Each tree motif finished triangular section is approximately 4.5 in (11.5 cm) tall and 5 in (12.5 cm) at the base.
— Star / Snowflake End Motif :
Round 1 :
6 sc in magic ring (6)
Round 3 :
(1 sc, inc) x 6 (18)
Round 4 :
(2 sc, inc) x 6 (24)
Round 5 :
Change to cream if not already. *Ch 7, sl st into next sc for 6 points total around to create loop petals. Work sl st back to center after each point to secure (24 loops total but points made by chain loops).
Info :
Alternate method: you can make elongated loops with 1 tr instead of chains for a more open star. Pin each point flat and steam block lightly to shape the star before attaching tassel.
Round 6 :
Work around center: *(sc, ch3, 3 dc in loop, ch3, sc) into each chain loop around to create lacy point edging. Repeat for 6 points. Fasten off and weave ends (approx 48 sts when counting sc base).
Round 7 :
Attach a small chain loop to top point and fringe/tassel join: make 6 small tassel loops, tie together and attach securely to the center top of star. Fasten off.
Info :
This decorative star is worked flat and added to each runner end. Block the star, then tack it to the endmost tree base when assembling for a finished look.
— Cream Tree Motif (Make many repeats) :
Round 1 :
Using cream yarn: ch 6, join with sl st to form ring, ch 2 (counts as hdc), work 7 hdc in ring, join (8 hdc) - this forms the trunk anchor (8)
Round 2 :
Ch 3 (counts as dc), dc in same st, ch 2, *2 dc in next st, ch 2; rep from * around, join (8 groups x 2 dc) (16 dc groups separated by ch-2 spaces)
Info :
We will build the tree as a layered triangle with five tiers. Each tier is worked into the chain-2 spaces from the previous round. Place a stitch marker at the center top stitch to help align the tree when joining to foliage later.
Round 4 :
Into each ch-2 space: (ch3, 3 dc, ch3, sl st) to form petal. Work this across all 8 spaces so the motif fans outward into an octagonal lacy base (8 petal fans).
Round 5 :
Shift to triangular shaping: identify bottom center of future triangle (pick every other fan to build a triangular tree shape). In the three chosen fan points for the first triangle tier, work: *(ch4, 4 dc cluster, ch4, sl st back into base sp) in each chosen fan; skip the others. This creates three lacy arms forming the first tier points.
Info :
At this stage the base has many open spaces; be careful to count which fans become triangle points. The tree triangle will be symmetrical: use fans 1, 4, 7 (spaced evenly) to form the lower tier base when creating the central column up the runner length. Mark the apex fan with a removable stitch marker for orientation.
Round 6 :
Work round for first narrow tier: Into each of the three tier fans: ch5, (tr, dtr, tr) all in same fan space, ch5, sl st to base. This increases vertical height and creates elongated lacy branches (3 main branch points).
Round 7 :
Prepare second tier: In the spaces between the three first-tier branches, work shell groups of (ch3, 5 dc, ch3) in the small chain loops to give the tree fullness in the next tier. Connect shells with sl st to the top of first-tier cluster to secure shape.
Round 8 :
Center column: At the apex area, ch3, dc 5 into apex fan, ch3, sl st to form a pointed top. Turn the motif so the apex now reads as top of tree. Continue by working a narrow picot edging around the apex: *(sc, ch2, sl st into ch2) around top three apex loops.
Info :
Begin lightly stuffing the center base with scrap fibers or simply leave open for a flatter motif. The tree is mostly decorative and should remain lightweight for joining. If you prefer a padded look, slip a tiny amount of fiberfill into the trunk anchor area only.
Round 9 :
Third tier widening: In each branch cluster (now 6 visible clusters) work (ch4, dc, tr, dc, ch4) to continue the triangular shape. Increase the stitch count symmetrically so that each side of triangle grows evenly. After this round there should be 18 visible branch loops (count by clusters).
Round 10 :
Decorative ladder: Working from base upward, create ladder chains to form the lacy interior of the tree: *ch6, sl st into next cluster base, rep around the triangle (3 ladder runs). Pull slightly to shape and block later.
Round 11 :
Edge finishing: Use sc around the outermost edge of tree, placing 2 sc in each large chain space and 1 sc in each base stitch to stabilize the shape. This secures points and gives a neat edge for sewing (approx 72 sc around when averaged).
Round 12 :
Leaf detailing: With a hook one size smaller, work small picot points along each outer branch: *(sc, ch3, sl st in sc) across all outer loops (approx 24 picots total). Fasten off and weave ends.
Info :
Make as many tree motifs as your desired runner length; the sample uses 8 trees. Always orient the apex in the same direction when joining to ensure a consistent central spine. Block each tree flat and gently press the lacy chains into a triangular form.
— Pine Leaf / Foliage Motif (Make many, used to create dense background) :
Round 1 :
With forest green: ch 6, sl st to form loop. Work 10 sc into loop and join (10)
Round 2 :
Ch 2, (1 hdc, ch3, 1 hdc) in same st to start leaf base. *In next st work (1 hdc, ch3, 1 hdc); rep around to create small petal ridges (10 petal ridges)
Info :
These foliage motifs are intentionally small and layered to create depth. We will work many sizes — small single leaves, medium paired leaves and elongated fern fronds. Make a minimum of 60 small leaves and 40 medium leaves for one 8-tree-runner. Scale down or up for longer or shorter runners.
Round 4 :
Small leaf finishing: In each petal ridge: sl st into base, ch4, (sc in 2nd ch from hook, hdc, sc) to form a pointed leaf. Sl st back to base and repeat for all ten ridges. Fasten off. (10 small leaves per motif)
Round 5 :
Medium leaf / frond: Start with ch8, work along chain: sc in 2nd ch from hook, hdc in next, dc in next 3, hdc, sc, sl st to base to mirror the other side and create a full frond. Join with a sl st and fasten off. Each frond uses approx 12-14 sts.
Info :
Make fronds in both Forest Green and Olive Green to create a layered green palette. When placing under trees, stagger darker and lighter greens for depth. Slightly steam-block fronds for a natural curve that sits nicely against the table surface.
Round 6 :
Long fern frond: ch 12, sc in 2nd ch from hook, *ch2, sk1, sc in next, repeat along chain to end. Turn and work back along chain with alternating sc to create serrated feather look. Sl st to starting loop and fasten off. Each long frond is approx 18 serrated points.
Round 7 :
Edge curl: For some small leaves work 3 sc in same st, ch2, slip into next st to create a curled tip; this helps the background look organic when sewn in place.
Info :
Make the foliage in batches and pin them to a blocked base panel when assembling — this helps you visualize density before sewing. Use varying lengths and widths so the foliage looks hand-gathered rather than uniform.
— Berry Cluster Motif (Make many - small jolts of color) :
Round 1 :
Using deep red yarn: ch 2, 6 sc in 2nd ch from hook (6) - form a tight little round berry.
Round 2 :
Make 1 round of tiny bobbles: *(puff stitch into same st: yo, insert hook, pull loop five times, yo and draw through all 6 loops), ch1, sl st into next st; rep to create a textured cluster effect. Make 3-4 bobbles per berry for fuller look.
Round 3 :
Fasten off leaving a 6 in tail for sewing. Use a needle to draw tail through center and pull slightly to tighten the berry into a neat puff if desired.
Round 4 :
Mini-cream berries: Repeat rounds 1-3 in cream color but make only 4 sc in round 1 to create smaller berries (4 st base). Fasten off with long tail.
Info :
Create clusters by sewing 3-6 berries together: arrange 1 larger red berry with two small cream berries and tack them in place through the center with a few stitches. These clusters will be sewn onto foliage panels and between tree base edges. Use small glass beads or tiny buttons as optional centers for sparkle.
Round 5 :
Pinecone accent (tiny): Using warm brown: ch 3, in 2nd ch from hook work 3 sc, turn and work (ch2, 3 sc) in last sc to create a tapered layered cone. Make 6-8 tiny pinecones to tuck into greenery. Fasten off and shape with steam if desired.
Info :
Make at least 40 red berries, 30 cream berries and 6-8 pinecone accents for the sample runner. More clustered decoration will require more berries. Sew clusters securely to the foliage panel so they lay flat and do not snag tableware.
— Base Connector Panel and Joining Units :
Round 1 :
Chain 40 with forest green as a temporary base loop for joining (not visible - this single chain acts as a spine when joining trees). Join with sl st to form a long chain loop if making separate panels; or work in rows for a flexible backbone.
Round 2 :
Into chain backbone, work 1 sc in each chain across to create slightly raised backbone that will be hidden under foliage. Fasten off or continue as a continuous chain for full runner length (40 sc per segment).
Info :
We will use the backbone to anchor tree motifs: each tree base will be attached to this spine every 5 inches (12.5 cm). When making a longer runner, extend the backbone proportionally. Mark positions on the backbone with stitch markers corresponding to tree base width to keep spacing even.
Round 4 :
Placement loops: At each tree junction, leave a ch 2 space to allow a small 3D pocket for berries and pinecones to nestle. To do so: *Work 3 sc, ch2, sk2 along the backbone to create small open spaces at regular intervals. These ch2 pockets will receive small berry clusters during assembly.
Info :
The backbone should be flexible but sturdy. If you prefer more stiffness, create two parallel backbone chains and join them with sc rows to form a narrow strip which you will then use as the main anchor for sewing foliage and tree bases.
— Border and Edge Loops (gives finished scalloped edge) :
Round 1 :
Attach olive green along outer edge of arranged foliage: sc in each outermost st around runner to create a defined edge. Approximate count varies with density, target ~160-200 sc around per full runner side.
Round 2 :
Picot scallops: *Ch5, sl st into 3rd ch from hook, sk 2 sc, sl st into next sc; rep around to create delicate scallops. This yields approx 30-40 picot scallops depending on spacing.
Info :
Work the scallop border with your hook slightly loosened to allow delicate edges to sit flat on a table. If you want a more pronounced border, add a second row of larger shell stitches (5 dc shells) over every other picot.
— Assembly and Joining Steps (Detailed stitch-by-stitch placement) :
Round 1 :
Lay out backbone on a flat surface. Pin trees in place at marked positions with apex pointing outward from center of runner. Ensure even spacing — measure 4.5 in (11.5 cm) between tree centers for the sample runner.
Round 2 :
Using a tapestry needle and a length of matching green yarn, sew the bottom trunk anchor of each cream tree to the backbone using an invisible ladder stitch or whip stitch. Sew through base stitches counted at round 11 of the tree motif (approx 8-10 evenly distributed stitches). Make a double pass for security.
Round 3 :
Attach foliage clusters: arrange 6-8 leaf motifs around each tree base; tack them with a few hidden stitches at the base of each leaf so that leaves overlap and cover the backbone. Use varying shades and lengths for a natural look. Each leaf should be sewn with 2-3 small stitches at its base only to keep a lifelike lift.
Round 4 :
Sew berry clusters into ch2 pockets along the backbone: using long tails left from berry motifs, pierce through backbone and pull tight so berries sit snugly. Secure with 3-4 stitches through berry center and into backbone; knot and weave ends to the back.
Round 5 :
Position pinecone accents in groups of two or three tucked into leaf spaces near tree bases. Sew each pinecone using invisible stitches at its base. If using pre-made plastic pinecones, attach with a few stitches and a drop of fabric glue for extra security.
Round 6 :
Edge cleanup: Once all pieces are attached, fold the foliage over the backbone and conceal any bulky seams by tucking leaves into overlapped stitches and sewing them down flat. Trim any long yarn tails and weave in securely to the underside so they do not show.
Round 7 :
Final blocking: Pin the assembled runner to shape and lightly steam to set the motifs. Do not press too hard over bobbles and berries. Allow runner to dry completely before removing pins.
Info :
Assembly is the longest part of the project. Take frequent breaks and test the layout visually as you go. It helps to photograph each step so you can remember placements when resewing or adjusting later.
— Tassel Finish :
Round 1 :
Make a tassel of cream yarn roughly 2 in long: wrap yarn around a 1.5 in wide card about 20-24 times, cut one end and tie securely near top. Trim ends evenly. Make 2 tassels for the ends if desired.
Round 2 :
Attach tassel to the center lower point of star/snowflake end motif using strong doubled tape or long tail sewn through the knot of the tassel. Secure with 6-8 stitches on the back of the star and weave ends through adjacent stitches for neatness.
Info :
The tassel gives a lovely finishing touch and weight to the end of the runner so it hangs nicely off the table edge. Add a small bead or gold accent at the tassel knot for a touch of shine.
— Additional Decorative Adjustments and Tips :
Round 1 :
Sprinkle small cream bobbles along the foliage edge to simulate snowberries; sew each with a single small knot and minimal stitches to maintain a rounded appearance.
Round 2 :
Use gold or ivory beads sparingly: place a few between berry clusters for catchlight. Sew through beads with strong thread and anchor on the underside to prevent loosening.
Info :
For an extra-special runner, lightly stiffen the center trees with a thin layer of diluted fabric stiffener on the underside only; this helps them keep an upright lacy profile. Test on a scrap first to ensure no discoloration.
Round 3 :
Make more or fewer tree repeats depending on your table length. A small side table might look lovely with 3-4 repeats; a dining table may use 10-12 repeats. Adjust backbone length and foliage counts proportionally.
This cream tree and red berry runner is a beautiful, tactile centerpiece that transforms any table into a cozy holiday scene. Each motif layers delicate lace, textured foliage and tiny berry bursts for a handcrafted look that feels both traditional and fresh. The modular structure means you can lengthen or shorten the runner easily — add more trees for a long dining table or reduce for a sideboard. Enjoy the process of assembling each detailed motif into a living garland of stitches! 🎄✨