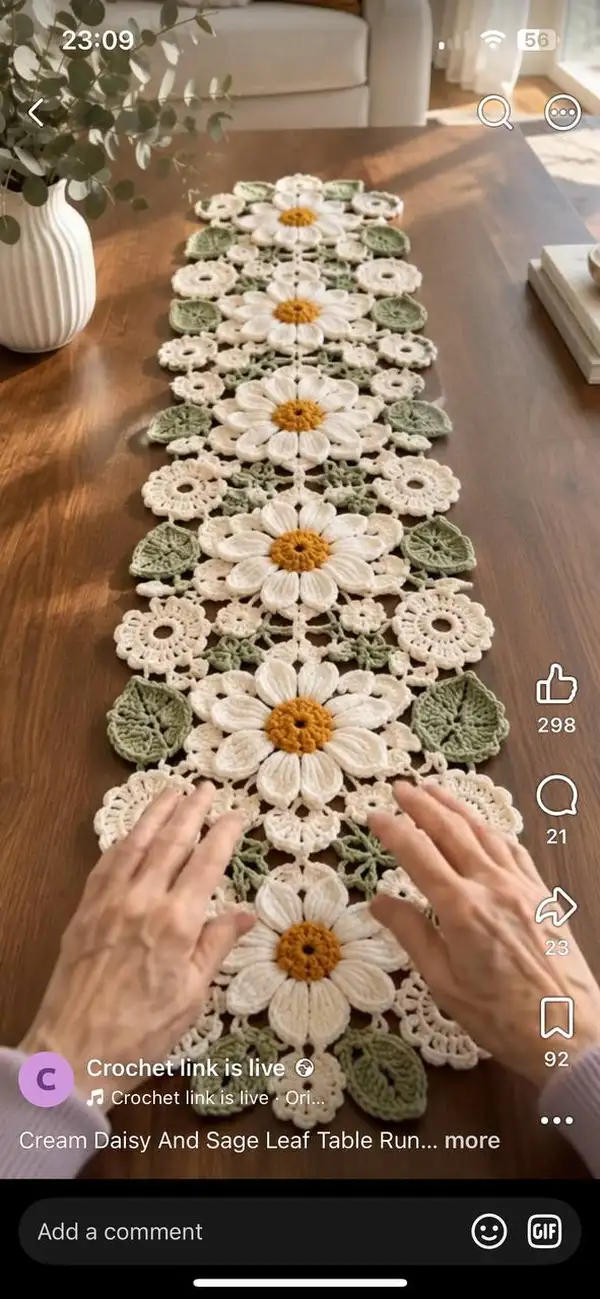
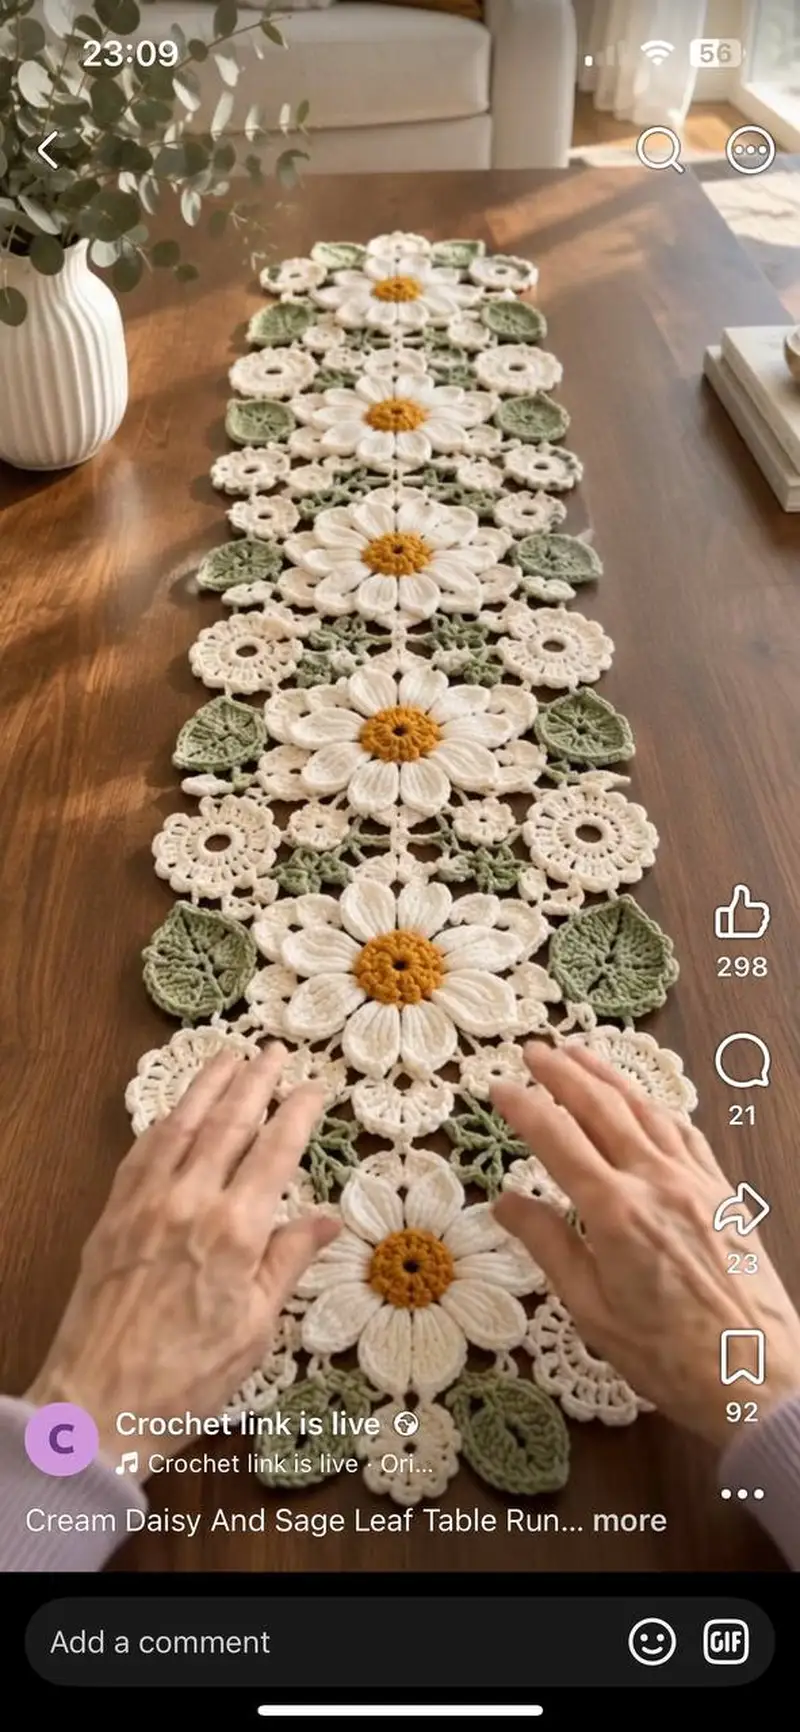
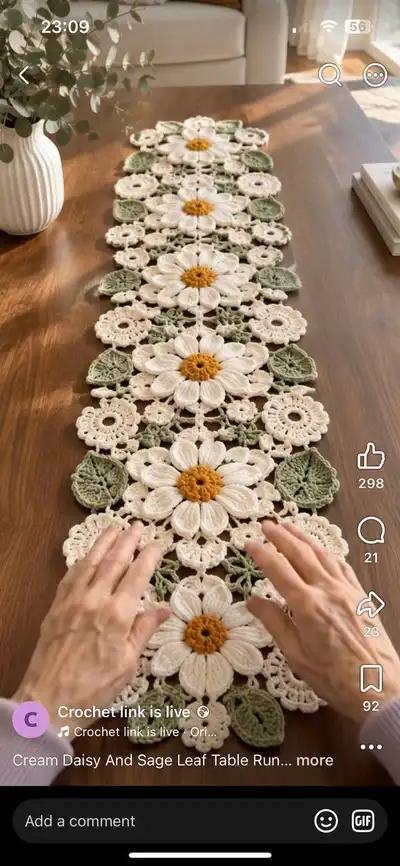
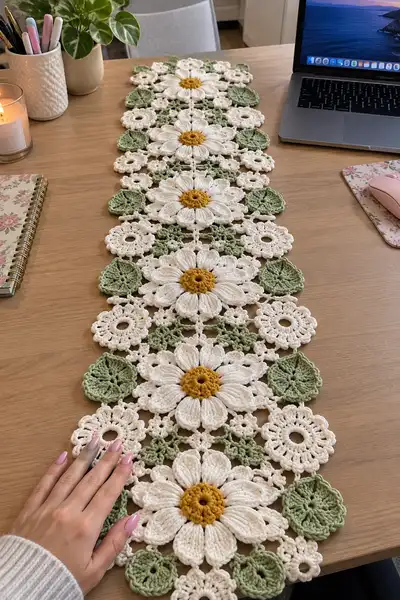
Brighten your table with a handcrafted cream daisy table runner accented with sage-green leaves and warm mustard centers. This modular motif pattern joins large 10-petal daisies with delicate lace rings and leafy medallions to form a long, elegant runner. Detailed join-as-you-go instructions make assembly straightforward and the textured puff petals add charming dimension. Perfect as a seasonal centerpiece or thoughtful handmade gift.
Progress Tracker
0% Complete
— Overview :
Info :
This runner is modular: large Daisy motifs (A), small circular motifs (B), little four-point connector motifs (C) and Leaf medallions (D). Make the number of motifs to reach your desired runner length. The sample runner uses 5 large daisies joined by rows of connecting motifs for a total finished length of approximately 110-120 cm (43-47 in) and width of about 22-24 cm (8.5-9.5 in).
Info :
Gauge is not critical for appearance but will change final size. Using 4.0mm hook and worsted cotton the large Daisy (motif A, complete) measures roughly 22-24 cm across at its widest point. Keep tension consistent across all motifs.
— Daisy Center (Make one for each large daisy) :
Round 1 :
Work 10 sc in magic ring (10)
Round 2 :
Inc in each st around (20)
Round 3 :
(1 sc, inc) x 10 (30)
Round 4 :
(2 sc, inc) x 10 (40)
Round 5 :
(3 sc, inc) x 10 (50)
Round 6 :
(4 sc, inc) x 10 (60)
Info :
Change to mustard/golden yarn here. The increased count 60 gives 10 evenly spaced anchor groups for 10 petals (60/10 = 6 base stitches per petal area).
Round 7 :
1 sc in each st (60)
Round 8 :
Work a textured cluster round: *sc in next 2 sts, bobble in next st* repeat around (bobble counts as 1) (60)
Info :
For the bobble: yo, insert in stitch, pull up loop, yo, draw through 2 loops on hook; repeat 4 times in same stitch then yarn over and draw through all loops to form the bobble. This creates a raised center texture that looks like a daisy disk.
— Daisy Petals (Work around the center; create 10 petals) :
Info :
Petals are worked around the edge of the center disk. You will work 10 identical petals; place the first petal starting at the join between Round 6 groups, then work a petal every 6th stitch (60/10=6). A petal is made from elongated puff clusters to give the thick, soft petal texture seen in the photos.
Round 1 :
*Ch 1, skip 2 sts, in next st work (yo, insert, pull up loop) x5 (puff 5), ch 2, sl st to base between petals; ch 4 to move to next anchor; repeat from * around to make 10 petals. Fasten off and weave tail in behind petal base (no change in base count)
Info :
Each petal block uses 5-tuck puff clusters worked into a single base stitch (the anchor every 6th stitch). Practice one petal to get tension consistent; do not close puffs too tightly or they will flatten.
Round 2 :
Re-join cream yarn behind first petal anchor, sl st into top of puff, ch 1, work 5 sc around the base of that puff (encasing the bottom), *sc into small ch-bridge between petals, 5 sc around next puff* repeat around (total 10 petals x 5 sc = 50 sc plus 10 sc in bridges = 60 sc) (60)
Round 3 :
1 sc in each st (60)
Info :
Working sc around petals flattens them slightly and secures the puff. Keep the hook under the loops of the puff rather than pulling through tightly to keep petals lofty.
Round 4 :
*Ch 3, skip 4 sc, sl st into next st (creating a chain-lace arch around petals), repeat around to create 10 arches; join with sl st to first ch-3 (10 arches)
Round 5 :
Into each ch-3 arch: (sc, hdc, 2 dc, hdc, sc) to create a scallop around petals (10 scallops; stitch count 6 per scallop = 60)
Info :
These scallops form the decorative ring around each flower and will also serve as join points to the next set of small rings and connectors. Keep scallop stitches even by placing markers at the start of every scallop while working.
— Daisy Outer Lacy Ring (finishes the large daisy motif) :
Round 1 :
Join cream yarn in the base of any scallop, ch 1, *sc in next sc, ch 5, skip to next scallop, sc in base* repeat around to create 10 ch-5 loops (20 sc including joins) (count is variable but maintain 10 loops)
Round 2 :
Into each ch-5 loop: (sc, 3 dc, sc) forming lacy petals between scallops (10 shell units; work evenly) (40)
Round 3 :
Ch 1, sc into each st around including shells and existing scs to create stabilizing round (approx 60 sc)
Info :
At this point the large daisy motif is complete. Fasten off leaving a 20-25 cm tail for join-as-you-go connections. Make the number of large daisies required (sample uses 5).
— Small Round Motif B (Make multiple as connectors between daisies) :
Round 1 :
6 sc in magic ring (6)
Round 2 :
Inc in each st (12)
Round 3 :
(1 sc, inc) x 6 (18)
Round 4 :
(2 sc, inc) x 6 (24)
Round 5 :
Ch 1, *sc in next 2 sts, ch 4, skip 2 sts* repeat around creating 6 ch-4 loops; join (24 base sc and 6 loops)
Round 6 :
Into each ch-4 loop: (sc, 2 dc, sc) to make small scallops (6 scallops) (24)
Round 7 :
1 sc in each st around to stabilize (24)
Info :
These small round motifs act as decorative wheels between daisies and provide secure anchor points when joining. Make many: sample runner uses 20+ small rounds to connect daisies and fill gaps.
— Mini Rosette Motif (Tiny filler - optional) :
Round 1 :
8 hdc in magic ring (8)
Round 2 :
(1 hdc, inc) x 4 (12)
Round 3 :
Ch 2, *sl st into next st, ch 2* repeat around to create small loops for joining (12 small loops)
Info :
These tiny rosettes fill little negative spaces between larger motifs for a full, balanced look. Make dozens as needed to achieve a uniform layout.
— Leaf Medallion D (Make one for each leaf position) :
Round 1 :
6 sc in magic ring (6)
Round 2 :
Inc in each st (12)
Round 3 :
(1 sc, inc) x 6 (18)
Round 4 :
1 sc in each st (18)
Round 5 :
Ch 2, *hdc in next 2 sts, 2 dc in next, hdc in next 2 sts, ch 2, sl st in next* Repeat to form left half of leaf then mirror on right half; total anchor formation (leaf shape formed) (18)
Round 6 :
Work short rows along each edge to create pointed leaf: working along edge of left half: (sc, hdc, dc, tr, dc, hdc, sc) into chain spaces; mirror on right. Fasten off (no change in base count)
Info :
Leaf medallions are worked flat with an intentional point at the tip. Use sage yarn and keep stitches loose enough to curve slightly; these leaves are sewn to the outside of daisies in the final layout.
Round 7 :
Optional: With cream yarn, work a reverse sc edging around leaf to soften edge and match motifs (approx 36 sc)
— Four-Point Connector Motif C (small cross connector) :
Round 1 :
6 sc in magic ring (6)
Round 2 :
Ch 3, *sl st in next st, ch 3* repeat to form 3 small chain points (6 tiny loops)
Round 3 :
Into each ch-3 loop: (sc, 3 dc, sc) to make tiny petal points (6 petals) (24)
Round 4 :
Join points pairwise by working small chains and sl sts creating a four-point micro-cross suitable to anchor between motifs (no change in count)
Info :
These small connectors sit between larger motifs forming the open lace pattern between daisies. Keep them small and numerous for a delicate net-like join.
— Joining And Layout (Join-as-you-go and sewn joins) :
Info :
Block all motifs first (see blocking section). Lay out daisies in final order with small rounds and connectors positioned between petal scallops and outer shells exactly where gaps should fall. Pin motifs flat on blocking board to set spacing.
Round 1 :
To begin joining, pick one large Daisy as your starting central piece. With cream yarn and the 4.0mm hook, join in the base of any scallop, ch 1.
Round 2 :
Work sc across to reach a scallop that meets a small round motif B. Slip stitch into the ch-4 loop of motif B to join; continue sc around the scallops of Daisy to the next join point. Secure with tail and continue around completing 4 joins to adjacent small rounds (maintain base count on Daisy; no changes to motif round counts).
Info :
When join-as-you-go, insert hook through the ch-space of the adjacent motif, then finish the stitch in your working motif to lock motifs together without sewing. For tight joins, use a sl st; for slightly flexible joins use ch-sc joins so the runner lays flat.
Round 3 :
After four initial joins, position a second Daisy adjacent and join it at its scallop points to the small rounds that have already been attached to the first Daisy. This forms the start of a chain of daisies. Repeat the join pattern: four joins per side where motifs touch.
Round 4 :
Where gaps remain, use a mini rosette motif to fill the space. Slip stitch the rosette into the space and tack with a couple of whip stitches from the wrong side for security.
Info :
Sewing vs JAYGO: For edge leaves and outer corners I recommend sewing the leaf medallions on with a blunt tapestry needle using mattress stitch for an invisible join. For interior motifs the join-as-you-go gives cleaner front-side joins.
Round 5 :
Continue joining daisies in a linear chain by adding small rounds B at each scallop intersection and securing them via sl st through the ch-space then completing the sc in your working scallop. This stabilizes the run and forms the open lace lines between daisies.
Round 6 :
At the edges where leaves attach, align leaf tip to the outermost shell of the daisy. From the wrong side, bring the yarn tail through the leaf and the daisy shell and make 6 evenly spaced small whip stitches. Knot and weave tail inside motif. Repeat for every leaf position.
Round 7 :
Where two small round motifs meet on the inside of the runner, add a Four-Point Connector C to create stable triangular join points. Sew the connector in place with small whip stitches in matching yarn, ensuring it sits flush with the front surface.
Round 8 :
Check alignment frequently by folding the runner lengthwise to ensure edges line up and the lace openings are uniform. If sections pucker, release a join and re-pin with slightly more spacing. Use blocking pins to hold position while you finish joins.
Round 9 :
To finish long runs: Once all daisies, small rounds, rosettes and leaf medallions are joined, work a shallow border to tidy the outline. Using cream yarn, attach at a visible join near one edge and work 1 sc evenly around the entire perimeter, placing 3 sc in any large ch-space to maintain flat edge (count will vary with runner size).
Round 10 :
Edge round: Ch 3 (counts as dc), skip 1 st, (dc, ch 2, dc) in next ch-space to form small picot-shells along edge; in tighter areas work only sc or hdc to avoid bulky corners. Fasten off and weave ends.
Info :
For a neat edge, work into the front loops only of the outermost stitches (FLO) to create a lifted border that frames the runner. Add a final round of sc in FLO to even out any ripples.
— Joining Routines: Detailed Step-by-Step (procedural rounds often reference motif rounds) :
Round 1 :
Pin three motifs in a row: Daisy A - small round B - Daisy A. Mark the ch-spaces on all motifs that need to be joined with removable pins or small safety pins (mark 8 join points per daisy side where scallops and loops meet).
Round 2 :
Working from left to right: on Daisy-Left, join into a scallop base where it meets small round B using sl st; then on small round B, complete a matching sl st into the ch-space that corresponds. Continue around that particular join point until there are 4 consistent join points connecting the two motifs.
Round 3 :
After joining each pair of motifs by sl st at 4 points, flip the runner and secure the back side with 2 tiny whip stitches in matching yarn along the sl st path to ensure joins don't loosen over time (do not over-tighten).
Round 4 :
Connect small round B units to each other where applicable using the four-point connector C by aligning their ch-loops and slip-stitching through two loops and then sewing down the connector. This reinforces the interior net.
Round 5 :
At each leaf position, check how the leaf overlaps the outer scallop. If the leaf sits proud, remove two or three stitches of the scallop by reaching under and making a small anchor stitch to tuck the leaf edge in, then re-block.
Round 6 :
As you approach the runner ends, finish with a half-daisy fill if necessary to make edges symmetric. Create partial daisy halves by crocheting only half the scallops and securing the cut edge with a row of sc in the FLO to stabilize.
Round 7 :
Throughout the join process, keep the runner flat by pinning every 4-6 cm along long seams. Re-block pin locations after any major sewing to let wet-blocking correct small twists.
Info :
If you prefer a totally seamless front finish, use the join-as-you-go sl st method for all interior joins and reserve sewn joins for the leaves and outer connectors only.
— Edge Finish And Final Rounds :
Round 1 :
Attach cream yarn at an unobtrusive point, ch 1, work sc evenly into the outermost FLO around entire runner edge to create a consistent base for decorative edging (count varies, maintain even tension)
Round 2 :
Decorative border round: *sc, ch 3, skip 1 st* around to form small loop picots; in wider gaps work (sc, ch 5, sc) to keep edge flat. Adjust placement to ensure no curling (no change to base count).
Round 3 :
Final scallop accent: Into each ch-3 picot work (sc, 3 dc, sc) for a subtle shell; in ch-5 spaces work (sc, 5 dc, sc). This brings a finished ornamental edge reminiscent of vintage doilies.
Info :
For a modern minimal finish you can skip the final scallops and simply do two rounds of sc and a close bind off; for a vintage look follow the scallop rounds above.
— Blocking And Finishing :
Info :
Wet-block each motif gently and pin to shape. For full runner blocking: pin the assembled runner flat on blocking mats, using rust-proof pins to shape scallops and leaf tips. Spritz with water and allow to dry overnight. Steam lightly if needed but do not press the puffs directly with a hot iron.
Round 1 :
Weave in all tails on wrong side using a tapestry needle, burying tails across several stitches. Trim close. Check all joins and add extra small whip stitches where necessary for security.
Round 2 :
Optional: Add a small non-slip backing to the center of daisies (fabric dots) if the runner will be used in high-traffic areas to prevent shifting.
Info :
Store runner flat or loosely rolled to preserve shape. Re-block lightly after washing if needed to refresh the scallops and petal loft.
This Cream Daisy table runner is a true labor of love—textured petals, warm mustard centers, and sage leaves combine for timeless charm. Each motif is satisfying to make and the join-as-you-go method keeps assembly elegant and seamless. Enjoy arranging this runner as a centerpiece or gifting it to someone special. 🪴🧶 Bring spring to your table with every stitch and savor the finishing touch of blocking and edging. Happy crocheting! 🌼