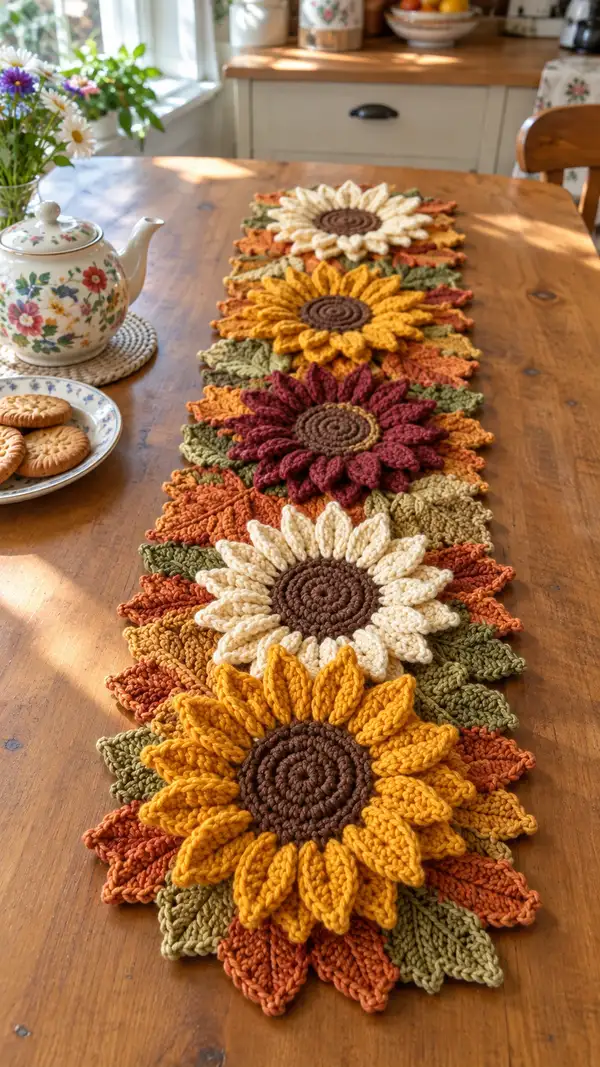
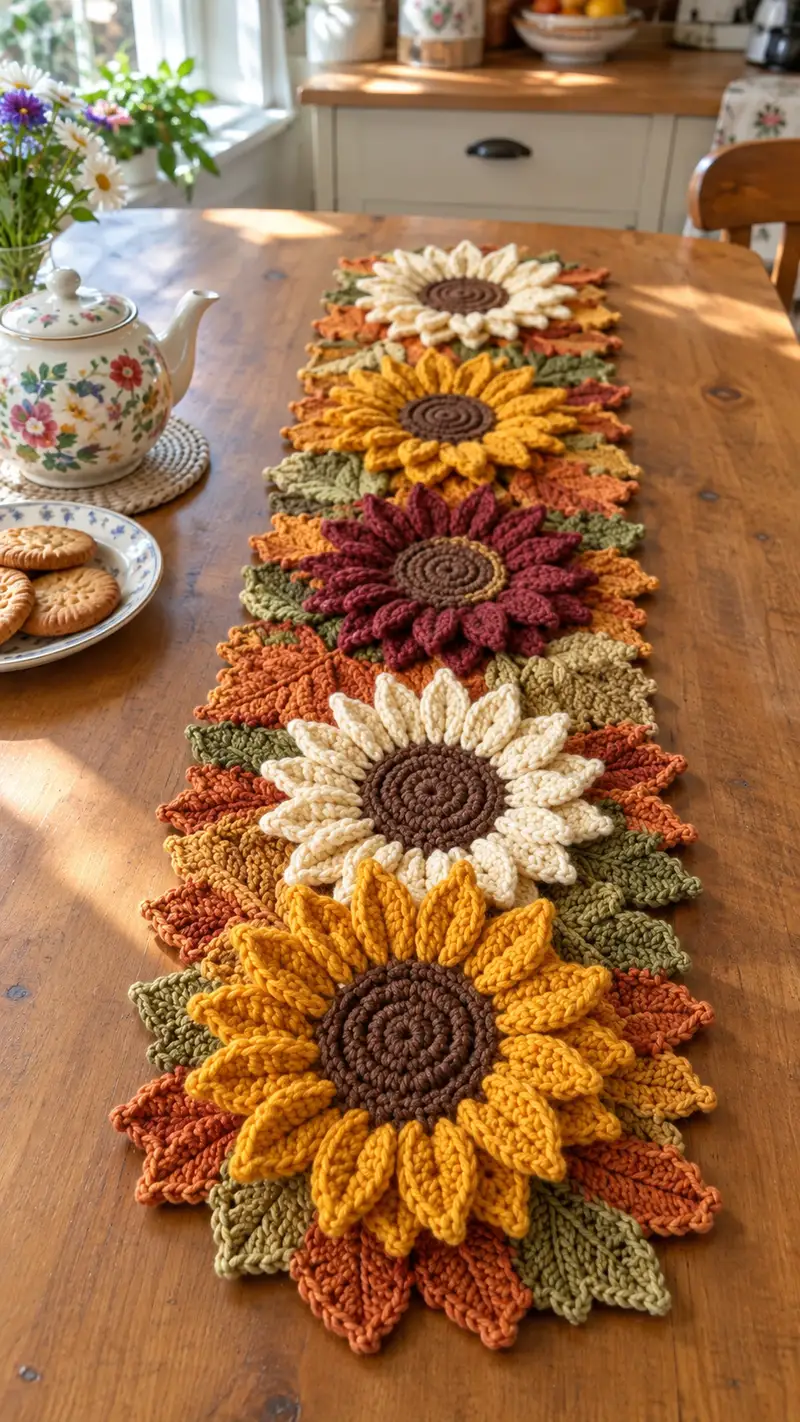
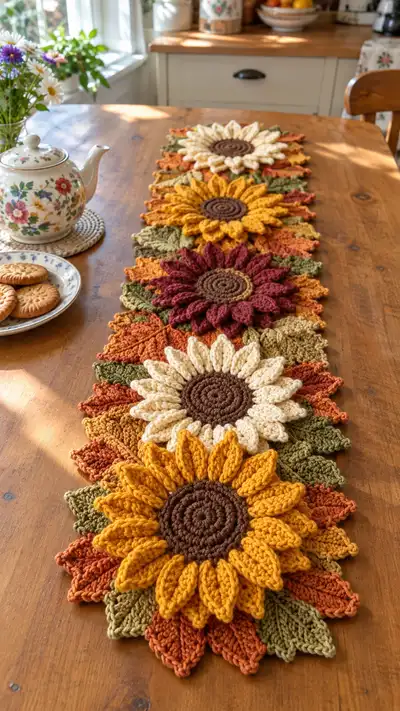
Create a warm, textured sunflower table runner that brings autumn charm to your home. This design features layered 3D sunflower motifs with raised petals, textured brown centers, and a ring of leaf-like square motifs in fall hues. The long runner is made by joining repeated sunflower-and-leaf modules for an elegant, farmhouse-style centerpiece.
Progress Tracker
0% Complete
— Notes :
Info :
This pattern describes one sunflower motif and one square leaf motif. Make as many motif repeats as needed to reach the desired runner length. Each sunflower module is built from a spiraled center, two layered petal rounds (inner and outer), and is joined to a ring of small background leaf squares. Use a 5.0mm hook for the petals and squares. If you want a slightly firmer center, use a 4.5mm hook for the center circle only and switch back to 5.0mm for petals.
Info :
Throughout the pattern, I include specific Info sections for tips, stuffing, and blocking. Keep stitch markers handy: mark the beginning of rounds and mark petal anchor points as you go. When a round lists a stitch count, that refers to the count of base stitches unless otherwise noted.
— Sunflower Center (make 1 per flower) :
Round 1 :
6 sc in magic ring (6)
Round 3 :
(1 sc, 1 inc) x 6 (18)
Round 4 :
(2 sc, 1 inc) x 6 (24)
Round 5 :
(3 sc, 1 inc) x 6 (30)
Round 6 :
(4 sc, 1 inc) x 6 (36)
Round 7 :
(5 sc, 1 inc) x 6 (42)
Round 8 :
(6 sc, 1 inc) x 6 (48)
Info :
Fasten the last round gently or work in a spiral for a continuous spiral look. If using spiral rounds, do not join; place a marker at every 12th stitch to help count. Using brown worsted yarn will give the center the dense, seeded look seen in the photos.
Round 9 :
1 sc in each st (48)
Round 10 :
1 sc in each st (48)
Info :
Optional: for a tighter spiral appearance, work Round 9 in BLO to show a subtle ridge. The center should be flat and firm; if it feels loose, add an extra sc round before starting petals.
— Petal Anchor Round (create anchor spacing for 16 petals) :
Round 11 :
*1 sc in next 2 sts, ch 3 (this ch-3 will become the base of a petal), sk next st*; repeat from * to * around, join with sl st to first sc (48 base sts, 16 ch-3 petal anchors)
Info :
We are creating 16 evenly spaced petal anchor points by grouping the 48 base stitches into 16 sets of 3. The ch-3 loops will be used to work the petal clusters so you do not alter the base stitch count. Place a marker in the first anchor loop to track the start.
— Inner Petal Row (sculpted short petals) :
Round 12 :
*In next ch-3 sp: (sc, hdc, 3 dc, hdc, sc) — forming a 7-stitch petal cluster; sl st to next sc on base to secure*; repeat 16 times (petals worked into ch-3 spaces; 48 base stitch equivalents)
Info :
Each inner petal is a small fan worked into the ch-3 anchor. After each petal cluster, sl st into the next sc of the center to anchor the petal firmly. This ensures petals stand upright. Keep the tension slightly loose in the petal loops so they are plush but not floppy.
Round 13 :
Ch 1, 1 sc in each base sc around, working sl sts into the back of each petal base where you see gaps to lock petals in place (48)
Round 14 :
1 sc in each st (48)
Info :
Now the inner petal row is anchored. If you want a shorter inner row, work only Round 13 and proceed. The sl st anchoring will make the petal stand out from the center and create a valley for the outer petals to rest in.
— Outer Petal Base (foundation for taller petals) :
Round 15 :
*Ch 2, work 1 sc into the top of the petal cluster made previously, ch 3, sl st in next base sc (this spaces out where the outer petals will be attached)*; repeat from * to * around (48 base-equivalent positions, 16 ch-3 petal anchors)
Round 16 :
*In each ch-3 sp: (sc, 2 hdc, 5 dc, 2 hdc, sc) — a larger fan to form the outer petal; sl st to next sc to anchor; repeat x16 (petals attached at 16 points)
Info :
These outer petals are larger and will be shaped with post stitches and puff stitches in the coming rounds to create the folded, sculpted look. Make sure each petal cluster is symmetrical by counting the number of dc in each fan.
Round 17 :
Ch 1, 1 sc in each sc and around the bases of the outer petals, working evenly to traverse around petals (48)
Round 18 :
1 sc in each st (48)
Info :
At this stage you have 2 petal rows: a shorter inner row and a larger outer petal row. The next rounds add height and sculpt the petals using front post stitches and puffs worked into the petal bodies.
— Sculpting Petals (Layered texture and folding) :
Round 19 :
*Work along the body of the first outer petal: fpdc around the middle dc of the petal fan, ch 1, sl st into base between petals; repeat for each petal (16 fpdc made in total; base stitch count maintained)
Round 20 :
*Into each petal body: make (puff stitch made of 3 loops) across the top center of the petal to create raised ribs — pull loops through carefully to keep uniform height. After puff, ch 1 and sl st to base*; repeat x16
Round 21 :
Ch 1, 1 sc in each base st around and sl st into the top of each petal base to lock puffs in place (48)
Info :
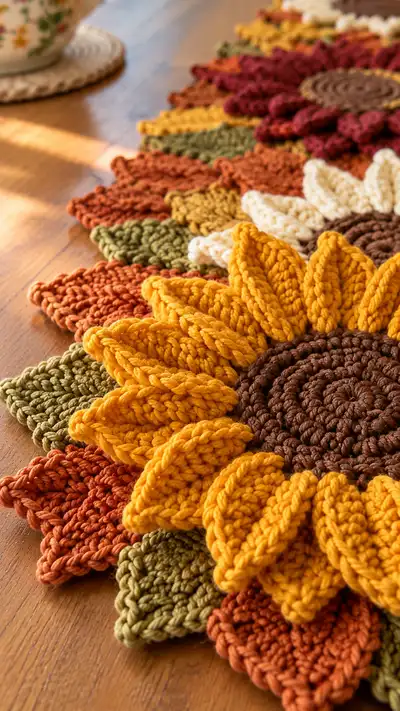
Quality control tip: Keep puff heights consistent by pulling up loops to the same height each time. If a puff is too tall, gently tug to match neighbors or remove and redo. These puffs form the center rib seen on each petal in the photos.
Round 22 :
*For each petal: ch 1, 1 sc in next sc, then into the front loops of the petal work (1 hdc, 2 dc, 1 hdc) creating a folded ridge; sl st to base between petals*; repeat x16 (48 base points)
Round 23 :
1 sc in each st (48)
Round 24 :
*Into each petal tip area: (sc, sl st, sc) to form a neat tip and slightly point petals; repeat x16 (work into dc tops; base count unchanged)
Info :
At completion of these rounds, the petals should sit in two distinct rows — inner short petals and taller outer petals with a ribbed center. If petals lie flat, steam-block lightly or use a spray starch to help them take the folded shape.
— Petal Finishing Rounds :
Round 25 :
Ch 1, 1 sc in each st around, working sl sts through the backs of the petal tips to tidy the edge (48)
Round 26 :
1 sc in each st BLO around to create a subtle ridge at the petal base (48)
Round 27 :
1 sc in each st (48)
Info :
If you wish to alternate petal colors (like cream or burgundy seen in the runner), change color before Round 19 per module. Carrying yarn is not recommended across large gaps; fasten off and join new color at petal start for a clean color change.
Round 28 :
Fasten off petals leaving a 20-30 cm tail for sewing if you are going to stitch this motif to adjacent motifs. Weave end through the back to stabilize petal joins and hide tail inside the petal valley.
Info :
Your finished sunflower motif should measure approximately 8.5-10 inches (22-25 cm) across depending on yarn and hook. Measure across the widest points of the outer petals.
— Leaf/Background Square Motif (make 12 per sunflower module) :
Round 1 :
Make a magic ring, ch 1, 8 sc in ring, join with sl st to first sc (8)
Round 2 :
Ch 1, 2 sc in each st around (16)
Round 3 :
(1 sc, inc) x 8 (24)
Info :
We are forming a small round base that will become a square via corner increases and post stitch edges. Choose a leaf/background color (olive, rust, pumpkin) for a warm fall palette.
Round 4 :
*Sc in next 5 sts, (2 sc, ch 2, 2 sc) in next st for corner*; repeat from * to * around — 4 corners formed; (24 + 8 additional corner stitches accounted as 32 worked spots)
Round 5 :
Ch 2 (counts as hdc), work hdc in each st and in each corner ch-2 space (32)
Round 6 :
Ch 2, fpdc around next st, dc in next 6 sts, bpdc around next st, dc in next 6 sts, fpdc around next st, dc across to corner; repeat shaping around to form slight leaf texture (32)
Round 7 :
Ch 1, sc in each st across, sc 3 in each corner ch-2 to deepen corners and square off (32 + corners)
Info :
This square is intentionally textured: alternating front- and back-post stitches create visible ribs which read as leaf veins. Keep post stitches consistent in direction so the ribbing aligns with neighboring squares when joined.
Round 8 :
BLO: 1 sc in each st BLO around to create a distinct ridge along the square's edge (32)
Round 9 :
Ch 3, *sk 1 st, dc in next st, ch 1*; repeat around to create a slight scalloped edge, join (32)
Round 10 :
1 sc in each st around to tidy the scallops (32)
Round 11 :
For leaf tip: join a contrasting color if desired, ch 1, make 3 sc in each corner point and 1 sc in each side stitch to accentuate shape (32)
Round 12 :
Fasten off leaving long tail for joining; weave tail through corner posts to secure (32)
Info :
Make 12 squares per sunflower as a default to surround the flower in a ring. You can make more or fewer depending on how dense you want the background. Mix colors randomly across rust, olive, pumpkin, and tan for a vintage look.
— Joining Sunflower to Leaf Squares (module assembly) :
Round 1 :
Arrange sunflower center (flower face up) and 12 leaf squares around it in a ring. You should place squares so their corners meet beneath petal valleys. Pin arrangements before joining.
Info :
Use pins to hold petals and square corners in place. The sunflower petals should overlap slightly over the squares for a layered effect like in the photo. Keep inner petals tucked into the center and outer petals extending beyond the square edges.
Round 2 :
Using the long tail from a square, whip stitch the square corner to the underside of the petal valley on the sunflower, catching petal base and center rounds so the square sits flush. Repeat for each square (12 sewn points)
Info :
Stitch through two strands only at the join points to avoid bulky seams. For a less visible join, use a matching color yarn and make small, even stitches. Weave the tails through the square edges and back under the square to hide them.
Round 3 :
After all 12 squares are attached, flip module to RS and use a 5.0mm hook and matching ply to sc around the outer edge linking petals to squares — sc evenly across petal tips and square edges, making 3 sc in each square corner to keep square shape (join with sl st) (approx 80 sc around module depending on stitch placement)
Info :
This single round link seals the module and produces a tidy edge to use for joining modules end to end. Keep stitches even so the runner edge lies flat. If your petal tips are very domed, use slightly shorter tension on the sc edge to pull them slightly outward so motifs don't cup.
— Joining Modules Into a Runner :
Round 1 :
Decide module order (photograph shows alternating petal colors of golden yellow, cream, burgundy, deep gold). Place two completed modules RS together, matching square edges where they will touch.
Round 2 :
Join modules using whip stitch or mattress stitch through the outer sc joining round created previously: sew through the outer sc of both modules every 3-4 stitches to create a stable seam. Repeat until modules are joined in desired length.
Info :
For a runner of four sunflowers like in the picture, join four modules in a straight line edge-to-edge. For a longer runner, continue adding modules until the desired length is reached. Keep motifs aligned so petals are alternating and colors balanced.
Round 3 :
After modules are sewn together, sc around the entire outer edge of the joined modules to tidy seams and create a continuous border: 1 sc in each outer sc across modules, make 3 sc in each corner/valley where squares meet to maintain a flat edge. Work consistently to maintain an even stitch count around the runner (approx 320 sc for a 4-module runner; counts will vary).
Info :
If there are visible gaps between modules, use small slip-stitches or short connecting chains to bridge the gaps and keep the runner flat. Blocking after joining will help the seam relax and sit smoothly on the table.
— Optional Center Embellishment (spiral detail) :
Round 1 :
With dark brown, re-align over the center and work 1 sc around the inner rounds to re-define spiral: insert hook through the existing sc rounds and work 1 sc in each st for 2 rounds (48 each round)
Round 2 :
Work a spiral of slip stitches across the top of the center to create a tighter seed look: *sl st 2, sl st 1 into next st* — work evenly across for 2-3 passes to deepen texture
Info :
These tiny slip-stitch spirals give the center the dense, coiled appearance like sunflower seeds. Avoid pulling too tight or it will pucker the center; keep tension gentle but snug.
— Final Border and Scallop (finishing edge) :
Round 1 :
With a neutral color (light tan), join at any point on runner edge, ch 1, sc in each st around (work 3 sc in any corner points to maintain shape) — join with sl st (even around)
Round 2 :
*Ch 3, skip next st, sc in next st*; repeat around to create a subtle picot scallop; work 3 sc in corners to keep the edge flat
Round 3 :
Fasten off and weave all ends through backs of loops. Trim ends and tuck them under the runner body for a neat underside.
Info :
Blocking: Pin the runner flat on blocking mats, shape petals gently outwards and pin each petal tip. Steam lightly and allow to dry to set the petals. For petal stiffness without blocking, brush very lightly with water and shape, or use a fabric stiffener sparingly on the underside.
— Alternate Color Notes and Variations :
Info :
Alternate petal colors every other module to mimic the photo’s cadence (gold, cream, burgundy, warm gold). To make a two-tone petal, work the petal foundation round in one color and change to a second color at the first sculpting round. Always change colors at the start of a round and fasten off tidy tails on the underside.
Info :
If you prefer a smaller runner, make just two or three modules. For placemats, make one module and add an optional backing fabric adhered with slip-stitch join for stability.
— Troubleshooting Tips (frequent Info sections for success) :
Info :
If petals are curling inward, block them flat and then steam lightly from the wrong side while pinning them in an outward curve. If petals droop, you can rework the last petal finishing round with slightly tighter tension or add a small hidden running stitch at the petal base to pull it upright.
Info :
If the runner edges wave after blocking, add a final tidy sc round in a smaller hook (e.g., 4.5mm) to pull the edges in and flatten the piece. This is particularly useful if your squares vary slightly in gauge.
Info :
When joining modules, keep seam stitches shallow (catch just a couple of loops) to avoid bulky ridges. If you see holes at joins, duplicate stitch with matching yarn to fill gaps or use small slip-stitch bridging chains from the underside.
Finishing this sunflower table runner is such a joy — each module becomes a little sun-bright parcel of texture and color. The layered petals and textured leaves capture an autumn afternoon on your table. I hope this runner brings warmth and a handcrafted accent to your home, ready for teas and gatherings. 🌻🧶