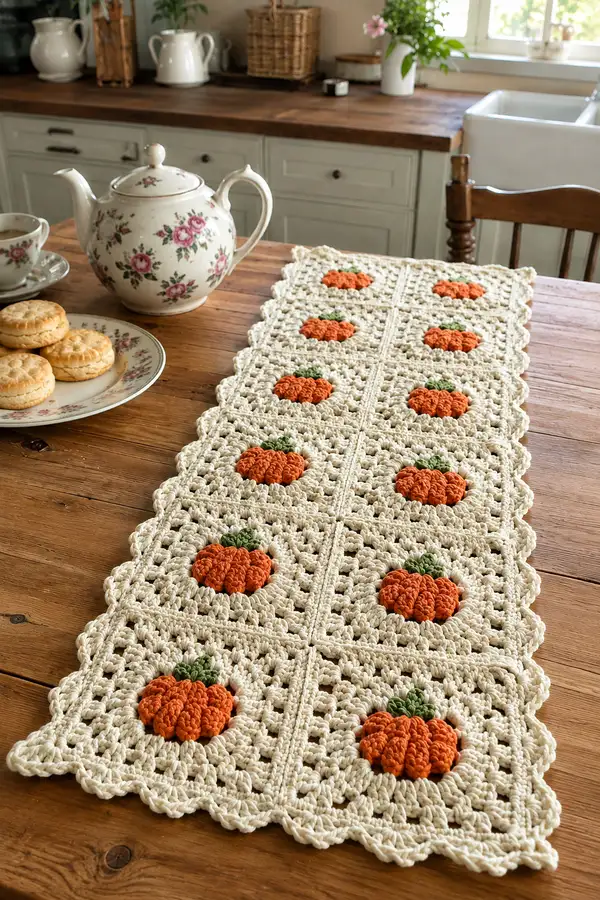
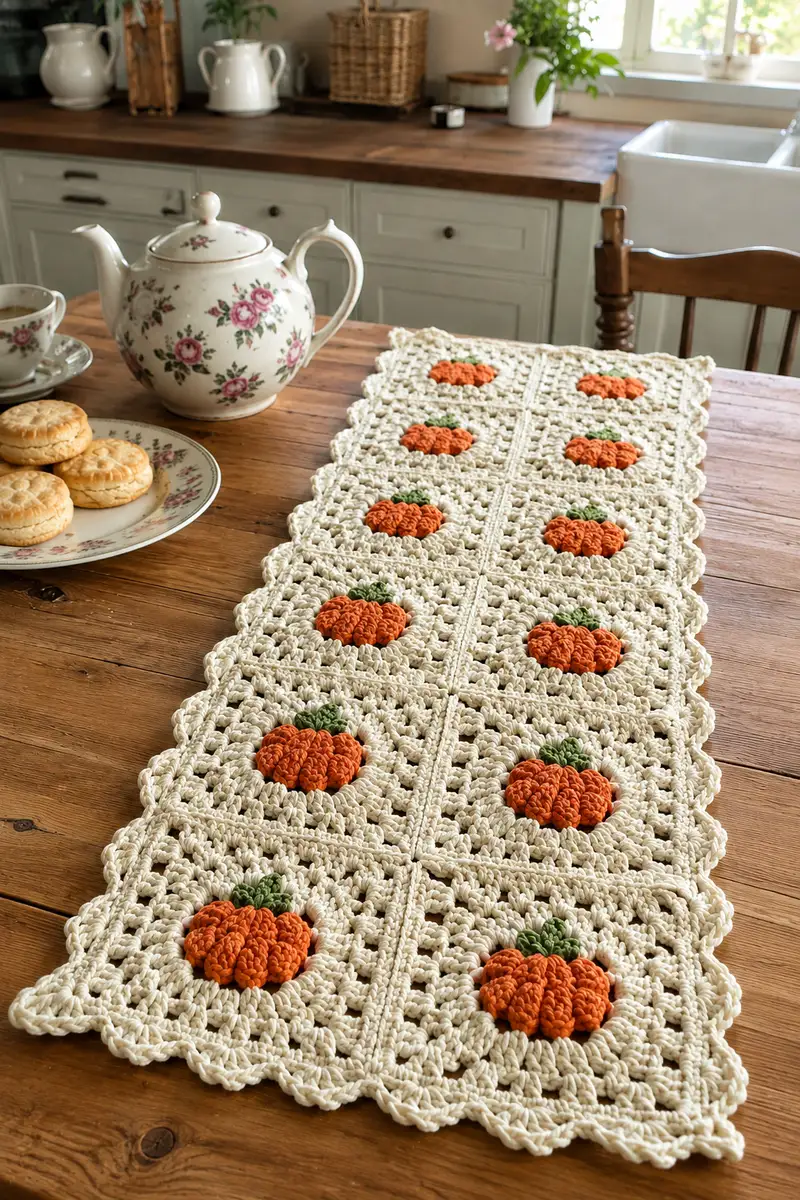
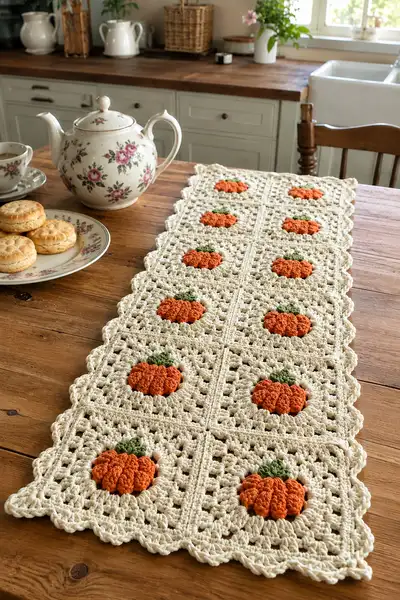
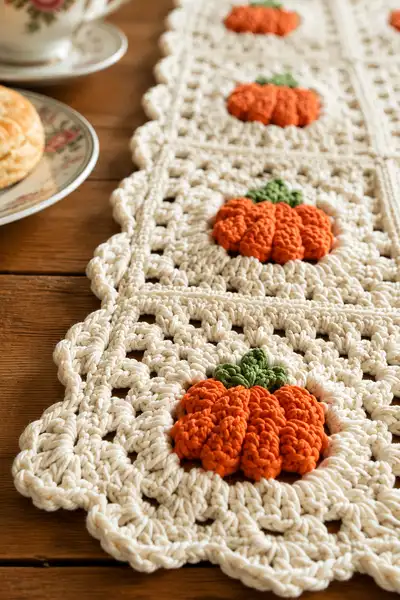
A cozy autumn table runner made from cream granny squares, each centered with a raised orange puff-stitch pumpkin and a tiny green leaf. This runner is made from soft, sturdy cotton-style yarn and finished with a scalloped cream border for a vintage farmhouse look. Perfect for autumn tables, festive displays, or a seasonal centerpiece — the repeating squares join together for a long, elegant runner that looks beautiful on wood or linen surfaces.
Progress Tracker
0% Complete
— Notes & Gauge :
Info :
Gauge is not critical for this table runner because the motif is modular, but you should aim for even squares. With 5.0mm hook and worsted/aran cotton, one finished square (after border) should measure approximately 6.5"-7" (16.5-18cm). If your squares are larger or smaller, adjust hook size. Make a sample square with the pumpkin center and preferred number of rounds before committing to all squares.
Info :
Abbreviations: This pattern uses standard US terms. Puff stitch technique is explained in the Pumpkin section. Each puff counts as one stitch for stitch-count math. Always use stitch markers at round starts and at square corners for easier joining and consistent shaping.
— Pumpkin Motif (make 10) :
Round 1 :
6 sc in magic ring (6)
Round 3 :
(1 sc, 1 inc) x 6 (18)
Round 4 :
(2 sc, 1 inc) x 6 (24)
Round 5 :
(3 sc, 1 inc) x 6 (30)
Info :
Change to Pumpkin/Orange yarn here if you began your magic ring with a different stash yarn. Fasten off main color tail or carry inside if you prefer. For tidy join, do a standing sc into the next round to change color without a visible knot.
Round 6 :
(4 sc, 1 inc) x 6 (36)
Round 7 :
(5 sc, 1 inc) x 6 (42)
Round 8 :
(6 sc, 1 inc) x 6 (48)
Info :
We will create 8 pumpkin "ridges" using puff clusters placed evenly around the round. With 48 stitches, we will repeat the sequence (5 sc, puff) x 8 so each repeat uses 6 positions. The puff is worked in a single stitch and counts as one stitch for stitch counts.
Round 9 :
(5 sc, puff) x 8 = 8 puffs + 40 sc (48)
Info :
Puff stitch (standard): yo, insert hook into stitch, yo and pull up loop (repeat 3 more times for 5 loops on hook total), yo and pull through all loops on hook, ch1 to close puff. Each puff is finished with a ch1 to stabilize; the ch1 is not counted as stitch in repeats. Keep tension even so each puff sits snugly and similarly sized.
Round 10 :
1 sc in each st around (48)
Round 11 :
(5 sc, puff) x 8 (48)
Info :
For a fuller pumpkin, work two rounds of puff placement (Rounds 9 and 11). The intervening round of sc (Round 10) stabilizes the puffs and prevents stretching. If you prefer a flatter applique, skip Round 11.
Round 12 :
1 sc in each st around (48)
Round 13 :
BLO: (5 sc BLO, puff BLO) x 8 (48)
Info :
Working in BLO on this round pulls the back of the stitches inward, giving additional relief around each puff and making the pumpkin sit up more from the surface. Make sure to insert the hook only through the back loop of each stitch when instructed.
Round 14 :
1 sc in each st (48)
Round 15 :
(3 sc, dec, 2 sc, puff) x 8 = 8 puffs + (3+2)*8 sc - 8 dec (calculate to keep 48) ; simplified: (3 sc, sc2tog, 2 sc, puff) x 8 (48)
Info :
Round 15 introduces small shaping to pull the pumpkin slightly inward at intervals and accentuate the ridges. Use sc2tog (single crochet two together) for tidy decreases. Keep counts consistent; each repeat yields 6 stitches including the puff as one stitch so counts remain 48.
Round 16 :
1 sc in each st around (48)
Round 17 :
(1 sc, puff, 5 sc) x 8 (48) — alternate puff placement to stack slightly offset (48)
Info :
Staggering puff placement slightly (rounds 9/11 vs 17) gives a more organic, tufted pumpkin appearance and avoids completely flat concentric rings. Keep a consistent number of loops for each puff.
Round 18 :
1 sc in each st (48)
Round 19 :
(2 sc, dec, 3 sc, puff) x 8 = (48)
Info :
If your pumpkin feels too tall, omit one puff round (for example skip Round 17) or use fewer puff clusters. The goal is to create a raised, roundish segment that sits proud of the square center but does not make the square lumpy. Bulky yarn will result in larger puffs than fingering/ DK yarn.
Round 20 :
1 sc around (48)
Round 21 :
sc in next 4 sts, dec, (puff) in next st — (arrange to shape) x8 (48)
Round 22 :
1 sc around (48)
Info :
Fasten off pumpkin center leaving a 12" tail if you will sew the pumpkin onto a square, or leave a shorter tail to weave when you are joining the pumpkin into the square directly. If you plan to work the pumpkin into Row 3 of the square during construction (sewn-in applique), leave a long tail and position accordingly.
Round 23 :
Optional tiny stem: join brown yarn at top center, ch2, 3 sc in next 2 ch, sl st to base; fasten off. (counts negligible)
Round 24 :
Leaf (make 1): With green, ch6, sc in 2nd ch from hook, hdc in next, dc in next, tr in next, sl st in last; turn and work along opposite side: dc, hdc, sc, sl st to base. Fasten off leaving tail for sewing. This small leaf fits above one puff cluster and anchors pumpkin to square.
Info :
Make 10 pumpkin motifs total. Keep all pumpkins the same size by counting your puff loops and maintaining consistent tension; use the same hook for the puff rounds if possible. Block lightly by pinning flat on a towel if puffs want to curl.
— Granny Square Background (make 10; add pumpkin centers) :
Round 1 :
With cream, ch4, join with sl st to form ring, ch3 (counts as first dc), 2 dc in ring, ch2, (3 dc, ch2) x 3; join with sl st to top of ch3 — corner clusters created (12 dc + 4 ch2 spaces)
Round 2 :
Sl st into next 2 dc to reach corner ch-2, ch3, 2 dc, ch2, 3 dc in same corner, *ch1, 3 dc in next corner ch-2, ch2, 3 dc; rep from * around with ch1 between corners; join (24 dc + 4 ch2 corners)
Round 3 :
Join at corner, ch3, 2 dc, ch2, 3 dc (corner made), ch1, 3 dc in space between corner clusters (same as row 2 placement), continue around making ch1 spaces between side clusters. Join at end. (clusters per side increase; maintain ch1 spaces between clusters)
Info :
In early rounds, position the pumpkin motif into the center: before finishing Round 3 (or Round 4 depending on your desired square size), place the pumpkin over the ring center and sew or slip-stitch it into place. I prefer to crochet the square up to Round 4 and then whip-stitch the pumpkin to the square through the back of the puff clusters so the pumpkin appears set into the square.
Round 4 :
Continue granny pattern: ch3 (counts as dc), place (3 dc, ch2, 3 dc) in each corner ch-2 space; along sides work *(ch1, 3 dc) into each ch1 space from previous round*; join with sl st to top of ch3. This round will frame the pumpkin; keep tension slightly relaxed so the pumpkin can sit inside the square opening.
Round 5 :
Repeat Round 4 but increase clusters along sides so each side has 4-5 cluster groups depending on desired square size. Ensure corners remain ch2 for turning and joining later.
Round 6 :
Work 1 round in BLO using sc around clusters to create a subtle ridge for the later joining seam: sc in each dc and sc in each ch space (counts vary by square; typically 48-56 sts after this round depending on cluster count)
Info :
At this point pin the pumpkin motif into the center if not already sewn. Using the long tail left from the pumpkin, sew the pumpkin onto the square by catching the back of the puff loops and the fabric of the square so it sits neatly nested. If you prefer, slip-stitch the pumpkin into the square center with the working yarn as you made Round 4 — this is join-as-you-go style.
Round 7 :
Increase square by adding one more row of clusters: corners (3 dc, ch2, 3 dc) and sides *(ch1, 3 dc) into each ch1 space*. This adds visual size to accommodate a larger pumpkin. Typical stitch count around after round 7 equates to approx. 64 stitches across the round perimeter but will vary by how many 3-dc groups you worked.
Round 8 :
Repeat Round 7 for a more open, lacy square. Work evenly so each square becomes roughly 6.5" to 7" finished (measure and adjust rounds accordingly). Join and fasten off, leaving tails for joining squares later.
Round 9 :
Optional decorative frame round: sl st into next space, ch1, sc around clusters and into ch spaces to create a solid frame row; place 2 sc in corner ch-2 spaces to maintain corner shape. This creates a tidy square edge for joining.
Info :
Repeat the same series of rounds for all 10 squares. Work consistently so every square matches in tension and size. Use blocking to even edges if needed: pin squares to a flat board to exact dimensions and spritz lightly if yarn content allows.
— Joining Squares (assembly rows) :
Info :
Layout: The runner in the photos is arranged as 2 columns x 5 rows (10 squares total). I recommend working five strips of two squares each, then joining the strips along the long edge. You can also join as you go using a slip-stitch join method or whip stitch squares together for an invisible seam. These instructions show join-as-you-go (JAYG) for a clean join and fewer ends.
Joining Step 1 :
Make five pairs: for each pair put square A (right-side up) and square B (right-side up) adjacent so the edges meet. We will join along one side of each pair using JAYG: With right sides facing you, attach cream yarn to corner of square A, ch1, sc evenly along one side edge of square A until corner, then pick up square B and sc through both loops of corresponding edge stitch on square B and the loop on square A (or sc into both layers). Continue across edge. Join and fasten off. Repeat for all five pairs.
Info :
If you prefer a decorative join, use a slip-stitch join where you sl st through the back loop of both squares to create a subtle ridge. Test both methods on two spare squares to see which finish you like best. Keep joins consistent throughout to maintain a flat runner.
Joining Step 2 :
Now join the five paired strips together: lay two paired strips side by side and align edges. Use mattress stitch or invisible whip stitch to create a seam. Stitch through the back loops of the border row of each square so the seam is tidy on the front. Repeat until all strips are joined into one long runner.
Info :
When stitching strips together, place your stitches near center of the side border row so the seam lies flatter. Keep even tension and check alignment frequently so pumpkin centers line up in straight columns along the runner.
Joining Step 3 :
Once strips are joined, lightly block the entire runner to 2-3% larger than finished size to square edges. Use rustproof pins and a damp cloth spray (or blocking mats) suitable for cotton yarns. Let dry fully before continuing to border rounds.
— Assembly Border & Scalloped Edge :
Round 1 :
With cream yarn and 5.0mm hook, join at a corner. Ch1, work sc evenly around the entire runner edge, placing (sc, ch1, sc) in each corner ch-2 space to maintain a neat corner. Work approx. 1 sc per one-triple cluster space along edges; typical total stitches around runner will vary (approx. 240-320 sts depending on square size and number of clusters). Join with sl st to first sc.
Info :
This round evens the edge and gives a base for decorative rounds. Count stitches on one long side and short side and note totals for symmetry in the next rounds. Use stitch markers at quarter points to prevent stretching.
Round 2 :
Ch3 (counts as dc), *skip 1 sc, 5 dc shell in next sc, skip 1 sc, dc in next sc; rep from * around; in corners work (5 dc shell, ch2, 5 dc shell) to turn the corner nicely. Join with sl st to top of ch3.
Round 3 :
Ch1, sc in same st, *ch3, skip next 5-dc shell, sc between shells (in the dc used previously), rep around; in corners ch3, sc between the corner shells to maintain corner scallop spacing. Join with sl st.
Info :
Rounds 2-3 create a scalloped effect foundation. Adjust shell size if your yarn is particularly thick; you may need 4-dc shells instead of 5-dc to avoid bulky overlapping. Keep shells consistent around perimeter.
Round 4 :
Ch2 (counts as hdc), hdc in same space, *5 dc in ch3 space (shell), hdc in next sc; rep; corners: (5 dc, ch2, 5 dc) in corner ch3 space. Join with sl st.
Round 5 :
Ch1, sc in same st, *work scallop: (skip 2 sts, 7 dc in next st, skip 2 sts, sl st in next st) — this large scallop forms the pronounced scallop edge; rep around; in corners make a scallop centered over the corner space. Join and fasten off. Weave in ends.
Info :
If your scallops curl too much, add one round of sc around the edge before the large scallop to stabilize. Scallop size can be adjusted to visual preference. Blocking after the scallop round will open and flatten the shells for an elegant finish.
Round 6 :
Optional picot trim: join cream, *sc in scallop peak, ch3, sl st in 3rd ch to create picot, sc in next peak; rep around. Fasten off and weave ends. This gives a tightened vintage finish to each scallop edge.
Info :
Final blocking: Pin scallops into a smooth shape and lightly mist the runner if fiber content allows. Cotton will hold shape after drying. The final runner should lie flat and display even scallops and square joins.
— Finishing Touches & Alternate Variations :
Info :
Optional accent: embroider small veins on green leaves with contrasting green using a backstitch, or add a tiny crocheted stem with brown yarn. You may also sew on small wooden buttons to the center of pumpkins for a rustic accent (pre-drill or use large-seam buttons to avoid splitting yarn).
Info :
To make a runner shorter or longer, add/remove rows of squares keeping the same 2-column width or increase columns for a wider runner. For a table mat, make a single square or a 1x2 set and finish with the same scalloped border.
Info :
Care: hand wash in cool water with mild detergent for best longevity. Reshape while damp and dry flat. Avoid tumble drying to preserve scallops and puff texture.
Finishing this cream and orange pumpkin runner is such a satisfying seasonal project — the warm orange puff pumpkins pop from the soft cream background and the scalloped edge gives a vintage, handmade feel. Each square comes together quickly and the modular structure means you can adapt the length any time. Enjoy setting it on your table for a cozy autumn display and feel proud of every stitch! 🎃🧶