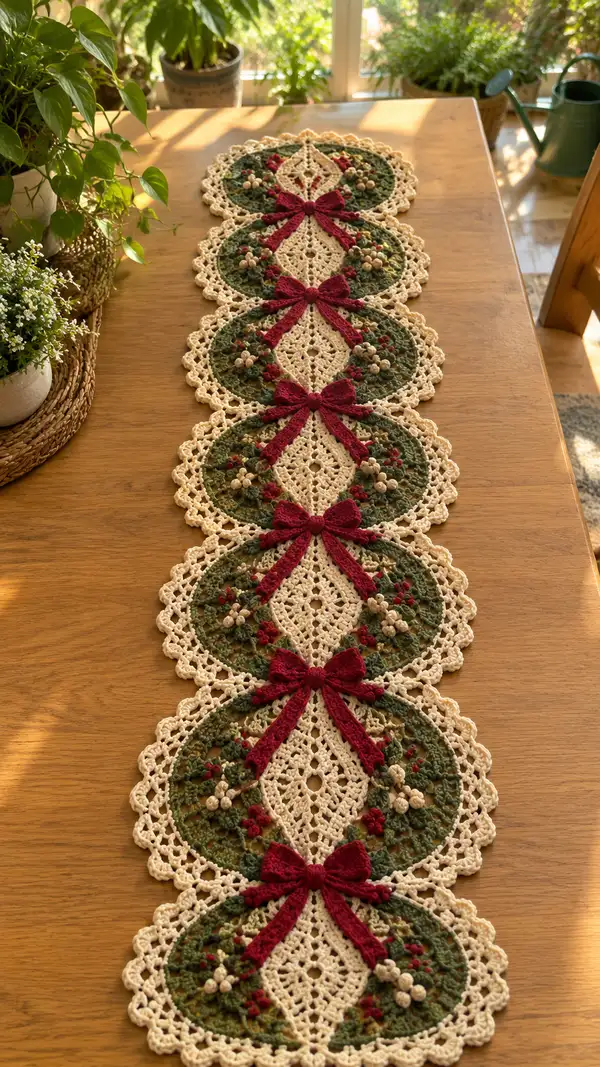
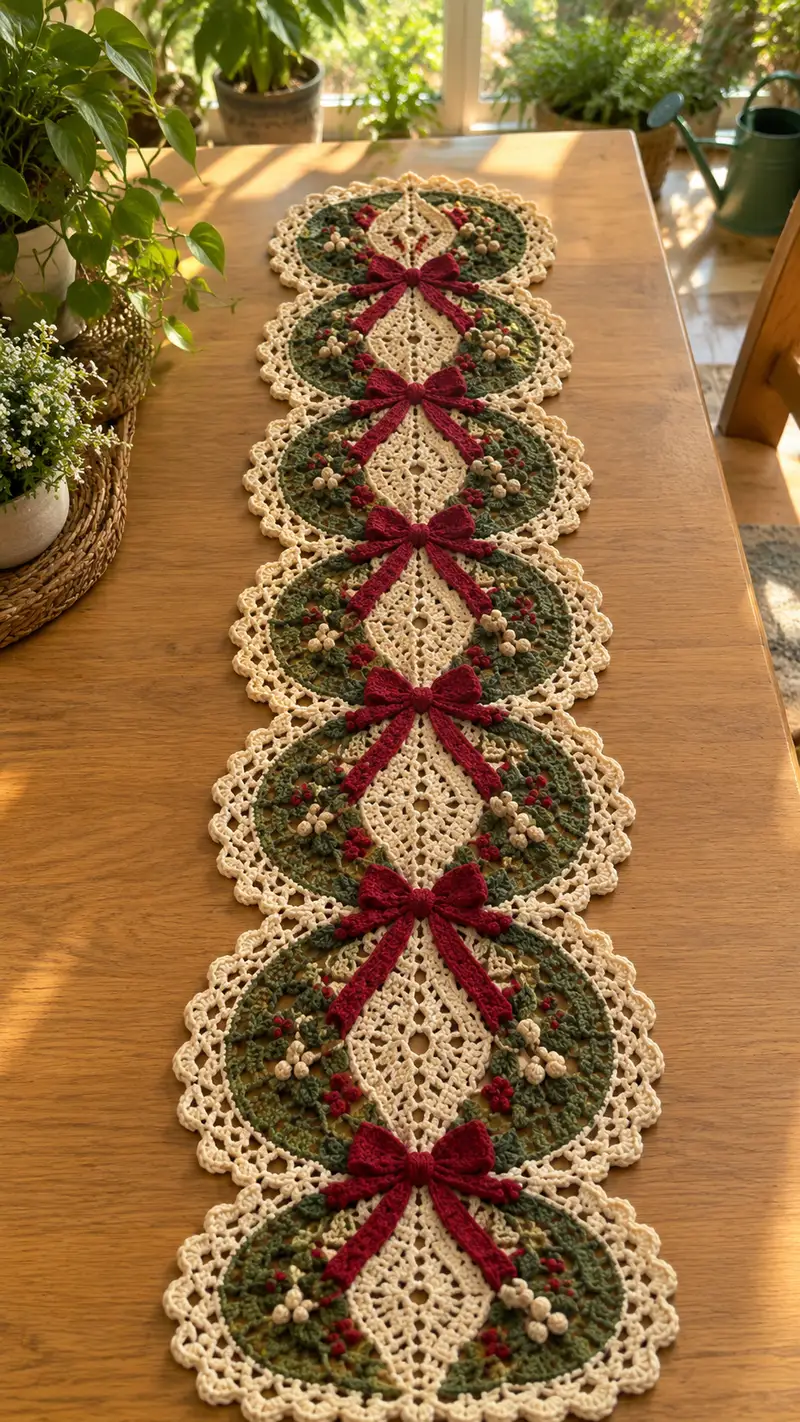
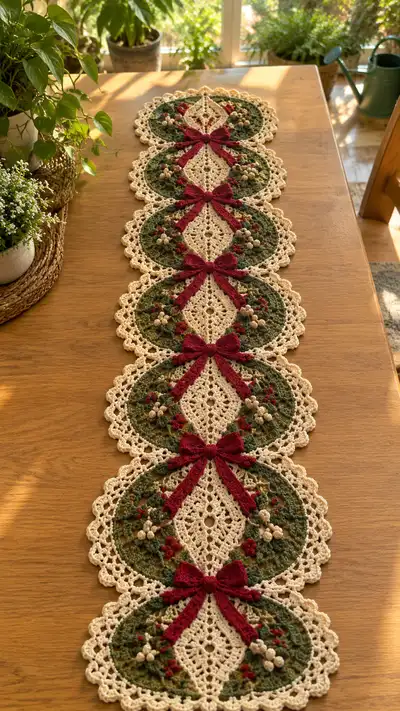
Create a stunning vintage-inspired table runner composed of linked circular lace motifs with cream crochet lace centers, forest-green wreaths, tiny cream berry clusters and rich berry-red bows. This pattern walks you through each lace round, decorative berry and rosebud, and the bow applique9s used to join motifs into a long runner. Finished photos show six connected motifs but the pattern explains how to make any number for a custom length.
Progress Tracker
0% Complete
— Motif: Cream Lacy Diamond Center :
Round 1 :
6 sc in magic ring (6)
Round 2 :
Inc in each st around (12)
Round 3 :
(1 sc, inc) x 6 (18)
Round 4 :
(2 sc, inc) x 6 (24)
Round 5 :
(3 sc, inc) x 6 (30)
Info :
We begin with a solid base worked in cream. Keep rounds tight and place a stitch marker in the first stitch of each round. This small central disc will be the anchor for the lacy diamond pattern.
Round 6 :
(4 sc, inc) x 6 (36)
Round 7 :
(5 sc, inc) x 6 (42)
Round 8 :
(6 sc, inc) x 6 (48)
Round 9 :
Ch 3 (counts as dc), *skip next st, dc in next st, ch1* repeat around to create 24 dc and 24 ch-1 sps—adjust final join so there are 48 working points (48 points)
Info :
Round 9 transitions to a lacy round. If counts feel odd, count ch-1 spaces; you should have 24 ch-1 spaces around the circle between dc groups. This establishes the framework for the diamond-shaped filet later.
Round 10 :
Work (dc, ch2, dc) in each ch-1 sp around, join with sl st to top of ch-3 (24 shell points)
Round 11 :
Ch 1, sc in same st, *ch 5, skip shell, sc in top of next shell* repeat around (24 ch-5 sps)
Round 12 :
Working into each ch-5 sp: (sc, hdc, 3 dc, hdc, sc) -- rounded fan in each ch-5 sp; join (24 fans)
Info :
These fans create a circular lace disk. Keep each fan consistent — count your dc clusters and keep tension even. This builds diameter before diamond shaping begins.
Round 13 :
Ch 1, sc in same, *ch 3, skip fan, sc between fans* around to create ch-3 mesh (24 ch-3 sps)
Round 14 :
In each ch-3 sp: (sc, ch2, 2 dc, ch2, sc) forming elongated petal points (24 petals)
Round 15 :
Ch 1, sc in same, ch 1, *sc in middle of next petal, ch 2* repeat around (48 sc/ ch-2 alternation)
Info :
Now we begin carving the diamond. The motif in the photo has an elongated diamond running top to bottom; we'll box a vertical axis by reducing stitches on the sides over subsequent rounds. Mark the top and bottom central petals so you can orient the diamond consistently.
Round 16 :
(1 sc in next 5 sts, sc2tog) x 6 (42)
Round 17 :
(1 sc in next 4 sts, sc2tog) x 6 (36)
Round 18 :
(1 sc in next 3 sts, sc2tog) x 6 (30)
Info :
As you decrease, pay special attention to keeping top and bottom central stitches unchanged — decreases should happen primarily on the lateral sides to elongate the vertical axis. This creates the diamond silhouette in the cream center.
Round 19 :
(1 sc in next 2 sts, sc2tog) x 6 (24)
Round 20 :
(1 sc, sc2tog) x 6 (18)
Round 21 :
(sc2tog) x 6 (6)
Info :
Do not fasten off. We will re-expand along the sides to form the elongated diamond with open mesh. At the end of Round 21 the center is slightly tightened; use this to pivot and work rows across to open into a diamond shape using chains and arches.
Round 22 :
Rejoin to a central top stitch: ch 1, sc in same, *ch 6, skip to opposite area and sc* repeat 6 times to create 6 long ch-6 spokes (36 ch-6 sps)
Round 23 :
Work (sc, ch3, tr, ch3, sc) in each ch-6 sp to create tall arches (6 arches across the vertical axis)
Round 24 :
Between arches, work ch 2 and sc to tie arches together, forming a diamond-lattice in the vertical strip; also work sc along remaining perimeter to maintain a stable circular outer edge (approx 48 sts total)
Info :
At this point, the cream center should show an open diamond-shaped lattice aligned vertically. Block this piece to shape the diamond before attaching the green wreath. Use pins and steam or wet-block for best definition.
Round 25 :
Work a round of sc evenly around all outer loops to provide a neat joining edge for the green wreath. Aim for 48 sc evenly distributed (48)
Round 26 :
Ch 3, *dc, ch 2, dc* in same st to create small picot-like raised points every 4th stitch around (12 small points)
Round 27 :
Ch 1, sc in same, *ch 4, sc in next 3 sc* repeat to produce uniform ch-4 loops around outer edge ready for wreath attachment (approx 12 loops)
Info :
Finish cream center by weaving in ends on the wrong side. Keep a long tail if you plan to sew the center to a backing or to connect directly to the green wreath. Blocking now ensures neat joins and consistent shape.
— Green Wreath (Make 1 per motif) :
Info :
The green wreath is worked mostly in forest green with small accent shades of moss/olive. You will join into the cream loops created in Round 27; use the ch-4 loops as attachment points. Work outwards from the cream center to build a textured wreath with leaf clusters and spaces for berries and rosebuds.
Round 1 :
Join forest-green yarn into any ch-4 loop: ch 1, 8 sc evenly around the loop (8)
Round 2 :
Inc in each st (16)
Round 3 :
(1 sc, inc) x 8 (24)
Round 4 :
(2 sc, inc) x 8 (32)
Info :
Rounds 1-4 create a stable base around the cream center. Keep the increases evenly spaced so the wreath sits flat. If you added a contrasting strand of moss green, alternate every other stitch for subtle variation.
Round 5 :
Ch 3, *skip next st, dc in next, ch 2* repeat around to create 16 dc groups with ch-2 sps (16 dc groups)
Round 6 :
In each ch-2 sp: (sc, hdc, 3 dc, hdc, sc) — leaf-shaped fan (16 leaves)
Round 7 :
Ch 1, sc in same st, *ch 3, sc between leaves* repeat around to create spaces for decorative berries (16 ch-3 sps)
Info :
Lay out where berries and rosebuds will be placed. In the photo each wreath has 3 small cream clusters and multiple tiny red rosebuds; leave every 4th or 5th leaf with an accessible ch-3 space for berry placement.
Round 8 :
Work (sc, ch2, 2 dc, ch2, sc) in each ch-3 sp to create rounded pockets; join (16 pockets)
Round 9 :
Ch 1, sc evenly around leaves and pockets working 48 sc total (48)
Round 10 :
Slip stitch into every other sc to create slight contraction where berries will sit—work 24 sl st (24)
Round 11 :
In chosen pocket positions add surface slip stitch vines: with moss/olive green, sl st around the leaf edges for subtle raised veins; work about 3-4 sl st per leaf for texture
Info :
Surface slip stitch vines use a second shade of green carried along the back or sewn on later; this gives the wreath depth and an aged, mottled look reminiscent of the photo sample.
Round 12 :
Ch 1, sc in each st BLO around to create a defined inner ridge that will frame the cream diamond (48 BLO)
Round 13 :
Work 1 sc in next 3 sts, (ch 4, skip 1) repeat around to form open scallop base for outer picot edging (12 ch-4 sps)
Round 14 :
In each ch-4 sp: (sc, ch 2, 3 dc, ch 2, sc) producing a fuller wreath outer arch (12 outer arches)
Round 15 :
Ch 1, sc around whole wreath edge to balance stitch count; aim for 72 sc evenly (72)
Info :
Pause and layout the wreath beside the cream center; tack with pins and check alignment. The wreath should overlap the outer cream loop but leave a central diamond visible. Adjust by adding or skipping a few sc to even tension.
Round 16 :
Optional decorative round: (ch 3, picot, ch 3, sl st) into each outer arch to create raised picot beads around wreath edge (12 picots)
Round 17 :
Work a round of sc in the outermost loops to prepare for scalloped cream joining; aim for 72 sc (72)
Round 18 :
Finish by fastening off leaving long tail for sewing to the cream center if you did not join earlier. Weave in the starting tail on wrong side but keep attachment tail for joining motifs.
— Berry Cluster (Make 3 clusters per motif — cream berries) :
Info :
Each cluster is composed of several tiny beads/berries worked in light beige/antiqued cream. They are dimensional and can be slightly stuffed with tiny bits of yarn or tightly wound if you want firm berries. We'll make a 5-berry cluster with a small base to sew into the wreath pockets.
Round 1 :
With beige, make 6 sc in mr to create a tiny berry base (6)
Round 2 :
Inc in each st around (12)
Round 3 :
(1 sc, inc) x 6 (18)
Round 4 :
Fold the small disc in half and sc through both layers around about 9 sc to close into a little puff; stuff very lightly if desired. Leave a long tail to sew. Make 5 of these tiny berries for one cluster.
Info :
Make a small chain of 3 sc between each berry when joining them into a cluster so they sit naturally on the wreath. Alternatively, sew them close together in a compact five-star formation and secure with a few extra stitches to the wreath foundation.
Round 5 :
Arrange the 5 berries into a round cluster on the wreath pocket — sew through the base of each berry to secure, using the long tails. Knot tails on wrong side and bury ends.
— Red Rosebud (tiny) (Make 6-8 per wreath) :
Round 1 :
With berry-red and 2.5-3.0mm hook, ch 4, sl st to join to make a loop, ch 1, 6 sc in loop (6)
Round 2 :
In next round: (sc, hdc, 2 dc) in first st, (sc, hdc, 2 dc) in next two sts to form 3 small petal clusters; leave a 6-8 cm tail to sew (3 petals)
Round 3 :
Roll the petal strip tightly into a spiral and sew along the base with matching yarn to hold rose shape. Secure base with a few stitches and knot; leave tail for sewing to wreath
Info :
Rosebuds are worked flat and then rolled; this gives authentic small roses seen in the photo. Make several sizes by adjusting ch foundation to 3–5. Place them in clusters with the cream berries for contrast.
— Bow Applique9 (Make 1 per join) :
Info :
The bows are worked with berry-red yarn and attach on top of the cream diamond where two motifs meet. Each bow is comprised of a center knot, two loops and two tails. The sample bows are flat but dimensional; we will make looped bows with textured tails (a twisted cord) to match the image.
Bow: Center Knot Round 1 :
Ch 6, sl st into a loop, sc 6 in loop, sl st to join (6)
Bow: Center Knot Round 2 :
Fold small circle and sc around both layers 6 sc, fasten off leaving long tail for wrapping the center (6)
Info :
Center knot will wrap around the bow loop to give the tied look. Leave a long tail to wrap securely around bow loops and tails after assembly.
Bow: Loop (Make 2) Round 1 :
Ch 30, turn, sc in 2nd ch from hook and across (29)
Bow: Loop Round 2 :
Ch 1, turn, sc across (29)
Bow: Loop Round 3 :
Fold loop strip in half lengthwise and sc through both layers across the short end to form a rounded loop. Work 29 sc to close end then shape loop by sewing short edges together and hiding tail
Bow: Tail (Make 2) Round 1 :
To create textured tails, ch 40, in 3rd ch from hook work (dc, ch1) across to end, fasten off leaving long tail (approx 38 dc with ch-1 spaces)
Bow: Tail Round 2 :
Twist tail gently and wrap with yarn into a loose rope; secure ends with a few stitches to prevent unravelling
Bow: Assembly :
Arrange two loops crossing in the center, then place tails underneath. Wrap the center knot long tail around the meeting point tightly several times and secure on the back with invisible sewing. Trim ends and weave in neatly
Info :
Make bows slightly smaller if you prefer a subtler effect. The sample bows are moderate size to read well over the wreath; aim for bow width roughly equal to the motif center vertical diameter.
— Scalloped Cream Border (Outer Lace Edge) :
Round 1 :
Join cream yarn to outermost green edge: ch 1, sc evenly around, aim for 72 sc to match wreath outer edge (72)
Round 2 :
(Sc in next 2 sts, ch 3, skip 1) repeat around to form 24 ch-3 loops for scallops (24 loops)
Round 3 :
In each ch-3 loop: (sc, hdc, 3 dc, hdc, sc) to produce shell scallops (24 shells)
Round 4 :
Ch 1, sc around shells placing 3 sc into each shell peak and 1 sc into valleys to even out shape (approx 96 sc)
Round 5 :
(Ch 3, sl st in next st, picot on top of shell) repeat so each outer scallop has a decorative picot point (24 picots)
Info :
The scalloped cream border gives the runner the antique lace effect seen in the photo. Work tight picots and shells for a crisp edge. Block each finished motif with the scallop pinned to perfect symmetry.
Round 6 :
Optional finishing round: sc in each st BLO for a defined raised edge (96 BLO)
Round 7 :
Fasten off and weave in ends. Leave a long tail for joining motifs in sequence at the cream diamond tips (we will attach bows and join here)
— Joining Motifs & Assembly :
Info :
The runner is assembled by joining the cream diamond tips of adjacent motifs and overlaying a berry-red bow at each join to conceal the seam. You can join motifs by whip stitch, slip stitch join, or single crochet join; the instructions below describe a neat whip stitch join followed by bow applique9 placement.
Join Step 1 :
Place two motifs with wrong sides together so cream diamonds align tip-to-tip. Pin the diamond tips together so the inner lattice meshes neatly (tips meeting center-to-center).
Join Step 2 :
Using the long cream tails left at scallop rounds, whip stitch through both motifs at the corresponding stitch counts across the diamond tips. Work 8-12 small stitches along the inner diamond seam to hold securely. Knot and weave ends inside.
Info :
Before finishing the seam, insert the pre-made berry clusters and rosebuds into their pockets and tack them down so they sit naturally within the wreath. This secures small pieces and makes final sewing easier.
Join Step 3 :
Once two motifs are sewn, position the bow over the seam. Using berry-red yarn, tack the bow center to the motifs by sewing through the center knot base into both motifs. Add a couple of stitches on the tails to anchor them flat on the runner surface.
Join Step 4 :
Repeat joining to make a chain of motifs to your desired length. The photo sample has six motifs but pattern repeats allow any number. At the ends, secure single motif edge with an extra small cream picot if you want a finished end loop.
Info :
As you join motifs, check that bows are aligned along the runner center and that wreaths face the same direction. Adjust before final sewing by pinning all motifs in a long line and checking visual alignment on your table surface.
— Final Finishing & Blocking :
Info :
Blocking is essential. Carefully wet or steam-block each motif pinned to shape — ensure scallops are symmetrical and diamonds are elongated. Allow to dry fully before removing pins. Light starch spray can provide extra stiffness if desired.
Final Step 1 :
Weave all remaining tails into the wrong side of the runner, trimming close. Secure any loose decorative elements with a hidden stitch or a dab of fabric glue if needed.
Final Step 2 :
Give the runner one gentle press on low heat (if yarn permits) for final flattening and sheen. Lay on table and admire—your Cream Lace Forest Green Berry Bow Table Runner is ready to display.
Info :
Store runner flat or rolled to avoid creases; if gifting, include care instructions recommending gentle hand wash and flat dry to preserve lace shape and colors.
Finishing this runner is so rewarding — every scallop and tiny berry adds personality and vintage charm to your table. The modular motif system means you can create any length you need and customize colors for seasons or holidays. Enjoy the slow, meditative lacework and the happy moment when the bows are finally tied into place. 🧶🌿🎀