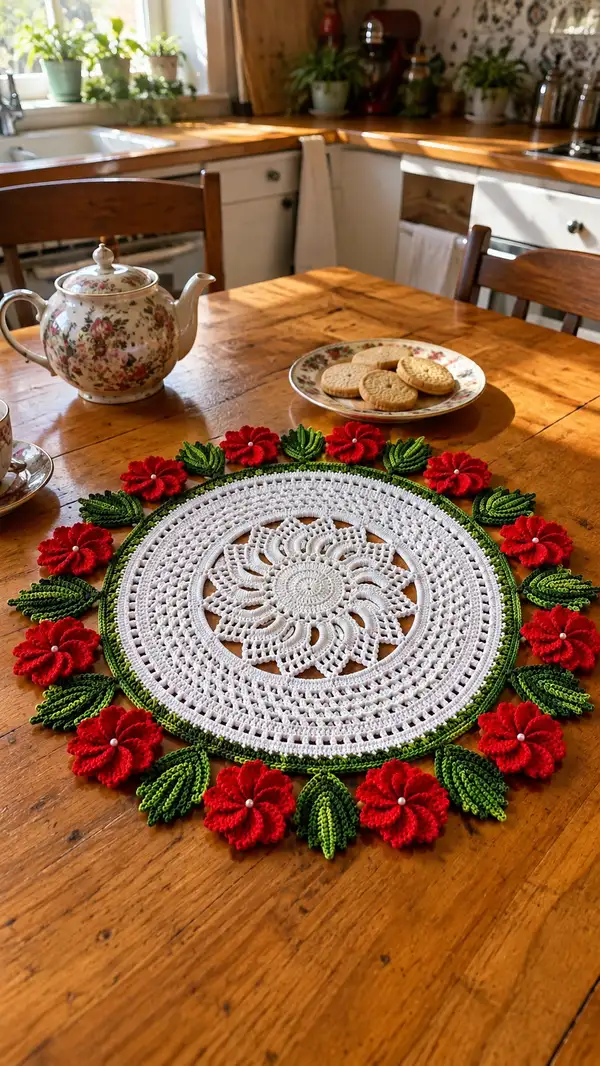
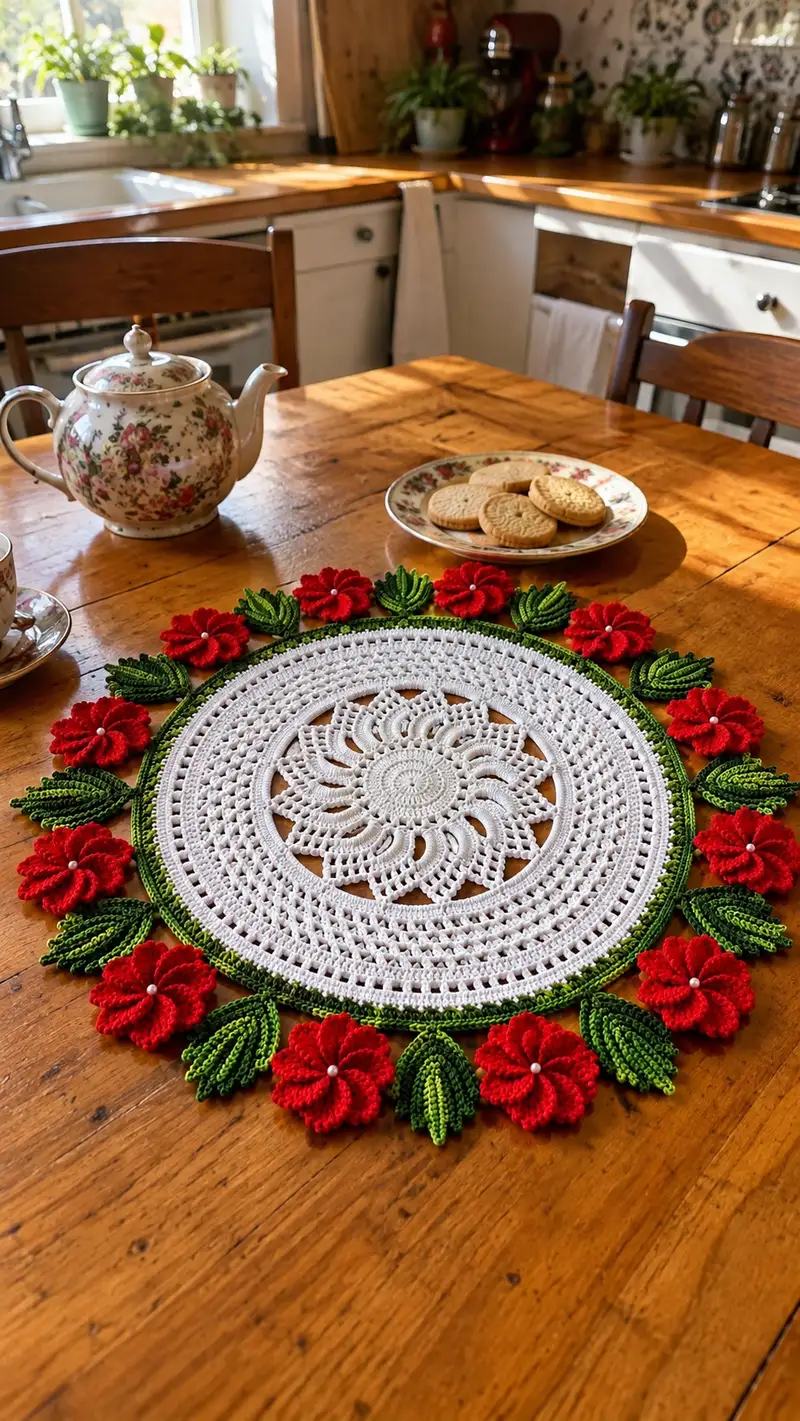
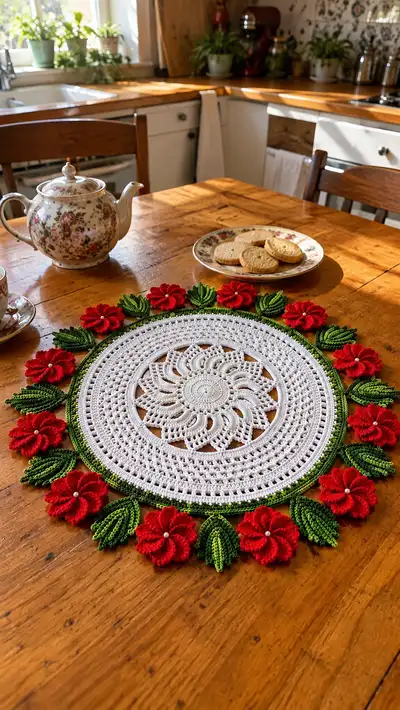
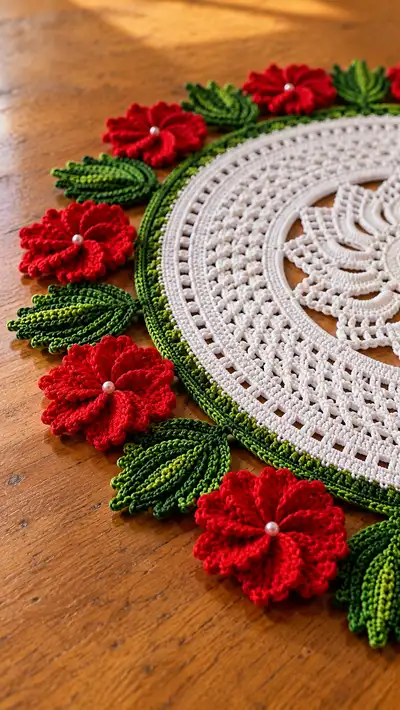
A charming vintage-inspired round crochet placemat with an intricate white mandala center, moss-green scalloped border, and bright red layered flowers with matching ribbed leaves. The design lays flat and features delicate openwork, textured post-stitches and scalloped edging finished with small pearl centers on the flowers. Perfect as a table centerpiece or decorative tray mat, this pattern combines lacey motifs with bold floral accents for a warm, classic look.
Progress Tracker
0% Complete
— Central Mandala :
Round 1 :
Start with a magic ring. Ch1, 6 sc in ring. Pull ring closed. (6)
Round 2 :
Inc in each st around. (12)
Round 3 :
(1 sc, inc) x 6. (18)
Round 4 :
(2 sc, inc) x 6. (24)
Round 5 :
(3 sc, inc) x 6. (30)
Info :
Keep tension even and relatively firm to form a flat disc. If your work begins to cup, switch to a slightly larger hook for the next round; if it ruffles, go down a hook size.
Round 6 :
(4 sc, inc) x 6. (36)
Round 7 :
(5 sc, inc) x 6. (42)
Round 8 :
(6 sc, inc) x 6. (48)
Round 9 :
(7 sc, inc) x 6. (54)
Round 10 :
(8 sc, inc) x 6. (60)
Round 11 :
(9 sc, inc) x 6. (66)
Round 12 :
(10 sc, inc) x 6. (72)
Info :
At this size you have a solid circular base. If your gauge differs and you want a slightly larger or smaller center, you may add or remove one increase round now before beginning textured rounds.
Round 13 :
1 sc in each st around. (72)
Round 14 :
Ch3 (counts as dc), *sk next st, dc in next st; rep from * around to create small spaced loops. Join with sl st to top of ch3. (36 dc clusters)
Round 15 :
Ch1, sc in same st, *ch3, sk next dc, sc in next dc; rep from * around. This creates small chain arches. Join. (36 arches)
Info :
These chains form the base of a petal/sunburst motif. Keep stitches relaxed in rounds with chain spaces so the work will lie flat and not pull inwards.
Round 16 :
Working into each ch3-arch: in each arch work (sc, hdc, 3 dc, hdc, sc) to form a petal. Join with sl st. (36 petals)
Round 17 :
Ch1, sc in each st and in each petal top around, working 2 sc in each petal top where space allows to form a continuous round. (Approx. 72-80 sc depending on spacing)
Round 18 :
Ch2 (counts as hdc), *sk 1, (dc, ch1, dc) in next st (creates small clusters), sk 1, hdc in next st; rep around. Join. (This introduces openwork ray effect)
Round 19 :
Ch1, sc in each st and ch-1 space around to stabilize openwork. (Count will vary by one or two depending on previous row; aim for an even number to maintain symmetry)
Round 20 :
Ch3, *FPdc around the next sc (front post double crochet), ch1, skip next st, dc in next st; rep around. Join. This adds vertical texture and height to petals. (Approx. 80 sts including posts)
Info :
Work these FPdc and chain spaces loosely so the petals pop slightly; if your posts look too tall and flop, work FPdc into the base of the stitch rather than through the full post height.
Round 21 :
Ch1, sc in each st and around post stitches (work 1 sc into each dc post as if it were a stitch). (Approx. 80 sc)
Round 22 :
Ch4 (counts as tr), tr in next 2 sts, ch2, sk 2, tr cluster in next 3 sts, ch2; rep around to create airy lacy scallops. Join. (Patterned clusters)
Round 23 :
Ch1, sc in each st and in chain spaces to reinforce lacy scallops. (Maintain same count as previous round)
Round 24 :
Switch to dc openwork: ch3, *sk1, dc in next, ch1, sk1, dc in next; rep around to form open mesh. Join. (Count equal to number of visible loops)
Info :
If you wish to emphasize the inner mandala pattern, work Round 24 in BLO so the raised ridge of the previous round shows on top of the mesh.
Round 25 :
Ch1, sc in each dc and in each ch1 space around. (Even count, keeps mesh stable)
Round 26 :
Work 1 round of alternating dc and ch1 spaces: ch3, *dc in next st, ch1; rep around. Join. (Creates a small open grid)
Round 27 :
Ch1, sc in each st and ch-space around. (Even count)
Round 28 :
Ch2 (hdc), *3 dc in next ch1 space, hdc in next st; rep around. Join. This begins forming gentle scalloped rings out toward the border.
Round 29 :
Ch1, sc in each st and in the top of each 3-dc group (3 sc over group) for a tidy surface. (Count will increase modestly — aim for 96 sc total if your gauge matches previous increases)
Info :
Check your work against a flat surface often to ensure the mandala remains flat. Blocking later will help, but it's easiest to keep things even as you progress.
Round 30 :
Ch3, *fpdc around next 2 sts, dc in next st, ch1; rep around. Join. This is the final textured round of the white mandala before moving to the openwork ring.
Round 31-36 :
1 sc in each st around (36), maintaining consistency and checking flatness. (Work 6 rounds to create stable plate for joining openwork)
Info :
Fasten off white if you plan to pick up stitches for the green border separately. If you prefer a continuous join, leave a long tail and change color directly for the next rounds.
— Open Mesh & Transitional Rounds :
Round 37 :
Join contrast green (darker green) with sl st to any st. Ch1, sc around for one tidy join round. (Approx. 96 sc)
Round 38 :
Ch3, *sk 1, dc in next st, ch1; rep around to create larger mesh row. Join. (48 dc spaces)
Round 39 :
Ch1, sc in each st and ch-space around to firm up mesh. (Approx. 96 sc)
Round 40 :
Ch2, *2 dc in next st, ch1, sk next st; rep around. Join. (Creates small arches for next row to anchor decorative leaves and flowers)
Info :
Use this round to count out how many attachment points you will have for leaves and flowers. The sample project has 12 flower positions and 12 leaf positions alternating; plan spacing every 8 stitches (or every 96/12 = 8 sts).
Round 41 :
Ch1, sc in each st to create a sturdy base. (96 sc)
Round 42 :
Ch1, 1 sc in each of the next 4 sts, *ch3, sk 4, 1 sc in next 4 sts; rep around. Join. You now have 12 ch-3 loop positions (approx) to anchor flowers and leaves. (Spacing roughly every 8 sts)
Info :
Mark each ch3 or designated attachment loop with a removable or safety stitch marker. This ensures even placement of flowers and leaves in assembly.
Round 43 :
Ch1, sc in each st around (including over ch-3 spaces working 1 sc in each space) to reinforce attachment points. (96 sc)
Round 44 :
Switch to a lighter green for the decorative border highlight. Join with sl st and ch1, 1 sc in each st around to make the green edge pop. (96 sc)
Round 45 :
Ch2, *BPdc around next sc, ch1, FPdc around next sc, ch1; rep around to create ribbed texture on edging. Join. (96 posts total)
Round 46 :
Ch1, sc in each st around working into posts and ch-spaces to neaten the texture. (96 sc)
Info :
This green ring is the platform where you'll attach leaves and flowers. Keep this round neat and even so sewn elements sit properly without pulling the edge inwards.
— Leaves (Make 12) :
Info :
Each leaf is worked flat in two greens to create a ribbed, dimensional leaf. Work the leaf in rows; each leaf uses approximately 6-8 grams of combined green yarn. Make 12 leaves, alternating dark and light green stitches as indicated.
Leaf Round 1 :
With dark green, ch8. Sc in 2nd ch from hook and across (7 sc). Turn. (7)
Leaf Round 2 :
Ch1, 2 sc in first st, sc across until last st, 2 sc in last st. (9)
Leaf Round 3 :
Ch1, 1 sc in first 2 sts, inc in next st, sc across to last 3 sts, inc, 1 sc in last 2 sts. (11)
Leaf Round 4 :
Ch1, sc across working BLO for one row to create a ridge (11 sc). Turn. This is an optional texture step to form a central vein.
Leaf Round 5 :
Switch to light green (join in first st). Ch1, sc in each st across (11). Turn. (Light green highlight)
Leaf Round 6 :
Ch1, sc2tog, sc across until 2 sts remain, sc2tog. (9)
Leaf Round 7 :
Ch1, sc across (9). Work 1 sc around the tip by working 3 sc into the end stitch to round the leaf tip and continue down the other side of foundation chain. Continue sc around to complete the leaf shape joining to first sc of round. (Approx. 18 - this is your full leaf perimeter)
Leaf Round 8 :
Ch1, work FPdc and BPdc alternating along the leaf center to create ribbing: *FPdc in next 2 sts, BPdc in next 2 sts; rep across. Fasten off leaving long tail for sewing. Press lightly to shape.
Info :
Stiffen lightly with diluted fabric stiffener if you want the leaves to hold a sculpted shape. Block each leaf flat and pin into a slightly curved oval so that sewn leaf has natural arch.
— Flowers (Make 12) :
Info :
Each flower is a layered rosette with 8 petals and a gathered center anchored by a small pearl bead. Work petals in rounds to create depth. Make 12 flowers to alternate with leaves around the placemat edge.
Flower Round 1 :
With red, make a magic ring, ch1, 8 sc into ring. Pull ring closed. Join with sl st. (8)
Flower Round 2 :
Ch2, (hdc, dc, tr, dc, hdc) in each st around to form petal bases. Join with sl st between petals. (8 petals)
Flower Round 3 :
Ch1, sc into base of first petal, ch3, sc into next petal base; rep around (8 ch-3 loops). Join. These ch-3 loops form pockets to work detailed petal texture.
Flower Round 4 :
Into each ch-3 loop work (sc, hdc, 3 dc, hdc, sc) to make fuller petals. Join. (8 full petals)
Flower Round 5 :
Ch1, sc in each st and in between petal tops to firm up the petal edges. (Count will be 40-48 depending on petal width)
Flower Round 6 :
Ch4, (tr3 cluster) in the base spaces between petals to produce a second, smaller petal layer. Join with sl st. (Creates layered look)
Flower Round 7 :
Ch1, sc around including into cluster tops to stabilize second layer. Fasten off leaving a long tail for sewing. Sew a small pearl in the center through the back of the flower, knot securely and hide end. (Optional: use a French knot made with yarn for a non-bead center)
Info :
If you prefer a puffier flower, use a smaller hook for the petal rounds so the stitches are slightly tighter and the petals stand up more. For flatter petals use the same hook as the mandala rounds.
— Flower and Leaf Attachment Preparation :
Round A :
With green round 43 marked (attachment platform), count the 12 marker positions you made earlier. Number them conceptually 1-12. You will attach 12 flowers with leaves alternating: e.g., flower at position 1, leaf at position 2, flower at 3, leaf at 4, etc.
Info :
Pin each flower and leaf in position first with straight pins through the base and into blocking mat or foam board. Adjust spacing so petals do not overlap too much—aim for about 1-2 cm of negative space between adjacent petals for visibility.
Round B :
Using the long tail from a finished element, sew each flower to the green platform by inserting the needle through the green base and through the underside of the flower center. Use small whip stitches to secure, then knot on the underside and bury the tail. Repeat for all flowers and leaves.
Info :
For stronger attachment, weave a figure-eight stitch across the underside of the platform and through the flower base, then tie off. If the placemat will be washed often, use a few discrete stitches rather than a single knot to avoid loosening in the wash.
— Final Edge & Finishing Rounds :
Round 47 :
With dark green and a 3.0mm hook, join to any st of the green platform. Ch1, sc around working evenly between flowers and leaves; in areas where flower bases sit, work 2 sc around the seam for reinforcement. (Approx. 96 sc)
Round 48 :
Ch3, *sk next st, 5 dc shell in next st, sk next st, sl st in next st; rep around to create scalloped edging. Join. (Creates a decorative scallop framing the flowers)
Round 49 :
Ch1, sc in each scallop edge and in sl st spaces to neaten. Work 2 sc in the center stitch of each shell to accent the scallop. Fasten off and weave in ends. (96 sc equivalent)
Info :
Weave tails through the underside of the green edging so they are invisible from the top. Trim ends close after weaving 5-8 cm through several stitches.
Round 50 :
Blocking: Wet block the entire placemat. Place on a flat surface, arrange flowers and leaves so they sit slightly raised, and pin the outer scallop to perfectly round shape. Allow to dry fully.
Info :
Blocking ensures a flat, professional finish. If you want the flowers to be a bit firmer, spray-starch them lightly during blocking or use diluted fabric stiffener on petals only.
— Alternate Petal Variation (Optional extra texture) :
Alt Round 1 :
Before attaching the flowers, you can add a short round of small picots between each flower to add delicate points: join white or light green, *ch3, sl st in base of ch3 to make picot; rep between each element. Fasten off.
Info :
This optional step is purely decorative and adds a vintage lace feeling. Make sure picots do not compete with flower petals—test a few before committing to all 12 positions.
— Extra Notes on Scaling and Substitution :
Info :
To scale the placemat up or down: change yarn weight and hook size proportionally. For a larger mat, use sport to DK weight yarn plus a 3.5–4.0mm hook and add additional increase rounds in the central mandala (follow the increase pattern of adding one more sc between increases each round to keep the flat circle). For a smaller mat use thinner thread and smaller hook and stop increasing earlier.
Info :
You may substitute beads, embroidered centers, or small fabric buttons for the pearl centers. If using beads, sew them on with a strong thread and back them with a small scrap of felt for stability if needed.
Info :
Assembly tip: attach flowers and leaves to the dry, blocked mat. If you attach to an unblocked mat, you may find spacing shifts after blocking. Blocking first gives the truest placement guide.
Info :
Care instructions: hand wash gently in cool water and lay flat to dry. Avoid wringing and high heat. Light steam blocking is fine if you used mercerized cotton.
This vintage floral placemat is a wonderful mix of lace and bold floral accents that will brighten any table setting. Each carefully constructed petal and leaf adds depth, while the white mandala keeps the design timeless and elegant. Enjoy the tactile pleasure of crocheting intricate lace combined with playful flowers — the result is a piece you'll be proud to gift or display. Happy stitching and enjoy the warmth this handmade centerpiece brings to your home! 🧶🌺