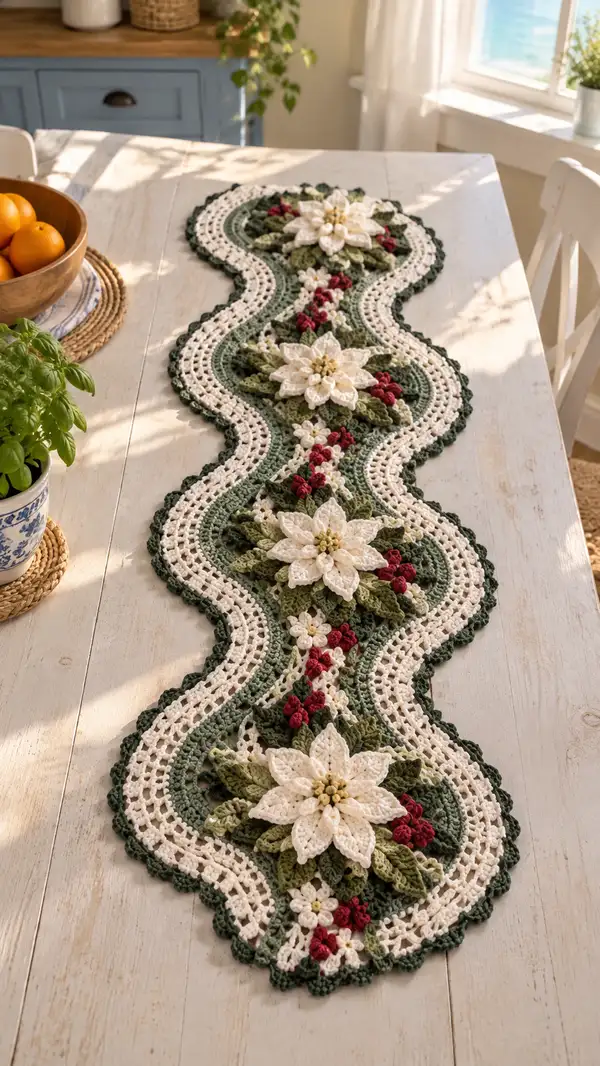
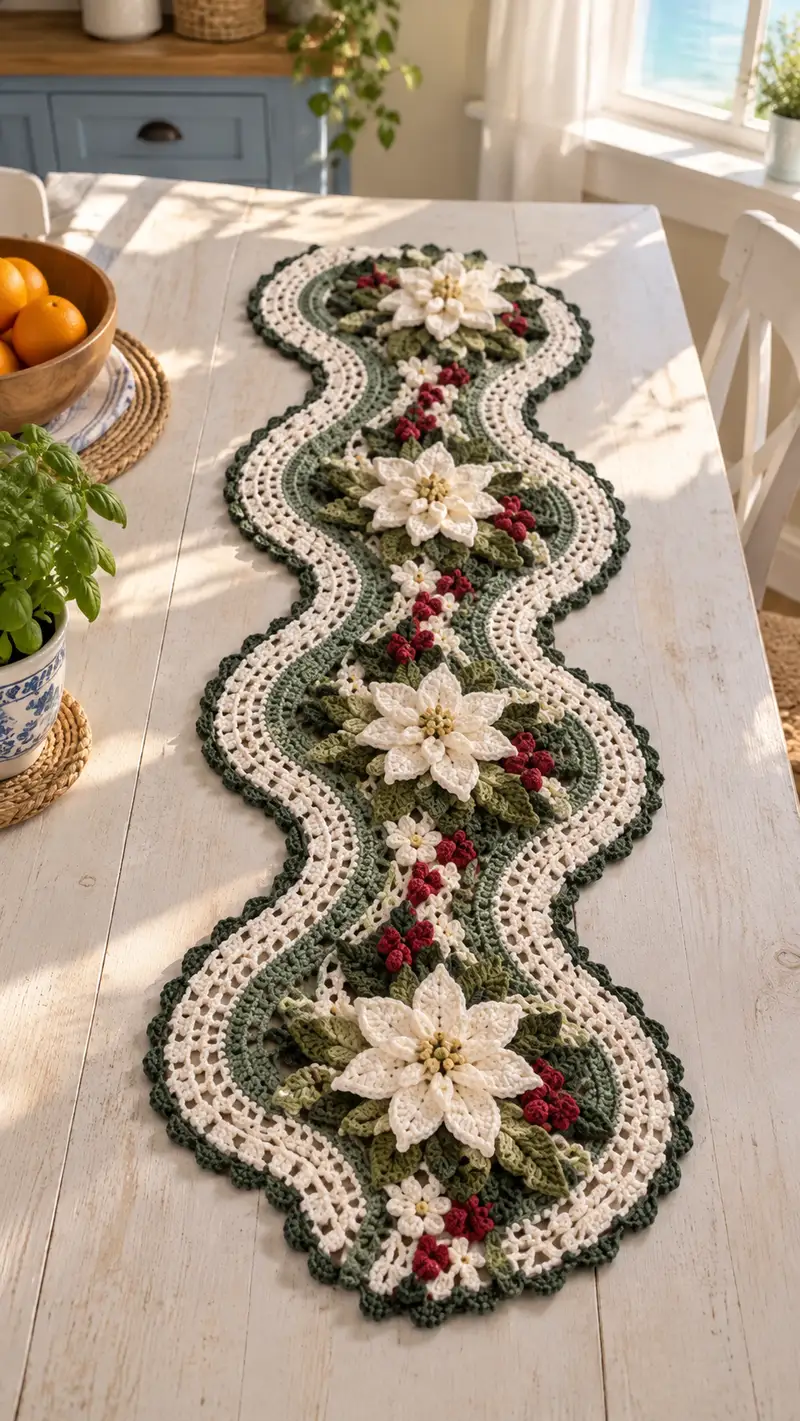
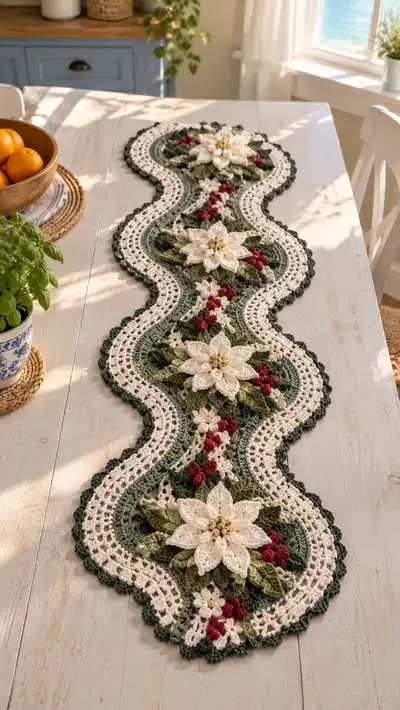
This elegant table runner features three dimensional cream poinsettia motifs set on a forest green and cream scalloped lattice background with little red berry clusters. The runner uses layered petals, textured leaves, tiny blossom accents, and a scalloped edge for a finished, festive look. Perfect as a holiday centerpiece or seasonal decor, it brings vintage charm and hand‑stitched detail to any table.
Progress Tracker
0% Complete
— Components Overview :
Info :
This runner is worked in separate motifs: 3 large Poinsettia Medallions (each made from layered flower centers, petals, and a leaf ring), several Leaf Clusters, Berry Clusters, small Blossom Accents and three long wavy Base Panels that are joined then edged with a scalloped border. Work motifs using the same hook and tension, block motifs flat before joining, and use a matt surface for accurate alignment.
— Poinsettia Medallion (Make 3) :
Round 1 :
Magic ring, 6 sc into ring (6)
Round 2 :
Inc in each st around (6 inc) (12)
Round 3 :
(1 sc, inc) x 6 (18)
Round 4 :
(2 sc, inc) x 6 (24)
Round 5 :
(3 sc, inc) x 6 (30)
Info :
This small domed center sets the foundation for the layered petals. Maintain a tight tension to keep the center compact; fastening off is not necessary as we continue into the petal foundation.
Round 6 :
1 sc in each st (30)
Round 7 :
*ch 3, sk 1 st, sl st in next st; rep from * around to create 15 ch-3 petals base (15 ch-3 sp)
Info :
Petal base worked as chain arches. If you prefer smaller or larger petals, adjust ch length by +/-1 but keep all petals uniform across all medallions.
Round 8 :
Working into each ch-3 sp: (sc, hdc, 3 dc, hdc, sc) in each sp — form first layer of petals (15 petals)
Round 9 :
1 sc in each st around the base of petals to anchor (60)
Round 10 :
Change to cream-light if using two-tone for petals. Info: change to 'Cream' yarn now. Carry inner tails under petals for neatness.
Round 11 :
Ch 4, sl st in base between petals to make 15 ch-4 loops for the second petal layer (15 ch-4 sp)
Round 12 :
In each ch-4 sp: (sc, hdc, 5 dc, hdc, sc) making fuller petals (15 petals — larger) — anchor with sl st to base after each petal
Round 13 :
1 sc evenly around the petal bases to tidy edge and connect layers (90)
Info :
Begin shaping second petal layer with slightly taller stitches to create dimensional overlap. Slightly steam-block each petal after finishing to coax them upward and outward for that poinsettia look.
Round 14 :
Continue with a short picot trimming: *sc in next 2 sts, (ch 3, sl st into first ch to form picot), sc in next 2 sts* around petal ring (approx 90 with picots)
Round 15 :
Fasten off cream if using contrasting center, leave long tail for sewing to leaf ring. Info: tidy the back by weaving tail through the underside of petals.
Round 16 :
Change to golden yellow (tiny center buds). Join yarn to center top. Ch 1, 6 sc in top center spaced evenly forming a small raised center (6)
Round 17 :
In each st around: puff stitch (yarn over, insert, pull up loop x4, yarn over and draw through all loops) to create 6 tiny bud puffs; sl st to secure after each puff. Fasten off leaving tail for tacking into center (6 puff buds)
Info :
Sew golden puffs down to hold them clustered. Use a second needle and a small amount of stuffing if you want extra lift, but minimal stuffing is recommended so the puffs sit natural.
Round 18 :
Prepare for leaf ring: With olive green, join yarn to the back of the flower base where petal base rounds meet. Ch 2, 10 sc evenly around to create an inner ring (10)
Round 19 :
(1 sc, inc) x 10 (15)
Round 20 :
(2 sc, inc) x 5 (20)
Info :
This small ring builds the platform where larger layered leaves will be attached. It should sit flat and even; if it cups, check tension and block flat before continuing.
Round 21 :
*Ch 6, sl st to form loop, rep across to make 10 leaf foundation loops* (10 ch-6 loops)
Round 22 :
Work leaf motif into each ch-6 loop: (sc, hdc, 3 dc, hdc, sc) forming 10 small rounded leaves; sl st to ring after each leaf
Round 23 :
Change to forest green for outer leaves. Info: join forest green and work larger leaf layer into gaps between small leaves to create alternating leaf arrangement.
Round 24 :
Between each small leaf: ch 8, then into ch-8: (sc, 2 hdc, 6 dc, 2 hdc, sc) — produce 10 larger leaves that alternate with inner leaves
Round 25 :
Sc around the whole leaf ring to tidy edges and join leaf bases (approx 160)
Round 26 :
Info: Block the entire medallion flat, gently shape petals and leaves so petals sit on top of leaves and leaves sit beneath. Allow to dry before joining. Fasten off and weave ends.
— Small Blossom Accents (Make 9 per runner) :
Round 1 :
Magic ring, 6 sc into ring (6)
Round 3 :
*Ch 3, sl st in next st* around to create 6 mini petals (6 ch-3 loops)
Round 4 :
In each loop: (sc, hdc, 2 dc, hdc, sc) — shape each tiny blossom; fasten off leaving tail for stitching (approx 36)
Info :
These tiny blossoms are scattered along the runner between larger medallions. Make a few extra in case of loss during blocking and assembly.
— Berry Clusters (Make 12 clusters) :
Round 1 :
With berry red, make a small magic ring and work 4 sc into ring (4)
Round 2 :
Work 4 bobble/puff stitches into each of the 4 sts to create a cluster effect: *yarn over, insert in st, pull up loop three times, yarn over & pull through all, ch 1 to secure* (4 puff bobbles)
Round 3 :
Fasten off leaving long tail for sewing. Info: Make clusters of 2–4 puff berries sewn closely to make realistic holly/berry clusters.
— Leaf Sprays (Make multiple sets for each medallion; 6 leaves per medallion recommended) :
Round 1 :
Chain 10, sc in 2nd ch from hook, hdc in next, 2 dc in next 2, tr in next 3, 2 dc in next 2, hdc in next, sc in last — shape leaf along chain then sl st back along opposite side to base to create closed leaf. Fasten off (approx 20 sts length)
Round 2 :
Info : Use alternating olive and forest green yarns for layered visual depth. Block leaves flat with a gentle curve toward center for natural appearance.
— Base Panel (Make 3 long wavy panels and join) :
Info :
The runner body is built from three identical wavy panels that interlock under each medallion and are joined with small connecting stitches plus blossom and berry accents. Each panel is worked in rounds outward from a central elongated loop and uses chain mesh and double crochet rows to form the lattice.
Round 1 :
Foundation: ch 42 (this forms the lengthwise spine of one panel). Count note: chain 42 forms a long base; be sure not to twist.
Round 2 :
Row-style: sc in 2nd ch from hook and across to last ch, (41 sc) — turn, ch 1 at end and work evenly back along opposite side of foundation chain to create an oval base; sl st to join to first sc (82)
Round 3 :
Ch 3 (counts as dc), dc in each st around the oval base to create first dc round providing stiffness (82)
Round 4 :
Ch 1, sc around top of dc to even the edge (82)
Info :
Establish wavy shaping by creating increases and chain arches at set intervals; these create the S-curve when two panels are joined and when medallions sit on top. Mark every 10th stitch with a removable marker so increases are consistent.
Round 6 :
*Dc in next 9 sts, (dc, ch 3, dc) in next st (creates arch) — rep across to form four arches along the panel* (approx 82 with arches)
Round 7 :
Ch 4, sk arch, sl st in top of arch to create open mesh; *ch 4, sl st* alternating with dc runs to create airy lattice. Info: keep ch-4 loops even for neat appearance.
Round 8 :
Working into ch-4 loops: (sc, ch 3, sc) making a row of small arches which will later be decorated with tiny blossoms and berries (approx 40 arches)
Round 9 :
1 sc in each st across inter-arch dc rows to unify the panel (82)
Info :
To build the wave profile for each panel's edge, we will alternate shallow increases on one side and shallow decreases on the opposite side across several rounds. This will create the gentle S-shape when panels are placed together.
Round 11 :
On Side A: (dc in next 8 sts, inc) x 8 across side A; Side B: (dc in next 9 sts) x 8 without increases — total stitches by end of round approx increases added (calc approx 90)
Round 12 :
Even round: dc in each st around (approx 90) — check stitch counts and adjust if necessary to maintain symmetry across panel
Round 13 :
On Side A: (dc in next 7 sts, inc) x 8; Side B: (dc in next 10 sts, dec) x 8 — this begins to shape the wave gently (approx 98)
Round 14 :
1 sc in each st around to tidy (approx 98)
Info :
At this point, align and pin your medallion shape over the approximate center of this panel. The arch spaces created previously in round 6/7 should fall under where you'll attach leaf sprays and berries. Make placement marks with pins.
Round 16 :
Decorative mesh: Working along the panel edges, *ch 3, sk 2, sc in next 2 sts* across to form small open squares for airy lace effect (count approx 98 spaced mesh)
Round 17 :
1 sc in each st around and in each ch-3 loop: sc, ch 1, sc to fill mesh (approx 120)
Info :
Make three identical panels. Block each panel flat and shape wave edges carefully. The panels will be joined later with slip-stitch seams and decorative slip-stitch filling to hide join lines. Keep panels flat and same size—measure them against each other.
— Joining Panels and Placing Medallions :
Round 1 :
Lay Panel A and Panel B alongside, overlapping the narrow center area where medallions will sit. Using forest green, join yarn and sl st through corresponding sc on both panels to seam them together at small tacking points every 6–8 sts along the seam. Repeat to add Panel C so you have a continuous runner (approx seam length variable)
Info :
Pin medallions centered over the top of joined seams so that the flower centers rest just above the seam and leaves fan out over panels to conceal joins. Sew medallions to panels with long tails using mattress stitch or whip stitch from round 25 of medallion leaf ring to the base panel's sc rows.
Round 2 :
Sew small blossoms and berry clusters into the ch-4 arch spaces created in base panels' round 8 and 16. Use small whip stitches and gather clusters in groups of 2–3 to look natural. Secure with a few extra passes.
— Scalloped Edge Border :
Round 1 :
With forest green, join at a side seam. Work 1 sc evenly around entire runner edge (measure stitch count; expected approx 420–520 depending on tension). Fasten off and join new yarn for scallop rounds.
Round 2 :
Edge shaping: *Skip 2 sc, 5 dc in next sc, sk 2 sc, sl st in next sc* repeat around to form scallops (approx 60 scallops — adjust to match runner length)
Round 3 :
Finish scallop with shell tops: in each shell: (sc in shell base, ch 3, sc in top dc) to form decorative loops across scallop edge; fasten off and weave in ends
Info :
For a crisp edge, block scalloped edge after finishing—pin scallops round and spray with light water or blocking solution. Shape each scallop outward for an even, classic finish.
— Alternative Edging Option (Optional Picot Trim) :
Round 1 :
With cream, join in any space between scallops: *sc in top of scallop, ch 3, sl st into first ch to form picot, sc into next scallop* repeat for a delicate picot finish
Info :
Picot trims can be worked in contrast or matching color. If using cream, this will echo the flower color and tie design elements together visually.
— Finishing & Blocking :
Info :
Weave in all ends with tapestry needle. Block pieces: pin runner flat on blocking mats, ensuring scallops are evenly spaced and medallions sit flat. Spray lightly and allow to dry fully. This helps flatten mesh and lift petals and scallops for a professional finish.
Info :
Inspect joins and secure any loose clusters with additional invisible stitches from the runner underside. Add a few extra reinforcing stitches under heavy medallion areas to prevent sagging during use.
— Optional Size Adjustments :
Info :
To lengthen the runner, add additional panels and medallions, repeating the panel and joining instructions. To shorten, omit a panel and medallion and finish with edging on the remaining end. Always maintain symmetry when placing medallions so the runner balances on the table.
— Tips, Troubleshooting & Notes :
Info :
When sewing medallions, tack first at 6 equal points then fill in remaining stitches to prevent shifting. Use matching thread color for invisible joins when possible. If a petal or leaf is uneven, lightly steam and reshape with fingers once blocking.
Info :
For a sturdier runner that will be laundered, choose mercerized cotton and test a swatch for washing durability. If you want a softer drape, choose a cotton blend with slight elasticity and adjust hook size larger by 0.25–0.5mm.
Completing this Cream Poinsettia Forest Green Table Runner is a truly rewarding project—each layered petal, leaf, and berry comes together to form a timeless holiday centerpiece. The detailed assembly and blocking steps make the motifs sit beautifully on the runner, and the scalloped edge gives a professional finishing touch. Enjoy the satisfaction of seeing the textured flowers pop against the lacy green background! 🧶✨ Add it to your seasonal decor or gift it to someone special — they will love the handmade warmth. 🎁