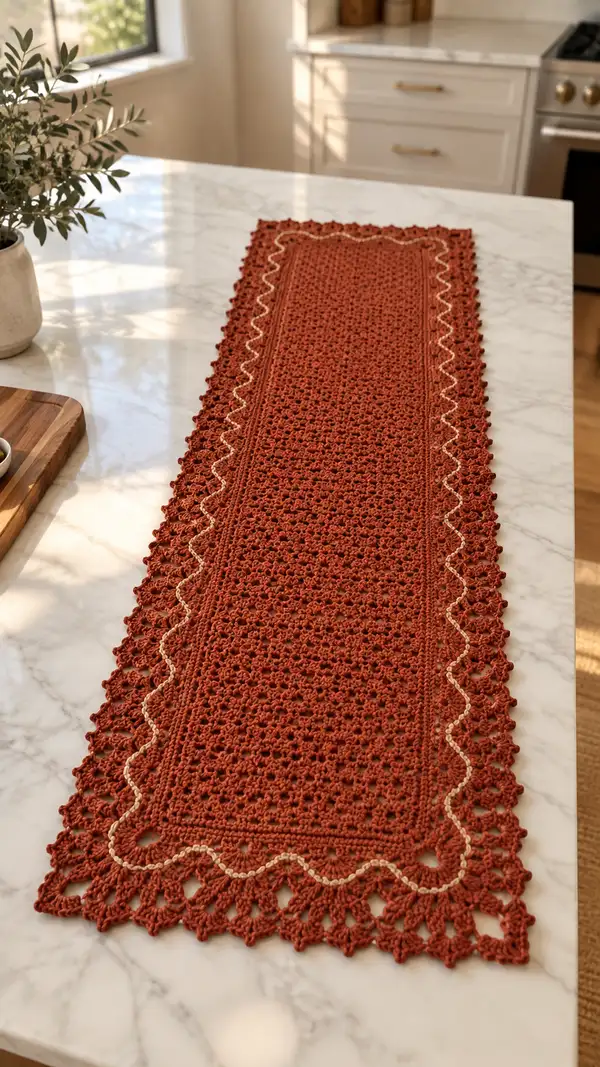
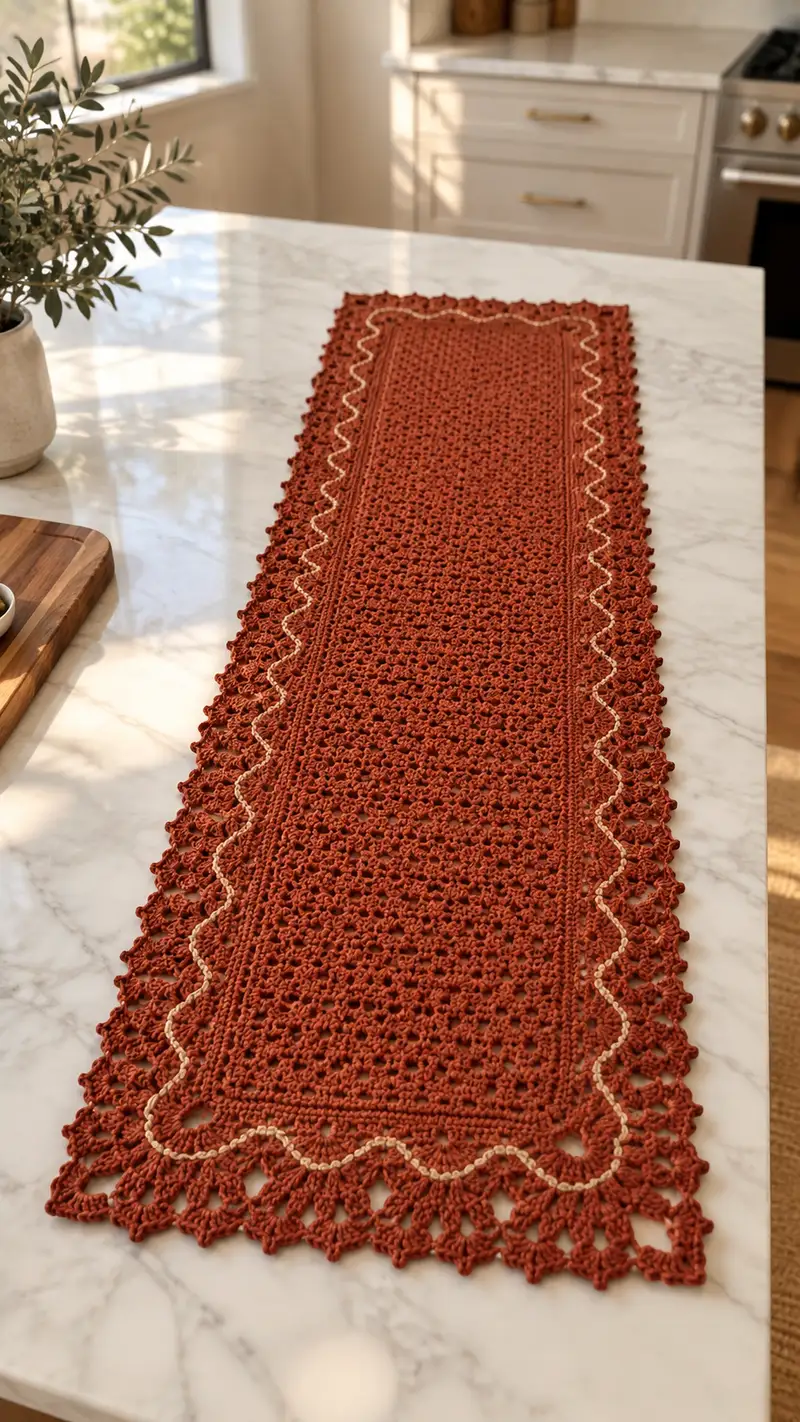
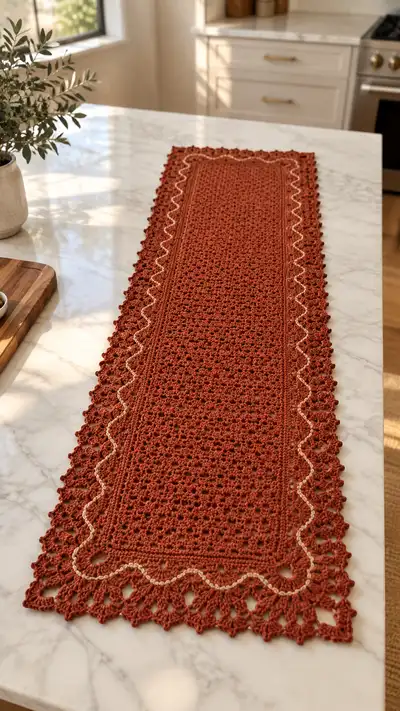
A warm rust-colored lace table runner featuring a dense textured center panel, delicate scalloped lacy border, and a contrasting cream wavy surface accent. This rectangular runner combines clusters, shell stitches, and small picot edging for a vintage-modern look. The pattern works lengthwise repeats so you can easily adjust the final length to fit your table.
Progress Tracker
0% Complete
— Notes & Gauge :
Info :
Pattern worked in US terms. Gauge is not critical for fit but important for matching look: 18 dc x 10 rows = 4 in (10 cm) blocked in worsted cotton with 3.5 mm hook. The runner pictured measures approximately 14.5 in (37 cm) wide and 48 in (122 cm) long finished; adjust the length by adding or subtracting center repeats. All row counts below assume a foundation chain of 150 sts (multiple of 6 plus 6). Maintain a consistent tension for lace definition.
— Materials :
Info :
Use worsted weight cotton for crisp stitch definition and stable edges. Main color (rust) and contrasting cream are used for the surface wave only. Work main body and edging in rust unless stated otherwise.
— Foundation & Edge Setup :
Row 1 :
Ch 150 + 2 turning ch (counts as first dc). Turning chain counts as dc throughout (150 sts across).
Row 2 :
RS: Dc in 3rd ch from hook (counts as first dc), dc in each ch across to end, turn (150 dc).
Info :
Keep a stitch marker in the first st of every right-side row to keep track of the turning chain. The 150-st foundation gives 25 repeats of a 6-st cluster motif used later across the width (150/6 = 25).
— Center Panel — Introduction to Motifs :
Info :
The center panel alternates textured cluster rows with open mesh and shell rows to create the dense but lacy body. Each motif row maintains the 150-st width when counting dc equivalents and chain spaces; for practical counts we will refer to 'across (150 stitch equivalents)'. A cluster (cl) is made as: (yo, insert, pull through, yo, pull through 2) three times, join all loops on hook with a final yo and pull through (US 3-dc cluster). When written as a cluster in a stitch position, it occupies the space of one dc for counting purposes.
Row 3 :
WS: Ch2 (counts as hdc), hdc in same st, *ch1, sk 1 st, hdc in next st; rep from * across ending hdc in last st (150 stitch equivalents).
Row 4 :
RS: Ch3 (counts as dc), *cl in next st, ch1, sk next st, dc in next st; rep from * across to last st, dc in top of turning ch (150).
Row 5 :
WS: Ch2, hdc in each dc and ch1 space across (150 equivalents).
Row 6 :
RS: Ch3, *2 dc in next ch1 sp, ch1, sk next dc, cl in next dc; rep from * across, ending with dc in top of turning ch (150).
Row 7 :
WS: Ch1, sc across in each dc and cluster top across (150).
Info :
Start weaving in ends as you work the first 8 rows; this keeps the runner tidy. If you prefer a firmer center, work Rows 3-7 with a 3.25 mm hook and switch to 3.5 mm for the lacy border later.
— Center Panel — Repeating Section (work this 38 times to achieve pictured length) :
Rows 8-15 :
Repeat Rows 3-7 plus Row 4 patterning once more: Row 8 (RS): Ch3, *cl, ch1, dc; Row 9 (WS): Ch2, hdc across; Row 10 (RS): Ch3, *2dc in ch1 sp, ch1, cl; Row 11 (WS): Ch1, sc across; Row 12 (RS): Ch3, *cl, ch1, dc; Row 13 (WS): Ch2, hdc across; Row 14 (RS): Ch3, *2dc, ch1, cl; Row 15 (WS): Ch1, sc across. Maintain 150 stitch equivalents each row.
Info :
Each full 8-row repeat builds one lace block in the center. Repeat this 38 times to achieve an approximate length of 48 in (122 cm). To lengthen or shorten, change the number of repeats: each 8-row repeat equals roughly 1.25 in (3 cm) of length in worsted cotton—adjust to suit your table.
Rows 16-79 :
Work Rows 8-15 repeat pattern continuously for 32 additional repeats (total of 38 repeats including the initial set). Keep stitch counts consistent: each row equals 150 stitch equivalents when counting clusters and dc positions.
Info :
Check for straight edges every 8 repeats—lay runner flat and count repeat verticals. If you notice leaning, adjust tension and redistribute stitches by easing the edge stitches with a yarn needle between stitches to correct drift.
Rows 80-87 :
After completing center repeats, work eight finishing body rows: Row 80 (RS): Ch3, dc across in each st (150). Row 81 (WS): Ch2, hdc across. Row 82 (RS): Ch3, dc across. Row 83 (WS): Ch2, hdc across. Row 84 (RS): Ch3, dc across. Row 85 (WS): Ch1, sc across. Row 86 (RS): Ch2, *sc in next 2 sts, ch2, sk 2; rep across to create a tidy motif line (counts remain based on 150 space layout). Row 87 (WS): Ch1, sc across. These rows create a stable base to begin the edging rounds.
Info :
Fasten off main color temporarily if you plan to work the cream surface wave before edging. If you prefer to do the surface wave after blocking the whole runner, wait until the end. Blocking before the final surface stitch makes the wave placement easier to measure.
— Surface Wave Accent (Cream) :
Info :
Surface wave runs inside the scalloped border approximately 5 stitches from the outer edge. Use the cream color and a tapestry needle or slip-stitch method to form a shallow wavy line along both long sides and both short ends. The written method below uses slip-stitch surface crochet across the right-side only.
Round 1 :
Attach cream yarn at the right-side along one long edge roughly at Row 6 from outer edge (count inward). Pull up a loop with a sl st into the designated stitch; *sl st vertically down 2 rows and forward 5 dc equivalents forming a slight slant, then skip a small area and sl st back up to form a wave; rep across the side. For precise placement, work a group of (sl st 3, ch1) then 5 sl st across the imaginary arc; repeat until you reach the corner. Turn cream and follow the same pattern on the opposite side. Tie or invisibly weave ends on the wrong side.
Info :
This surface wave is flexible—do a test on a small swatch to get the look right. Do not pull the surface stitches too tight; the wave should rest gently on the lace to create the highlighted line shown in the photo.
— Scalloped Border — Preparation :
Info :
We will now work the multi-round scalloped edging around the entire rectangle. Counting the long sides: the foundation of 150 dc equivalents translates into 25 scallop base points when each scallop uses 6 sts across (150/6 = 25). Short ends will use adjusted scallops calculated from the number of rows across the width: after center repeats the short edge stitch equivalents are 150/6 = 25 scallop counts across the short rows as well—this keeps border alignment balanced. The edging is worked seamlessly in rounds, turning at corners with extra chain spaces to keep the runner flat.
— Scalloped Border Rounds :
Round 1 :
RS: Join main color at any corner with sl st, ch1, sc evenly around the perimeter working 1 sc in each row-end and across the sides into edge stitches (work 4 sc per corner as you go). Work 2 sc in each corner to help turn. This round yields a total of approximately 620 sc (150 sts across each long side x 2 + short sides + corner sc). For practical purposes, ensure you have 4 sc for each corner and evenly distributed sc along sides.
Info :
Place markers at the centers of the long sides (after 25 scallop positions) to ensure symmetrical scallop placement in later rounds. If you miscount slightly, adjust by adding or skipping a few sc across the first round—this first round defines scallop spacing.
Round 2 :
Ch3 (counts as dc), dc in next 2 sc, *ch2, sk 2 sc, dc in next 6 sc, ch2, sk 2 sc, dc in next 3 sc (this forms a raised scallop base); rep from * around, working (dc clusters and ch spaces) into corners with extra chain-2 corners to maintain square corners.
Info :
Each scallop base from Round 2 occupies 6 sc of the counting base—this matches the 25 scallops across each long side. Check your count at mid-side marker: you should be centered if your initial sc distribution was even.
Round 3 :
Ch1, sc in each dc across and 3 sc in each corner chain space to round out the corner. This evens the base and prepares for the shell rounds. Maintain the same number of shell bases (25 per long side).
Info :
This sc round will likely change your total sc count slightly from the theoretical number above due to corner increases—do not worry; the scallop pattern relies on even shell counts, not an absolute sc number. Match shells to bases when working the next round.
Round 4 :
Ch3, *skip next 2 sc, (5 dc) in next sc (shell), sk next 2 sc, sc in next sc; rep from * around including 5 dc shells into each shell base around long sides and adjusted shells on short ends and corners. You should have one 5-dc shell per scallop base: 25 shells per long side, adjusted counts on short ends.
Round 5 :
Ch1, sc in each dc across and in each shell center, working 3 sc in corner shells. This stabilizes the shell round.
Info :
From here we build up the outer scalloping through a series of shell and picot accent rounds. Keep stitch markers at the midpoint long sides and at corners to avoid drift and ensure symmetrical shaping.
Round 6 :
Ch4 (counts as tr), tr in next 2 dc, ch2, sk 2, 3 tr in shell center, ch2, 3 tr in same shell center (convert shell to a taller fan for height), sk 2, tr in next 3 dc; rep around. This creates a layered scallop look. Maintain a count of 25 fans across each long side.
Round 7 :
Ch1, sc in each tr and ch space around; work 5 sc in each corner ch-2 space to keep corners rounded and consistent. This returns the round to a stable base for final picots.
Round 8 :
Ch1, *sc in next 2 st, pic (ch3, sl st to first ch), sc in next 3 st, sk 2 st, sc in next st to create a scallop edge; rep from * around, at corners work (sc, pic, sc) in corner ch space. The picot adds the delicate little points seen in the scalloped border photo.
Info :
Those picots are small and decorative—if you prefer a smoother edge, substitute a simple chain-3 loop or tiny single crochet cluster. Keep the picots consistent for a crisp visual texture as shown.
Round 9 :
Ch1, sl st into each sc and picot around working gently to neaten and set the points. Fasten off and weave ends. If your runner looks slightly wavy, pin and reblock (see Blocking section below).
Info :
If adding more dramatic picot points like the photo shows, work Round 8 with slightly taller stitches (hdc or dc) before each picot to allow the arch to form. Gentle steam or wet blocking will set the scallops.
— Alternative Border Variation (Optional Extra Height) :
Round 10 :
Replace Round 6 and 7 with taller fans: Ch4, *in shell center work (tr, ch1, tr, ch1, tr), sk 2 base sts, sc in next st; rep around. Then sc around and add picots as in Round 8. This variation produces larger scallops similar to the photo’s deeper lacy edge.
Info :
Use this variation if you desire deeper scallops like the picture—just ensure spacing by counting shell bases so scallops remain uniform around the whole runner.
— Finishing :
Info :
Weave in all loose ends with a tapestry needle. Gently wet block the runner: pin it to a blocking mat with the scallops pulled to shape, mist with water until damp (do not saturate), and allow to dry completely. Blocking wires through larger scallops will keep edges even and help the cream wave lay flat.
Final Check :
Inspect scallop spacing, surface wave placement and overall symmetry. If needed, carefully unpick a small section and redistribute stitches (for example if one corner has an extra shell) then rejoin and reblock. Press lightly with a steam iron from a distance if needed, on the wrong side only, for cotton yarn.
Info :
To create a runner of different length: adjust the number of center panel 8-row repeats. Each repeat changes length by about 1.25 in (3 cm). Maintain the initial foundation chain multiple of 6 + 6 to preserve scallop math across the width.
— Tips & Techniques Throughout the Project :
Info :
Work gently and keep a light hand when making picots so they remain small. Use a yarn needle to distribute loops from clusters evenly across the top of the stitch so clusters look uniform. When joining new yarns for the surface wave, use a secure double knot on the wrong side and weave in ends at least 2 in (5 cm) into the fabric.
Info :
Mark the midpoint of each long side before starting the scalloped border to ensure scallops center correctly; you may need to add or remove a sc on Round 1 to get 25 base points per side exactly—this is acceptable and expected when transitioning from straight rows to circular edging.
Completing this rust lace table runner is such a satisfying project—watching the dense center panel give way to those delicate scalloped edges is truly rewarding. The cream surface wave adds that little artist’s flourish that draws the eye and makes the runner feel handmade and special. Block carefully, enjoy the tactile beauty, and place it down to bring warmth to your table. 🧶🍂✨