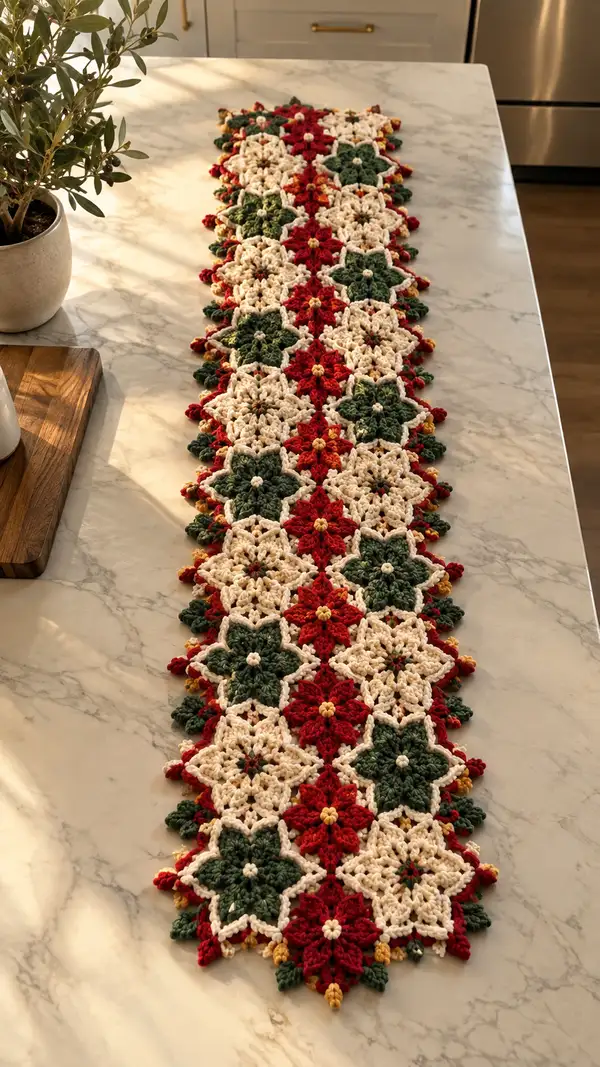
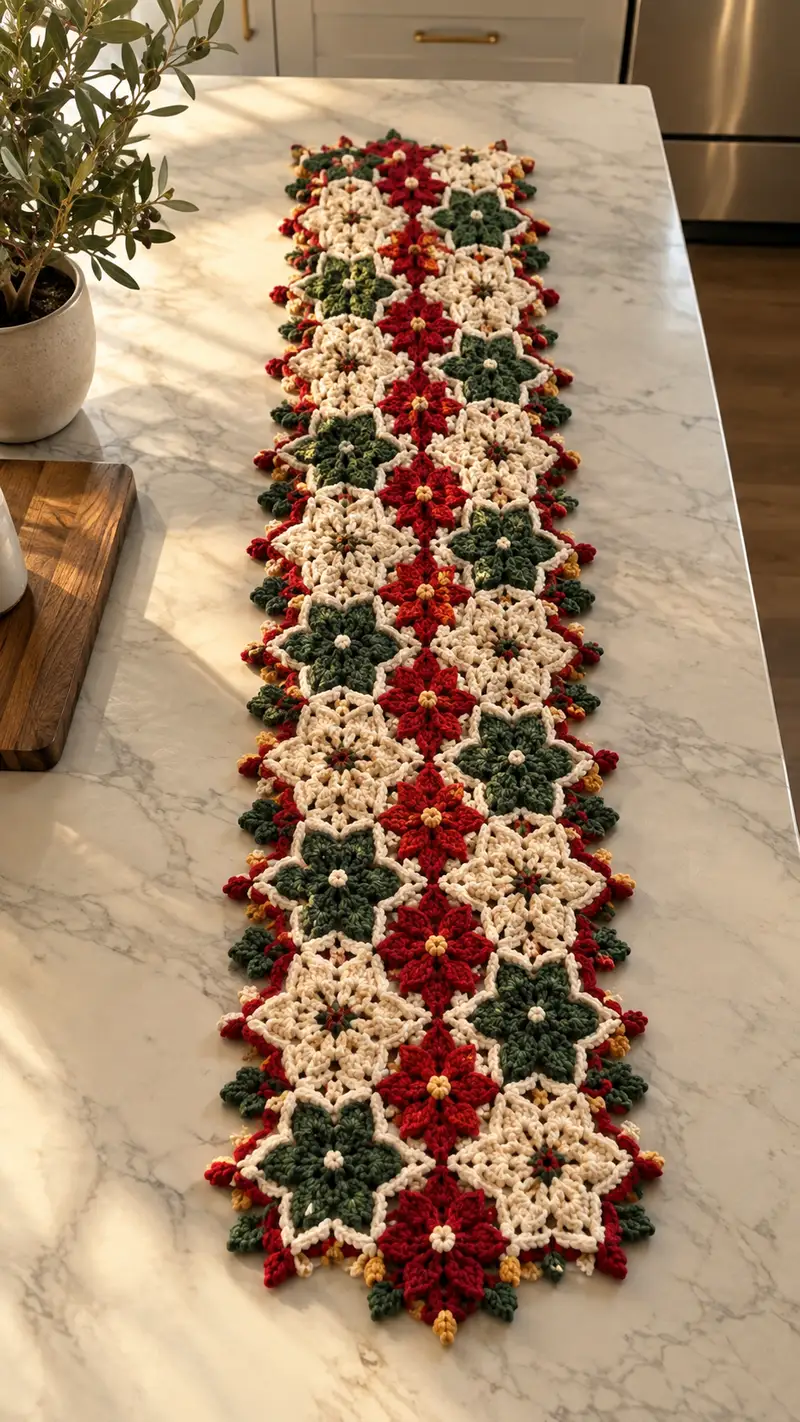
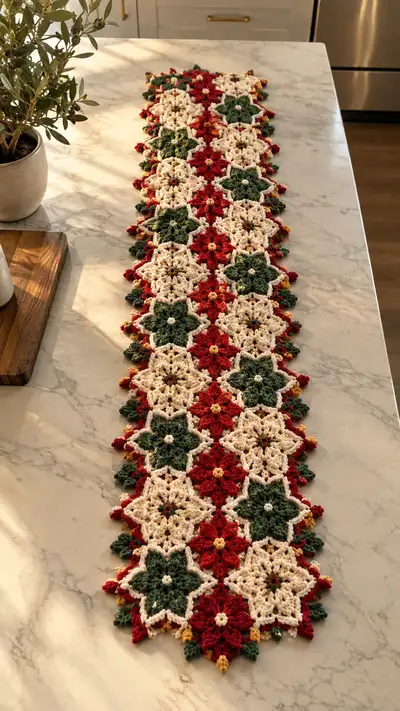
A festive, handcrafted poinsettia table runner made from interlocking six-petal floral motifs in cream, deep red, forest green and tiny golden centers. The runner uses puff/cluster petals, delicate cream join motifs and a decorative scalloped edge to create a holiday-ready centerpiece. The pattern includes motif construction, joining and a layered border for a plush, textured look.
Progress Tracker
0% Complete
— Overview and Notes :
Info :
This pattern describes how to make one six-petal poinsettia motif, how to join motifs into a long runner, and how to add the decorative cream scalloped edge and gold picot accents. It uses worsted weight yarn and a 4.0mm hook. Work with consistent tension. Each motif is worked in several color changes: petal color, cream connector round, and small gold center. The pattern lists round-by-round instructions and includes frequent Info sections for tips, stuffing (not applicable here), joining and finishing guidance.
— Abbreviated Stitch & Puff Instructions (Quick Reference) :
Info :
Puff stitch used in this pattern: yarn over, insert hook into designated space, yarn over and pull up a loop (repeat yarn over/insert/pull up loop total 4 times), yarn over and pull through all 9 loops on hook, ch1 to close puff. Counts for puff stitches are given in parentheses. When counting stitches in rounds that work into chain loops, the total number of 'worked stitches' around is given in the count parentheses.
— Motif : Six-Petal Poinsettia (Work many—each motif approx. 9-11 cm across depending on yarn)
Round 1 :
Make a magic ring (mr). Ch1, 6 sc in mr. Tighten ring and sl st to first sc. (6)
Round 2 :
Ch5 (counts as ch3 + ch2 picot loop, creates first petal foundation), *sl st in next sc, ch5; rep from * around to make 6 loops. Join with sl st to base of first ch5. (6 ch5 loops)
Info :
These ch5 loops will form the working spaces for the puff petals. Keep tension slightly loose in the chains so the puff stitches have room. Count the loops as 6 petal spaces.
Round 3 :
Attach petal color yarn in first ch5 loop. Work into each ch5 loop around: *(sc, ch1, puff x4, ch1, sc) in loop; sl st in next sl st on base to secure petal; rep from * around. Fasten off petal color or carry it inward if preferred. (6 petals; per petal: 2 sc + 4 puff stitches + chaining)
Info :
Puff stitch detail: each puff = (yo, insert into loop, yo pull up loop) repeated 4 times, yo and pull through all loops, ch1 to close. Each petal is plush; ensure each puff is consistent in height for a uniform motif.
Round 4 :
Join cream yarn at the base between petal 1 and petal 2 (in the sl st join used previously). Ch2 (counts as hdc), *(hdc in next st on base, ch3, hdc in base between next petal pair); repeat around to form 6 ch3 connector loops. Join with sl st to first hdc. (12 hdc worked total; 6 ch3 spaces)
Info :
This round forms a scalloped base that frames the petals and creates anchor points for joining motifs later. Keep the ch3 loops even – these are part of the outer frame.
Round 5 :
Work into each ch3 loop around: *(sc, ch2, sc) into each ch3 loop; sl st to next hdc; rep from * around. Join with sl st to first sc. (12 sc around; 6 ch2 loops)
Round 6 :
With cream, *(ch4, 3 dc cluster around base of next petal, ch4, sl st into ch2 loop of previous round to anchor cluster); rep around to create pointed outer frame points at each petal tip. After last cluster, join with sl st to base. (6 outer clusters; additional anchoring sl sts as noted)
Info :
3-dc clusters form a petal tip outline. Work clusters consistently and anchor each with a sl st into the small sc-ch loops from Round 5 so petals are framed cleanly. You may adjust the number of chain stitches to flatten or point the edge.
Round 7 :
Switch to golden yarn. Sl st into center base (between petals) and work *(ch1, (sl st, repeat 2 more sl st) to create a 3 sl st bud), sl st to next join point; rep in each center between petals to create 6 small golden bud clusters. Fasten off gold. (6 tiny bud clusters)
Info :
These tiny gold clusters are the small center dots visible in the finished runner; they provide a bright focal point. Keep tail lengths long enough (approx 12–15 cm) to weave into the cream base later if you prefer.
Round 8 :
Re-join cream yarn at the base between any two petals. Work *sc into same place, ch3, sc into tip of cluster (work through the top of the 3-dc cluster), ch3; rep around finishing with sc in starting place. Join with sl st. (12 sc & 12 ch3 loops counted as decorative edge)
Info :
This round adds a thin openwork frame around the motif to allow nearly invisible joining and create the lacy cream appearance you see between motifs. Keep ch3 loops even; these will be used for whip/flat joins to neighboring motifs.
Round 9 :
Optional texture round: 1 sc in each sc and 1 sc in each ch3 loop around for a continuous edge (24 sc). Join with sl st. (24)
Info :
If you prefer a slightly raised cream outline, work Round 9. If you want more open lace, skip this round and go directly to joining instructions. The pictured runner uses a slightly raised cream border so Round 9 is recommended.
Round 10 :
Fasten off leaving 10–15 cm tail for weaving. Weave tail under several stitches to secure. Motif complete. (No stitch count change)
Info :
Make a quantity of motifs: the pictured runner uses a repeating layout of 5 motifs across and 12 motifs long (60 motifs total) in alternating colors (cream-centered connectors, red and green petal motifs alternating down the runner). Decide your runner width and length before committing to all motifs.
— Joining Motifs (As You Go Joining Technique) :
Info :
Join motifs while working the final cream rounds (Round 8 or 9). Use the ch3 loops or sl st anchor points to join. Join on the second motif's Round 8/9 while holding the previously completed motif in position; use slip stitch join or flat whip stitch with matching cream yarn for a nearly invisible seam. The instructions below show a step-by-step for joining two motifs, then how to continue a long row and staggered rows.
Join Step 1 :
Place motif A (completed) face up. Start motif B and work through Rounds 1–7 as above. At Round 8 on motif B, when you reach a ch3 loop that will touch motif A, insert hook into corresponding ch3 loop of motif A and work sc through both loops (sc in motif B ch3 loop and in motif A ch3 loop), then continue motif B. Repeat at each contact point.
Info :
For a long runner with staggered rows, each motif will share 2–3 adjacency points with neighboring motifs depending on placement. Pin them together first to decide positioning. Join gently so petals remain flat.
Join Step 2 :
For motifs in same row: when joining motif B to motif A at two points, work sc through both corresponding ch3 loops for each join. When joining motif to two neighbors (one left and one below), join to left motif first then to previous row motif using the same sc-through-both method to maintain flat joining. Continue until row is complete. (No numeric stitch count—repeat joins according to layout)
Info :
When joining across a seam use the tapestry needle and whip stitch for a flatter, less visible seam. Use slip stitch joining to include the join as part of the working round and maintain edge continuity.
— Constructing the Runner Layout :
Info :
Layout for the pictured runner: 5 motifs across (width) by 12 motifs long (length) arranged in alternating color sequence so red and green petals form a staggered column effect separated by cream motifs. Diagramming your layout before joining helps prevent placement errors. Start by joining motifs in the first row side-by-side, then add subsequent rows, joining to both the previous motif in row and to motifs in the row above at one or two join points.
Step :
Make and join motifs by rows, leaving the final outer perimeter to be finished with the border. Use pins to hold three motifs together at intersections before final joining for neat seams.
Info :
Make small sample strips and block them to verify motif layout and tension. This prevents unexpected crowding or gaps once all motifs are joined.
— Border and Decorative Rounds (Start after all motifs are joined) :
Round 1 :
With cream yarn, join anywhere on outer edge with a sl st into an outermost sc or ch loop. Ch2 (counts as hdc), 1 hdc evenly around outer edge working 2 hdc into larger gaps and 1 hdc into smaller gaps; work approximately 240 hdc around runner perimeter (exact count depends on your motif joins). Join with sl st to top of ch2. (Approx. 240 hdc)
Info :
Even out stitch counts along the border by working extra hdc in larger open spaces between motif points. The approximate count will vary with your tension and exact number of motifs and joins—measure as you go.
Round 2 :
Ch3 (counts as dc), *skip next hdc, (3 dc, ch1, 3 dc) in next hdc (shell made across an hdc), skip next hdc, dc in next hdc; rep around to create scalloped shell border. Join with sl st. (Shell clusters repeated around; total approx. 40 shells)
Info :
This decorative shell gives the scalloped look around the runner. Adjust spacing (skip counts) to keep shells even; aim for shell centers to align with motif points for a harmonious look.
Round 3 :
Ch1, 1 sc into top of each dc and sc across including shells (work 6 sc across each shell: (sc, ch1, sc, ch1, sc, ch1, sc, ch1, sc, ch1, sc) to form a compact lace fill) — this compresses the shell into a textured scallop. Join with sl st. (Approx. 360 sc if counted across compressed shell spaces)
Info :
This round creates a tighter edge that bridges shells for a stable perimeter to attach the final picot/leaf accents. Keep stitches even and maintain slight tension to avoid puckering.
Round 4 :
Switch to green yarn for leaf accents. Work along outermost shell points: *sl st into one st at side of shell, ch3, (sc, ch3, sc) into same point to make a little leaf cluster; sl st back into next edge space; rep around to add alternating green leaves at each shell. Fasten off green. (Approx. 40 little leaves)
Info :
These small leaf clusters echo the green petals of the motifs and add color rhythm around the runner. Work them at every other shell or at each shell depending on desired density.
Round 5 :
Switch to gold yarn. Into each shell point (between leaves if used) work: *(ch3, picot, sl st into base of picot), sl st to next base; rep around to create small gold picot tassels at each scallop point. Fasten off gold. (Approx. 40 gold picots)
Info :
Gold picots create the tiny tassel-like accents visible in the runner. Make sure to secure gold tails by weaving them into the nearest cream stitch on the backside for durability.
Round 6 :
Re-join cream and slip stitch evenly across remaining spaces to tidy edges: 1 sc in each available st around, making sure picots and leaf clusters are integrated. Join and fasten off leaving long tail for final weaving. (Approx. 360 sc)
Info :
After this tidy round, weave all ends and block the runner flat to set the scallops and picots into a neat final shape.
— Optional Extra Texture Rows (for a fuller border) :
Round 7 :
With cream yarn, ch2, 1 hdc in same st, *BLO 1 hdc in next 2 sts, (hdc, ch2, hdc) in next st (create a raised ridge every third stitch); rep around. Join. (Approx. 360 hdc in patterned placement)
Info :
Working in BLO creates a subtle ridge that adds dimension. Use this round if you want a chunkier, more cable-like border effect around the runner.
Round 8 :
1 sc in each st around to flatten and finish the ridge. Join and fasten off. (Approx. 360 sc)
Info :
These optional rows increase thickness and yield a plush feel along the edges. If you plan to use the runner under heavy items, this extra structure is helpful.
— Edge Bobbles & Final Accent Rounds :
Round 9 :
With cream, pick up along the very edge where shells and picots meet. *Ch2, (bobble stitch in next sc) ch2, sl st into base; rep around to place small bobbles between picots. Join. (Approx. 40 bobbles)
Info :
Bobble instructions: yo, insert hook, yo and pull up loop (repeat 3 more times to have 9 loops on hook), yo and pull through all loops, ch1 to close. Place bobbles in alignment with motif points for even visual rhythm.
Round 10 :
Fasten off and weave ends thoroughly. Block runner flat—gently steam or pin to measurements you prefer and allow to dry completely. (No stitch count change)
Info :
Blocking is critical for this motif-heavy runner to even out petals and scallops. Use blocking pins and a flat surface and allow full drying time before use.
— Finishing & Weaving In Ends :
Step :
Weave in all tails on the back side using a yarn needle, following the cream frame stitches to hide color changes. For the small gold centers, weave ends into the motif center and knot invisibly if desired. Trim excess tails close to fabric once secured. (No stitch count change)
Info :
Hide ends by following the stitch path and burying tails across multiple joins. For motifs used in high-traffic settings, consider tying a second small knot inside the weave for extra security before trimming.
— Scale & Customization Guidance (Make larger or smaller runner) :
Info :
To make the runner wider, add more motifs to the width; each additional motif adds roughly 9–11 cm depending on tension. To make it longer, add motif rows. Adjust motif color placement for stripes or grouped color blocks. You can also change yarn weight and hook size—use a hook 1 size smaller than yarn label for tighter, less gap-prone motifs.
Note :
Because this pattern is modular, you can create matching place mats or table centerpieces by working few motifs and finishing with the same border rounds—scale counts are proportional.
— Troubleshooting & Tips :
Info :
If motifs gape at joins, you may have worked ch loops too loosely earlier; consider re-joining with whip stitch to pull joins closer or re-make motif rounds with a slightly smaller hook. If edges curl, add an extra tidy sc round and block flat.
Info :
Keep a small sample motif to test border stitch counts and tension; this helps you calculate required hdc around the perimeter so the shell border distributes evenly.
Info :
Care instructions: hand wash cold, lay flat to dry to preserve shape of puff petals and picots. Avoid high heat drying or ironing directly on the puffs.
Completing this poinsettia table runner is such a rewarding holiday project! Each motif stacks up into a beautiful, textural centerpiece full of seasonal cheer and cozy handmade details. The layered petals and tiny golden centers give it a vintage-yet-refined look perfect for holiday gatherings. Enjoy the meditative rhythm of making motifs and the joy of seeing them join into one long runner. 🎄🧶