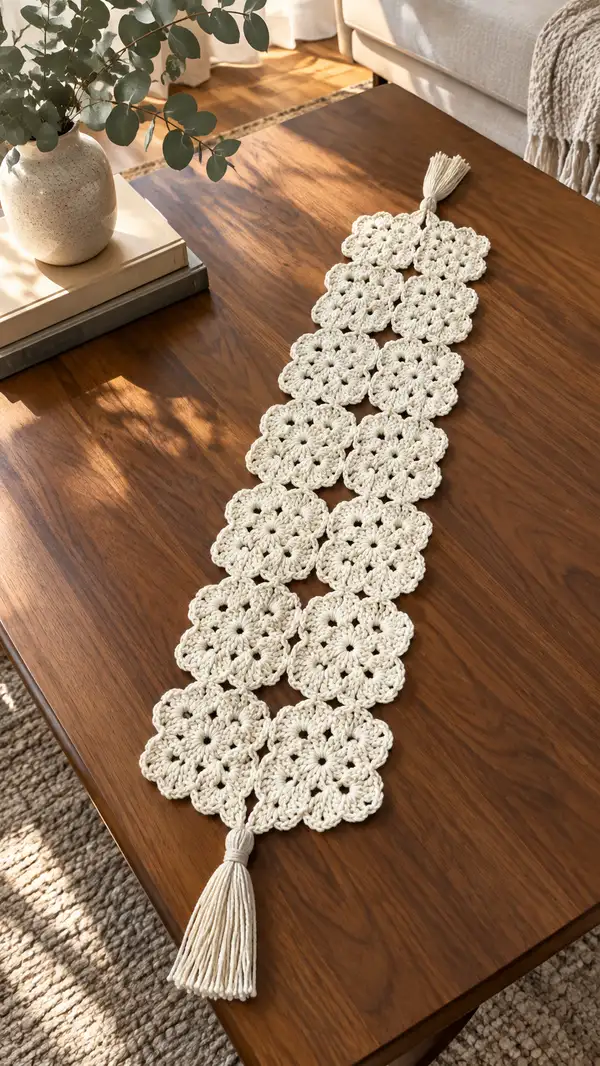
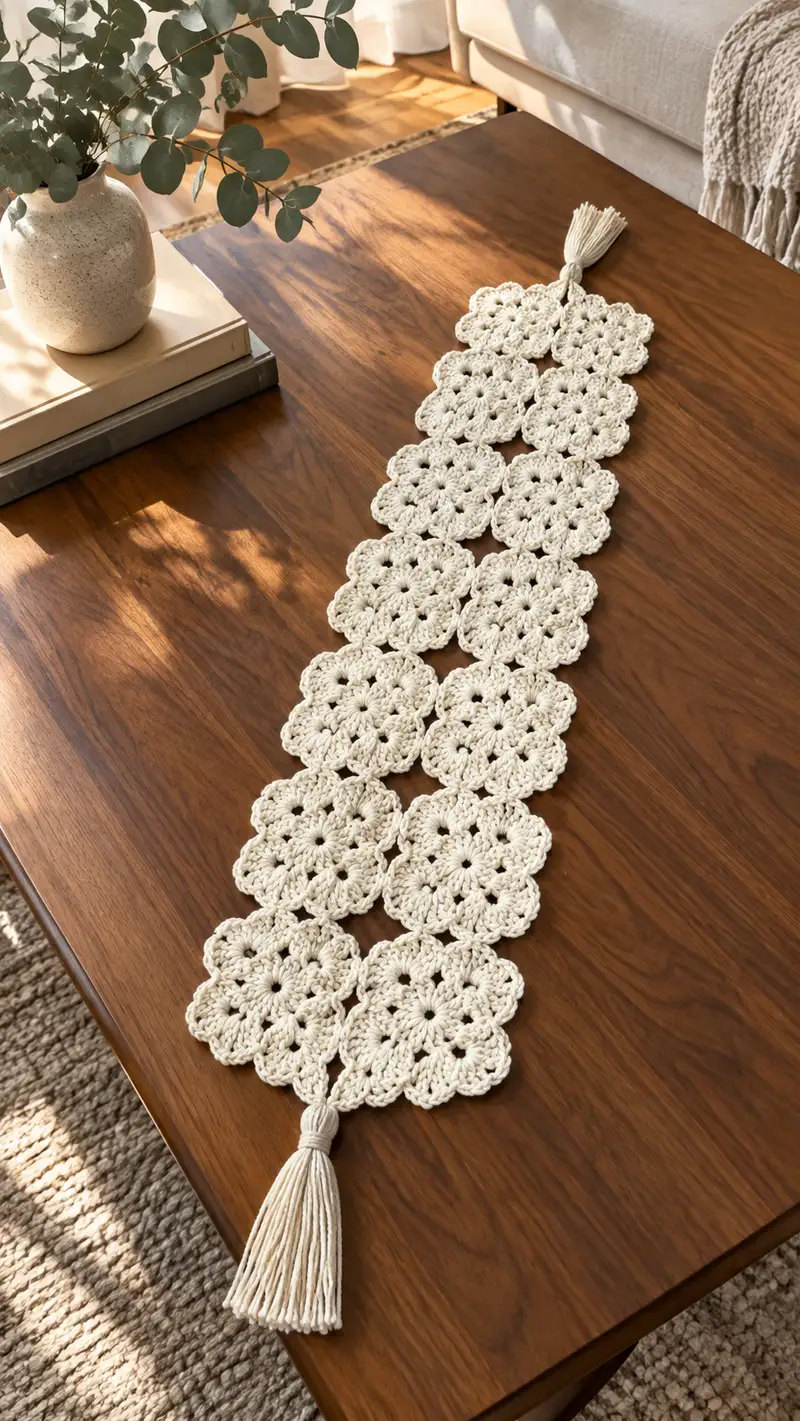
Create a warm, vintage-inspired table runner made from linked floral granny motifs in a soft natural cream. This runner features twelve lacy flower-motifs joined in a single column with a neat scalloped edge and tasseled ends. The pattern uses bulky cotton yarn for a soft, textured finish that sits beautifully on a wood table or dresser—perfect for seasonal decor or everyday cozy styling.
Progress Tracker
0% Complete
— Notes & Gauge :
Info :
Gauge is not critical for this decorative runner but motifs in the photos measure roughly 3.25-3.75 inches (8-9.5 cm) across when worked with bulky cotton and a 6.0mm hook. If your motifs are larger or smaller, adjust the number of motifs or hook size to suit your table length.
Info :
Make 12 motifs and join them in a single column as shown in the photo. Work motifs in a consistent tension for neat joins. Block motifs lightly to even out shape before joining if desired.
— Floral Motif (Make 12 identical motifs) :
Overview :
Each motif is worked in the round from the center out to create eight petals and a scalloped outer edge. All motifs are identical and will be joined to form the runner. For clarity each motif is listed with rounds 1-10 below. Repeat these rounds for motifs 2–12.
Round 1 :
Make a magic ring. Ch 3 (counts as first dc), 2 dc into ring, *ch 2, 3 dc into ring*; rep from * to * 6 more times (you will have 8 clusters of 3 dc separated by ch-2 sps). Join with sl st to top of ch-3. (24 dc, 8 ch-2 sps)
Info :
Keep the magic ring loose enough to close slightly but not so tight that the center puckers. Pull ring closed evenly after Round 2 to get a neat center.
Round 2 :
Sl st into the first ch-2 sp. Ch 3 (counts as dc), 2 dc in same ch-2 sp, ch 2, 3 dc in same ch-2 sp (this makes a large shell in the first ch-2 sp). *Move to next ch-2 sp, (3 dc, ch 2, 3 dc) in each ch-2 sp; rep from * around. Join with sl st to top of ch-3. (48 dc, 8 ch-2 sps)
Info :
Round 2 increases the motif diameter substantially by doubling the visual cluster size; keep your stitches even and count shells to ensure 8 shells are worked.
Round 3 :
Sl st to the center dc of the next 3-dc group (sl st keeps a neat join). *Ch 1, sc in center of shell (work sc into the space between the 3-dc groups where the shell joins the next shell), ch 5; rep from * around to create open chain loops between shells. You should have 8 ch-5 loops around the motif. Join with sl st to first sc. (16 sc total, 8 ch-5 loops)
Info :
These chain loops will form the base for the petal cluster round. Keep ch-5 loops upright and even—use your finger to hold tension while you work the next round into them.
Round 4 :
Work petals in ch-5 loops: *Into next ch-5 loop: (ch 3, 4 dc, ch 3, sl st) all into same ch-5 loop to form a full rounded petal; rep from * around for each ch-5 loop. You will have 8 petals when complete. Join with sl st to base of first petal. (8 petals)
Info :
Petals are made of 4 dc flanked by ch-3 gussets so they puff slightly. Use gentle tension so petals sit flat, not collapsing inward.
Round 5 :
Ch 1, sc in same st, *ch 3, sc in top center of next petal (insert hook around petals’ top loops), ch 3, sc between petals (in the small gap formed at petal bases); rep from * around to make a scalloped chain outline. Join with sl st to first sc. (16 sc plus 16 ch-3 loops total)
Info :
Round 5 establishes the connectors that will later be used to join motifs. Keep the sc placements consistent—always place the sc in the same visual spot on each petal to maintain symmetry.
Round 6 :
Work a small shell in each ch-3 loop to create the final scallop: *Into next ch-3 loop work (2 dc, ch 2, 2 dc); rep from * around. Join with sl st. (8 shells if referencing petals, total stitches this round = 8*(2+2)=32 dc and 8 ch-2 sps)
Info :
This round refines the edge and gives the motif its subtle square-ish floral look. The ch-2 spaces act as small joining points when motifs are assembled.
Round 7 :
Ch 1, sc in same st, *ch 1, sc into center of shell (in the top of the 2-dc group series), ch 4; rep from * around to create small looped connections for a crisp edge. Join with sl st. (16 sc and 8 ch-4 loops)
Info :
Keep ch-4 loops open and even; these loops create extra decorative breathing room and also assist alignment when joining motifs side-by-side in the column.
Round 8 :
Working into each ch-4 loop: *sc, ch 3, 3 dc, ch 3, sc in same loop to make a petite scallop; rep from * around. Join with sl st to first sc. (8 small decorative scallops)
Info :
Round 8 polishes the motif edge and increases the motif diameter by 5-6 mm. If you want a flatter/larger motif adjust the number of dc in the scallop to match your desired size.
Round 9 :
Ch 1, sc in same st, *ch 2, sc between outer scallops (in the small gap created by the last scallop round), rep from * around. Join with sl st. This forms neat small picot-like gaps used visually between motifs. (16 sc, 8 ch-2 gaps)
Info :
If you prefer a tighter edge, work this round in BLO to flatten the outer scallop slightly. For the airy look in the photo, work into both loops as written.
Round 10 :
Final tidy round: ch 1, sc evenly around placing 2 sc in each previous sc space that looks slightly recessed, 1 sc in other sts to maintain an even edge—aim for a total of 32 sc around. Join with sl st. Fasten off and weave ends. (Approximately 32 sc total)
Info :
After Round 10, trim ends and block motif lightly if desired. Repeat Rounds 1-10 to make a total of 12 motifs. Arrange them in a single vertical column before joining to confirm orientation and alignment.
— Motifs 1–12 :
Info :
Make 12 identical motifs as instructed above. Label each motif numbers 1–12 as you go to simplify the joining sequence. Lay them out on a flat surface in the order you plan to join (top to bottom). The photo shows 12 motifs joined edge-to-edge in a straight line with tassels at both ends.
— Joining Motifs (Join-As-You-Go and Sewing Options) :
Info :
Joining may be done 'join-as-you-go' on the final round of each motif (Round 10), or you may sew motifs together after all are complete using tapestry needle and yarn. The instructions below describe a two-step approach: secure join-as-you-go for strong joins at the connection points, then reinforce with an invisible whip-stitch for a tidy finish.
Join Step 1 (Prepare Motif 1) :
Choose the motif you want at the top of the runner (Motif 1). Ensure its final outer edge (Round 10) is neat. Do not weave in the long tail; leave it for a later reinforcement sew. This is your anchor motif.
Join Step 2 (Join Motif 2 to Motif 1) :
Place Motif 2 face-up on Motif 1 so their outer scallops align. With the working yarn attached to Motif 2 (or join yarn to the ch-2 gap on Motif 2's edge), turn Motif 2 so you can slip-stitch into Motif 1 where the ch-2 spaces meet. Starting at one of the middle ch-2 sps on the joining edge, sl st through the ch-2 sp of Motif 2 and then through the corresponding ch-2 sp of Motif 1. Continue around the joining edge, sl st through matched ch-2 sps and small sc spaces (approx 4–6 sl sts per join edge depending on motif spacing) until Motif 2 is securely attached to Motif 1. Fasten off and weave in ends.
Info :
Use pins to hold motifs perfectly aligned before you begin slip-stitch joining. Work gently so the outer edges remain flat and do not ripple.
Join Step 3 (Repeat Joining) :
Repeat Join Step 2 to attach Motif 3 to Motif 2, then Motif 4 to Motif 3, continuing until all 12 motifs are connected in a single straight column. Always check alignment after every 2 joins to ensure the column remains straight.
Info :
Take breaks after joining several motifs to prevent tension drift—sl st joins can pull if worked too tightly. If you notice a twist, gently block the joined portion before continuing.
Join Step 4 (Reinforce Seams) :
Once all motifs are joined by slip-stitch, use a matching yarn and tapestry needle to reinforce joins: using a ladder stitch or invisible whip stitch, sew through corresponding outer edge stitches on both motifs. Use small, even stitches to keep the join flat. Tie securely and weave ends on the wrong side of the runner.
Info :
Reinforcing by sewing gives a cleaner look on the top (right) side and prevents stretch over time. For a more visible decorative seam, use a contrasting thin thread and a decorative blanket stitch instead.
— Outer Edging (to tidy long edges and fill small gaps) :
Edge Round 1 :
With the 6.0mm hook and main yarn, join yarn anywhere on the outer edge (not the join seams) with a sl st. Ch 1, sc evenly around the outside perimeter of the entire runner (working around petals and scallops). Place 2 sc in any slightly recessed stitch to keep the edge even. Work carefully around the small inner gaps created by the motif joins. Aim for a neat, even edge. Join with sl st to first sc. (St count varies—aim for an even border without puckers)
Info :
Counting stitches for the entire runner is impractical due to curvature—focus on visual evenness: add or reduce sc where needed rather than trying to hit a magic number. This round stabilizes the whole runner edge.
Edge Round 2 :
Ch 2 (counts as hdc), work hdc into each sc around to create a slightly raised finished border. When you reach a join seam, work hdc into both motifs’ edges to cinch the seam flat. Join with sl st to top of ch-2. (Even around)
Info :
Hdc round adds a subtle ridge that frames the runner. Use this round to hide small irregularities by working extra hdc in small dips or reducing hdc in small high points.
Edge Round 3 (Decorative Scallop) :
Switch to 5.0mm hook if you want a slightly tighter finishing edge. Ch 1, *skip next hdc, sc in next hdc, ch 3, sc in same hdc (creating small 3-ch loops), skip next hdc; rep from * around. Join with sl st. Fasten off and weave in ends. This creates a delicate open scallop similar to the motif’s outer rhythm.
Info :
If you prefer a plainer finish for a modern look, skip Edge Round 3 and simply weave in ends. The open scallop gives the runner a handmade lace-like finish consistent with the pictured example.
— Tassels (Make 2) :
Tassel Prep :
Tassels in the photo are thick and substantial. Use the same bulky yarn folded to achieve fullness. Wrap yarn around a 3.5–4 inch wide card 30–40 times for a dense tassel (adjust wraps for desired fullness). Slide loops off card and tie a 4–5-inch length of yarn tightly around the bundle near the top. Fold bundle in half and tie again just above the loop fold to create a small hanging loop and a defined head.
Tassel Finishing :
Trim the bottom loops to form an even tassel tip. Wrap a small length of yarn around the tassel head about 1/2" down from the top to conceal the tying knots; tuck the end under the wrap and secure with a small stitch. Repeat for the second tassel.
Attaching Tassel :
Attach tassels to both ends of the runner by sewing the tassel loops through the center join of the top/bottom motif using a sturdy yarn tail. Make 4–6 stitches through the tassel loop and the motif center, knot securely on the underside and weave ends to hide them.
Info :
Position tassels centered on the end motif along its long axis for a balanced look. If you want longer tassels, use more wraps or include doubled yarn for extra length and volume.
— Finishing Touches :
Info :
Weave all loose ends into the wrong side of the runner using a yarn needle. If needed, lightly steam or wet-block the runner to encourage uniform shape—do not over-stretch motifs. Allow to dry flat.
Info :
Care: Spot clean or hand wash in cool water, reshape and lay flat to dry. Avoid tumble drying to preserve cotton integrity and tassel shape.
This elegant floral granny runner is such a satisfying make—each motif is meditative to stitch and the finished column reads rich and handcrafted on any table. The neutral cream yarn and chunky cotton texture create a warm, inviting accent that suits modern and rustic homes alike. Adding tassels gives a playful flourish that elevates the piece from simple to studio-crafted. Enjoy the rhythm of repetition as you build this runner, and take pride in how these little flowers nestle together to form a signature home accessory. 🧶🌿