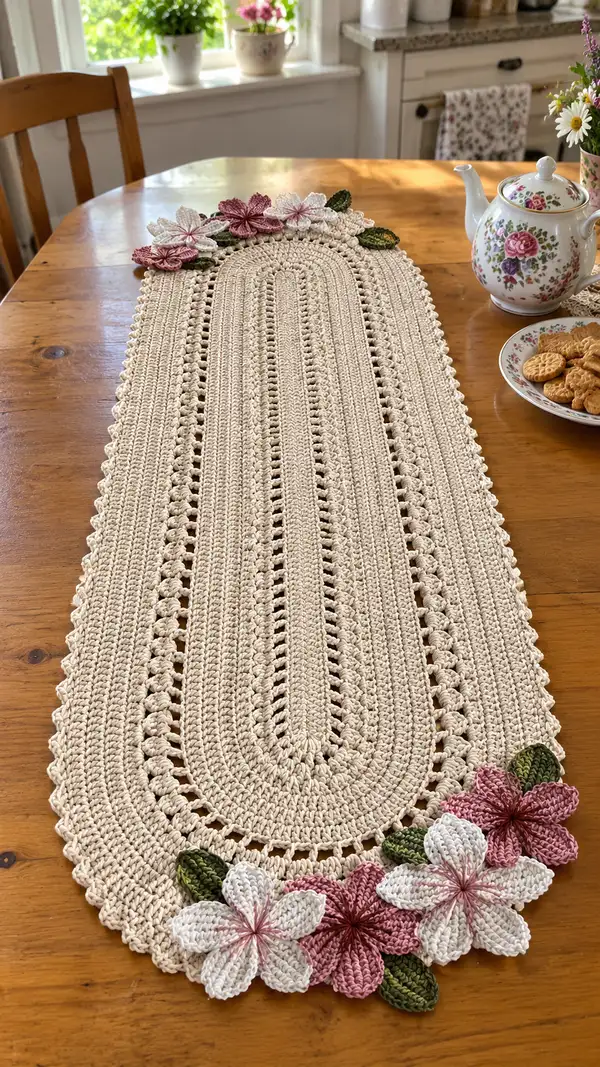
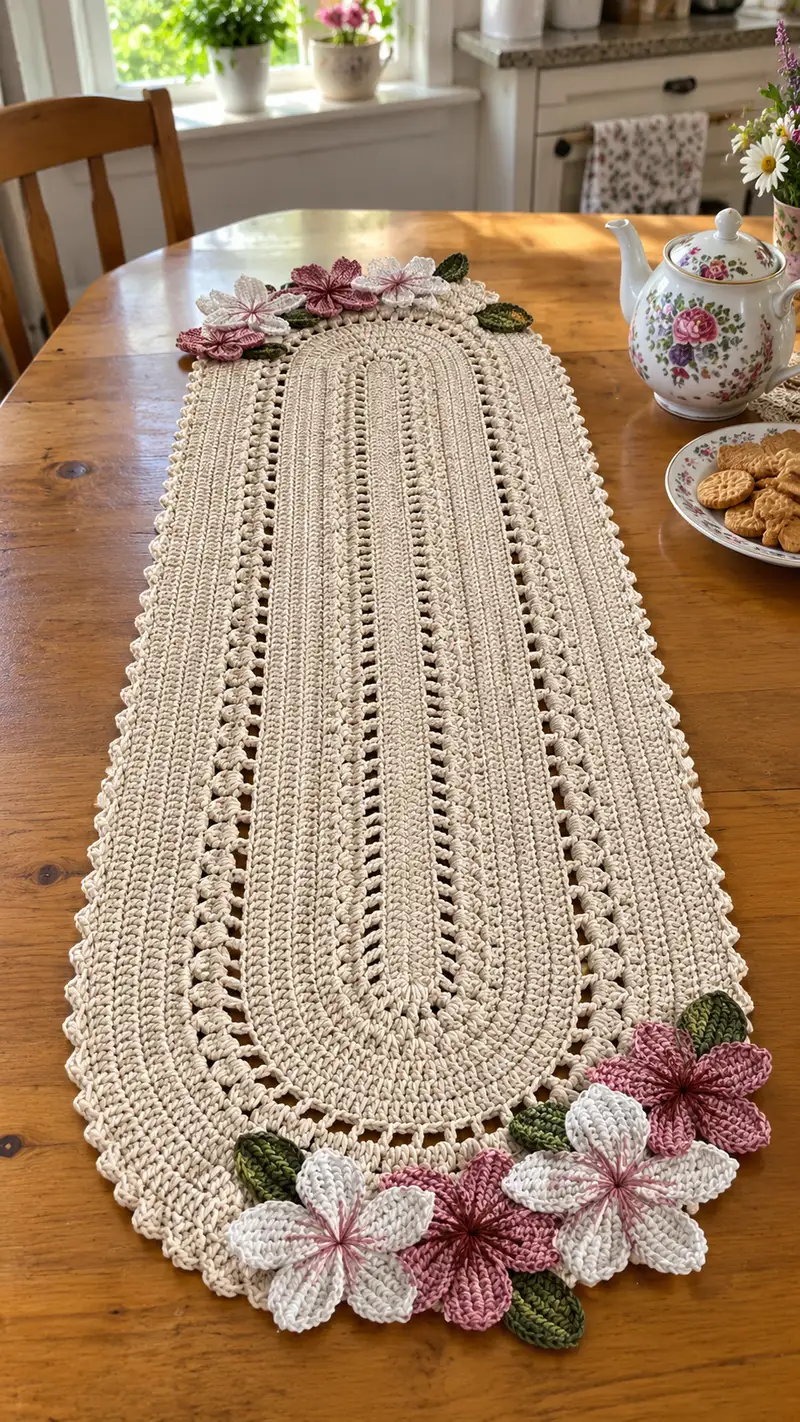
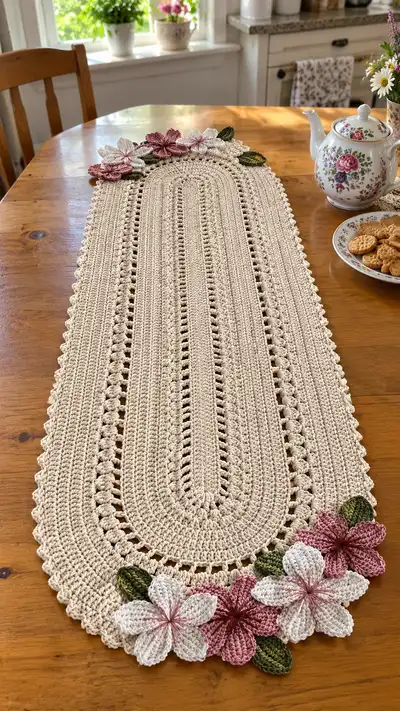
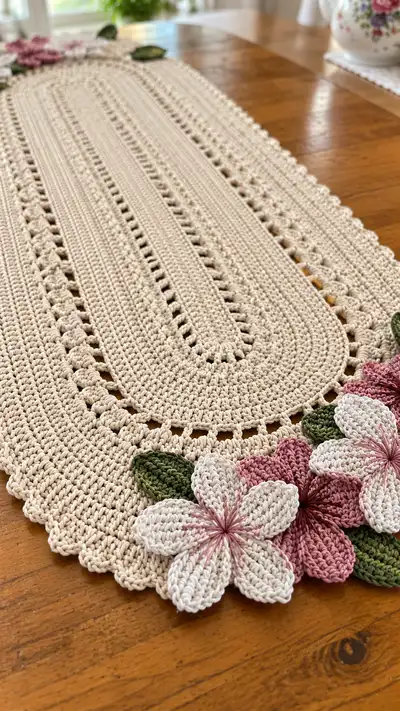
This elegant oval table runner is crocheted in a soft cream cotton with a delicate openwork center and scalloped edge, finished with layered pink and white floral appliques and green leaves. Designed to sit beautifully on a dining table, it combines dense rows for durability with airy lacy panels for visual interest. The floral cluster is sewn on to one end for a charming, cottage-style accent.
Progress Tracker
0% Complete
— Center Oval Base :
Round 1 :
With cream yarn and 4.0mm hook, ch 18. Sc in 2nd ch from hook and in next 15 ch (16 sc), 3 sc in last ch; now work along opposite side of foundation chain: sc in next 16 ch, 3 sc in first ch (the turning chain) (38)
Info :
Place a stitch marker in the first sc of the round and move it up each round. This foundation oval technique creates two 3-sc clusters at the rounded ends which will be the increase points for subsequent rounds.
Round 2 :
Working in continuous rounds, sc in next 11 sts, (inc, sc, sc) in next st (first 3-sc corner cluster expanded to 4 sc), sc in next 11 sts, (inc, sc, sc) in next st (other corner) (42)
Round 3 :
Sc in next 12, (sc, inc, sc, sc) in corner cluster, sc in next 12, (sc, inc, sc, sc) in corner cluster (46)
Round 4 :
Sc in next 13, (sc, sc, inc, sc, sc) in corner cluster, sc in next 13, (sc, sc, inc, sc, sc) in corner cluster (50)
Info :
Increase only in the rounded end clusters (the groups of 3–4 sts). Keep the long straight sides worked in even single crochet to create the oval shape and maintain width.
Round 5 :
Sc in next 14, (sc x2, inc, sc x2) in corner cluster, sc in next 14, (sc x2, inc, sc x2) in corner cluster (54)
Round 6 :
Sc in next 15, (sc x3, inc, sc x3) in corner cluster, sc in next 15, (sc x3, inc, sc x3) in corner cluster (58)
Info :
Check stitch count at the end of each round. The increases should add 4 sts per round total (2 at each end) once corners are worked as expanded clusters; after round 2 increases may add 4 stitches per round when you add single increases symmetrically.
Round 7 :
Sc in next 16, (sc x4, inc, sc x4) in corner cluster, sc in next 16, (sc x4, inc, sc x4) in corner cluster (62)
Round 8 :
Sc in next 17, (sc x5, inc, sc x5) in corner cluster, sc in next 17, (sc x5, inc, sc x5) in corner cluster (66)
Round 9 :
Sc in next 18, (sc x6, inc, sc x6) in corner cluster, sc in next 18, (sc x6, inc, sc x6) in corner cluster (70)
Info :
At this point you have formed a modestly wide oval. The runner in the photo uses many rounds to achieve elongated proportions; we will continue adding subtle increases for 6 more rounds to create the semicircular end caps.
Round 10 :
Sc in next 19, (sc x7, inc, sc x7) in corner cluster, sc in next 19, (sc x7, inc, sc x7) in corner cluster (74)
Round 11 :
Sc in next 20, (sc x8, inc, sc x8) in corner cluster, sc in next 20, (sc x8, inc, sc x8) in corner cluster (78)
Round 12 :
Sc in next 21, (sc x9, inc, sc x9) in corner cluster, sc in next 21, (sc x9, inc, sc x9) in corner cluster (82)
Round 13 :
Sc in next 22, (sc x10, inc, sc x10) in corner cluster, sc in next 22, (sc x10, inc, sc x10) in corner cluster (86)
Info :
From here on you will switch between dense rounds for body strength and decorative openwork rows that echo the twin panels in the photo. Keep a written tally of straight-side stitches between corner clusters; that number will determine placement of openwork stitches later.
Round 14 :
Sc in each st around (86)
Round 15 :
Sc in each st around (86)
Round 16 :
Sc in next 10, ch1, sk1, sc in next 32 (straight side), ch3, sk3 across the top center for a decorative chain-space, sc in next 32, ch1, sk1, sc remaining rounds (86)
Info :
The inserted chain spaces in round 16 begin the first narrow openwork column down the runner centre. Count evenly so that chain spaces line up on both sides of the center length.
Round 17 :
Sc in each st and ch-space around, working 1 sc into each chain-space to close openings (86)
Round 18 :
Sc in next 9, (dc, ch2, dc) in next st to form a vertical eyelet at the start of the panel, sc across straight side until mirrored point, (dc, ch2, dc) at opposite end of straight side, continue sc (86)
Round 19 :
Sc in each st around (86)
Info :
These alternating rounds of solid sc and small eyelet pairings create the ribbon-like columns visible in the runner's center. Maintain stitch count and symmetry on each side of the center line.
Round 20 :
Sc around in BLO (86) — this will create a subtle ridge that echoes the vertical stripes
Round 21 :
Sc around in FLO (86) for a contrasting texture row
Round 22 :
Sc in each st around (86)
Round 23 :
Sc in next 8, (hdc, ch1, hdc) in next st to create mini shell openings, sc across straight side until mirrored point, (hdc, ch1, hdc) at opposite end, sc remaining rounds (86)
Info :
Every 4–6 rounds introduce a decorative motif. These small shell-like openings stack to create the lacy columns seen in the photograph. They remain dense enough otherwise to support tabletop items.
Round 25 :
Sc in each st around (86)
Round 26 :
Sc in next 7, (dc x3 in same st, ch2, dc x3 in same st) in corner cluster to form a puffed corner spacer, sc in next 30, repeat corner spacer on opposite side, sc rest (86)
Round 27 :
Sc in each st around (86)
Info :
If you prefer a narrower center, stop increasing the first oval rounds earlier. The sample was made with 86 sts circumference after shaping the initial oval; adjust early rounds to scale runner width.
Round 28 :
Sc around in BLO (86)
Round 30 :
Sc in next 6, (ch3, sk2, sc in next st) to form a chain-eyelet column, continue sc along repeating chain-eyelet every 6 sts on long sides, mirror on opposite long side (86)
Info :
Continue alternating several rows of texture and eyelet columns down the full length of the runner. The runner in the photo is composed of many repeated motifs stacked to reach its long length—we will now move into the extended length repeats.
— Length Repeats (Repeat these 12-round panels x 8–10 to desired length) :
Panel Round A (31) :
Sc in each st around (86)
Panel Round B (32) :
Sc in next 5, (dc, ch2, dc) over next st to create openwork column, sc in next 18, repeat openwork column, sc remaining (86)
Panel Round C (33) :
Sc in each st around (86)
Panel Round D (34) :
Sc in BLO around to create a narrow ridge line (86)
Panel Round E (35) :
Sc in FLO around to create a contrasting ridge (86)
Info :
These five rounds form a basic texture repeat. The sample uses a long runner length—repeat Rounds 31–35 consecutively as many times as you need to reach the length in the photo (roughly 8–10 repeats depending on gauge).
Panel Round F (36) :
Sc around (86)
Panel Round G (37) :
Sc in next 7, (hdc, ch1, hdc) in next st, sc across to opposite mirrored spot (86)
Panel Round H (38) :
Sc around (86)
Info :
Repeat this 8–12 round motif set along the runner's length. For the pictured runner, the maker repeated sets until the desired length was reached, maintaining the same stitch count and pattern alignment so that the end oval mirrors the starting oval shape.
Panel Round I (39) :
Sc around (86)
Panel Round J (40) :
Sc in each st BLO (86)
Panel Round K (41) :
Sc around (86)
Panel Round L (42) :
Sc around (86)
Info :
Measure as you go. The pattern's sample runner was made to a finished length of roughly 36–40 inches; adjust by adding or subtracting panel repeats. For each added 12-round repeat expect ~3–4 inches of additional length depending on tension.
— End Oval (Mirror the Center, rounds 43–72) :
Round 43 :
Begin shaping the opposite oval end by increasing at the two corner clusters: sc in next 22, (sc x10, inc, sc x10) in corner cluster, sc in next 22, (sc x10, inc, sc x10) (90)
Round 45 :
Sc in next 21, (sc x9, inc, sc x9) in corner cluster, sc in next 21, (sc x9, inc, sc x9) (94)
Info :
Gradually increase a few rounds to round out the final oval end. The aim is to mirror the first end and maintain consistent stitch columns across the length—do not add increases on the long straight sides except where needed at the corners.
Round 47 :
Sc in next 20, (sc x8, inc, sc x8) in corner cluster, sc in next 20, (sc x8, inc, sc x8) (98)
Round 49 :
Sc in next 19, (sc x7, inc, sc x7) in corner cluster, sc in next 19, (sc x7, inc, sc x7) (102)
Round 50 :
Sc around (102)
Round 51 :
Sc in next 18, (sc x6, inc, sc x6) in corner cluster, sc in next 18, (sc x6, inc, sc x6) (106)
Info :
Check that the long straight sides have the same number of columns as the start of the runner and that openwork motifs align; correct by adjusting a sc or replacing a sc with a small eyelet if necessary for alignment.
Round 52 :
Sc around (106)
Round 53 :
Sc in BLO around (106)
Round 54 :
Sc in FLO around (106)
Round 55 :
Sc around (106)
Round 56 :
Sc in next 9, (hdc, ch1, hdc) in next st to form a decorative repeat around the curved end, sc around remaining (106)
Round 57 :
Sc around (106)
Round 58 :
Sc in next 8, (dc, ch2, dc) in next st to form a larger eyelet, sc across to mirrored point (106)
Round 59 :
Sc around (106)
Info :
When shaping the final oval, try the runner draped on the table to confirm end shape. If the end looks too pointed or too flat, add or remove a couple of increases at the corner clusters to adjust curvature.
Round 60 :
Sc around (106)
Round 61 :
Sc in each st around (106)
Round 62 :
Sc around in BLO (106)
Round 63 :
Sc around in FLO (106)
Info :
Finish the base rounds with a couple of uniform sc rounds to create a stable edge for the final scalloped border. This prevents a wavy edge and gives the scallops an even foundation.
— Scalloped Edge (Rounds 64–76) :
Round 64 :
Ch1, sc in same st and next 2 sts, *sk 1 st, 5 dc in next st (shell), sk 1 st, sc in next 3 sts; rep from * around; join with sl st to first sc. Adjust last repeat so shells are evenly spaced across long sides and ends.
Round 65 :
Sl st into centre dc of each shell, ch1, sc into the same dc, *ch2, sc into centre dc of next shell; rep from * around (creates picot spacing) (number of sts will vary depending on spacing)
Info :
Spacing for scallops depends on total stitch count; if shells bunch at corners, remove a shell from the run on one side and redistribute evenly. The goal is a regular scalloped finish like the photo with small shells on the long sides and rounded shells at ends.
Round 66 :
In each shell: (sl st, ch1, 7 dc in shell centre), sl st to next shell centre to form a slightly raised scallop. Work sc between shells to hold shape.
Round 67 :
Sc around to tidy edge and cover any visible join stitches. Fasten off and weave ends.
Info :
Lightly block runner to set scallops: pin scallops out and either steam-block or wet-block by hand for best shape retention. Allow to dry fully before adding appliques.
— Flower Appliques (Make 5–7 Flowers for cluster) :
Flower Base Round 1 :
Using dusty pink or white with 3.5mm hook, ch 6, sl st to form ring, ch3 (counts as dc), work 11 dc into ring, sl st to top of ch3 (12 dc total) — Fasten off color A or continue for petal shaping
Flower Petal Round 2 :
Join yarn in any dc, *ch1, (sc, hdc, 3 dc, hdc, sc) all in same dc to form a petal, sl st into next dc to anchor petal; rep from * 4 more times to make total 5 petals; join and fasten off (5 petals)
Info :
The petal cluster above creates an overlapping petal look. For the flower in the photo each petal is slightly cupped — pinch the base of each petal after making it to create three-dimensionality before fastening off.
Flower Detail Round 3 :
Optional: With contrasting darker pink, embroider 6 straight stitches from petal tip to center across each petal for vein detail. Use tapestry needle and 6–8 strands for visible veins.
Flower Alternate (Layered) :
Make a slightly smaller 5-petal layer in contrasting shade and sew centered atop the larger flower, offsetting petals for fullness. Sew through center with tight whipstitches and knot securely.
Info :
Make flowers in two sizes: larger base flowers (as above) and smaller top flowers to layer. The sample uses both white and dusty pink layers to create depth. Make 3 large and 2–4 small flowers to match the photograph cluster.
— Flower Petal Alternate Method (Detailed petal shaping, 6-round petal) :
Petal Round 1 :
Ch8, sc in 2nd ch from hook, sc in next, hdc in next, dc in next 3, hdc in next, sc in last; sl st into base to form petal; rep 5 times around a small ring to create a fuller petal set (Repeat to make layered flowers)
Petal Round 2 :
Working in FLO only on petals: sc across petal edge to force petals to curl slightly upward; secure petal base with tiny backstitch to maintain curl.
Info :
For dramatic petals like some in the photo, use a slightly larger hook (4mm) for petals so they have more drape, then block petals shaped upward to get the sculpted look.
— Leaves (Make 6–8 leaves) :
Leaf Round 1 :
With green yarn and 3.5mm hook, ch 8. Sc in 2nd ch from hook, hdc in next, dc in next 3, hdc in next, sc in last; now working on opposite side of foundation chain, sc in next, hdc, dc x3, hdc, sc to complete leaf; sl st and fasten off (leaf shaped) (approx 14 sts)
Leaf Round 2 :
Join yarn in center base of leaf and embroider a midrib by making a line of sl sts up the center. For raised veins add 2–3 short surface hdc stitches on each side.
Info :
Make leaves in two sizes. For smaller leaves reduce foundation chain by 2; for larger increase chain by 2–3. Block leaves gently to flatten then shape slightly under the flowers to create a layered look.
— Flower & Leaf Assembly :
Info :
Arrange the flowers and leaves on a flat surface and experiment with layout. The sample cluster places 3 large flowers and 2 smaller layered flowers with leaves tucked beneath, concentrated on one end of the runner. Pin pieces in place before sewing.
Assembly Step 1 :
Using matching cream thread for invisible stitches, sew the largest flower first to the runner at the scalloped end, stitching through the center several times to anchor tightly.
Assembly Step 2 :
Layer a smaller contrasting flower offset on top of a larger flower and tack down with tiny stitches through the center, then hide knots under layered yarn strands or a few backstitched wraps.
Assembly Step 3 :
Sew leaves beneath and between flowers so edges peek out naturally. Use small whipstitches at leaf bases and a few stitches across leaf veins to secure.
Info :
Use a handful of small glass-headed pins to temporarily hold placements, then remove pins as you secure each applique by sewing with a yarn needle. Keep stitches small and even to hide them on the face of the runner.
— Final Finishing Rounds & Blocking :
Final Round 1 :
Once all appliques are secured, weave in all ends toward the inner rows and trim close. Use a tapestry needle to bury remaining tails.
Final Round 2 :
Lightly steam-block or wet-block the entire runner: pin to desired shape with scallops fanned evenly, and allow to dry fully to set stitch shape and openwork.
Final Round 3 :
Check the underside for any loose stitches; add tiny securing stitches where needed. Trim any stray fibers and give the runner a light press with a cloth between iron and crochet if necessary (use low heat for cotton).
Info :
The runner gains its refined look after blocking; do not skip this step. If you plan to launder periodically, hand-wash gently in cool water and re-block after washing to maintain shape.
Completing this elegant runner brings such satisfaction—every stitch contributes to the textured panels and delicate scallop edge. The layered flowers add a feminine finishing touch that makes the piece feel handmade and special. Whether you place it under a teapot or down the center of your dining table, it will brighten a room and invite compliments. 🧶🌸 Enjoy the rhythm of the repeats and the joy of the final floral assembly—happy stitching! ✨