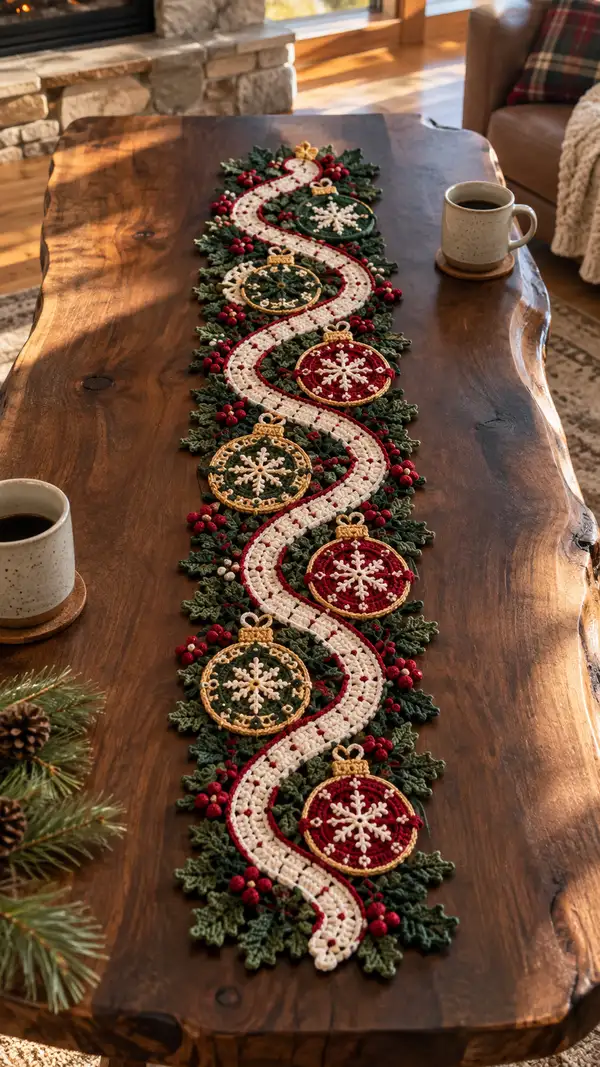
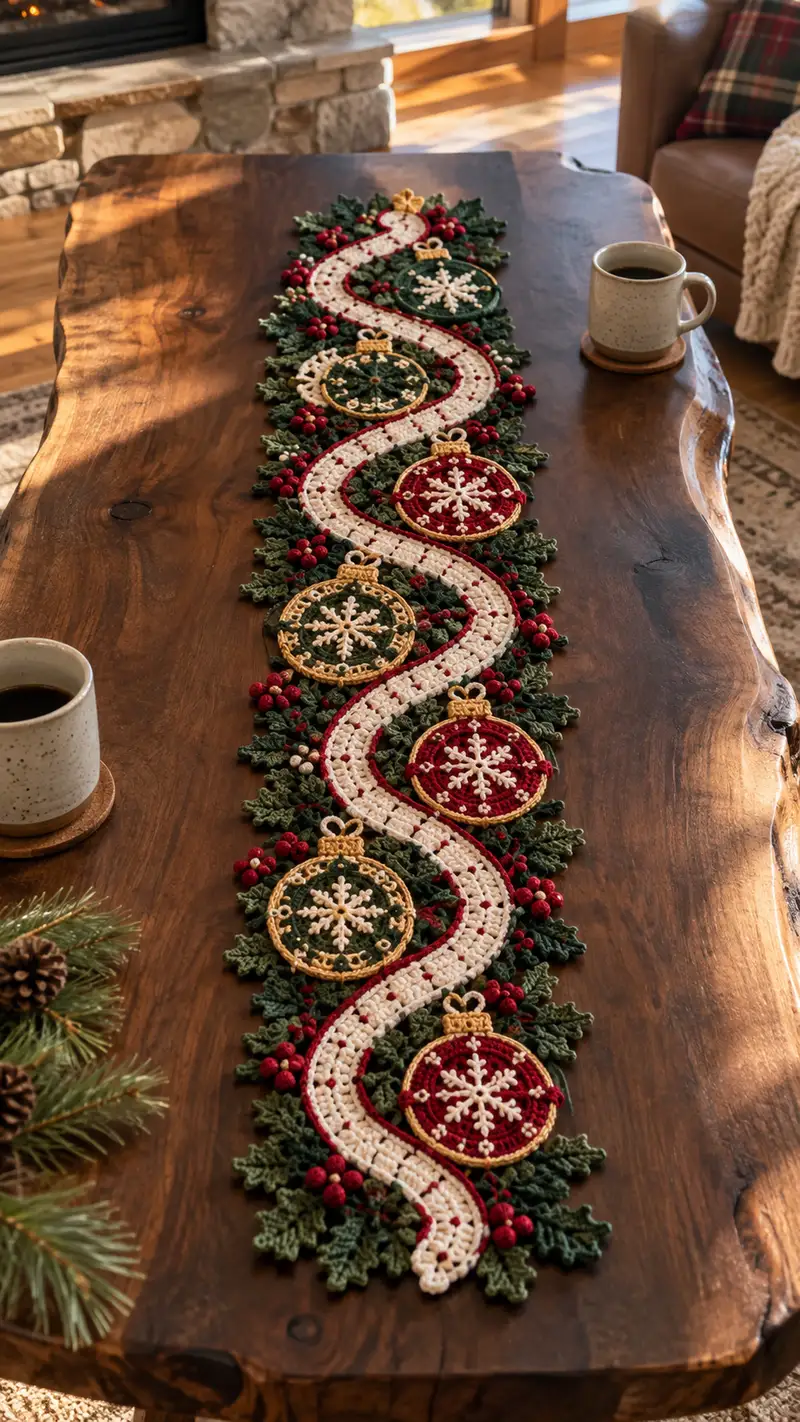
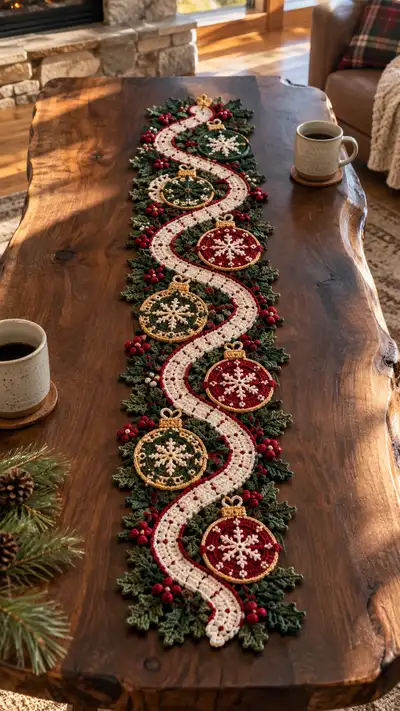
Create a festive cream-and-red table runner featuring wavy central band, crocheted holly leaves, clustered red berries and decorative round ornaments with snowy centers. This richly textured runner layers motifs for a dimensional, heirloom look. The pattern uses contrasting colours (cream, deep red, two greens and gold) and is worked in modular motifs joined into a graceful S-shaped runner perfect for dining tables or sideboards.
Progress Tracker
0% Complete
— Notes & Preparation :
Info :
Work all motifs in US crochet terminology. Maintain consistent tension throughout. Use the 3.5mm hook for main motifs and a 3.25mm or 2.75mm for tighter detail items like berries and snowflakes. Block and steam-flat all disks and leaves before assembly for best results. Join motifs using mattress stitch or whip stitch, pinning carefully to achieve the S-wave placement shown.
Info :
Gauge is not critical for dimension as runner length can be adjusted, but keep yarn weight consistent across colors. The sample runner measures approximately 48-54 inches long and 8-10 inches wide depending on motif spacing — estimate your own spacing with a small sample before committing.
— Main Wavy Center Band (Cream with Red Edge) :
Round 1 :
Foundation chain 120 (or adjust to desired length in multiples of 4). Turn and work into 2nd ch from hook: 1 sc in each of next 119 ch (119)
Round 2 :
Ch1, turn. 1 sc in first 4 sts, (2 sc in next st, 1 sc in next 6 sts) rep across until last 4 sts, 1 sc in each remaining 4 sts — this creates a subtle scallop to begin the width shaping (approx 131)
Info :
If you change the foundation chain, add or remove sets of 8 chains to maintain symmetrical wave spacing. Use stitch markers every 10 stitches to count quickly across this long foundation.
Round 3 :
Ch1, turn. 1 sc in each st across for one even round to settle the foundation (131)
Round 4 :
Ch1, turn. Work a shaping repeat across the strip to begin the S-wave: (BLO 1 sc x 6, inc) x 16, finish BLO 1 sc across remaining — This raises a subtle ridge on one side to help form the wave edge (147)
Round 5 :
Ch2 (counts as hdc), turn. Working in BLO, 1 hdc in each st across to create a slightly taller row for shaping (147)
Round 6 :
Ch1, turn. 1 sc in first 8 sts, (sk 2, 3 dc in next st, sk 2, 1 sc in next 10 sts) rep across to form a crocheted texture that will help the band curve; end with sc in last 8 sts (147)
Info :
The S-shaped band is built by alternating slightly wider and narrower sections. Work these shaping repeats to get the same ripple. On sample runner these repeats were worked for 40 rows total to reach the final width and body height.
Round 7 :
Ch1, turn. 1 sc in each st across (147)
Round 8 :
Ch1, turn. (1 sc, inc) x 49 (196) — expand slightly in the center of the band to create the puffed cream rope look
Round 9 :
Ch1, turn. 1 sc in each st (196)
Round 10 :
Ch1, turn. (3 sc, inc) x 49 (245)
Info :
At these larger stitch counts, keep even tension and check the strip is lying flat. If your band begins to ripple excessively, reduce increases in the next repeat. If the band is too narrow, add an extra increase repeat every 12 sts.
Round 11 :
Ch1, turn. 1 sc in each st (245)
Round 12 :
Ch1, turn. Work a decorative filet-style chain-eyelet within the center to make an openwork texture: *1 sc in next 4, ch 2, sk 2* rep across (st count still 245)
Round 13 :
Ch1, turn. 1 sc in each st across picking up sc over ch-2 spaces (245)
Round 14 :
Ch1, turn. (2 sc, inc) x 81 + 2 sc (327)
Info :
These expansion rounds are staggered across the length: to create the serpentine S-curve, you will deliberately increase more in alternate sections while keeping other sections steady. Mark the beginning of each section where ornaments will sit (approx every 14-16 inches) so the wave aligns with ornament placement later.
Round 15 :
Ch1, turn. 1 sc in each st (327)
Round 16 :
Ch1, turn. (4 sc, inc) x 65 + 2 sc (392)
Round 17 :
Ch1, turn. 1 sc in each st (392)
Round 18 :
Ch1, turn. Working short rows to create outward bulges where ornaments will sit: work 60 sts, turn without working remaining sts; repeat on second pass for other side; then join and work even round across full width — this technique yields controlled three-dimensional bulges (392)
Info :
Short rows are used to push the center band up and down to create valley where leaves attach. Practice short-row shaping on a small swatch to get comfortable before applying to the full band.
Round 19-24 :
Repeat Round 11 and Round 12 alternately to lock the shape, finishing with two even sc rounds to stabilize (392)
Info :
Change to Deep Red yarn for edging now. Carry cream yarn up the inside edge and secure every 6-8 sts if you prefer not to break yarn.
Round 26 :
With Deep Red, join with sl st to the outer edge of the cream band. Ch1, sc evenly around the outermost edge working 2 sc in the apex of each outward curve and sc in straighter sections. Aim for approx 420 sc total after edging (actual count varies slightly with your foundation). This creates the red outline seen hugging both sides of the wave.
Round 27 :
Ch2, turn. 1 hdc in each st around to form a raised edging line (approx 420)
Round 28 :
Ch1, turn. Decorative picot scallop: *1 sc in next 3, (ch3, sl st in 3rd ch from hook) in next st* rep around. This gives the lacy inner edge where ornaments and leaves will be sewn (approx 420 picots)
Info :
Fasten off and weave in ends after completing the wavy band. Block the strip lightly to set the wave shape before assembling motifs.
— Ornament Bauble Disk (Make 6) :
Info :
Make one full ornament disk in contrast colors and repeat to make 6. Each bauble has three components: inner disk (ornament background), decorative gold rim and top cap. Inner disks are worked flat in rounds; use Forest Green for alternating ornaments and Deep Red for alternating ornaments as shown in photo.
Round 1 :
With ornament color (Red or Green), mr, 6 sc into mr (6)
Round 3 :
(1 sc, inc) x 6 (18)
Round 4 :
(2 sc, inc) x 6 (24)
Round 5 :
(3 sc, inc) x 6 (30)
Info :
The ornament disk should remain flat. If it begins cupping, block it flat with steam or pins. If it ruffles, reduce increases in the next round.
Round 6 :
(4 sc, inc) x 6 (36)
Round 7 :
(5 sc, inc) x 6 (42)
Round 8 :
1 sc in each st (42)
Round 9 :
Ch1, *sk 1, 3 dc in next st, sk 1, sc in next 4* rep around to create delicate lacy openings for the gold rim to sit over (42)
Round 10 :
1 sc in each st (42)
Info :
Fasten off ornament color leaving a 7-8 inch tail for sewing to rim. Block disk flat to prepare for decorative snowflake embroidery in the center.
— Snowflake Motif (for center of each ornament) :
Round 1 :
With White/Ivory, mr, ch3 (counts as tr), work (2 tr, ch2, 3 tr) into ring (this forms one arm). Ch2, repeat for 6 arms total to form a 6-spoke start. Sl st to top of first ch3 to close. (6 arms)
Round 2 :
Work into each ch-2 space: *(sl st, ch3, 3 tr, ch1, 3 tr, ch3, sl st)* across each arm to create pointed arms and loops between. After completing 6 arms, fasten off leaving tail for sewing (flat snowflake approx 2.25" across)
Info :
Use a smaller hook (2.75mm) for the snowflake for tight, crisp arms. Press lightly with a warm iron through a cloth to flatten if needed. Stitch the snowflake centered onto the ornament disk with the tail left earlier, then weave underside ends neatly.
— Gold Rim / Filigree Ring for Ornament (Make 6) :
Round 1 :
With Gold yarn, mr, 8 sc into mr (8)
Round 3 :
(1 sc, inc) x 8 (24)
Round 4 :
(2 sc, inc) x 8 (32)
Round 5 :
Ch1, 1 sc in each st BLO around to create a flat ring that will sit over the ornament disk edge (32)
Round 6 :
Ch1, *sl st in next 2, ch3, sl st in next 2* rep around to create decorative loops on the rim. Fasten off leaving a long tail for sewing the rim atop the ornament disk.
Info :
Place the gold rim atop the ornament disk so the loops sit over the lacy openings created in Round 9 of the disk. Adjust placement before sewing; use pins and a matching gold thread to attach invisibly.
— Ornament Cap & Bow (Make 6) :
Round 1 :
With Gold, ch6, sl st to join in ring, ch1. Work 6 sc into ring (6)
Round 2 :
(1 sc, inc) x 3 (9)
Round 3 :
1 sc in each st (9)
Round 4 :
Ch5, sl st to front of cap to form a decorative bow loop. Fasten off leaving tail to sew cap onto top of gold rim. (cap sits approx 0.5" tall)
Info :
Use a small length of thin craft wire (optional) inside the bow loop to shape and stiffen the loop, tucking wire ends under sewing and wrapping in yarn so ends are not exposed.
— Holly Leaf Motif (Make 30-36) :
Info :
Leaves are worked flat starting with a small chain and building pointed lobes. Use Forest Green for most leaves and a second green to add tonal variety. Make 30-36 leaves for full edging; vary sizes slightly for a natural look.
Round 1 :
With Forest Green, ch8. Row 1: sc in 2nd ch from hook and in next 6 ch (7)
Round 2 :
Ch1, turn. 2 sc in first st, 1 sc in next 5 sts, 2 sc in last st (9) — begins leaf base
Round 3 :
Ch1, turn. (1 sc in next, hdc in next, dc in next 3, hdc in next, 1 sc next) across forming a central ridge of taller stitches for the midvein (9)
Round 4 :
Ch2, turn. Working down the opposite side of the starting chain: dc in first, hdc next, sc in next 3, hdc next, dc last — mirror of Round 3. (9)
Round 5 :
Ch1, sl st to tip, ch3, work 3 tr into tip to form pointed tip cluster, sl st back down to base (this creates the pointed holly tip)
Round 6 :
Ch1, turn. Working along entire edge, *sc, ch2, sk1* to make serrated lobes; repeat down both sides to create 5-6 small lobes. Fasten off, leaving a tail for sewing (leaf approx 2.25" long)
Info :
For varied texture, make some leaves with an additional round: after Round 6 add (sc around entire leaf in BLO) to create a raised ridge. Slightly different leaves will create depth when layered around ornaments.
— Berry (Make lots - clusters of 3-5) :
Round 1 :
With Deep Red, mr, 6 sc into mr (6)
Round 3 :
Dec around using sc2tog x6 to form a small firm berry (6). Fasten off leaving 4-5" tail for sewing. Stuff very lightly with tiny scrap of fiberfill or leave flat for a natural dried-berry look.
Info :
Group berries in clusters of 3-5 by sewing bases together with their tails, then sew clusters to the band around ornament bases and among leaves to mimic the photo. Add tiny cream or pink beads in the center of some berries for highlights if desired.
— Assembly & Joining (Joining motifs to band and to each other) :
Info :
Lay the blocked wavy cream band flat. Position ornament disks at measured intervals along the inward curves of the S-wave — sample spacing approx every 8-10 inches with alternating red/green color order. Pin the ornament disks in place centered over the bulges made by the short rows earlier. Use coarse pins to hold positions through blocking mat if necessary.
Round 2 :
Using mattress stitch and the long tails left on the ornament disks, sew the ornament disk to the cream band by stitching through the outer rounds of the disk and through the band picot edge, spacing stitches every 3-4 stitches to keep it secure. After disk is sewn, position the gold rim centered and stitch along the sl st loops created in rim Round 6 to lock rim to disk. Repeat for each ornament (6 total)
Round 3 :
Attach the gold cap by sewing it to the very top of the rim. Secure the bow loop of the cap by tacking it to the rim and under-stitching into the band a few threads so the cap sits upright.
Round 4 :
Arrange holly leaves around each ornament: layer two or three leaves under each ornament so points radiate outward. For a natural cluster, stagger leaf sizes and overlap edges by 25-35%. Sew leaves in place through their centers to the band and the underside of the ornament disk.
Info :
Sew leaves using matching green tails and invisible stitches along the central vein for a neat finish. If you want extra hold, tack through the band at two anchor points per leaf.
Round 5 :
Sew berry clusters into leaf groupings and at points where two leaves meet; use the berry tails to secure into the band and under ornament rims. Create additional small berry clusters between ornaments in the wave valleys for continuous flow.
Round 6 :
Embroider small cream highlight dots around the snowflake center and on the rim with single strand yarn or pearl beads to mimic the picture's tiny white dots. Secure knots on the underside and weave in tails thoroughly.
Round 7 :
Edge finishing: With Deep Red, re-visit the outermost edge of entire runner and work a final round of sc in BLO to create a tidy border and strengthen the seam between motifs and band (work 1 sc in each visible stitch across all joined edges, approx 1 sc per picot/edge stitch).
Round 8 :
Final decorative accent: With Gold, work a chain overlay around each ornament rim (through the loop spaces created in the rim) adding a continuous gold ring. Anchor ring with small invisible stitches so it glimmers from the top like metal trim.
Info :
Weave in all ends after assembly and steam-block lightly to set shape. If desired, add a thin layer of textile stiffener to the underside of leaves to keep them slightly upturned as shown in the image.
— Alternate Edge & Optional Table-Safe Backing :
Round 1 :
To add a backing for extra durability, create a simple rectangular backing of the same length and approx 8-10 inches width using worsted cream: foundation chain equal to band length plus edge, sc rows until backing matches band shape when held together (work even rows, seam together with mattress stitch).
Info :
Sew backing to underside with slip-stitch seam or invisible mattress stitch, catching only the back loops of the band to keep top motifs crisp. Backing is optional if you plan to store runner flat or use on smooth surfaces only.
Round 3 :
Final blocking: Lay runner flat and pin gently into final S shape using blocking pins to set the curves. Allow to dry fully (24 hours) if you used steam or starch. Inspect joins and resew any loose points.
Info :
For best results, display runner on a flat table, not directly under heavy objects. The ornaments are decorative and should not be used to support hot items or heavy vases without extra backing or reinforcement.
This cream-and-red ornament holly table runner captures the spirit of the holidays with elegant handwork and rich texture. Each assembled motif — the snowflake-centered ornaments, layered holly leaves, and clustered berries — comes together to create a striking centerpiece that feels both festive and handmade. I love how the metallic gold highlights elevate the rustic greens and warm cream to an heirloom-quality finish. 🧶✨ Display it proudly on your table or give it as a thoughtful seasonal gift! 🎄