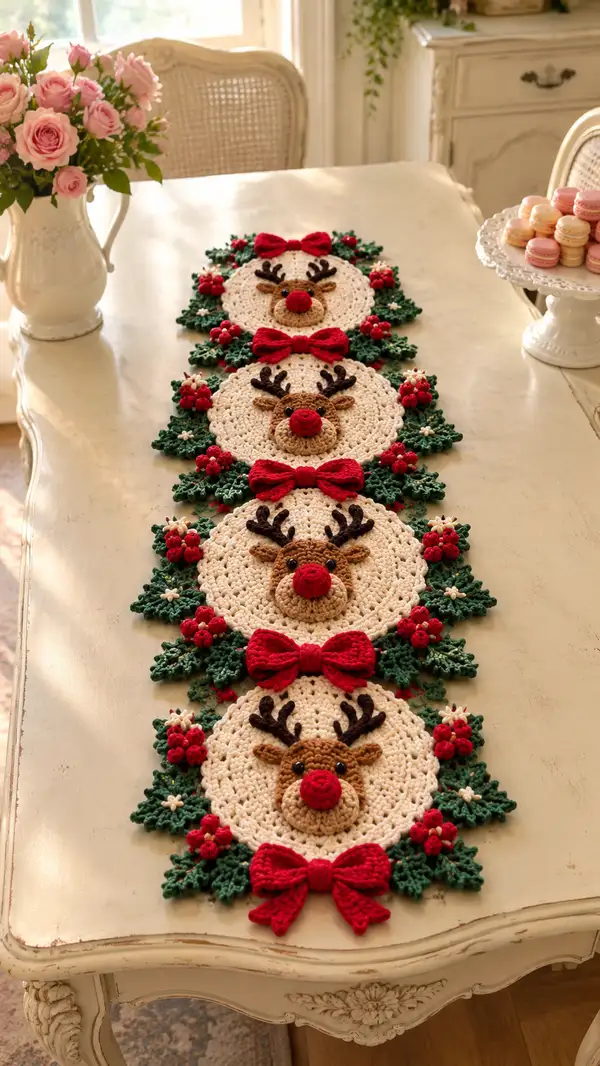
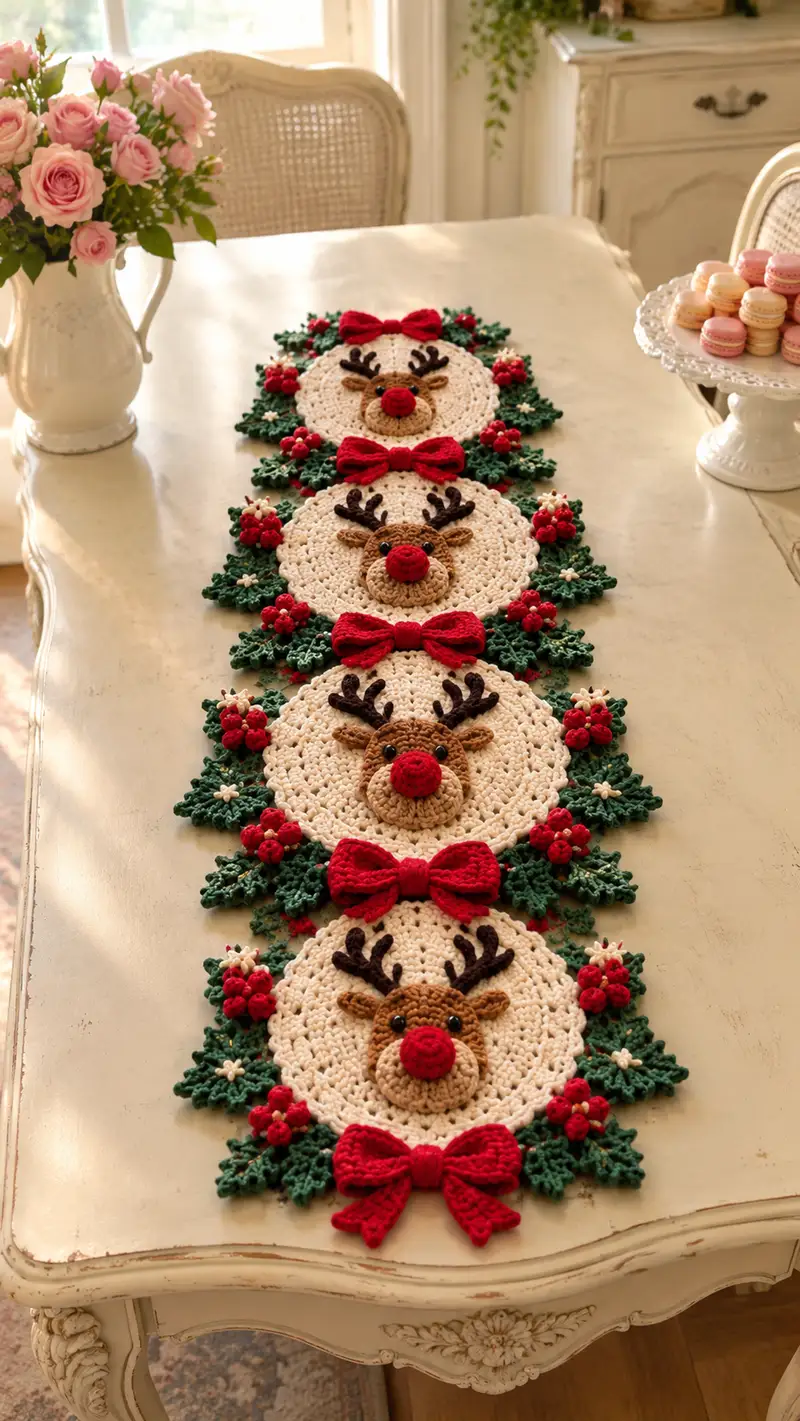
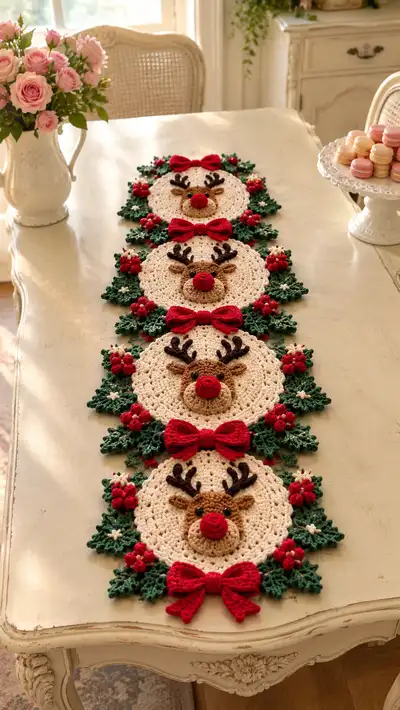
A festive, vintage-inspired table runner made from repeating cream round motifs framed with lush green holly leaves, bright red bows and three-dimensional reindeer faces. Each circular medallion features a textured reindeer snout, bobble nose, crocheted antlers and clusters of berries for a charming holiday centerpiece. The pattern uses simple motifs joined together with a decorative border — perfect for holiday decorating or gifting.
Progress Tracker
0% Complete
— Reindeer Head (Main Face Applique) :
Round 1 :
6 sc in magic ring (6)
Round 3 :
(1 sc, inc) x 6 (18)
Round 4 :
(2 sc, inc) x 6 (24)
Round 5 :
(3 sc, inc) x 6 (30)
Round 6 :
(4 sc, inc) x 6 (36)
Round 7 :
(5 sc, inc) x 6 (42)
Round 8 :
(6 sc, inc) x 6 (48)
Info :
Work the reindeer face flat in the round — this piece will be the base 3D facial disc that sits slightly proud of the cream doily. Use light brown worsted yarn and a 3.0mm hook for a tidy, slightly firm fabric.
Round 9-14 :
1 sc in each st (48) — work six rounds even to create height for the face (48)
Info :
Mark the first stitch of each round. Place the snout later centered on the lower third of this face. If you prefer a flatter face, work only 4 rounds even.
Round 15 :
(6 sc, dec) x 6 (42)
Round 16 :
(5 sc, dec) x 6 (36)
Round 17 :
(4 sc, dec) x 6 (30)
Info :
Begin light stuffing of the facial disc if you want a slightly padded look. Use only a small pinch of polyester fiberfill — this piece should remain fairly flat so it adheres well to the cream doily.
Round 18 :
(3 sc, dec) x 6 (24)
Round 19 :
(2 sc, dec) x 6 (18)
Round 20 :
(1 sc, dec) x 6 (12)
Round 21 :
6 dec (6) - fasten off leaving long tail for sewing
Info :
Weave the tail to the wrong side and flatten the face disc carefully. This small round will be sewn to the cream doily so leave the tail long for seam security.
— Snout (Make 1) :
Round 1 :
6 sc in magic ring (6)
Round 3 :
(1 sc, inc) x 6 (18)
Round 4 :
1 sc in each st (18)
Round 5 :
(2 sc, dec) x 6 (12)
Info :
Stuff the snout lightly — this should be slightly padded to stand proud of the face disc without being spherical. Use the same light brown as the face, and a 3.0mm hook to keep it tidy.
Round 6 :
(1 sc, dec) x 6 (6)
Round 7 :
6 sc around (6) - fasten off leaving a long tail for sewing
Info :
Sew the snout to the center lower third of the face disc using the long tail. Secure firmly; take small stitches around the base so the join is invisible from the front.
— Nose (Bobble Nose) :
Round 1 :
6 sc in magic ring (6)
Round 3 :
Work 6 bobbles evenly spaced around: *[yo, insert, yo, pull], repeat until 5 loops, draw through all loops, ch1 to secure* x6 (use bright red)
Info :
Alternatively make a tightly stuffed small sphere: (1 sc, inc) x 3 to 9 then fasten off and stuff. Attach directly to the snout tip, centered, and secure with several passes.
Round 4 :
Fasten off leaving long tail and sew the nose to the outer center of the snout. Use small, neat stitches to hide the join.
— Eyes (Make 2) :
Info :
Place safety eyes between rounds 11-12 of the face disc about 8-10 stitches apart depending on desired expression. Alternatively embroider eyes with black yarn: 6-8 embroidered satin stitches or French knots to mimic glossy eyes.
Option :
If using safety eyes, insert them before the snout is sewn down — ensure the washer is secure and that stuffing is light around that area.
— Ears (Make 2) :
Round 1 :
6 sc in magic ring (6)
Round 3 :
(1 sc, inc) x 6 (18)
Round 4 :
1 sc in each st (18)
Round 5 :
(2 sc, dec) x 6 (12)
Round 6 :
1 sc in each st (12) - fold ear and sl st base to create a slight cup; fasten off leaving long tail
Info :
Sew ears to the upper sides of the face disc at approximately rounds 4-6 (counting from the center), angle them slightly forward for a natural profile. Add a small inner ear stitch with dark brown for contrast.
— Antlers (Make 2) :
Round 1 :
Ch 8, sc in 2nd ch from hook, sc across (7) - turn to create a stem
Round 2 :
Ch1, sc in each st across (7) - ch1, turn
Round 3 :
At st 3 from base create a short branch: ch4, sl st back into branch base; continue sc to end (7)
Round 4 :
Create 1-2 additional tiny branches by chaining 3-4 and anchoring back with sl st to the stem at staggered positions. Fasten off and leave a tail for sewing.
Info :
Antlers are worked flat and are best made with dark brown yarn. Starch lightly if you want them stiff, or insert thin floral wire inside before sewing for shape retention. Sew antlers to top of head between the ears using a ladder stitch for an invisible join.
— Cream Doily Circle (Main Medallion) :
Round 1 :
6 sc in magic ring (6)
Round 3 :
(1 sc, inc) x 6 (18)
Round 4 :
(2 sc, inc) x 6 (24)
Round 5 :
(3 sc, inc) x 6 (30)
Round 6 :
(4 sc, inc) x 6 (36)
Info :
Switch to cream yarn and use a 3.5mm hook for the large medallion. Keep rounds smooth and tension even — the medallion must lay flat to serve as the runner motif base.
Round 7 :
(5 sc, inc) x 6 (42)
Round 8 :
(6 sc, inc) x 6 (48)
Round 9 :
(7 sc, inc) x 6 (54)
Round 10 :
(8 sc, inc) x 6 (60)
Round 11 :
(9 sc, inc) x 6 (66)
Round 12 :
(10 sc, inc) x 6 (72)
Info :
To introduce delicate lace spacing, change Round 13 to a mixed dc and ch-skip round which creates an open, vintage look and helps the holly leaves tuck under the edge.
Round 13 :
*dc in next 3 sts, ch 2, skip 2 sts* rep around (72 plus ch-ps) - sl st to join
Round 14 :
*dc in next 2 sts, (dc, ch1, dc) in ch-2 space, dc in next 2 sts, ch1* rep around to create small shells (72)
Round 15 :
1 sc in each st and in each ch-1 space (72)
Round 16 :
*1 sc in next 5 sts, 3 sc in next st* rep around (84)
Round 17 :
1 sc in each st (84)
Round 18 :
*1 sc in next 6 sts, inc* rep around (96)
Round 19 :
1 sc in each st (96)
Round 20 :
*1 sc in next 7 sts, inc* rep around (108)
Round 21 :
1 sc in each st (108)
Round 22 :
*1 sc in next 8 sts, inc* rep around (120)
Round 23 :
1 sc in each st (120)
Info :
At this stage the medallion measures roughly 12-14 cm across depending on yarn and hook. If you prefer a slightly smaller motif, stop at Round 18; for larger motifs continue increases two more rounds (inc rounds would produce 132 and then 144).
Round 24 :
*sc in next 3, ch2, sc in next 3, shell (2 dc, ch1, 2 dc) in next st* rep around to create decorative scallops (120)
Round 25 :
Work a neat single crochet round in BLO to create a ridge for applique placement: 1 sc in each st BLO (120)
Info :
Place the completed reindeer face slightly above the vertical center of the cream medallion — approximately 1/3rd down from the top — so the bow and holly border can sit comfortably under the face. Use pins to hold the face in place prior to sewing.
— Red Bow (Make 1 for each medallion) :
Left Loop Round 1 :
Ch 12, sc in 2nd ch from hook and across (11)
Left Loop Round 2-4 :
Ch1, turn, sc in each st (11) - repeat 3 rows to make a rectangular loop (11)
Left Loop Round 5 :
Fold rectangle in half and join edges with sl st; fasten off leaving a tail (creates small rounded loop)
Right Loop :
Repeat Left Loop instructions to make a symmetric loop
Knot/Centre :
Ch 4, sc in each ch (3), wrap several times around the two loops and sew the wrap securely at the back. Fasten and weave ends (use bright red and a 3.0mm hook)
Tails (Make 2) :
Ch 10, sc in 2nd ch from hook and across (9), ch1, turn, sc 3 rows; fold tail to shape a V by sl st at the end, fasten off and trim at angle. Attach tails directly behind bow center and sew onto the base of each medallion.
Info :
Make bows slightly flat rather than stuffed. Use a smaller hook (3.0mm) to get crisp shaping and neat edges. Secure the bow to the cream medallion where the bottom center will sit between the holly clusters.
— Holly Leaf (Make multiple per medallion) :
Round 1 :
Ch 10, sc in 2nd ch from hook, sc across to end (9)
Round 2 :
Ch1, turn, sc across (9)
Round 3 :
Ch3 (counts as tr), tr in next 2 sts, 2 dc in next st, tr in next st, ch2, sl st into last st to form a pointed tip; continue down other side mirroring stitches to create symmetrical leaf (work opposite side back toward start)
Round 4 :
Edge the leaf with picot points: *sc, ch 3, sl st in 3rd ch* along both long edges to create serrated holly tips; fasten off (use dark green)
Info :
The leaf structure is intentionally flat and slightly textured. Make 4-6 leaves for each medallion: two larger leaves at the bottom and 2-4 smaller filler leaves around the sides.
— Berry Clusters (Make clusters of 3-5 small bobbles each) :
Round 1 :
6 sc in magic ring (6)
Round 2 :
Work 6 small bobbles evenly around, or do (1 sc, bobble) x 3 for a tight berry cluster — use bright red yarn (6 visible bobbles)
Round 3 :
Fasten off leaving tail to sew the cluster in place; attach clusters in groups of 2-3 around leaves and near the bow
Info :
To make a convincing berry cluster, group bobbles close together and sew a few stitches between the bobbles so they sit tightly. Use small stitches through the berry base to secure them to leaves and medallion edge.
— Tiny White Star Flowers (Make multiple) :
Round 1 :
Ch 5, sl st to form ring, (ch3, sl st) x 5 to form 5 tiny petals — fasten off (use white)
Info :
Sew tiny white flowers sparingly as filler on leaf clusters; they add a vintage, frosty accent around the berries and holly leaves.
— Joining One Motif to Another (Make 4 motifs total for runner shown) :
Info :
Work four identical cream medallions with applied reindeer faces, bows, holly leaves and berry clusters. Arrange them in a line and pin in place: motifs should butt edges together with approx 1 cm overlap where border stitches will hide seams.
Round 1 :
With dark green yarn and 3.5mm hook, join motifs using slip stitch: align motif A and motif B, and sl st through outermost scallop of motif A and corresponding scallop of motif B every 8-10 stitches to create a secure flat join
Round 2 :
Once motifs are joined in pairs, connect the pairs using the same method so all four form a continuous runner. Fasten off and weave ends
Info :
Alternatively sew motifs together with mattress stitch for an invisible seam if you prefer a sewn join over slip stitches. Pin heavily and check flatness as you go.
— Outer Decorative Border (Over entire joined runner) :
Round 1 :
With dark green yarn, join at one seam and sc evenly around the entire runner edge, working 3 sc in each scallop point and 1 sc in straight areas to smooth curve. Keep stitch count even.
Round 2 :
*sc in next 2 sts, picot (ch3, sl st in 3rd ch)* rep to create tiny ivy points around border (st count varies by runner length)
Round 3 :
Work small scallop edgings where desired: *skip 1 st, 5 dc in next st, skip 1 st, sl st in next* rep along the long runner sides for vintage lace detail
Info :
The border unifies the motifs and also hides any slight spacing between medallions. If your motifs are slightly warped, block the entire runner flat and then attach the border to a smooth base.
— Additional Decorative Motifs (Optional: Make accent sprigs) :
Leaf Sprig Round 1 :
Ch 6, sc in 2nd ch across (5), ch3 fold and sl st to create a tiny point; make several and attach as filler between medallions
Info :
These small filler sprigs are quick to make and are great to cover joints or add extra texture. Use one or two between medallions as needed for balance.
— Finishing & Blocking :
Info :
Weave in all ends. Lightly steam or wet-block the runner to flatten and shape the scallops and leaves. Pin flat while drying to preserve the silhouette. If you used safety eyes, ensure runners are for decorative use only (not for small children) or embroider eyes instead.
Info :
Trim any excess stuffing from snouts or noses that show; final shaping of bows may be enhanced by a small amount of fabric glue under the center wrap for security.
— Tips and Stitch Techniques Used Frequently :
Info :
Bobble stitch method: [yo,bk into st,yo,pull] repeat 4-5 times then yo and pull through all loops; ch1 to secure. Use consistent tension to make uniform berries. Invisible decrease (dec) = insert hook into front loop of next 2 sts and complete sc together for a neat finish. Use BLO rounds to form ridges for applique placement. Use small amounts of stuffing for facial elements — no piece should be rigid.
Info :
Every medallion is identical: once you perfect one, make three more using it as a template for positioning reindeer face and embellishments. Take photos of placement while pinning to replicate exact positions across all medallions.
This Cream Reindeer With Green Holly Table Runner is a labor of love that brings a traditional holiday touch to your table. Each medallion comes together with charming reindeer faces, joyful bows and festive holly clusters—perfect for creating warm memories. The modular structure means you can adjust the runner length to suit your table. 🎀🧶 Spread holiday cheer with every stitch and enjoy displaying your handmade centerpiece for seasons to come. Happy crocheting! 🎄