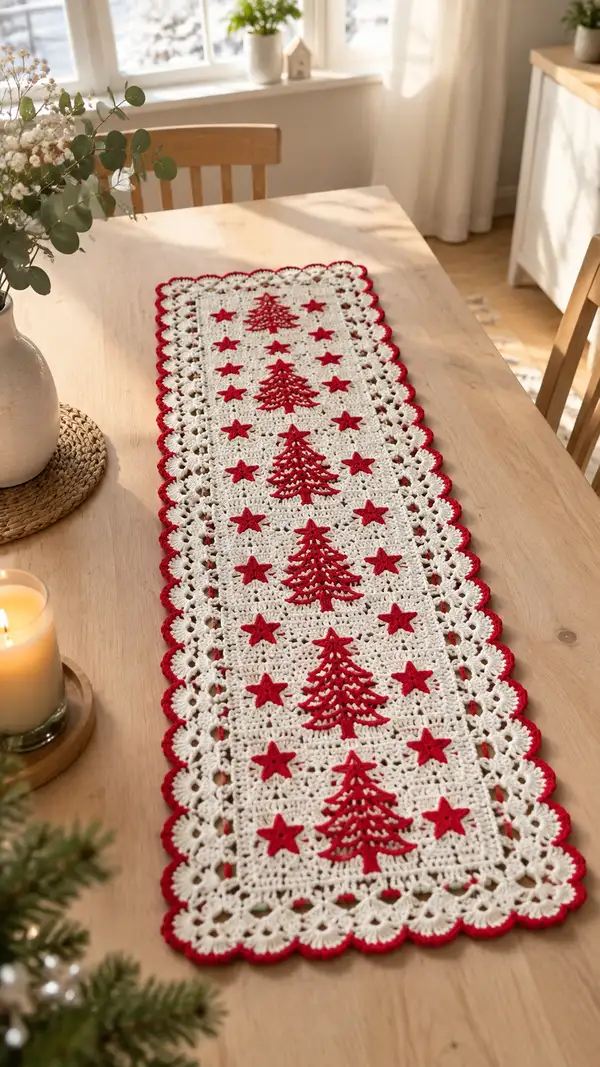
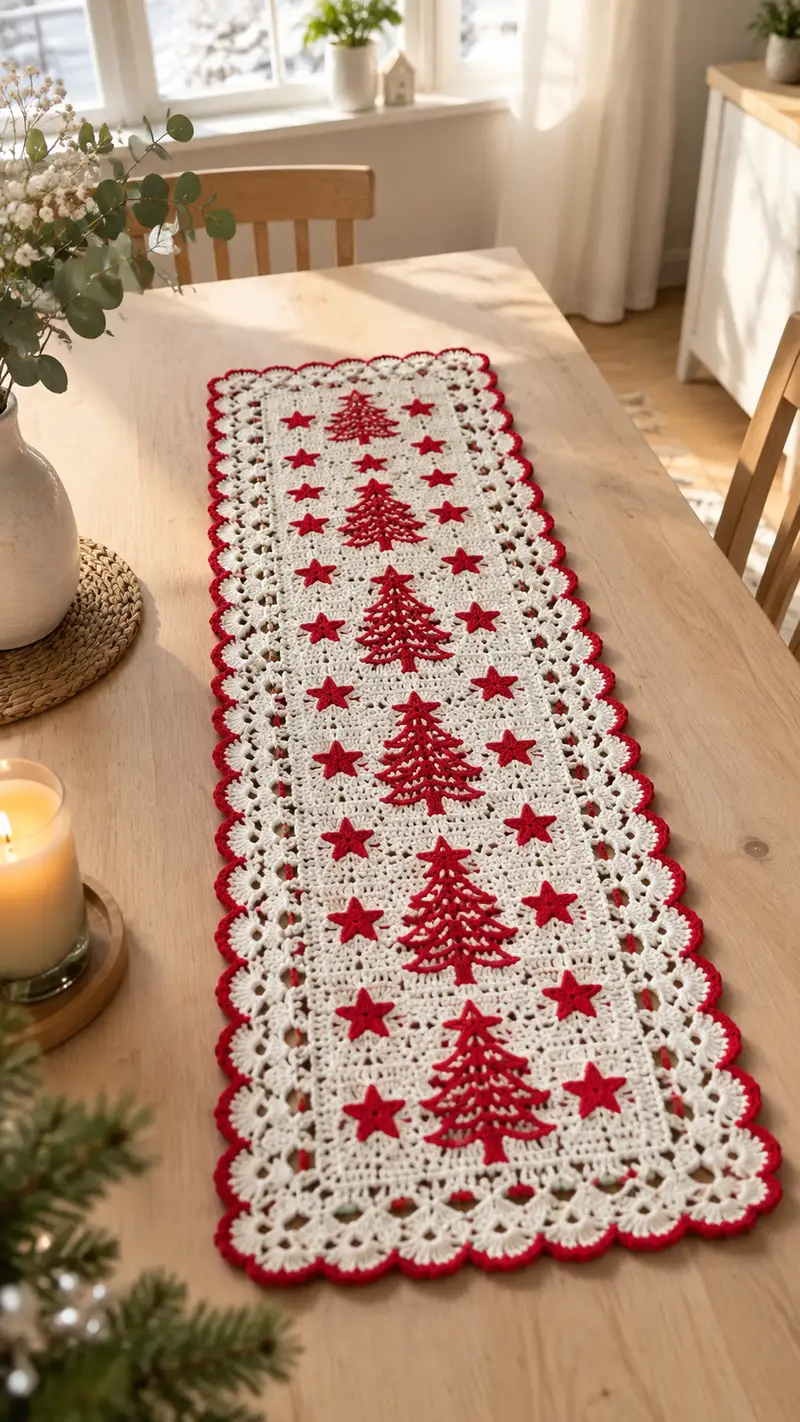
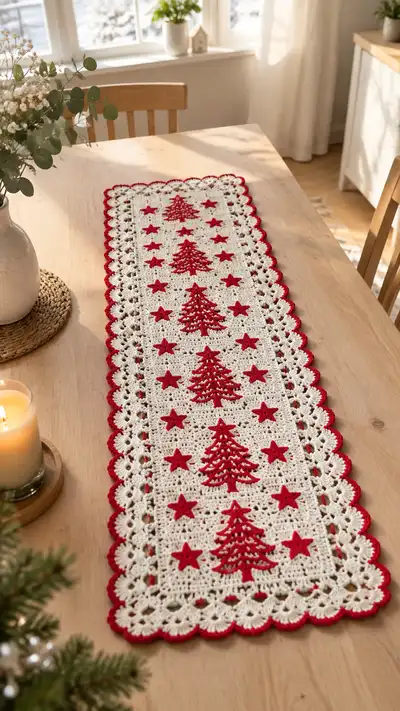
A classic rectangular table runner worked in warm cream with cheerful red appliqued Christmas trees and stars. The design features a solid but airy center panel, embroidered/crocheted tree motifs and a scalloped lacy border edged in red. Perfect for holiday decor, the runner sits flat and crisp on a dining table and combines solid rows, eyelet rows, and a decorative shell edging for a handmade seasonal centerpiece.
Progress Tracker
0% Complete
— Notes & Gauge :
Info :
Gauge is not critical for table runner width but use a 4.0mm hook to achieve the drape shown. A 10cm/4in swatch in double crochet across should measure approximately 12 dc x 6 rows when using worsted cotton. Adjust hook size to suit.
Info :
All rows are worked in rows, turning at the end of each row unless noted. The runner is constructed as one long rectangular panel, motifs are crocheted separately and sewn on, then the border is worked around the whole rectangle. Maintain consistent tension for even edges.
— Materials & Foundation :
Foundation :
Chain 123 (this gives a finished width of approximately 28-30cm / 11-12in; adjust chain in multiples of 4 if you want a different width). The pattern is written for 123 chains including 2 turning chains.
Row 1 :
Using cream yarn, ch 123. Ch 3 (counts as first dc), dc in 4th ch from hook and in each ch across to the last ch, 1 dc in last ch — total 121 dc across. Turn. (121)
Row 2 :
Ch 3 (counts as dc), dc in each st across to end, turn. (121)
Row 3 :
Repeat Row 2. Keep tension even; this is the solid foundation for the runner center. (121)
Info :
Place stitch markers at the first and last st of the foundation row; these will help you keep edges straight through the long panel and when sewing on motifs.
Row 4-6 :
Work 1 dc in each st across for 3 rows. (121)
Info :
Check that the panel lies flat after 6 rows. If edges ripple, adjust tension slightly. The runner is long — take breaks and check measurements every 20 rows.
Row 7 :
Eyelet row: Ch 3, *dc in next 2 sts, ch 2, sk 2 sts; repeat from * across until 3 sts remain, dc in last 3 sts. Turn. (counts remain 121; ch-2 spaces create decorative holes)
Row 8 :
Ch 3, dc in each dc and dc across ch-2 spaces working 2 dc into the ch-2 space to maintain width; end with dc in top of turning ch. Turn. (121)
Row 9-12 :
Work 4 rows of dc in each st across. (121)
Info :
This first block (Rows 1-12) forms the first background section where the lower motif will be placed later. Mark the center stitch of the panel (stitch 61) with a removable marker to help place center trees later.
Row 13 :
Repeat Row 7 (Eyelet row). (121)
Row 14-18 :
Dc in each st across for 5 rows. (121)
Row 19 :
Begin measured block: Ch 3, dc in next 9 sts, [ch 1, sk 1] twelve times across to create subtle vertical spacing, dc in final sts to end. Turn. (121)
Info :
The [ch1, sk1] repeat creates a narrow ladder effect used to center appliques. Count carefully — the ladder spaces will line up with the tree trunk center when motifs are sewn on.
Row 20-24 :
Dc in each st across, keeping the ladder spaces aligned — insert 2 dc into ch-1 spaces on the return row where needed to maintain 121 sts. (121)
Row 25 :
Eyelet row: Ch 3, *dc in next 2 sts, ch 2, sk 2 sts; rep across, end with last 3 dc. Turn. (121)
Row 26-30 :
Dc in each st across for 5 rows. (121)
Info :
At Row 30 you will have completed the lower third of the runner. Measure length; typical length at this point should be approximately 28-30cm. The finished runner in the photo has five evenly spaced tree motifs along its length — plan motif placement now.
Row 31 :
Ch 3, dc 10, ch 1, sk 1 repeat across to create the central ladder block again, dc to end for centering motifs. Turn. (121)
Row 32-36 :
Dc in each st across for 5 rows. (121)
Row 37 :
Eyelet row: Ch 3, *dc in next 2 sts, ch 2, sk 2 sts; rep across, end with last 3 dc. Turn. (121)
Row 38-42 :
Dc in each st across for 5 rows. (121)
Info :
If you prefer stripes, change to an off-white or soft cream insert here. For this pattern, keep consistent cream to allow red motifs to pop. Keep markers for motif centers through the panel.
Row 43 :
Ch 3, dc in each st across. (121)
Row 44-48 :
Dc in each st across for 5 rows. (121)
Row 49 :
Eyelet row: Ch 3, *dc in next 2 sts, ch 2, sk 2 sts; rep across, end with last 3 dc. Turn. (121)
Row 50-54 :
Dc in each st across for 5 rows. (121)
Info :
You're approaching the upper third. Confirm total runner length now. If you want a shorter runner, you may stop here and work the border. For the full length like the photo, continue as written.
Row 55 :
Ch 3, dc 9, ch 1, sk 1 repeats aligning with the previous ladder rows for motif placement. Continue to end. Turn. (121)
Row 56-60 :
Dc in each st across. (121)
Info :
Final solid section complete. Fasten off cream and weave in tail or leave attached for border work later. Measure length: typical finished panel before border is approximately 90-95cm (35-38in). Adjust as needed by adding or removing pairs of solid rows and eyelet rows evenly.
— Tree Applique (Make 5) :
Info :
Make tree appliques in red. These are worked flat from bottom (trunk) to top in rows of dc and chain loops to create layered branches. Each tree is approximately 8cm tall. Use a 3.5mm hook for crisper edges. Make 5 identical trees.
Round 1 :
With red, make a foundation chain of 7. Ch 1, sc in 2nd ch from hook across (6 sc). Fasten off. (6)
Round 2 :
Join red, ch 3 (counts as dc), dc across the 6 sc (6 dc) — this forms the trunk base. (6)
Round 3 :
Ch 1, turn. Row of increases: sc in first st, (sc, inc) across to end making 9 sts total — sc in last st. (9)
Round 4 :
Turn, ch 3, dc across 9 sts. (9)
Round 5 :
Form first branch: ch 3, sk next 2 sts, sl st into next st to make a small loop; *ch 3, sk 2, sl st into next st; rep across to end of row for 3 branch loops. Fasten off. (Visual: three evenly spaced loops representing top of small branch)
Info :
Each branch row will be staggered; subsequent branch rounds will be worked on top of previous rows to create layered look. Use a small hook for crisp loops and weave in ends carefully.
Round 6 :
Rejoin red at base of next row, ch 1, sc in each st of foundation row (9 sc) — create a solid base for next branch. (9)
Round 7 :
Ch 3, dc in next st, (ch 3, sk 1, sl st in next st) across to create 4 branch loops; finish with dc in last st. (9)
Round 8 :
Ch 1, turn, sc in each st across (9). (9)
Round 9 :
Increase row for wider branch: sc, (inc, sc) repeat across to total 13 sts. (13)
Round 10 :
Ch 3, dc across 13 sts. (13)
Round 11 :
Branch loops: Ch 3, sk 2, sl st into next st; rep across to create 5 loops; finish dc in last st. (13)
Round 12 :
Ch 1, sc across 13 sts. (13)
Round 13 :
Top tier increase: (inc, 2 sc) repeat to form 18 sts. Ch 3, dc across. (18)
Round 14 :
Top loops: *ch 5, sl st into next st* across to make decorative pinnacle loops for the tree crown. Fasten off and weave ends. (decorative finish)
Info :
Trim any long tails and steam-block lightly if you want a flatter applique. Repeat to make 5 trees. Keep consistent stitch counts so all trees match visually.
— Star Applique (Make 20) :
Info :
Small five-point stars are worked in red with 3.5mm hook. Each star is approx 2.5cm across. Make 20 stars to scatter between trees.
Round 1 :
Make a magic ring, ch 1, [sc, ch 3] x 5 around (5 sc, 5 ch-3 loops). Pull ring tight and sl st to first sc. (5 points)
Round 2 :
Work into each ch-3 loop: (sc, hdc, dc, hdc, sc) into each loop, sl st to first sc, fasten off. Weave ends. Each loop becomes a star point. (5 points)
Info :
Make stars flat and press lightly. Use a contrasting tiny stitch with tail to attach later. Make 20 stars for even spacing between trees — arrange three stars between each pair of trees and stagger top/bottom rows as shown.
— Placement & Sewing Appliques :
Info :
Lay runner panel flat. Find marked center stitch (st 61). From bottom edge measure up to first tree placement: place first tree so base trunk aligns at Row 11 center. Subsequent trees are spaced 14 rows apart vertically (typical photo spacing). Use pins to hold trees, then sew with yarn needle using small whip stitches through trunk base and back of tree, using invisible join technique. Sew stars between trees in the eyelet rows for best visual contrast.
Info :
Sew each appliqué with matching red yarn and small stitches, weave tail into back of panel and knot once secure. Avoid pulling too tightly — allow the applique to sit flat without puckering the background fabric.
— Blocking Before Edging :
Info :
Once appliques are sewn, block the runner lightly to align edges before working border: pin to blocking board or flat towel, stretch gently to shape and spray with water or use steam. Let dry completely to maintain shape for edging.
— Border & Scalloped Edge (Rounds 61-140) :
Info :
We will work a continuous border around the entire rectangle, turning at corners with specified increases to keep scallops even. Begin with cream border rounds, finish with red scallop round. Before starting border, measure entire perimeter and ensure runner is square/flat after blocking.
Round 61 :
With cream still attached at a corner, turn runner so you are working down the long edge. Ch 1, work 1 sc into each end-row stitch along the edge of the short end (approx 121 sts along the long side, but sc along each row end — approximate count: 60 sc along edge depending on row height). Place 3 sc in corner corner-ch to turn the corner. Continue around entire runner placing sc evenly along all four edges. Use 3 sc in each corner. Count total sc around to ensure even spacing for shell rows — typical count should be about 360-380 sc total depending on your previous counts. Adjust slightly to keep scallops evenly spaced. Join with sl st to first sc. (sc around)
Round 62 :
Ch 3 (counts as dc), dc in next 2 sc, *ch 2, sk 2 sc, dc in next 3 sc; rep across each side. At corners work (dc in next 3 sc, ch 2, dc in next 3 sc) to maintain shape. Join with sl st to top of starting ch-3. This sets up shell spacing. (total shells across perimeter variable — match spacing visually)
Round 63 :
Ch 1, sc in each dc and ch-2 space across, placing 3 sc in each corner ch-2 space. Join. This evens the edge and prepares for shell rounds. (approx same sc count as Round 61)
Round 64-66 :
Repeat Rounds 62 and 63 twice more to build a small double row frame (dc groups with ch-2 eyelets then sc return). This creates depth for the scallop. Keep corners consistent with 3 sc or 3 dc groups as described. (edge remains consistent)
Info :
If your perimeter stitch count differs slightly, space shells evenly: aim for an odd number of shells on each long side so that corner shells align visually. Use pins to mark shell centers before crocheting.
Round 67 :
Switch to a decorative shell round in cream: *skip 2 sc, 5 dc in next sc (shell), sk 2 sc, sl st in next sc; rep around. At corners, work 7-dc shells to turn corners smoothly (7 dc in corner st). Join and fasten off cream. This creates the lacy scallop foundation. (shell spacing even)
Round 68 :
Join red yarn at any shell center with sl st. Ch 1, work sc around shell edge as follows: *5 sc evenly across the top of the 5-dc shell, sl st into sl st space between shells; rep across. At corners work 7 sc across bigger 7-dc shell. Join with sl st to first sc. Fasten off. This outlines each shell in red for a crisp look. (red outline across)
Round 69 :
Red scallop finishing: Join red yarn in top of any outline sc, ch 3, skip 1 sc, (sc, ch 3, sc) into next sc to make small picot-like scallop; *skip 2 sc, (sc, ch 3, sc) in next sc; rep across. At corners work (sc, ch 5, sc) into corner outline sc for exaggerated corner scallop. Join and fasten off. Weave ends neatly on the back. This finalizes the red scalloped edge seen in photo.
Info :
Check scallops and, if necessary, block again lightly to encourage shells to lay flat. If edges curl slightly, wet-block and pin to shape. The red round can be worked more tightly for a crisp edge; use a slightly smaller hook if desired for a snappy scallop.
Round 70 :
Optional decorative picot row: With red, join at the base of a scallop and ch 1, sc around, adding a small picot (ch 3, sl st to base) at the apex of each scallop for extra definition. Fasten off and weave ends. This is optional but reflects the finished look in many photos. (final decorative edge)
Info :
Trim any stray ends and weave through back rows for a tidy finish. Use a yarn needle to bury tails along the underside of the runner; secure with a few backstitches if necessary to prevent slip.
— Finishing Touches & Care :
Info :
Gently press or steam-block the runner to ensure shells and motifs lie perfectly flat. For daily use, place a non-slip mat under runner when on polished surfaces. Hand wash cold and lay flat to dry to preserve shape and colors. Avoid bleach or harsh detergents for colored appliques.
Info :
If storing between seasons, wrap in acid-free tissue and store flat or rolled to avoid creases. Consider light blocking before display each year to reset shape.
Info :
Variations: Work trees and stars directly into the panel using tapestry or overlay crochet if you prefer fewer sewn seams. For a longer runner, repeat additional center blocks of Rows 25-54 as needed prior to finishing the top section.
Completing this festive table runner brings such satisfaction — the crisp cream background and bright red trees pop with classic holiday charm. Each carefully placed applique and scalloped shell edge adds handcrafted personality to your table. It's an enjoyable project to make for gift-giving or seasonal decorating, and the finished runner will brighten holiday meals for years to come. 🧶🎄✨