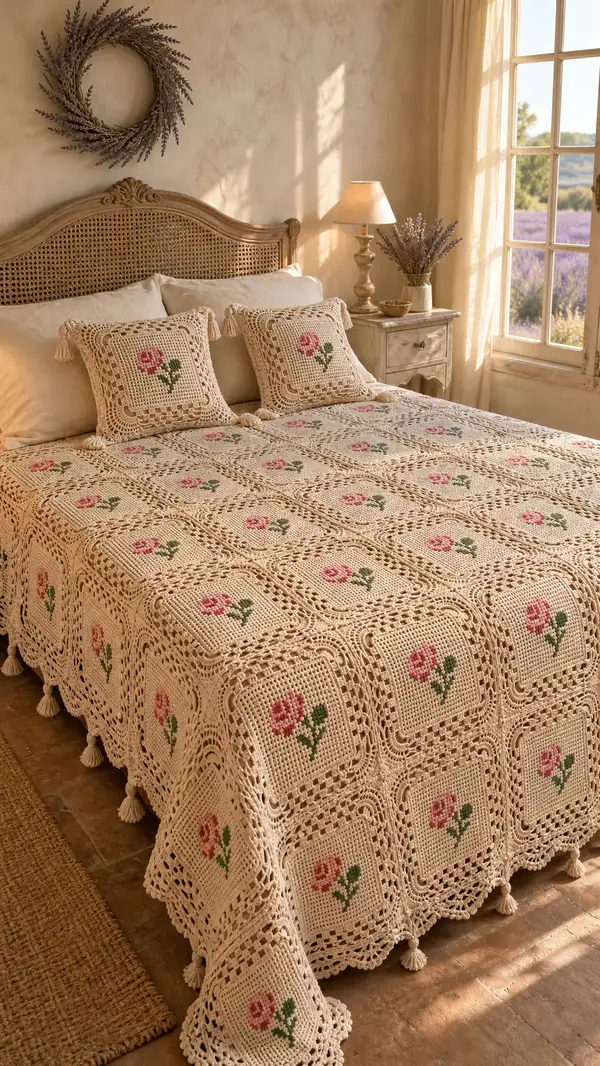
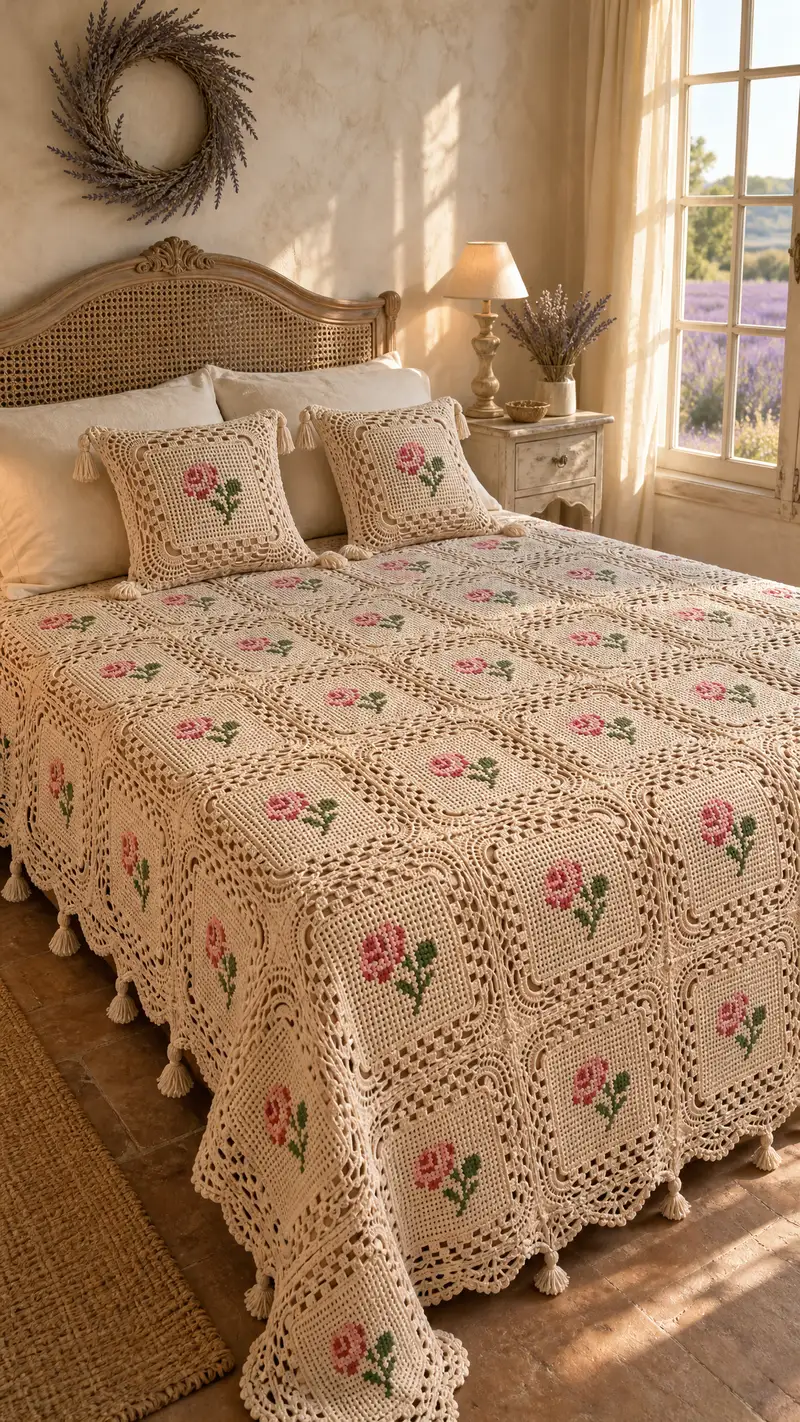
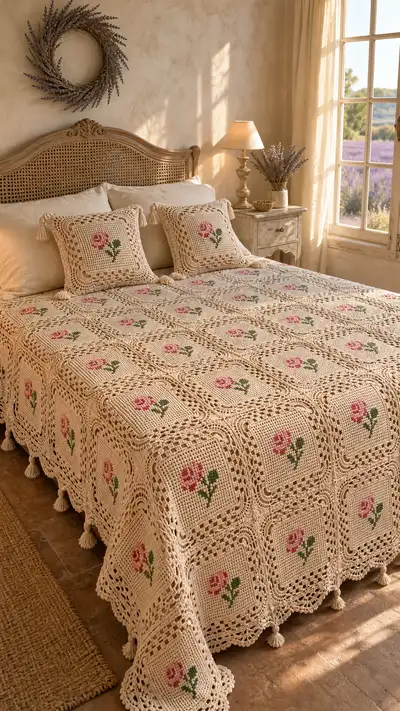
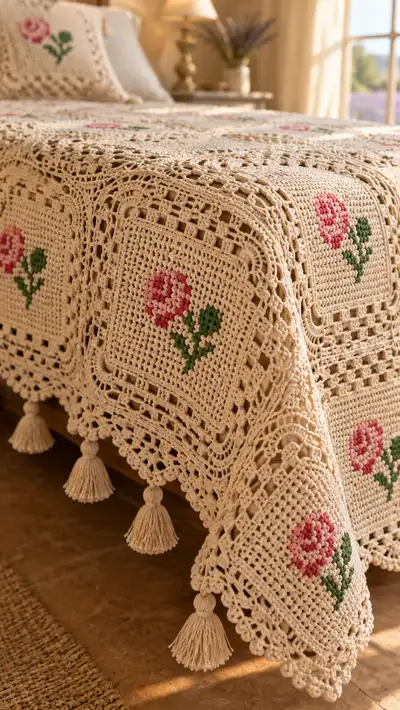
A timeless cream rose granny square bedspread with delicate filet rose motifs and a lacy scalloped border. This pattern recreates the vintage-inspired bedspread shown, featuring repeating square motifs with pink roses and green stems in a warm cream ground, finished with an openwork skirt and tasseled corners. Detailed instructions guide you through motif panels, lacy joining, wide edging, and pillow shams for a coordinated look. Perfect for a romantic bedroom or thoughtful handmade gift.
Progress Tracker
0% Complete
— Materials, Gauge & Notes :
Info :
Gauge (tapestry panel): 25 sts x 25 rows = approximately 12.5cm (5in) square measured in double crochet tapestry technique using 4.0mm hook and worsted cotton; adjust hook to match gauge if desired. Always block squares before joining.
Info :
Color abbreviations used in motif rounds: C = Cream (main background), P = Pink (rose), G = Green (stem). Where multiple pinks are used, they are referred to as P1 and P2 for highlights/dark areas. Carry unused yarn loosely at the back of the work, catching it every 6–8 stitches to keep floats tidy.
— Motif Panel (25 x 25 tapestry grid) :
Foundation :
Ch 26, turn (this creates 25 foundation stitches for the 25-grid tapestry panel). The turning chain counts as first dc on Row 1.
Row 1 :
RS: Dc in 2nd ch from hook and in each ch across (25 dc) (25)
Info :
Begin tapestry: hold main color (C) and carry other colors (P,G) along WS. Work each dc changing color before the stitch where color changes; to change color, complete the dc to last yarn-over, yarn over with new color and finish the stitch so the new color is ready for next st.
Row 2 :
RS: C x11, P x3, C x11 (25)
Row 3 :
WS: C x10, P x5, C x10 (25)
Row 4 :
RS: C x9, P x7, C x9 (25)
Row 5 :
WS: C x8, P x9, C x8 (25)
Info :
If using two shades of pink, replace the center 3 sts of a larger pink cluster with P2 (darker) on rows 4–7 to give depth. Work the darker stitches as specified when needed and carry the unused pink color behind work.
Row 6 :
RS: C x7, P x11, C x7 (25)
Row 7 :
WS: C x6, P x13, C x6 (25)
Row 8 :
RS: C x6, P x13, C x6 (25)
Row 9 :
WS: C x7, P x11, C x7 (25)
Row 10 :
RS: C x8, P x9, C x8 (25)
Info :
Start shaping slight petal highlights: on rows 10–12, optionally substitute the center 3 stitches of P clusters with a lighter/darker pink for tonal interest; keep floats short and catch them every 6 stitches.
Row 11 :
WS: C x9, P x5, C x11 (25)
Row 12 :
RS: C x10, P x3, C x12 (25)
Row 13 :
WS: C x11, P x1, C x13 (25)
Row 14 :
RS: C x11, G x1, C x13 (25)
Info :
Rows 14–21 introduce the stem and single green stitch column; place the green stitch centrally to create a narrow stem. If you prefer a broader leaf, you can spread G into two adjacent stitches on selected rows; adjust counts accordingly keeping row total 25.
Row 15 :
WS: C x11, G x1, C x13 (25)
Row 16 :
RS: C x11, G x1, C x13 (25)
Row 17 :
WS: C x11, G x1, C x13 (25)
Row 18 :
RS: C x11, G x1, C x13 (25)
Row 19 :
WS: C x11, G x1, C x13 (25)
Row 20 :
RS: C x11, G x1, C x13 (25)
Row 21 :
WS: C x11, G x1, C x13 (25)
Row 22 :
RS: C x12, G x1, C x12 (25)
Row 23 :
WS: C x12, G x1, C x12 (25)
Row 24 :
RS: C x12, G x1, C x12 (25)
Info :
Fasten off leaving a long tail for weaving and blocking. Block each motif to a square measuring exactly your gauge (example 12.5cm/5in). Blocking evens stitches and makes joining simpler.
— Square Border Rounds (work in rounds around blocked motif) :
Round 1 :
With RS facing and cream (C), join with sl st to any corner side dc base, ch1, sc evenly along side edge working 25 sc per side; when you reach a corner, work (sc, ch2, sc) into the corner turning point. Continue around to make a square frame (100 sc + 4 ch2 corner spaces) (approx 104 sts including corner spaces)
Round 2 :
Ch3 (counts as dc), *dc in next 24 sc; (3 dc, ch2, 3 dc) in each corner space; repeat from * around. Join with sl st to top of ch3. (approx 112 dc and 4 ch2 corners)
Round 3 :
Ch1, sc in same st, *ch3, skip 2 dc, sc in next dc; repeat along side until corner; in corner work (sc, ch5, sc) in corner ch2 space to create a larger arch. Continue around; join. This creates side arches for lacy work.
Info :
Use these arches as anchor points for joining later. Keep counts consistent on each side so squares will line up when joined into a grid; if necessary count stitches at the end of each round to confirm equal stitch counts per side.
Round 4 :
Ch3, dc in each sc around until you reach an arch: work 7 dc into each arch space to make a scallop; in corner (3 dc, ch3, 3 dc). Join with sl st.
Round 5 :
Ch1, sc in same st, *ch4, sk 3 dc, sc in next dc; rep around, in corner (sc, ch7, sc). This enlarges the openwork for the mid-border.
Round 6 :
Ch3, dc in each sc and ch space around, working 3 dc clusters into each corner ch7 space (3 dc, ch3, 3 dc). Join. Count should be even per side to match next rounds.
Round 7 :
Ch1, sc in same st, *[3 dc, ch1, 3 dc] in next ch4 space to define decorative blocks; sc between blocks; rep around. Join.
Info :
If you prefer a tighter look, use a 3.5mm hook for rounds 5–7 to draw the lace closer to the motif; otherwise continue with 4.0mm for a softer, more open lace effect.
Round 8 :
Ch2 (counts as hdc), hdc in each st around and in top of corner clusters to create a neat ridge (this readies the motif for join-as-you-go). Join and fasten off if not joining immediately.
— Making Multiple Motifs :
Info :
Make the number of motifs required for your bed size. Sample bedspread in photos is created with 5 motifs across and 6 motifs down = 30 motifs (queen-like sample). For a full/queen choose 5 x 6; for twin 4 x 5; for king 6 x 7 — adjust yarn quantities accordingly.
Info :
Block each motif square carefully to uniform measurements; this ensures even joining and a flat bedspread with consistent drape.
— Join-as-you-go Side Joins (join motifs horizontally) :
Round 1 :
With RS of a finished motif facing and cream (C) on the right-hand motif, rejoin yarn at mid-point of right side (ch4 arch area). Ch1, sc evenly across side until you reach a corner leaving the corner unworked for joining later. Do not fasten off.
Round 2 :
Align the next motif to be joined so its left side matches current side. With RS facing, bring the working motif behind the new motif; sl st through both loops of paired edge stitches to join as you sc across: work [sc in motif A, sl st through corresponding stitch in motif B] repeat across until the corner. This produces a flat invisible seam. Continue to join motifs across the row.
Info :
When joining, always match count of decorative elements (arches/scallops) so that puffed sections align; if counts differ, add or remove a small sc at the start and end of the side to maintain matching spacing.
Round 3 :
After completing the horizontal joins for a row of motifs, fasten off and weave in ends. Repeat to create each horizontal strip of motifs required for the bedspread.
— Vertical Joins (connecting rows into the bedspread) :
Round 1 :
Place two motif rows on top of each other, RS facing up. Starting at one end, join motifs vertically using the same join-as-you-go sl st through paired stitches along the vertical side edges where motif borders meet. Keep tension even so the join lies flat.
Info :
Work slowly at the intersections where horizontal and vertical joins meet to create neat squares — weave in tails from both motifs at intersections to hide yarn carries.
Round 2 :
Continue joining rows until the full grid is assembled. After all joins are complete, block the entire assembled bedspread lightly on a large surface to shape the drape and even out spacing.
— Wide Lace Skirt & Corner Expansion (applied to entire assembled bedspread) :
Round 1 :
With RS facing and cream, join yarn to any corner of the assembled grid at the outer-most edge of a corner motif border. Ch3 (counts as dc), work dc evenly along the outer edges of the assembled bedspread into the outermost border stitches (work approximately 3 dc per motif side arch area). At each bedspread corner, work (3 dc, ch5, 3 dc) to create a large corner shell. Join with sl st to top of ch3.
Round 2 :
Ch1, sc around working 3 sc into each 3-dc shell and sc into spaces between motifs; in corners ch7 between sc to create an open corner panel. This starts the long lace skirt seen in photos.
Round 3 :
Ch3, *dc in next 2 sc, (ch2, sk 1 sc, dc in next 3 sts) to create alternating block-and-open patterns along the skirt; in corner work (3 dc, ch3, 3 dc). Repeat around; join.
Round 4 :
Ch1, sc in same st, *ch5, sc in center of next decorative block; repeat around, in corner (sc, ch11, sc). This produces large open arches that will drape attractively over the bed edge.
Info :
At this stage you are forming the dramatic skirt; if your bedspread is very wide you can add extra chaining or repeats along each side to lengthen the border as necessary. Ensure symmetry by counting and matching stitches on opposite sides.
Round 5 :
Ch3, dc in each sc and ch space around, working 7 dc scallops into each ch5 arch, and in corner work (3 dc, ch5, 3 dc). Join.
Round 6 :
Ch1, sc in same st, *(5 dc shell, sc into next arch) repeat across skirt to create three-dimensional shells; join.
Round 7 :
Ch1, sc evenly, then work a picot row: *sc in next 3 sts, ch3, sl st into 3rd chain from hook (picot), sc in next 3 sts; repeat around and at corners to add delicate point work.
Round 8 :
Ch3, dc and treble clusters in the picot valleys to give the final lace texture; specifically: *dc in each of next 3 sts, (tr, ch1, tr) in picot valley; repeat around. Join.
Info :
Block the skirt heavily after completing rounds to open up lace and make the scallops even. Pin generously to emphasize the scalloped edges and allow to dry flat for a crisp finish.
Round 9 :
Optional Bead or Tassel Points: Ch5 loops across the bottom edge evenly where tassels will be attached. These loops become anchor points for tassel placement (see Tassel section). Space loops approximately every 12–14cm along bottom edge depending on tie spacing preference.
— Tassels (Make many; attach to perimeter and corners) :
Step 1 :
Make tassels using cream yarn. Wrap yarn around a 6–8cm cardboard (or book) about 40–60 times for a medium-full tassel depending on desired thickness.
Step 2 :
Slip a short piece of yarn under the wrapped bundle and tie tightly at the top. Cut the bottom loops open to form the tassel. Create a small head by wrapping yarn 5–8 times near top to form a neck; secure and trim ends evenly.
Info :
Make tassel length around 9–12cm from top of neck to tip. Comb gently with a small wide-tooth comb and trim for uniform length and fullness. Make enough tassels for entire perimeter (sample bedspread uses approx 30–36 tassels depending on spacing and bed size).
Step 3 :
Attach tassels by tying through the ch5 loop anchors at skirt edge: fold loop, thread tassel loop through anchor and pull tassel head through the loop, pulling tight to secure. For added strength, stitch the tassel top to the join using a yarn needle and small stitches.
— Pillow Sham (Make 2 matching shams) :
Square Front :
Make one motif panel following Motif Panel instructions for the front; add the same Square Border Rounds but stop before adding large skirt rounds. Block square to size.
Pillow Back (two-piece) :
Make two 25-st dc panels in cream only to size matching front panel plus 1cm allowance. Work 6 rounds of sc around each back panel creating a neat edge. These become the envelope back pieces.
Assembly :
Place front and back panels RS together; sc around three sides leaving an opening for envelope overlap on the fourth side. Fasten off and turn RS out; add tassels to corners if desired. Insert pillow and adjust overlap to match aesthetic of photos.
Info :
For pillow tassels tie smaller tassels than the bedspread tassels and attach at each corner using the same method. Add small stabilizing stitches through tassel heads to prevent pulling out.
— Final Finishing :
Info :
Weave in all ends with a tapestry needle; hide ends into the nearest vertical color carry so they are invisible from the RS. Steam-block the entire assembled piece, pinning scallops and tassels in place until completely dry for best drape.
Care :
Hand wash or machine wash on gentle cycle in cool water with mild detergent. Reshape and dry flat; do not tumble dry. Re-block if necessary to restore scalloped edges.
Info :
Optional: sew a lightweight cotton backing to the underside of the bedspread to hide seams and floats and to increase durability. If adding a backing, attach with ladder stitch through the border only to avoid stitching through lace layers.
This cream rose granny square bedspread brings an heirloom feel to any bedroom with its delicate rose motifs and lacy skirt. Each square is a little act of slow crafting that comes together into a dramatic, romantic coverlet you’ll love to make and display. Add matching pillow shams and tassels for a full coordinated look—every stitch adds charm and personality. 🧶🌸🕊️