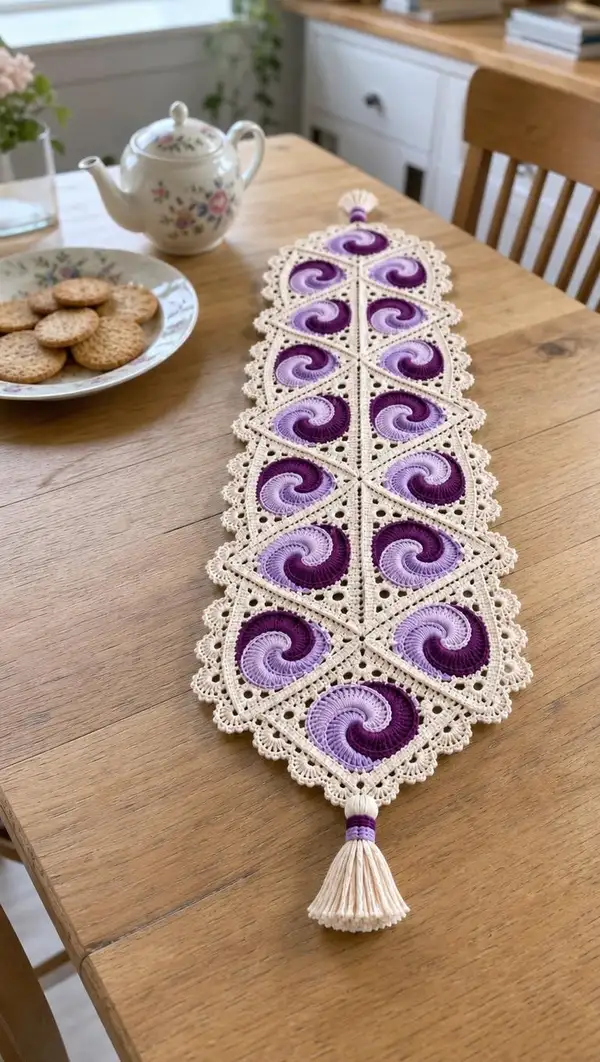
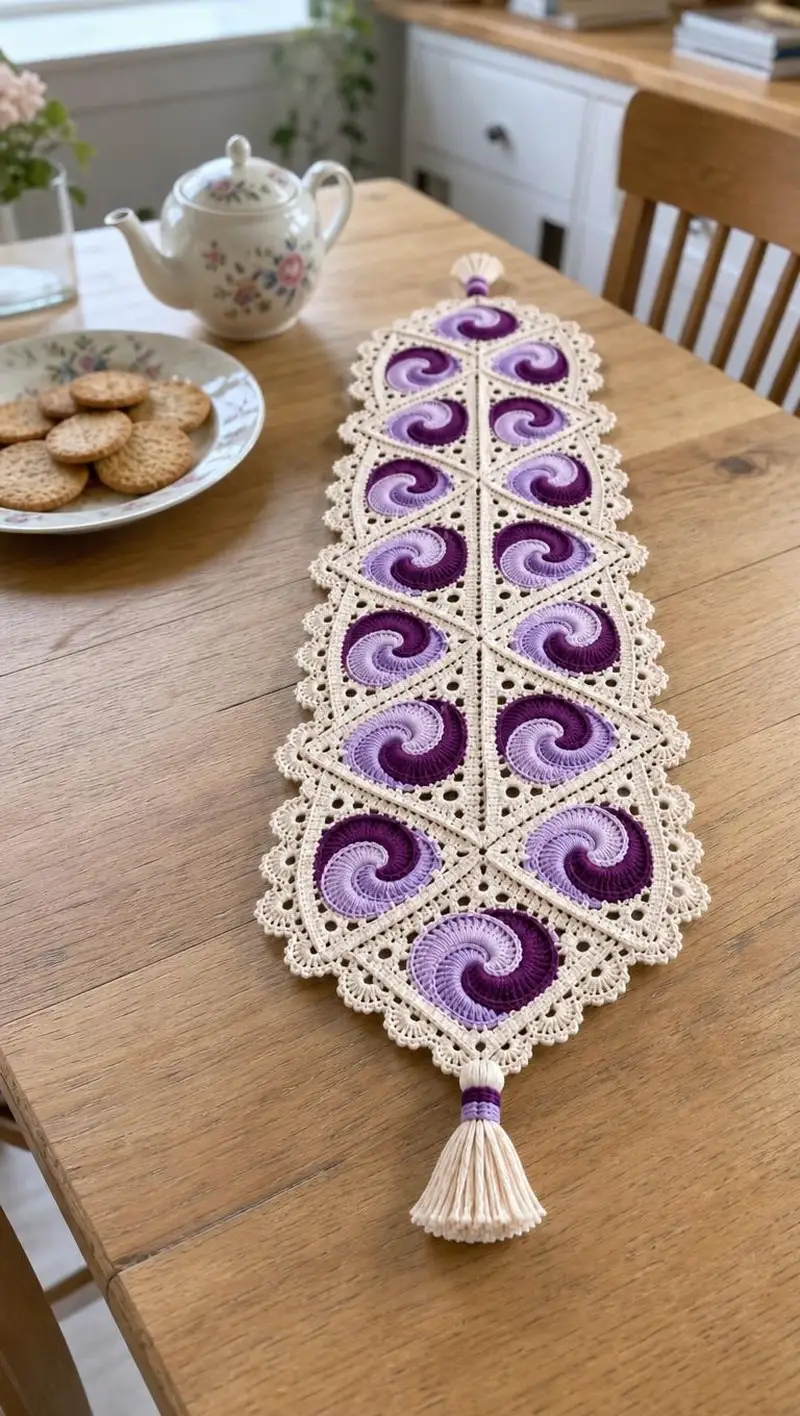
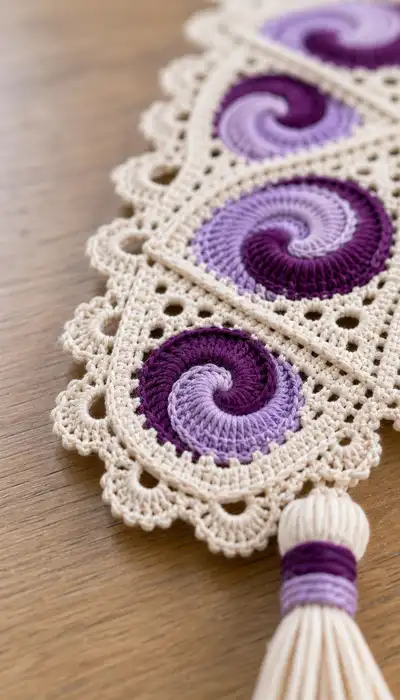
Create a delicate, vintage-inspired table runner featuring spiraling lavender motifs set into a soft cream lace frame. This pattern uses small triangular swirl motifs joined into a long runner with a scalloped edge and tassels at each end. The purple gradient spirals and openwork cream joining create a striking contrast that looks beautiful on a wooden table or dresser. Detailed shaping, color changes, and a pretty picot scallop finish give this runner an heirloom quality.
Progress Tracker
0% Complete
— Notes & Gauge :
Info :
Gauge is not critical for this decorative runner but for consistent motif sizing a 10cm (4in) measured across the flat triangular motif center (from midpoint of one side to opposite corner) is recommended. Adjust hook size if motifs come out noticeably different. Use cotton DK or sport cotton to achieve crisp texture similar to the photographs.
Info :
Abbreviations follow US terms. Work in continuous rounds unless otherwise stated. Fasten off and weave ends after color changes unless instructed to carry yarn. Block motifs before joining for even edges.
— Spiral Triangle Motif (Make 12) :
Round 1 :
Using light lilac (Accent C): Make a magic ring, ch1, 6 sc in ring (6)
Round 2 :
Inc in each st (6 inc) (12)
Round 3 :
(1 sc, inc) x6 (18)
Round 4 :
(2 sc, inc) x6 (24)
Round 5 :
(3 sc, inc) x6 (30)
Round 6 :
(4 sc, inc) x6 (36)
Info :
Change to medium lavender (Accent B) at end of Round 6 if following three-tone spiral. Fasten off previous color or carry it tightly along the back of work if you prefer fewer ends. Place a stitch marker at the start of each round to keep track of the spiral beginning.
Round 7 :
1 sc in each st (36)
Round 8 :
Switch to deep purple (Accent A). 1 dc in each st (36)
Round 9 :
1 dc in each st FLO (36)
Round 10 :
1 dc in each st BLO (36)
Info :
These dc rounds create an initial raised band that will help the spiral read as three dimensional. Keep tension consistent; use a slightly smaller hook for these rounds if your dc stitches are loose.
Round 11 :
(3 sc, 1 inc) x9 (45)
Round 12 :
(4 sc, 1 inc) x9 (54)
Round 13 :
Switch to medium lavender (Accent B). Work 1 hdc in each st (54)
Round 14 :
(6 sc, 1 inc) x7 + (5 sc) (repeat pattern across to maintain 54) (54)
Round 15 :
Switch to light lilac (Accent C). 1 dc in each st BLO (54)
Round 16 :
1 dc in each st (54)
Info :
We are building concentric bands. These color bands will visually form the inner core spiral. To encourage the swirl visual, when beginning Round 17 work the first 6-8 stitches with slightly tighter tension and gradually loosen to the original tension over the next 8 stitches - this causes a subtle curl.
Round 17 :
Switch to deep purple (Accent A). (7 sc, 1 inc) x6 + (6 sc) (60)
Round 18 :
(8 sc, 1 inc) x6 + (6 sc) (66)
Round 19 :
1 hdc in each st (66)
Round 20 :
(9 sc, 1 inc) x6 + (6 sc) (72)
Info :
From this round we will begin to introduce slight directional shaping to form three corners. Mark three points approximately 24 stitches apart (every 1/3 of the round) - these will become the triangle's corner increase zones. Place removable markers in the first stitch of each zone to track them as you work.
Round 21 :
Working in pattern and using the three markers as corner zones: For each zone do (ch2, 2 dc in same st) to create a small corner shell; between zones: 1 dc in each remaining st. After completing all three corner shells the total stitch count will be 72 + 6 additional corner stitches = 78 (78)
Round 22 :
1 dc in each st (78)
Round 23 :
(10 sc, 1 inc) x7 + (8 sc) (85)
Round 24 :
Change to cream (Main). Work 1 sc in each st (85)
Info :
Changing to cream will form the triangular frame that separates the spiral from the open lace join. Fasten off the purple shades neatly and weave ends toward the cream round to hide them inside the cream join later.
Round 25 :
1 sc in each st BLO (85)
Round 26 :
(5 sc, ch2, sk2, 5 sc) repeated between corner shells to create three interior eyelet clusters. Work these eyelets centered between the corner shells to form decorative holes (85)
Round 27 :
1 sc in each st (85)
Round 28 :
At each previously marked corner shell work: (sc, ch3, sc) into the shell apex to elongate corner points; between corners work 9 sc each side (88 total after adding corner ch loops) (88)
Info :
These chain loop corner extensions will help form a neat triangle when motifs are joined side-by-side. Keep the three corners distinct by counting stitches carefully and checking distances between the corner ch loops.
Round 29 :
1 sc in each st (88)
Round 30 :
(2 sc, picot) repeat across each side: *2 sc, picot* across side segments to form a small scallop inside the cream frame (88)
Round 31 :
1 sl st into each st around to tidy the edge - place extra sl sts in corner ch3 loops to anchor corners (88)
Info :
Fasten off and weave tails. Lightly wet-block each motif to lay flat; pin corners square so the triangle shape is accurately defined. Repeat to make a total of 12 identical motifs (or as many as you desire for your runner length).
— Motif Outer Lace Edge (worked on cream join, per motif) :
Round 1 :
Rejoin cream to any corner ch3 loop apex with sl st, ch1, 6 sc into loop to form a small picot cluster (6)
Round 2 :
1 sc in next 6 sts along side, *(sc, ch3, sc) in next sc to form eyelet, 6 sc along* repeat across side until corner cluster reached (approx counts vary per side; total per motif after completing three sides approximately 108)
Round 3 :
1 hdc in each st around the outer cream edge to form a firm border (108)
Info :
Work this outer lace edge the same on every motif so when motifs are joined the edges align neatly. Keep your tension even; if the lace flares, go down one hook size for these rounds.
Round 4 :
Shell round: *sk1, (5 dc, ch2, 5 dc) in next st, sk1, sc in next 3 sts* repeat across to create scalloped outer shells; work 3 shell clusters at the tip corners (approx 120)
Round 5 :
Secure with sl st, fasten off and weave ends. Block motifs to final size. Ensure outer scallops are pinned to consistent curve radius for uniformity across motifs.
Info :
Each motif now has a defined spiral center, cream frame, and outer scalloped edge. Blocking at this stage makes joining more accurate and keeps the lace even.
— Joining Motifs into Runner (12 motifs in photograph layout — 6 diamond pairs forming a strip) :
Info :
Lay out your motifs right side up in pairs: each diamond is two triangles placed tip-to-tip so the spiral curves mirror each other, forming the circular swirl effect inside a diamond shape. In the photographed runner motifs are joined in a single central column of diamonds; this pattern will join motifs into a single long strip of motifs edge-to-edge.
Round 1 :
With cream and tapestry needle, position two triangles together with right sides facing up and edges aligned. Using mattress stitch or sl st join through outer lace edge scs, work through corresponding loops to join the two motifs along the tip-to-tip seam. Join with sl st along 1/3 of the seam first to check alignment, then continue. (Join length will match seam stitch count of motifs.)
Round 2 :
Once two motifs are joined tip-to-tip, join the next motif along the long side: align scallops and join using slip-stitch through matching shell peaks: *sl st through shell peak of motif A, sl st through shell valley of motif B* across the full side. Repeat for the opposite side of that motif to build the strip. Continue joining motifs in this manner to create a long runner of 12 motifs (6 diamonds).
Info :
When joining, allow a small gap at the interior points of diamonds to reproduce the airy holes seen in the photographs — do not pull seams too tight. Use pins to hold alignment and check that spirals in joined diamonds mirror each other properly.
Round 3 :
Optional decorative join round: Using cream, work a round of sc around the entire assembled strip catching both motif edges in the join: *sc in each outer st, 3 sc in shell apex* to strengthen joins and create a uniform base for the outer continuous border (stitch count equals sum of outer motif edge stitches).
Round 4 :
Work a second round of 1 sc in each st to flatten joins and keep runner stable. Place extra scs at diamond intersection points to reinforce structural stress points (particularly at center joins where four motif corners meet).
Info :
If you prefer a looser, laceier join as seen in the image, use slip-stitch joins spaced every 2-3 sts rather than a full sc round. The pictured runner has a neat, regular cream join with visible open holes; replicate this with alternating sc and ch2 spaces to echo the motif's inner eyelets.
— Continuous Outer Border (worked around assembled strip) :
Round 1 :
Rejoin cream at one end of runner, ch1. Work 1 sc evenly around entire assembled runner, placing 3 sc in shell apexes and 2 sc in each corner ch loop for balance. This unifies all motif edges (total stitch count will vary; maintain evenness).
Round 2 :
1 hdc in each st around to create a firm base for the scallops (same count as previous round).
Round 3 :
Scallop formation: *sk 2, (7 dc, ch3, 7 dc) in next st, sk 2, sc in next 5 sts* repeat along entire edge to build large scallops matching motif outer shells.
Info :
Turn corners carefully: when scallops meet in corners or at the ends of the strip, reduce shell repeat by working (5 dc, ch3, 5 dc) to keep curvature smooth. Measure scallop spacing as you go so the final ends of the runner mirror each other.
Round 4 :
Picot bind-off round: *sc in each dc shell stitch, (ch3, sl st into 3rd chain to make picot) at scallop peaks* repeat to create delicate points. Fasten off and weave ends.
Round 5 :
Optional: add a small decorative bead or embroidered accent at alternating scallop peaks using spare purple yarn to echo the spiral colors.
Info :
Blocking after the outer border is essential to open scallops evenly and ensure the runner lies flat. Pin each scallop peak and valley while slightly stretching to equalize scallop sizes.
— Final Embellishment: Tassels (Make 2) :
Round 1 :
Make tassel using cream main: wind 80-100 wraps around a 6cm (2.5in) template for a full tassel. Remove and tie top with a short length of cream yarn close to the fold.
Round 2 :
Wrap center: secure tassel top by wrapping alternating bands of deep purple (A), medium lavender (B), and light lilac (C) several times each to mirror the spiral colors on the runner. Finish by threading the tassel loop through the corner ch3 apex and tying securely beneath the runner.
Round 3 :
Trim tassel ends evenly and comb lightly if desired. Add a small bead above the wrapped bands if you like the photographed finish.
Info :
Securely knot and add a drop of fabric glue to the wrap if the tassel will be handled often. Make both tassels the same length and wrap size so the runner hangs evenly.
— Finishing Touches & Blocking :
Info :
Once fully assembled and embellished, wet-block the entire runner. Pin scallops and diamond seams to a blocking board, gently steam or mist with water, and allow to dry fully. This step flattens lure of spirals and evens the lacework for a professional finish.
Round 1 :
Weave in all ends on the back of the runner with a tapestry needle, mirroring the color direction to conceal ends inside cream stitches. Trim any excess yarn close to the fabric after weaving through multiple stitches for security.
Info :
If you want the runner to be washable, use a mild laundry detergent and hand-wash cold, reshape while damp, and avoid tumble drying which can distort tassels and scallops.
Info :
Pattern Notes Summary: Each motif took approximately 31 rounds including spiral bands and cream frames. Outer lace and joining add approximately 20-30 more rounds across the assembled runner, leading to a composed, stable strip with many small shaping rounds to ensure symmetry. If you want a longer runner, make additional motifs in pairs and join using the same method.
Completing this lavender swirl table runner is a truly satisfying experience — watching each spiral motif come to life and join into a graceful, scalloped runner is so rewarding. The purple gradient centers pop beautifully against the warm cream lace, and the tassels give a charming handmade finish. This runner makes a thoughtful centerpiece or gift and proves that crochet can be both delicate and boldly decorative. 🧶🌿 Add it to your home and enjoy the compliments it draws! ✨