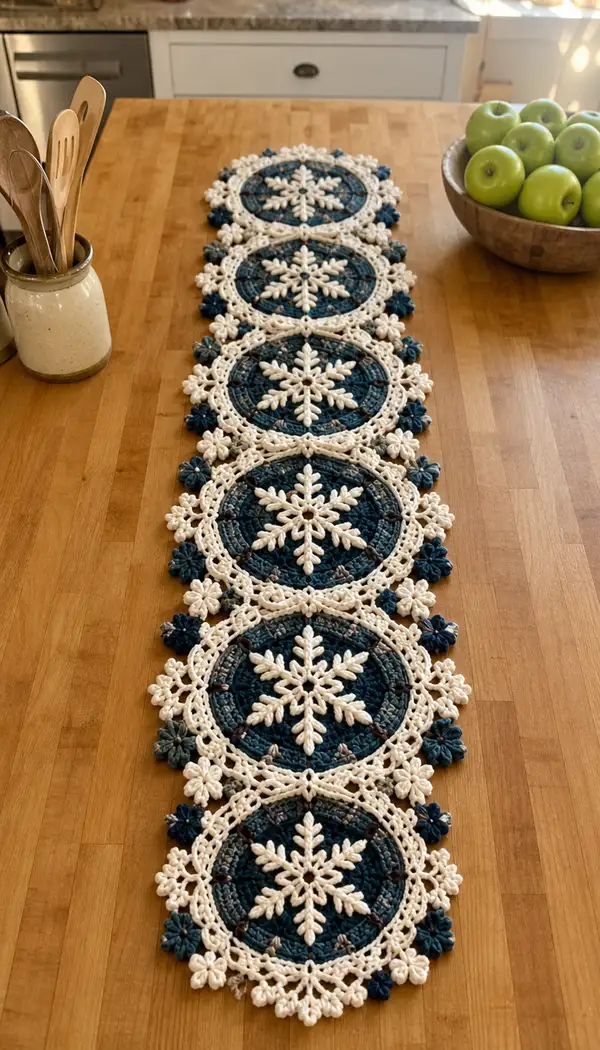
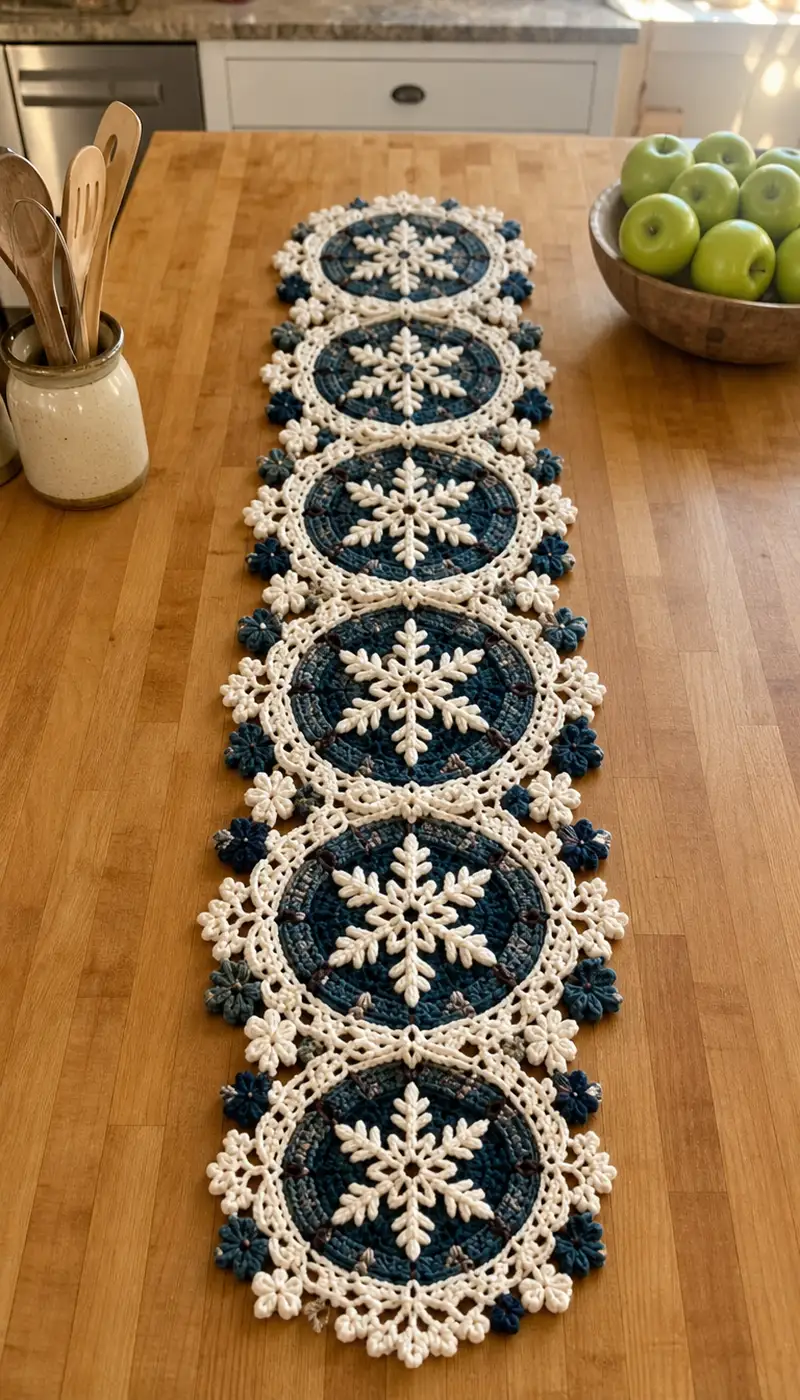
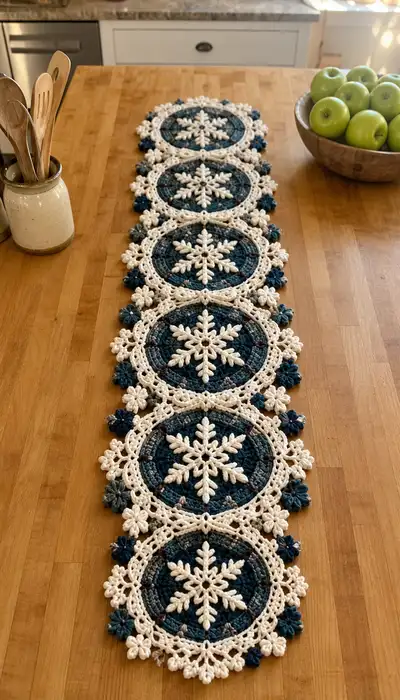
A delicate winter table runner composed of linked circular motifs featuring raised cream snowflakes set against a deep teal variegated center. Each round medallion is edged with lacy cream scallops and small puff flowers in matching teal and cream. The runner shown is five motifs long, creating an elegant centerpiece for seasonal or everyday display.
Progress Tracker
0% Complete
— Materials & Gauge :
Info :
Gauge is not critical for pattern repeat but is important for motif size consistency. Using a 4.0mm hook with worsted weight yarn your finished motif center (before border) should be approximately 6.25-6.5 inches (16-17 cm) across. Blocked with the cream border, each full medallion will be roughly 8-8.5 inches (20-21.5 cm). Adjust hook if your motifs are larger or smaller.
Info :
Make a sample motif first to establish tension and check that five motifs will produce a runner length you like; the sample helps calculate yarn usage per motif.
— Center Disc (Make 5) :
Round 1 :
mr, 6 sc in ring (6)
Round 2 :
inc in each st around (12)
Round 3 :
(1 sc, inc) × 6 (18)
Round 4 :
(2 sc, inc) × 6 (24)
Round 5 :
(3 sc, inc) × 6 (30)
Round 6 :
(4 sc, inc) × 6 (36)
Round 7 :
(5 sc, inc) × 6 (42)
Round 8 :
(6 sc, inc) × 6 (48)
Round 9 :
1 sc in each st (48)
Info :
Change to variegated teal if you started in a solid. Carry color or fasten off and join new color. Consistent color placement gives deeper visual rings in the center.
Round 10 :
(7 sc, inc) × 6 (54)
Round 11 :
1 sc in each st (54)
Round 12 :
1 hdc in each st (54)
Round 13 :
(8 sc, inc) × 6 (60)
Info :
At this point the disc is approaching finished center size. If you prefer a slightly larger center for a more visible snowflake, add one more increase round (see Optional Round A below).
Round 14 :
1 sc in each st (60)
Round 15 :
(*sc in next 2 sts, puff in next st* ) × 15 (60) — work puff in indicated stitch; puff counts as 1 st. Finish each puff by drawing yarn through 5 loops, yarn over and pull through all loops, ch1 to close the puff if desired.
Info :
Puff rounds add lovely texture and provide a nubbly surface for sewing the snowflake applique. Keep puffs consistent in size by pulling the same number of loops each time.
Round 16 :
1 sc in each st (60)
Round 17 :
*sc in next 3, dc in next, ch1* repeat around (60 dc & sc placement maintained) — place dc into every 4th stitch to create a subtle wheel effect (60)
Round 18 :
1 sc in each st (60)
Round 19 :
Switch to darker teal or navy accent, if desired, and work 60 sc in BLO to create a neat ridge close to the border (60)
Round 20 :
Fasten off and weave in ends, leaving long tail if you will tack the snowflake center in place. Block disc to 6.5-7 inches across measured from center to outer stitches.
Info :
Make five identical center discs. If making more or fewer motifs for a longer or shorter runner, adjust yarn quantities appropriately. Blocking now ensures consistent motif size for easy joining later.
— Raised Snowflake Applique (Make 5) :
Info :
Work the snowflake flat on cream yarn using a smaller hook (3.5mm) for crisp raised arms. The applique is worked from a small central ring, with chains extended to create six arms and textured leaves made with puff/bobble stitches. The finished applique should measure approximately 4.75-5 inches across blocked.
Round 1 :
mr, ch2 (counts as hdc), 11 hdc into ring (12 hdc) — join with sl st to first hdc
Round 2 :
ch3 (counts as dc), dc in same st, ch4, *skip next st, (dc, ch4, dc) in next st* repeat around to form six chain loops, join with sl st (12 dc groups, six loops)
Round 3 :
Working into each chain-4 loop: *(sc, ch2, 5-puff cluster, ch2, sc) in loop* × 6. To make a 5-puff cluster: yarn over, insert, pull loop (repeat 5 times), yarn over and pull through all loops, ch1 to close cluster. Each cluster counts as decorative leaf/arm base.
Info :
Use puff clusters for a raised, snowy texture. Keep tension loose enough to create full puffs but tight enough that applique lays flat when pressed and blocked.
Round 4 :
From front of work, join yarn at base of first chain loop. For each arm: ch3, (2 tr, ch2, 2 tr) into loop to make a tall arm, sl st back to center ring to anchor. Repeat for all 6 arms (6 tall arms anchored to center).
Round 5 :
On each tall arm, work small leaf edges: *sc at base, ch2, (puff, ch1, puff) centered along arm, ch2, sc at tip* — this creates a twig-like effect. Work identical pattern down each arm to keep symmetry.
Round 6 :
Turn the piece over and work small sc backs around each anchor point: 3 sc around anchor to tidy the back. Fasten off, leaving long tail for sewing to center disc.
Info :
Stiffen applique slightly when blocking by pinning into shape and misting lightly. The raised arms should remain dimensional to create the snowflake's shadow and depth when placed on the disc.
Round 7 :
Optional: Embellish arm tips with a tiny bobble: join yarn to tip, *(yarn over 4x, insert, pull through and complete bobble)*. Fasten off and weave ends into the back of the applique.
Info :
Make five snowflake appliques; sew them centred to the white puff rounds of each teal disc using long tails and a whip stitch or ladder stitch for invisibility. Tack the arms down lightly on the puffs only at a few points — not fully flattening the snowflake.
— Decorative Round & Lace Frame (Attach to each center) :
Info :
Switch to cream yarn for the lacy frame. Work around the entire disc edge with a sequence of shells, chain loops and puff flowers to create a scalloped, frosty frame that will also provide join points to adjacent motifs.
Round 1 :
Join cream yarn to any st on outer edge with sl st. ch1, sc in same st, *ch3, skip next 2 sts, sc in next 4 sts* around to form a ring of small chain picots and sc anchors (60 anchors and chain spaces remain visually correlated).
Round 2 :
*Into each ch3 space: (sc, ch3, sc, ch3, sc)* repeat around to create rhythmic chain arches (60 arches)
Info :
Work this round loosely to allow lace to lay flat later during blocking. The ch3 arches will convert into scallops for the shell round.
Round 3 :
Into each arch: work (2 dc, ch2, 2 dc) shell; sl st to next anchor sc. Repeat around to make 60 small shells spaced evenly.
Round 4 :
1 sc in top of each shell, ch5, sl st in next shell top to form elongated loops, creating spaces for flower attachments (60 loops)
Round 5 :
*Into every third ch5 loop: work (sc, ch3, 3-tr cluster, ch3, sc)*. These larger decorative points will later align with adjacent motif join points. Repeat around so that larger points appear every third loop (20 larger points total)
Info :
Mark each larger point with a removable stitch marker; these will be used to align and join motifs in a straight runner formation. Keep placement consistent around all motifs so join seams sit naturally and evenly.
Round 6 :
Between large points, fill with small puff flowers: Into each remaining ch5 loop work a 5-puff mini flower as follows: *(yarn over, insert, pull up loop) × 5, yarn over pull through all loops, ch1, sl st to top of loop* — this forms a mini flower bud. Space them between larger points to create a lace edge (approx 40 mini flowers distributed).
Round 7 :
1 sc evenly around whole border to tidy, working into tops of shells and petals as needed; sl st to join. Fasten off and weave ends. Block motif with snowflake attached, pinning each larger point and puff to exact shape and size. Allow to dry.
Info :
When blocking, ensure each larger point marker sits on the same radial position so that motifs will align perfectly in a runner. Each marked point will later receive a connecting slip stitch join.
— Small Spacer Flowers (Make 10-12 per join, Make 40+) :
Round 1 :
With navy or deep teal, mr, 6 sc in ring (6)
Round 2 :
(ch2, 3 dc in next st) × 6 join to form small 6-petal flower (6 petals)
Round 3 :
sl st into base, ch1, sc around base to tidy. Fasten off leaving tail to sew flower to border. Make many small flowers to echo the teal accents in photo and fill gaps between large points.
Info :
These small flowers are decorative accents placed between motifs at join points and along edges. Make at least 40 to match the pictured runner (about 8 per join for five motifs). Alternatively, make fewer for a sparser look.
— Join Motifs into Runner (Sequence Rounds) :
Info :
Lay motifs flat in desired order with right sides up and snowflakes pointing the same direction. Note large point markers on each motif (20 per motif). You will join motifs pairwise along their outer large points using slip stitch and decorative single crochet joins. Use cream yarn for invisible joins.
Round 1 :
Place two motifs side by side. Align the large point markers on the touching shells (typically there will be 5-6 larger points around each motif; choose two adjacent larger points near the sides to form a straight seam). From wrong side, insert hook through ch loop of motif A and corresponding loop of motif B, join with sl st. Repeat sl st through next 3-4 loops to create a firm seam. Work across entire side aligning each marked large point, using 1 sl st per ch5 loop that touches.
Round 2 :
On right side, with cream yarn, work sc along seam edge stitching through both motifs: *(sc into top of shell on motif A, sc into top of shell on motif B) × until seam ends*. This forms a neat join visible from top and reinforces seam strength (approx. 8-12 sc along each join depending on motif spacing).
Info :
Place 2-3 small navy flowers across the seam in gaps: tack with thread and sew through centers to join both motifs decoratively. The flowers hide join inconsistencies and echo photo accents.
Round 3 :
Continue joining the next motif using the same method so motifs form a linear strip. Add small flowers at each seam: sew one flower at the top, one at the center seam, and one at the bottom seam to visually repeat the clustered accents pictured.
Round 4 :
After all motifs are joined, on the top edge between joins add slip stitch loops in every third shell top to create an extra decorative ridge that matches the runner photo, using cream yarn (approx. 5-7 loops across each join).
Info :
If you want a removable runner, you can leave connectors as small removable ties of yarn instead of permanent stitches. For a permanent runner, sew securely and weave ends well on the wrong side.
— Final Outer Edge & Scallop Finish :
Round 1 :
With cream yarn, join at any seam and work: *ch1, sc in each top of shell*, working around entire runner edge including seam troughs, keeping stitch count consistent and snug to avoid gapping (estimate ~360 sc around full assembled runner depending on spacing).
Round 2 :
*In every 4th sc: 5 dc shell; in sc between shells: sc* — repeat around to create a strong scalloped edge. This will give the frosty edging visible in the image.
Round 3 :
*Into top of each 5-dc shell: (sc, ch3, sc) to form picot-style spikes; into small scs between shells: sc* — repeat around.
Info :
Use pins to gently pull outer points to a uniform shape while damp-blocking the assembled runner. Pin each scallop and every small puff flower until the runner dries completely, ensuring a crisp, flat runner with consistent scallops.
Round 4 :
Optional edging: add a tiny chained fringe by working into every other picot: *(sl st, ch6, sl st) repeat to form loops. Fasten off and weave in ends.* This is purely decorative; the pictured runner does not have fringe, but a small looped fringe adds extra texture if desired.
Info :
After finishing, firmly weave in all ends on the wrong side and steam-block again for a final crisp look. Avoid heavy steam directly on puff stitches to preserve loft.
— Optional Variations and Extensions :
Info :
To lengthen the runner: make additional motifs and join using the same seam method. To shorten: make fewer motifs. You can also alter color placement: swap the cream border for white for a brighter winter look, or use metallic thread for a festive sheen.
Optional Round A :
If you prefer a larger center disc, after Round 13 add: (9 sc, inc) × 6 → 66 sts, then work 2 rounds even before continuing with texture rounds so the raised snowflake sits further out from center.
Info :
Document each motif as you make it: label motif numbers so pattern placement and snowflake orientation are consistent across the runner. Photographs of each stage can help align snowflakes and border points when joining.
This cream and teal snowflake runner brings delicate winter charm to any table. Each motif is a little piece of handcrafted art, combining textured puffs, lacy shells, and raised appliques for a dimensional centerpiece. The step-by-step instructions make recreating the look approachable while leaving room for creative color swaps. Enjoy the peaceful rhythm of motif-making and the satisfaction of a beautifully finished runner! ❄️🧶