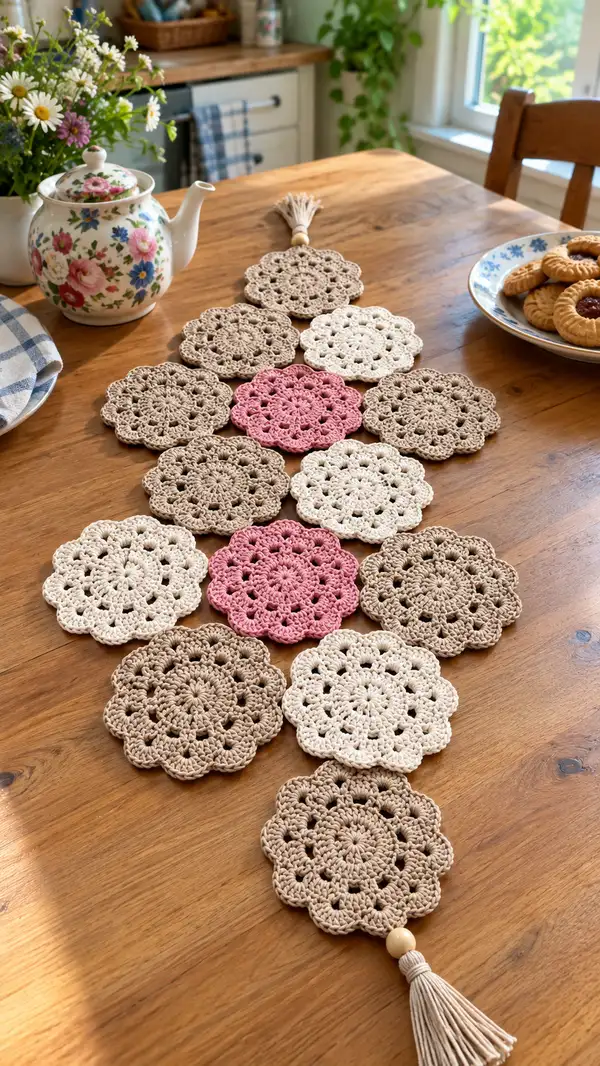
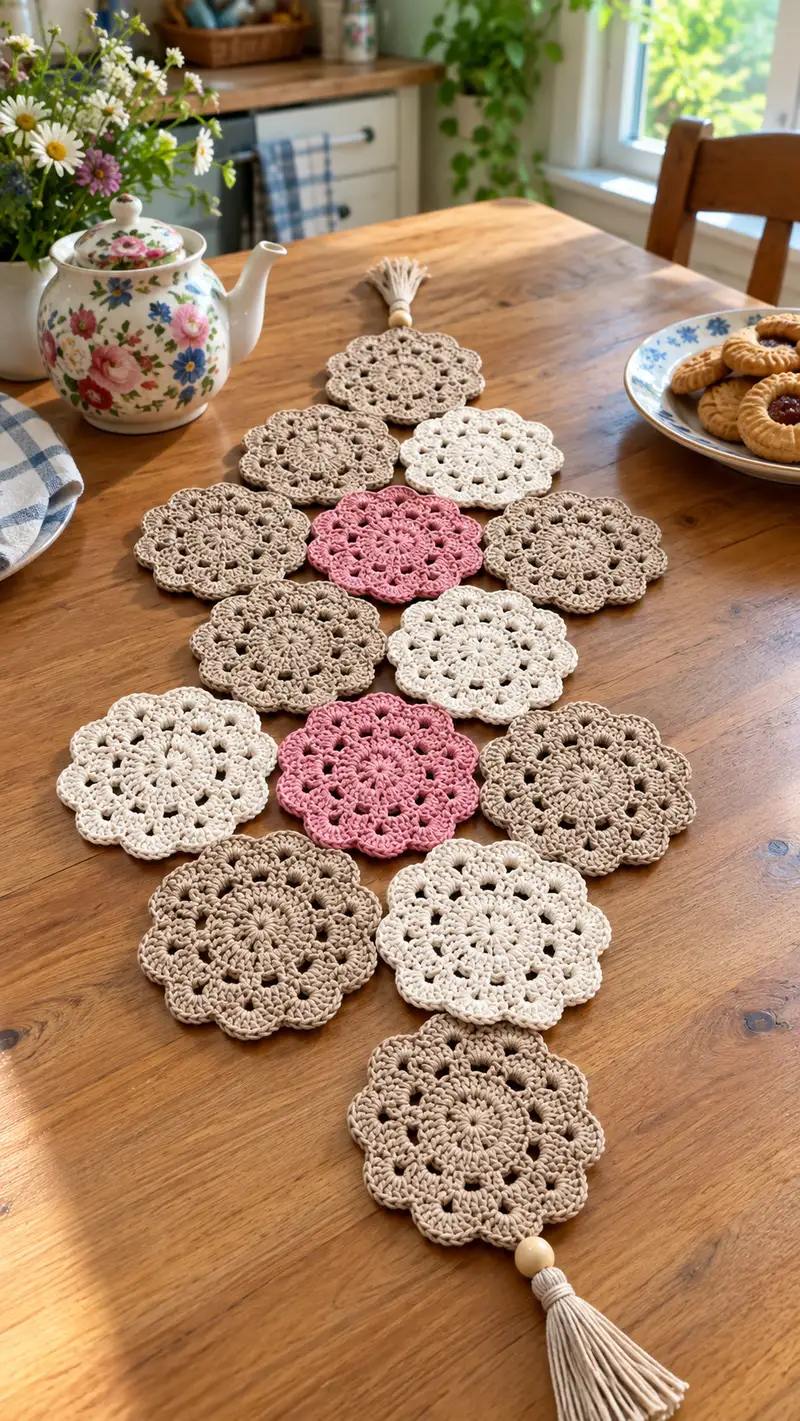
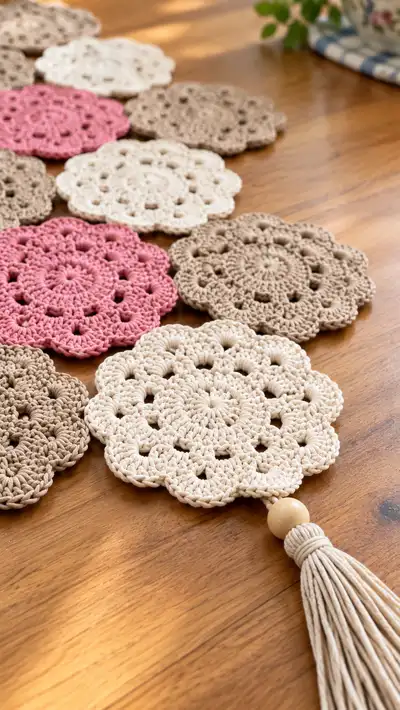
A charming scalloped floral coaster garland made from small round crochet motifs linked into a decorative table runner or wall-hanging. These lacy round coasters have a soft scalloped edge and gentle openwork that reads like tiny doilies. The photo shows neutral creams and warm taupes with two pop-pink accents and a tassel finished with a wooden bead, perfect for a cozy kitchen or tea table display.
Progress Tracker
0% Complete
— Overview :
Info :
This pattern describes the small scalloped floral motif you see in the photos and how to make a garland of 13 motifs finished with a tassel and bead. Each motif is worked flat in the round to create a layered petal effect. The pattern below shows one complete motif worked in 14 rounds with clear stitch counts and Info tips every few rounds. Make 13 motifs total: 4 cream, 5 taupe, 2 darker taupe, 2 pink accent as pictured, or choose your own color distribution.
Info :
Gauge is not critical for motif count, but with 3.5mm hook and worsted/light-worsted cotton-blend yarn each finished motif measures approximately 11-12cm (4.25-4.75") across. Keep tension consistent so motifs block flat and join evenly.
— Motif (template - repeat for Motif 1 through Motif 13) :
Round 1 :
Start: Make a magic ring. Ch 3 (counts as first dc), work 15 dc into the ring. Pull ring tight and join with sl st to top of starting ch-3. (16 dc)
Info :
Work tightly into the magic ring so the center closes neatly. The ch-3 counts as a dc throughout. Place a stitch marker in the top of the ch-3 to mark round starts if helpful.
Round 2 :
Ch 1. Sc in same st as join, *ch 3, sk next dc, sc in next dc; rep from * around. You will form 8 ch-3 loop spaces around the round with 8 sc between them. Join with sl st to first sc. (8 sc, 8 ch-3 sps)
Info :
These ch-3 loops create the first round of openwork that becomes the base for petal shells. Keep ch-3 loops even — don't pull them too tight or they will distort the round.
Round 3 :
Sl st into first ch-3 sp, ch 3 (counts as dc), (2 dc, ch 2, 3 dc) into same ch-3 sp (this creates a shell with a ch-2 picot-like separation). *Sk the next sc and into the next ch-3 sp work (3 dc, ch 2, 3 dc); rep from * around for a total of 8 shells. Join with sl st to top of ch-3. (8 shells — 6 dc per shell = 48 dc; 8 ch-2 spaces)
Info :
Count shells as units: each shell occupies what used to be a ch-3 space. The ch-2 between the 3-dc groups keeps petals open and gives the motif a lacy ring. Use stitch marker at the start of this round if you like.
Round 4 :
Ch 1. Sc in first dc of shell, sc in next 2 dc, ch 3, sc in last dc of same shell (this places a ch-3 arch on each shell). *Sc in the first dc of next shell, sc in next 2 dc, ch 3, sc in last dc of that shell; rep from * around. Join with sl st to first sc. (48 sc placed across shells, 8 ch-3 arch sps)
Info :
This round builds a small bridge of scs across the shells so that the next round can form a second tier of petals over these bridges. The ch-3 arches form neat spaces for the next petal cluster.
Round 5 :
Sl st into the first ch-3 arch, ch 3 (counts dc), (2 dc, ch 2, 3 dc) into same ch-3 arch; *sk the next 3 sc and into the next ch-3 arch work (3 dc, ch 2, 3 dc); rep from * around so you are building a second row of shells offset from the shells of Round 3. Join with sl st to top of ch-3. (8 shells — 6 dc per shell = 48 dc; 8 ch-2 spaces)
Info :
Because these shells are offset, the motif gains depth and a layered petal effect. Keep ch-2 spaces loose enough to create distinct arches for the final scallops.
Round 6 :
Ch 1, sc in each dc across shells, placing (sc, ch 3, sc) in each ch-2 space around to create small arches between shells. Join with sl st. (48 sc, 8 ch-3 sps)
Round 7 :
Working into each ch-3 arch from previous round: ch 3 (counts as dc), 2 tr, ch 2, 3 tr into same ch-3 arch (a taller petal cluster). *Rep into each ch-3 arch around. Join with sl st to top of ch-3. (8 petals — 6 tall treble posts per petal = 48 tr posts; 8 ch-2 sps)
Info :
The taller trebles give the motif height for a pronounced scallop edge. If your yarn is very fine, substitute dc for tr for a lower profile petal.
Round 8 :
Ch 1, sc evenly around working 1 sc in each treble/post across petals and placing (sc, ch 2, sc) in each ch-2 space between petals to create small arches. Join with sl st. (48 sc, 8 ch-2 sps)
Round 9 :
For final scalloped edge: Into each ch-2 space work (7 dc) forming a full scallop. *Work 7 dc into each ch-2 space around; rep from * for all 8 spaces. Join with sl st to first dc of the first scallop. (8 scallops, 7 dc each = 56 dc in shell segments)
Info :
Keep stitch heights even in each 7-dc scallop for a smooth edge. If your scallops ripple, use a slightly smaller hook for this round to stabilize the curve.
Round 10 :
Ch 1. Work 1 sc across all dc and across the top of each scallop to produce a neat edge: 1 sc in each dc across scallops and connect at the transitions with 1 sc. Join with sl st. (Approx 56 sc; exact count equals total dc from Round 9)
Round 11 :
Reverse single crochet (crab stitch) around for a firm, corded edge: sl st to next st and work reverse sc (or crab stitch) in each stitch around. Join with sl st and fasten off. (Approx 56 reverse sc)
Info :
Reverse single crochet on the edge gives a tidy, slightly raised border that helps motifs sit flat on a table. You can skip this round for a softer finish.
Round 12 :
Finishing note: Weave in ends neatly. Block each motif lightly by pinning to a flat surface and spritzing with water if you want uniform diameter. Allow to dry flat before joining. (Blocking step - no stitch count)
Info :
Blocking is highly recommended for motifs made from cotton-blend yarn — it opens the lace and evens the scallops so that matching motifs look identical.
— Motif 1 :
Round 1 :
Repeat Motif template Round 1 exactly: Make magic ring, ch 3, 15 dc into ring; join. (16 dc)
Round 2 :
Repeat Motif template Round 2 exactly. (8 sc, 8 ch-3 sps)
Round 3 :
Repeat Motif template Round 3 exactly. (8 shells = 48 dc)
Round 4 :
Repeat Motif template Round 4 exactly. (48 sc, 8 ch-3 sps)
Round 5 :
Repeat Motif template Round 5 exactly. (48 dc, 8 ch-2 sps)
Round 6 :
Repeat Motif template Round 6 exactly. (48 sc, 8 ch-3 sps)
Round 7 :
Repeat Motif template Round 7 exactly. (8 tall petals)
Round 8 :
Repeat Motif template Round 8 exactly. (48 sc, 8 ch-2 sps)
Round 9 :
Repeat Motif template Round 9 exactly. (8 scallops)
Round 10 :
Repeat Motif template Round 10 exactly. (Approx 56 sc)
Round 11 :
Repeat Motif template Round 11 exactly. (Edge - reverse sc)
Round 12 :
Repeat Motif template Round 12 exactly. (Weave ends and block)
Info :
Set Motif 1 aside after blocking. Repeat the motif template for Motifs 2-13, changing color yarns as desired. The following sections list each motif separately as 'Motif 2', 'Motif 3' and so on for clarity; each motif repeats the same 12 working rounds described above and finished with the reverse single crochet border and blocking step.
— Motif 2 :
Round 1-12 :
Make motif as template Rounds 1-12. Fasten off and block.
— Motif 3 :
Round 1-12 :
Make motif as template Rounds 1-12. Fasten off and block.
— Motif 4 :
Round 1-12 :
Make motif as template Rounds 1-12. Fasten off and block.
— Motif 5 :
Round 1-12 :
Make motif as template Rounds 1-12. Fasten off and block.
— Motif 6 :
Round 1-12 :
Make motif as template Rounds 1-12. Fasten off and block.
— Motif 7 :
Round 1-12 :
Make motif as template Rounds 1-12. Fasten off and block.
— Motif 8 :
Round 1-12 :
Make motif as template Rounds 1-12. Fasten off and block.
— Motif 9 :
Round 1-12 :
Make motif as template Rounds 1-12. Fasten off and block.
— Motif 10 :
Round 1-12 :
Make motif as template Rounds 1-12. Fasten off and block.
— Motif 11 :
Round 1-12 :
Make motif as template Rounds 1-12. Fasten off and block.
— Motif 12 :
Round 1-12 :
Make motif as template Rounds 1-12. Fasten off and block.
— Motif 13 :
Round 1-12 :
Make motif as template Rounds 1-12. Fasten off and block. This final motif will be placed near the tassel end for a tidy finish.
Info :
After making all 13 motifs, lay them out on a flat surface to match the arrangement in the photo: a diamond/triangle-like stacked linear layout with two pink motifs placed centrally and other neutrals alternating. Pin motifs in position for joining. The layout used in the sample places motifs in a 1-2-3-3-3-1 layout from the tassel end to the top (or adjust to suit your table length).
— Joining Motifs :
Info :
Choose your joining method: whipstitch with matching yarn for nearly invisible seams, or join-as-you-go (JAYG) crochet slip-stitch join for a decorative chain. The instructions below describe the neat whipstitch method and an alternate crochet join.
Round 1 :
Whipstitch Join Method: With right sides facing up, align two adjacent motifs so scallops meet evenly. Thread a tapestry needle with matching yarn and, using small whipstitches through the back loops of the reverse single crochet edge of each motif, sew them together with even spacing. Make 6-8 small stitches across the touching scallops for a strong seam. Repeat joining each pair according to layout. (assembly stitches - no stitch count)
Info :
For a softer visible join, use slip-stitch join-as-you-go: working with the new motif still on the hook at the final round, attach with sl st into the corresponding edge stitches of the previously blocked motif at each scallop point. This binds motifs together by crocheting into both edges simultaneously.
Round 2 :
Alternate Join (JAYG) Method: On the last round before the reverse crochet edge, work a slip stitch into the edge of the adjacent motif at 4 evenly spaced points (top of each scallop) and continue the round around the current motif. This joins the two as you finish. Repeat as required for chain joining. (joining slip-stitches variable per motif)
Info :
JAYG preserves a crocheted seam look and is excellent if you prefer not to sew. For an invisible join, whipstitch is best because you can hide the tail ends and control tension precisely.
Round 3 :
Continue joining motifs into your chosen layout. After all motifs are connected, gently steam or spritz the entire garland and re-pin if necessary to correct any small misalignments. Allow to dry completely. (blocking/finishing step)
— Tassel & Bead Finishing :
Round 1 :
Create tassel: Cut multiple strands of matching or contrasting macrame cord/yarn approximately 18-20cm (7-8") long doubled (so final tassel hangs ~9-10 cm). Gather 20-30 strands depending on desired fullness. Fold in half and secure with a tight wrap of leftover yarn about 2cm from fold to make the head. Attach wooden bead above the wrapped head using the looped top strands or a short cord. Trim bottom evenly. (tassel - no stitch count)
Info :
For a polished look thread the folded loop through the wooden bead and pass the bead down to the wrapped head, then tighten the bead so it sits snugly at the top of the tassel. Use a little fabric glue inside the bead if it is loose.
Round 2 :
Attach tassel to end motif: Thread a short length of yarn (approx 15 cm) through the top center of the terminal motif (at the scallop tip). Using a tapestry needle, bring the yarn from the back through to the front at the center of the outer scallop, tie secure slipknot around the folded tassel loop and pull through so loop is anchored under the bead. Secure with tight stitching behind the motif and weave ends on the back. (attachment stitches - no stitch count)
Info :
Leave a small tail of yarn on the back to weave in; avoid sewing through the bead so it can hang freely. If you prefer, add a small dab of glue inside the bead to secure the tassel core.
— Final Finishing & Care :
Info :
Weave in all ends securely on the back of the garland. Trim any excess fiber. If motifs have small ripples, re-pin and lightly steam-block to smooth. Spot-clean with a damp cloth; machine wash is not recommended for wooden bead and tassel unless they are removed first.
Info :
To adapt length: add or remove motifs as needed. For a longer runner add motifs in multiples and balance colors symmetrically from the center outward. For a hanging garland, attach hanging loops at top motifs with small ch-10 cords fastened behind the edge.
Finishing this scalloped floral garland is such a satisfying moment — watching each tiny doily-like motif come together into a long, pretty row is pure joy. The neutral tones with two pink accents and the tactile tassel make a lovely kitchen or shelf accent. I hope each stitch brings you a little calm and lots of pride. Hang it, gift it, or style it under your teapot for sunny tea-time charm! 🧶✨