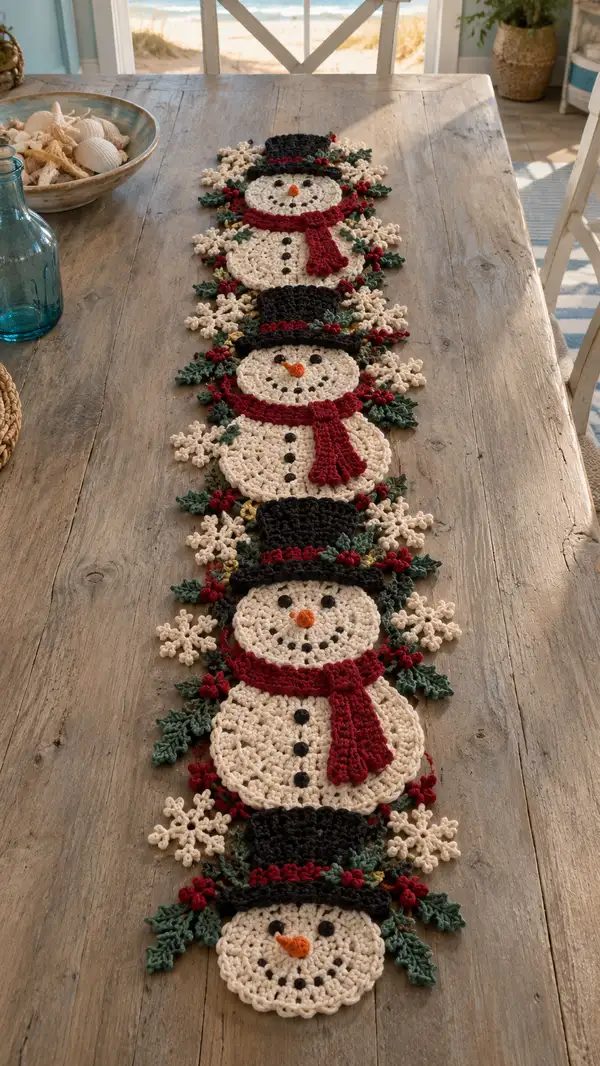
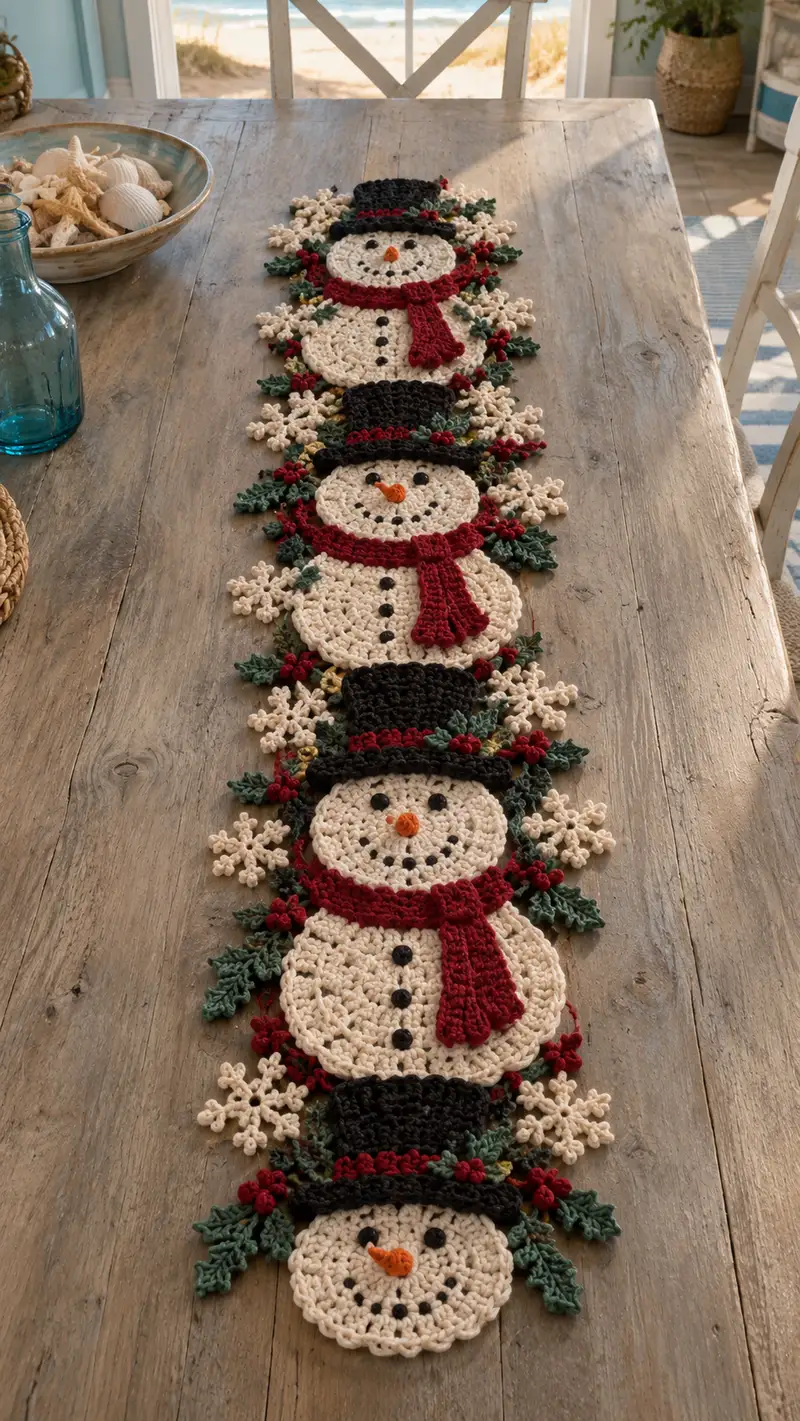
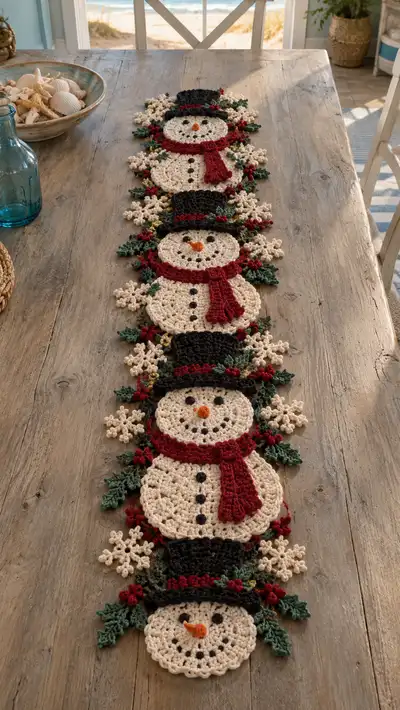
A charming, vintage-inspired table runner featuring a row of cream snowmen wearing black top hats, red scarves and holly accents. Each snowman motif is richly textured with shell stitches, snowflakes and leaf clusters. Perfect for holiday centerpieces and seasonal decorating, this pattern uses worsted weight yarn and simple motif-joining techniques to create a long, elegant runner.
Progress Tracker
0% Complete
— Overview :
Info :
This pattern creates a long table runner composed of repeating snowman motifs. Each motif has a head and lower body (two stacked circular motifs), a top hat, a scarf, holly leaves and berries, and surrounding snowflake accents. The pattern is modular: make three or more motifs to desired runner length and join with slip-stitch joining and sewn embellishments.
Gauge :
One snowman head disc measures approximately 5.5" (14 cm) across with 5.0mm hook and worsted yarn. Adjust hook size for desired density. Blocking will slightly enlarge flat motifs.
— Head (Make one head per motif) :
Round 1 :
6 sc in magic ring (6)
Round 3 :
(1 sc, 1 inc) x 6 (18)
Round 4 :
(2 sc, 1 inc) x 6 (24)
Round 5 :
(3 sc, 1 inc) x 6 (30)
Round 6 :
(4 sc, 1 inc) x 6 (36)
Round 7 :
(5 sc, 1 inc) x 6 (42)
Round 8 :
(6 sc, 1 inc) x 6 (48)
Round 9 :
(7 sc, 1 inc) x 6 (54)
Round 10 :
(8 sc, 1 inc) x 6 (60)
Info :
By round 10 the head disc is roughly full size. Maintain an even tension to keep a flat disc; if motif cups, block after finishing rounds. Place two black yarn dots or safety eyes later between rounds 13-14, about 8-10 sts apart for a friendly expression.
Round 11-14 :
1 sc in each st (60)
Info :
Embroider mouth dots or place decorative 'coal' beads beginning at round 14. To embroider, use black yarn and French knots or small straight stitches forming a curved smile centered below eye placement.
Round 15 :
(8 sc, 1 dec) x 6 (54)
Round 16 :
(7 sc, 1 dec) x 6 (48)
Round 17 :
(6 sc, 1 dec) x 6 (42)
Info :
Lightly stuff the head only if you prefer a slightly domed look for each motif. Use small amounts of polyfill and press gently; the motifs are primarily flat.
Round 18 :
(5 sc, 1 dec) x 6 (36)
Round 19 :
(4 sc, 1 dec) x 6 (30)
Round 20 :
(3 sc, 1 dec) x 6 (24)
Round 21 :
(2 sc, 1 dec) x 6 (18)
Round 22 :
(1 sc, 1 dec) x 6 (12)
Info :
Fasten off leaving a long tail to sew the head perimeter to the lower body disc for a tidy layered look. Weave tail through the back loops of the finishing round before pulling tight if closing small opening.
— Lower Body Disc (Make one per motif) :
Round 1 :
6 sc in magic ring (6)
Round 3 :
(1 sc, 1 inc) x 6 (18)
Round 4 :
(2 sc, 1 inc) x 6 (24)
Round 5 :
(3 sc, 1 inc) x 6 (30)
Round 6 :
(4 sc, 1 inc) x 6 (36)
Round 7 :
(5 sc, 1 inc) x 6 (42)
Round 8 :
(6 sc, 1 inc) x 6 (48)
Round 9 :
(7 sc, 1 inc) x 6 (54)
Round 10 :
(8 sc, 1 inc) x 6 (60)
Info :
Continue increasing to make the lower body slightly larger than the head so the stacked snowman shape reads clearly. The lower disc should be wider and will be the main anchor for buttons and scarf stitching.
Round 11-16 :
1 sc in each st (60)
Round 17 :
(8 sc, 1 dec) x 6 (54)
Round 18 :
(7 sc, 1 dec) x 6 (48)
Round 19 :
(6 sc, 1 dec) x 6 (42)
Info :
Place three button markers or sew three small black yarn circles evenly down the center starting at round 13-14 spacing approximately 6-8 sts between. Buttons give the lower disc personality and help align scarves.
Round 20 :
(5 sc, 1 dec) x 6 (36)
Round 21 :
(4 sc, 1 dec) x 6 (30)
Round 22 :
(3 sc, 1 dec) x 6 (24)
Round 23 :
(2 sc, 1 dec) x 6 (18)
Round 24 :
(1 sc, 1 dec) x 6 (12)
Info :
Fasten off leaving long tail for sewing the lower body disc to the hat brim area or to join motifs together. If making a linked runner, leave extra tail to stitch along motif edges for secure joining.
— Hat Crown (Make one hat per motif) :
Info :
Hats are worked in black. The hat comprises a brim disc and a taller crown worked in the round. Work loosely enough that brim lays flat but tight enough for structure.
Round 1 :
6 sc in magic ring (6)
Round 3 :
(1 sc, 1 inc) x 6 (18)
Round 4 :
(2 sc, 1 inc) x 6 (24)
Round 5 :
(3 sc, 1 inc) x 6 (30)
Round 6 :
(4 sc, 1 inc) x 6 (36)
Info :
This brim will be slightly smaller than the crown base so the crown can be sewn to the brim's center. If you prefer a curved brim, add or subtract 2 stitches in round 6 to adjust curvature.
Round 7 :
1 sc in each st (36)
Round 8 :
1 sc in each st BLO (36)
Info :
Working round 8 in BLO creates a defined brim ridge. Fasten off and set brim aside for crown attachment.
Hat Crown - Round 1 :
Join yarn to any st of brim center. Ch1, work 18 sc evenly around center (18)
Hat Crown - Round 2 :
(1 sc, 1 inc) x 6 (24)
Hat Crown - Round 3-8 :
1 sc in each st (24)
Hat Crown - Info :
Height of crown is 6 rounds in examples; add 1-2 rounds for a taller hat. To make a top hat band, change to deep red yarn now and work 1 round of sc around crown, then switch back to black.
Hat Crown - Round 9 :
Slip stitch around to join crown to brim center securely, fasten off leaving long tail for sewing. Sew crown to brim using whip stitch for tidy join.
— Scarf (Make one scarf per motif) :
Info :
The scarf is worked flat in rows to create a textured long strip that can be looped and sewn to the snowman. Use deep red yarn and a 5.0mm hook for drape.
Row 1 :
Ch 6, sc in 2nd ch from hook and across (5 sc)
Row 2 :
Ch1, turn, BLO hdc in each st across (5 hdc)
Row 3 :
Ch1, turn, BLO hdc in each st across (5 hdc)
Row 4-16 :
Repeat Row 3 for total of 16 rows (5 hdc each row)
Info :
Scarf ends are textured by working the final two rows in reverse for a slight rib. Leave long tails for sewing the scarf around the neck area and add a scarf tie by making a small rectangular flap of 4 rows and attaching to one end.
Row 17 :
Ch1, turn, sc across to create a neat edge. Fasten off leaving long tail to seam scarf on head between round 12 of lower disc and round 14 of head.
— Carrot Nose (Make one per motif) :
Round 1 :
With orange, 6 sc in magic ring (6)
Round 2 :
(1 sc, 1 inc) x 3 (9)
Round 3 :
1 sc in each st (9)
Info :
Form nose into tapered cone by flattening slightly and sewing flat to face between rounds 12-14; stuff with tiny amount of fiberfill if needed so it keeps shape.
Round 4 :
(1 sc, 1 dec) x 3 (6)
Round 5 :
6 sc (6) - fasten off leaving tail to sew nose in place
— Holly Leaf (Make 2-4 leaves per motif) :
Info :
Leaves are worked flat in green with picot edges to mimic holly. Each motif here uses 3 larger leaves and 2 small leaves clustered around hat brim and scarf sides.
Leaf Round 1 :
Ch 10, sc in 2nd ch from hook, hdc in next, dc in next 3, tr in next 2, dc in next, hdc in next, sc in last. (Work back along opposite side of chain) sc in next, hdc, dc, tr, dc, hdc, sc - join with sl st to first sc. (Approx 18 sts)
Leaf Round 2 :
Ch1, *sl st to next st, ch3, sl st in same st (picot)* along points to form serrated edge, repeat 4-5 times, fasten off leaving tail for sewing.
Info :
Sew leaf clusters symmetrically on either side of hat brim. Slightly block leaves to shape veins before attaching for a crisp silhouette.
— Berry (Make multiple per motif) :
Round 1 :
4 sc in magic ring (4)
Round 3 :
1 sc in each st (8)
Round 4 :
(1 sc, dec) x 2 (6) - fasten off leaving tail for sewing. Lightly stuff with fiberfill.
Info :
Attach clusters of berries (3 per cluster) near leaf bases and brim edges with short, neat stitches. Vary cluster size using 2 or 3 berries to create organic look.
— Snowflake Accent (Make 6 per motif evenly around edges) :
Round 1 :
Ch8, sl st to form ring, ch3 (counts as dc), 11 dc into ring, join with sl st (12 dc)
Round 2 :
*Ch 6, sc in 3rd ch from hook, picot in next ch (ch 3, sl st in picot base), sc in ring to anchor* repeat 6 times creating points (6 points)
Round 3 :
Work small decorative picots at ends of points (ch3, sl st back into tip) fasten off leaving tail to sew. Block flat.
Info :
Snowflakes are made in cream same as body; block each snowflake carefully to standardize size before attaching to the runner background.
— Decorative Joining/Edge Motif (Make repeated joining motifs) :
Round 1 :
With cream, ch 6, sl st to form small ring, 8 hdc into ring (8)
Round 2 :
(1 hdc, ch1) x 8 around ring, join (8 ch1 spaces)
Round 3 :
In each ch1 sp work (sc, ch2, sc) to form tiny loops. Fasten off. These tiny motifs fill gaps between snowmen and act as anchor points when joining motifs.
Info :
Make enough joining motifs equal to number of gaps between main snowman assemblies. They will be stitched between crowns and lower discs to stabilize runner edge and fill negative space.
— Assembly Prep :
Info :
Block all round motifs (head discs, lower discs, hats brims) flat on blocking mat with pins to even diameter. Steam or wet-block lightly for consistent shapes. Arrange motifs on flat surface in final runner order (hat/head/body, hat/head/body, hat/head/body) with leaves, berries and snowflakes positioned aesthetically around each motif.
Info :
Before sewing, count and mark attachment stitches on motif perimeters: mark center top, bottom, left, right and intermediate points to align pieces symmetrically. Use stitch markers or pins to hold pieces together as you sew.
— Joining Motifs Into Runner :
Round 1 :
Start at center seam of a lower body disc. With cream, whip stitch the head disc to the lower disc around the overlapping rings created by final rounds. Use mattress or whip stitch through back loops to maintain a flat seam.
Round 2 :
Sew hat brim to the top of head between rounds 10-12 by aligning the brim ridge (BLO round) with head top opening. Use even stitches; catch only a stitch or two from each round to avoid puckering.
Round 3 :
Sew scarf around seam between head and lower body: position scarf so one short end tucks under the scarf band and the other hangs down over the body disc; tack in place with small stitches at hidden points to prevent movement.
Round 4 :
Sew holly leaves and berries: position leaves at sides of hat brim and scarf knot, sew securely through leaf base and brim so they overlap and disguise stitching. Sew berries clustered in groups of two or three near leaf bases.
Round 5 :
Attach snowflake accents by sewing at three or four attachment points to keep them flat against runner. Place snowflakes along outer edges to give a cohesive snowy border.
Info :
Use matching yarn and small stitches. Pin pieces first and test runner drape before committing to final stitching. Reinforce any stress points with a second row of stitching if the runner will be moved frequently.
— Finishing Embellishments :
Round 1 :
Embroider button dots on lower discs with black yarn by sewing small French knots or tiny sewn circles. Space three vertically down center for each snowman.
Round 2 :
Sew carrot nose in place centered between eyes (approx between rounds 12-14 of head disc). Angle slightly upward for cheerful expression.
Info :
Hide most sewing tails inside motifs by weaving the tail under several rounds and trimming flush. Use a dab of fabric glue at berry bases for added security if desired.
— Edge Finishing and Blocking :
Round 1 :
Once all motifs are joined and sewn, create a tidy edge by working a round of single crochet in cream around the perimeter where motifs meet, picking up stitches evenly and filling small gaps with sc and chain loops to maintain runner outline.
Round 2 :
Work one final decorative round: *(sc, ch2, sl st) around curves to create subtle scallops and to stabilize points where holly leaves or snowflakes protrude.* Repeat around entire runner.
Info :
Block the entire runner again after the final edging to unify shapes. Pin into desired straight runner shape and allow to dry fully to set stitch memory and flatten seam joins.
— Variation Notes & Tips :
Info :
To lengthen the runner, make additional complete snowman modules and join using the same technique. For narrower runners, omit the lower body discs on some motifs and place hat-head motifs alone. Use metallic yarn for holly berries for a festive sheen or add tiny jingle bells sewn into berry clusters for a playful touch.
Info :
If you prefer an entirely flat runner without 3D elements, make the hat, scarf and holly as appliques in a single round and sew flat—skip stuffing and shaping. For machine-wash safety, use cotton yarn and secure all embellishments tightly.
This festive table runner brings handcrafted charm and holiday personality to your tabletop with layered snowman motifs and delicate snowflakes. You’ll enjoy the rhythm of making repeating motifs and the satisfaction of joining them into a long, celebratory centerpiece. The combination of cream, red and rich green gives a classic holiday palette that complements many décor styles. 🧶🎁 Keep this heirloom piece for seasons to come or gift it to a loved one for a warm, handmade surprise! ✨