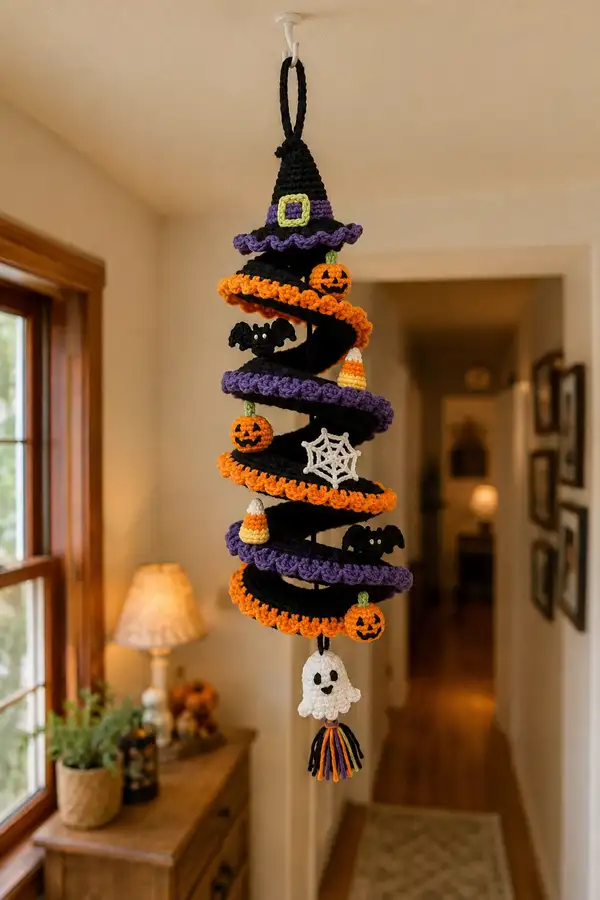
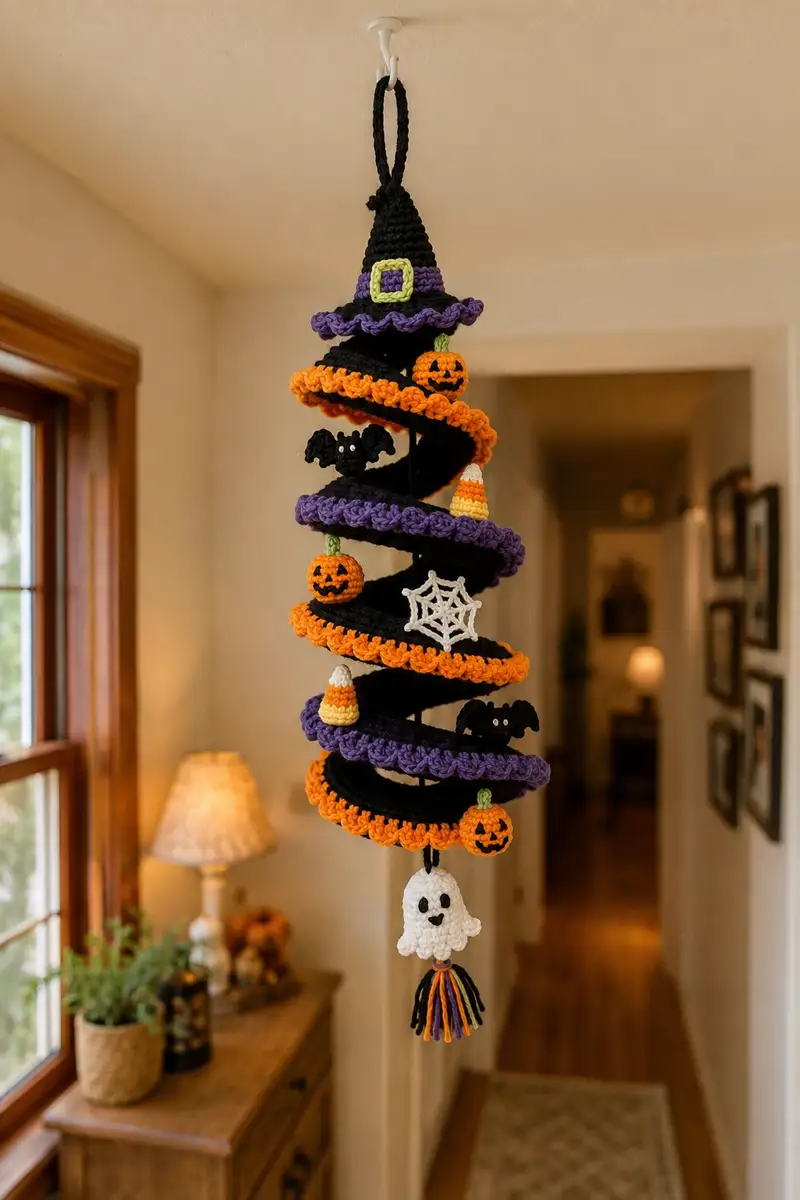
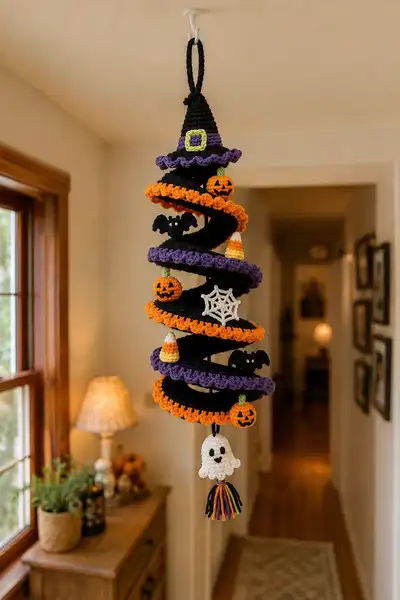
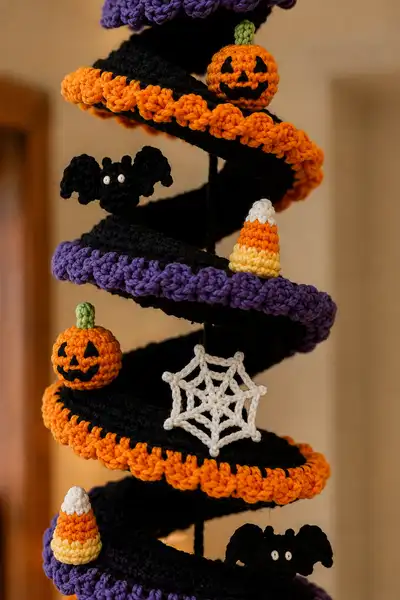
A whimsical hanging Halloween spiral garland featuring a tall witch hat topper, alternating black spiral tiers edged in orange and purple, and tiny amigurumi accents — pumpkins, bats, candy corn, a spiderweb and a friendly ghost tassel. The design is full of texture: scalloped edges, embroidered jack-o-lantern faces, tiny stacked cones, and a braided cord for hanging. Designed to be displayed in doorways or hallways, this project mixes flat spiral rings and small stuffed motifs for maximum seasonal charm.
Progress Tracker
0% Complete
— Materials & Gauge :
Info :
Gauge is flexible for this decorative project. With worsted weight yarn and a 3.5mm hook, 8 sc = 1 inch in single crochet. Work slightly tighter than you normally would to keep small motifs tidy and prevent stuffing from showing. Use a 3.0mm hook for very small details if needed.
— Overview & Construction Method :
Info :
This garland is constructed from multiple 'ring tubes' crocheted as rounds (each tube forms one spiral tier). Each tube is a joined strip: chain length equals the circumference in stitches (48 ch recommended), joined to work in continuous rounds, making a short tube (5-7 rounds tall). After making seven tubes, scalloped edging in alternating orange and purple is added to the outer edge of each tube. Small amigurumi accents (pumpkins, bats, candy corn, spiderweb and ghost) are crocheted separately and attached by sewing or with short lengths of yarn so they peek into the spiral when hung. Finally, a central braided hanger (or sturdy cord) is passed through the tube centers and motifs suspended to create the spiral effect.
— Spiral Ring Tube (Make 7 rings; repeat color pattern: orange, purple, orange, purple, orange, purple, orange) :
Info :
Each ring tube begins with a chain of 48. This gives a comfortable circumference for the small motifs to sit on and divides evenly for scallop repeats (48÷3=16 shells). If you prefer a wider or narrower spiral, adjust chain by multiples of 3 for scallop math and maintain the same number of rounds for height.
Round 1 :
Ch 48, join with sl st to first ch to form a ring (do NOT turn). Ch 1 (does not count as st), 1 sc in each ch around, join with sl st to first sc (48)
Round 2 :
Ch 1, 1 sc in each st around, join (48)
Round 3 :
Ch 1, 1 sc in each st around, join (48)
Info :
Check your rounds: the fabric should lie flat. If the tube cups, you may have used too few stitches; if it ruffles, you used too many. Adjust by adding/subtracting 3 ch in a future ring if needed.
Round 4 :
Ch 1, 1 sc in each st around, join (48)
Round 5 :
Ch 1, 1 sc in each st around (48)
Round 6 :
Ch 1, 1 sc in each st around (48)
Round 7 :
Ch 1, 1 sc in each st around, join, fasten off leaving tail for sewing if desired (48)
Info :
Optional: For a taller ring, work Rounds 2-6 for 7-8 rounds before finishing. Each ring will stack as a tier in the spiral. Make seven total rings, alternating trim colors as listed in the section header.
— Scalloped Edge (Shell Stitch) for Each Ring :
Info :
Switch to accent color for scallop trim (orange or purple depending on the ring). The shell stitch used is 5 dc in one st, skip 2 sts, sl st in next st (this consumes 3 base sts per shell). With a base count of 48, you will make 16 shells evenly spaced.
Round 1 (Edging) :
Join accent color at any outermost stitch. Ch 2 (counts as first dc), *5 dc in next st, skip next 2 sts, sl st in next st; rep from * around to make 16 shells, join with sl st to top of ch-2. Fasten off and weave ends (shell count = 16)
Info :
Work the shell stitch into the top loop of the outermost round so shells sit outward. When changing color, carry yarn loosely inside tube or fasten off and join again for neater joins.
— Witch Hat Topper :
Info :
The hat is shaped as a tall cone with a brimming ruffle. We work the cone by increasing to desired base width, then work even rounds for height, add a purple ruffle, and a lime buckle as a small square embellishment.
Round 1 :
With black yarn, mr, 6 sc in mr (6)
Round 3 :
(1 sc, inc) x6 (18)
Round 4 :
(2 sc, inc) x6 (24)
Round 5 :
(3 sc, inc) x6 (30)
Round 6 :
(4 sc, inc) x6 (36)
Round 7 :
(5 sc, inc) x6 (42)
Round 8 :
(6 sc, inc) x6 (48)
Info :
If you prefer a wider hat brim, continue increases in the same pattern: Round 9: (7 sc, inc) x6 (54); Round 10: (8 sc, inc) x6 (60). The sample uses 48 stitches in the base before working even rounds, which gives a medium brim size.
Round 9-13 :
1 sc in each st (48) (work 5 rounds even for cone height)
Info :
Stuff the cone lightly if you want the hat to keep a pointed shape or leave flat for a floppy look. If stuffing, do so gently to avoid distorting the cone. Stop stuffing before the brim so the edge lays flat.
Round 14 :
FLO: 1 sc in each st (48) — prepares for ruffled brim
Round 15 (Brim Ruffle) :
Switch to purple. Join purple at any st, ch 2 (counts as dc), *5 dc in next st, skip 2 sts, sl st in next st; rep from * around making 16 shells, join with sl st to top of ch-2. Fasten off, leaving long tail for attaching to top ring (shell count =16)
Info :
Make a short loop for hanging by knotting a 6-inch length of black yarn through the topmost tip of the hat, or incorporate into braided hanger when assembling. Add a lime buckle square by making a small rectangle (see below) and sewing to the purple band area.
Witch Hat Buckle :
With lime yarn, ch 6, join with sl st to form loop, ch 1, 6 sc around, ss to join (6). Work one additional round sc in each st (6). Fasten off and fold into a small square; sew onto hat band and secure with a tiny black rectangle of sc stitches underneath as the buckle hole if desired.
— Pumpkin (Make 3, approx 1.1 inch diameter) :
Round 1 :
With orange, mr, 6 sc in mr (6)
Round 3 :
(1 sc, inc) x6 (18)
Round 4 :
(2 sc, inc) x6 (24)
Round 5-6 :
1 sc in each st (24) — work two even rounds to expand pumpkin girth
Info :
Begin stuffing lightly at the end of Round 5 and add a bit more after Round 6. For the characteristic pumpkin ribs, you will use surface embroidery after closing to create vertical lines.
Round 7 :
(2 sc, dec) x6 (18)
Round 8 :
(1 sc, dec) x6 (12)
Round 9 :
6 dec (6) — finish stuffing firmly, fasten off leaving tail for closing and sewing (6)
Pumpkin Stem :
With green, mr, 6 sc in mr, 2 rounds 1 sc in each (6). Fasten off leaving long tail. Sew stem to top center of pumpkin. Use embroidery thread or black yarn to stitch tiny triangle eyes and smile: embroider three small triangles for eyes/nose and a stitched grin.
— Bat (Make 3) :
Info :
Bats are worked flat and stuffed lightly at the body. Body is a small sphere; wings are crocheted flat semicircles and sewn to the body symmetrically. You can use white French knots for googly eyes or embroider with off-white yarn.
Bat Body Round 1 :
With black, mr, 6 sc in mr (6)
Round 3 :
(1 sc, inc) x6 (18)
Round 4 :
1 sc in each st (18)
Round 5 :
(1 sc, dec) x6 (12)
Round 6 :
6 dec (6) — finish stuffing slightly, fasten off leaving tail (6)
Bat Wings (make 2 per bat) :
Ch 9; Row 1: sc in 2nd ch from hook and across (8), turn. Row 2: ch 1, sc in first st, *2 sc in next st, sc in next 2 sts, 2 sc in next st, sc in next st; (repeat the pattern once across) finish (10 sts). Row 3: ch1, sc across (10). Fasten off leaving tail. Fold wing into a slight scalloped curve by sewing along base and shaping with small tucks to create the curved wing outline. Sew wings onto sides of bat body, spacing them evenly. Embroider two white eye dots or attach tiny safety eyes before final sewing.
Info :
For tiny bat eyes, place two French knots made with cream yarn on the bat's head before stuffing to ensure they sit flat.
— Candy Corn (Make 3) :
Info :
Candy corn cones are worked in rows in a simple cone shape, with color changes for white, orange and yellow stripes. Work tightly to keep shape crisp.
Round 1 :
With white, ch 6, join with sl st to form loop, 6 sc in loop (6)
Round 3 :
Change to orange. 1 sc in each st around (12)
Round 4 :
Change to orange, 1 sc in each st around (12)
Round 5 :
Change to yellow, (1 sc, dec) x4 (8) — stuff lightly and fasten off (8)
Info :
Because of the small size, you will need very little stuffing. Weave tails into center so points look neat. Adjust color band widths by working more even rounds in the color you want wider.
— Spiderweb Motif (Make 1) :
Info :
This web is built as a small star with eight spokes joined by chain arcs. Work with white yarn and a 3.0 or 3.5mm hook to produce a delicate lacy web.
Round 1 :
With white, ch 6, join with sl st to form loop. Ch 3 (counts as first tr), *ch 3, tr into loop; rep from * 7 more times to make 8 spokes total, join to top of ch-3 with sl st
Round 2 :
*Sl st to top of next spoke, ch 4, sl st in same spoke; rep across to create small hub loops connecting spokes. Join and fasten off (creates 8 small chain loops)
Round 3 :
Rejoin yarn. Work sl st into the chain loop behind first spoke, ch 6, sl st in next chain loop, ch 6, sl st in next chain loop; rep around making connecting arcs to form web circles until you have 3 concentric arcs. Fasten off and block gently to shape (3 concentric rounds of chain arcs)
Info :
Pin web to a flat surface and gently stretch to shape while wet blocking for a crisp look. Alternatively, stiffen with a light spray of diluted glue if desired for longevity.
— Ghost Tassel (Make 1) :
Round 1 :
With white, mr, 6 sc in mr (6)
Round 3 :
(1 sc, inc) x6 (18)
Round 4-5 :
1 sc in each st (18) — work two even rounds for ghost body height
Round 6 :
(1 sc, dec) x6 (12) — begin closing the top but leave a short opening for the hanger loop (12)
Round 7 :
6 dec (6) — finish stuffing lightly, fasten off leaving long tail for sewing and hanging (6)
Ghost Ruffle Edge :
Join white at bottom edge, ch 1, *sc in next st, ch 2, sl st in same st (creates a picot-ish scallop); rep around for 9 scallops. Fasten off. Embroider eyes and mouth with black yarn: two small oval eyes and a tiny 'o' mouth. Attach a multi-color tassel below the ghost made from black, orange, purple and yellow yarn strands folded and secured with a band to create the hanging tassel.
Info :
To make the narrow tassel band, use three strands of each color folded in half and tied to a short length of yarn looped through the bottom center of the ghost. Trim to even length for a playful finish.
— Assembly: Threading & Spacing the Spiral :
Info :
Create a sturdy braided hanger approximately 36 inches long from black yarn or use a thin cord. The central cord will pass through the center holes of each ring tube. Starting from the top, slide on the witch hat (tip first) and position so hat ruffle rests at the top of the first tube. Continue threading the seven rings spaced roughly 1.25 to 2 inches apart depending on how open you want the spiral.
Step 1 :
Place hat at top of cord, tie a stopper knot above the hat to keep it from sliding, or secure with a few stitches through the hat base into the cord (hidden inside hat).
Step 2 :
Thread ring 1 onto cord below the hat. To create the spiral look, orient each ring at a slight angle when you slide it on — rotate each successive ring by about 25-30 degrees in the same direction so they form a continuous spiral as you move down the cord.
Info :
Use loose yarn tails from ring joins to baste each ring to the cord with 3-4 small stitches through the inner circumference so rings do not slide. Sew through underside only so stitches are hidden from view.
Step 3 :
After threading all seven rings, tie a small knot below the final ring to lock position. Below the final ring, attach the ghost and tassel using a 3-inch length of black yarn secured to the cord. Add a final decorative stopper knot and make a small loop for hanging above the hat for a ceiling hook.
Step 4 :
Sew small motifs into ring edges: tuck pumpkins, bats and candy corn on short 1.5-2 inch yarn lengths and sew those lengths through the inner tube wall so motifs hang into curve of spiral. Vary heights slightly so elements appear in different visual planes. Sew the spiderweb so it sits between two rings, anchored by two stitches on its upper chain loops.
Info :
Pin motifs temporarily with straight pins while the garland hangs so you can check placement and spacing. Once happy, secure with multiple passes of thread or yarn to ensure durability.
— Finishing Touches & Embellishment Tips :
Info :
Embroidering jack-o-lantern faces: use duplicate stitch or simple satin stitch triangles and curved mouth lines with black yarn. For a neater result, load a fine tapestry needle with a doubled strand and weave carefully. For the bat eyes, use two tiny white knots and a tiny black French knot for pupils. To stiffen the web, use a diluted glue solution or a spray starch. Weave all tails well into motifs and trim close.
Info :
Block rings lightly with steam or by pinning to shape on a flat surface if shells curl. Avoid heavy blocking that changes yarn texture too much.
— Sizing & Scaling Notes :
Info :
With a 3.5mm hook and worsted yarn, the finished garland measures approximately 28–32 inches from tip of hat to bottom of tassel. Use bulkier yarn and larger hook for a larger, bolder decoration; use fingering or sport weight with a smaller hook for a delicate miniature spiral.
This Halloween spiral garland brings seasonal delight to any doorway or hallway with tiny amigurumi accents and a whimsical spiral silhouette. The modular construction makes it fun to personalize — swap colors, add more motifs, or make a tiny family of garlands for a themed display. Each stitch pulls together a miniature story of pumpkins, bats, candy corn and a friendly ghost — perfect for gifting or brightening your own home. 🎃🧶