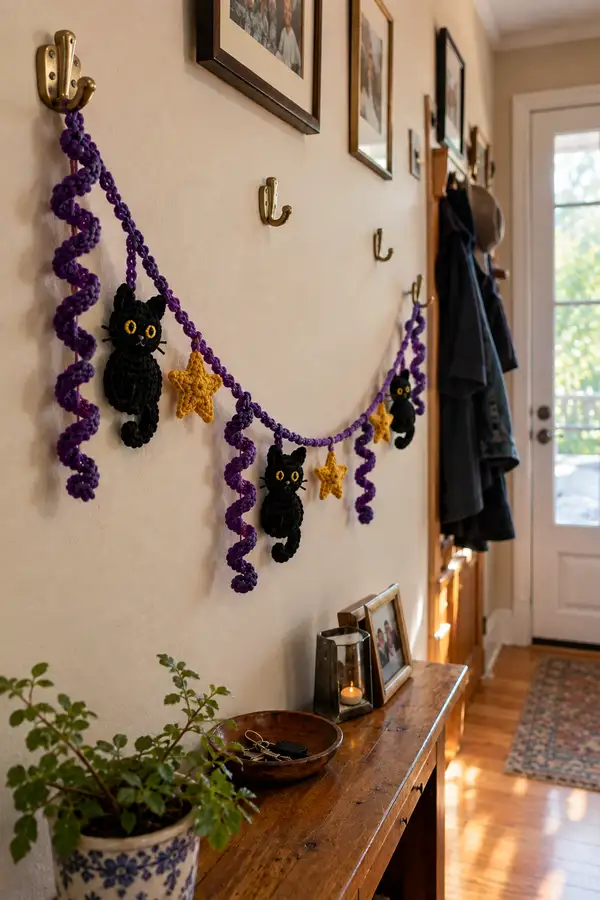
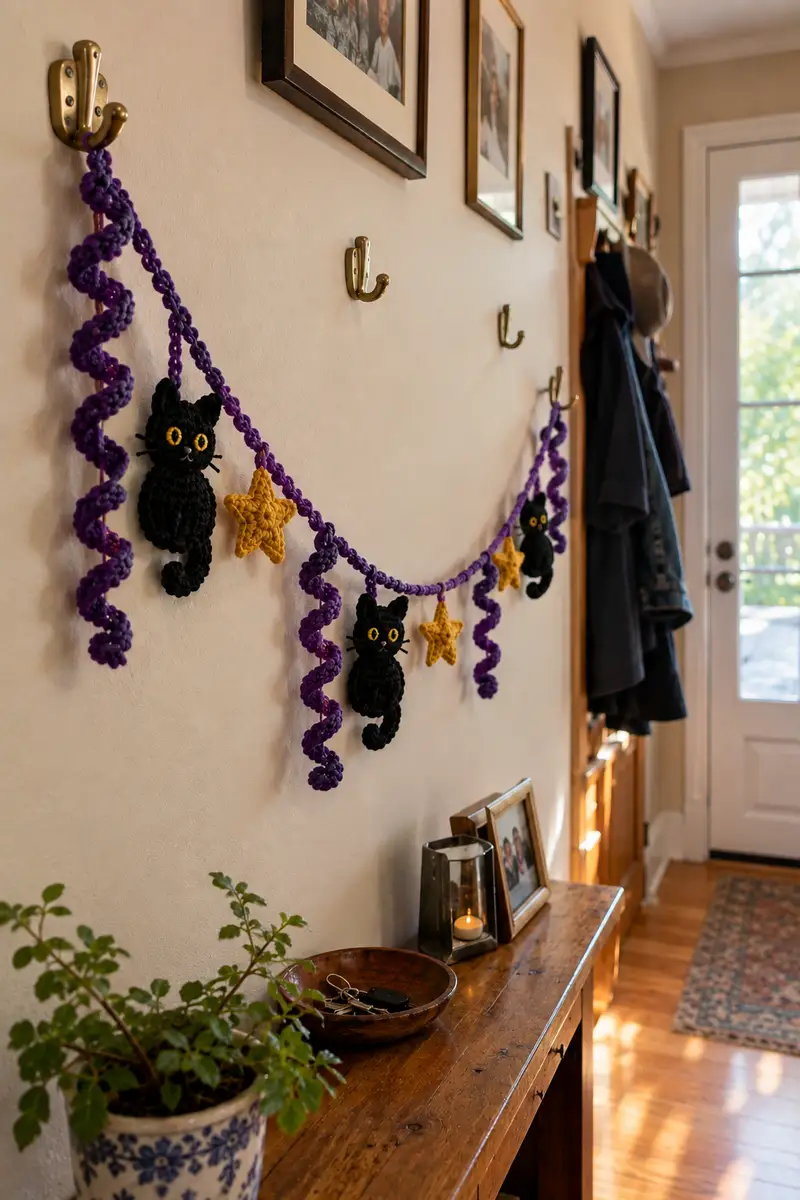
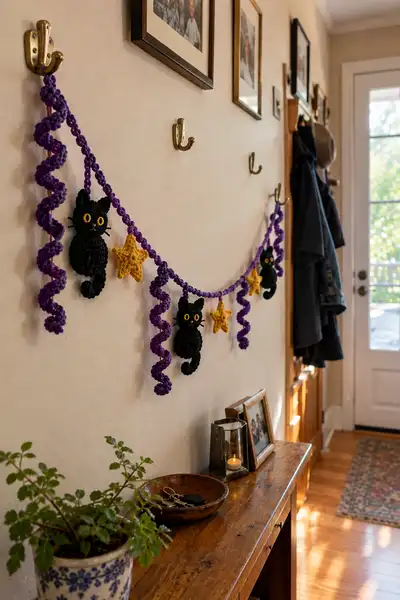
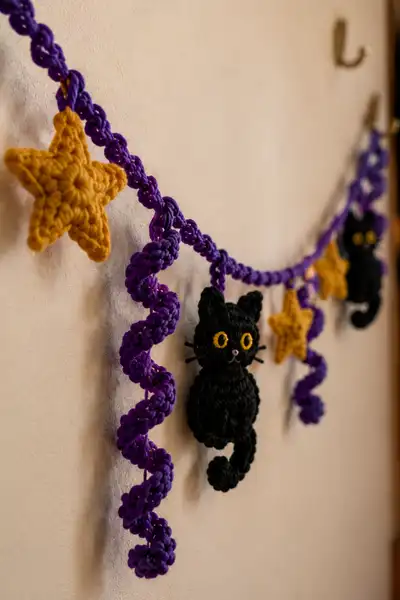
A whimsical Halloween garland featuring three little black crochet cats, golden stars, and playful purple spiral tassels. Each motif is worked in tight amigurumi-style stitches for a crisp silhouette and stuffed lightly so they hang flat. Perfect for doorways, mantels, or entry halls, this pattern shows step-by-step construction for cats, stars, spirals and the braided garland cord. Complete instructions include placement, assembly and finishing tips so you can make a full garland just like the photo.
Progress Tracker
0% Complete
— Overview & Notes :
Info :
This pattern describes how to make one hanging motif set (1 cat + 1 star + 1 spiral) and how to create the braided garland cord. Repeat motif sets to make a garland of any length. Work in continuous rounds for amigurumi unless instructed otherwise. Use a 3.5mm hook with worsted weight yarn for a firm fabric; change hook size if your fabric is too loose. All cats and stars here are worked in black and golden colors respectively. Make 3 cats, 4 stars and 4 spirals for an arrangement like the sample photo.
— Cat Head :
Round 3 :
(1 sc, inc) x 6 (18)
Round 4 :
(2 sc, inc) x 6 (24)
Round 5 :
(3 sc, inc) x 6 (30)
Round 6 :
(4 sc, inc) x 6 (36)
Round 7 :
(5 sc, inc) x 6 (42)
Round 8 :
(6 sc, inc) x 6 (48)
Round 9-12 :
1 sc in each st (48)
Info :
Place safety eyes (or mark eye placement for embroidery) between rounds 11 and 13, approx 8-10 stitches apart for a wide, expressive look. If using safety eyes, insert and secure washers now before further stuffing. Mark the leftmost and rightmost stitch of the eyes so you can orient features symmetrically.
Round 13-18 :
1 sc in each st (48)
Info :
If embroidering eyes, work a small yellow ring centered over the position you marked—see Eye Ring section. Begin light stuffing after round 16, adding small amounts so fabric remains smooth. Keep the head slightly under-stuffed until the body is attached to allow neck shaping.
Round 19 :
(6 sc, dec) x 6 (42)
Round 20 :
(5 sc, dec) x 6 (36)
Info :
Start to shape the chin succinctly. Use your finger to push polyester fill towards the upper face so the cheek area stays full as you decrease the lower rounds. Continue stuffing in small increments.
Round 21 :
(4 sc, dec) x 6 (30)
Round 22 :
(3 sc, dec) x 6 (24)
Round 23 :
(2 sc, dec) x 6 (18)
Round 24 :
(1 sc, dec) x 6 (12)
Info :
Fasten off leaving a long tail (approx 12-18 inches) for sewing the head to the body. Finish stuffing so the head is firm but slightly pliable. Thread the long tail onto a yarn needle for later attachment.
— Cat Body :
Round 3 :
(1 sc, inc) x 6 (18)
Round 4 :
(2 sc, inc) x 6 (24)
Round 5 :
(3 sc, inc) x 6 (30)
Round 6-9 :
1 sc in each st (30)
Info :
If you want the cat to have a slightly plumper belly like the photo, work rounds 6-9 gently but do not overstuff yet. Keep the opening at the top accessible for joining to the head.
Round 10 :
(4 sc, inc) x 6 (36)
Round 11-15 :
1 sc in each st (36)
Info :
Begin light stuffing at round 12, distributing the fill evenly so the body has a soft but stable form. Do not stuff too firmly at the top opening as you will sew the head onto it.
Round 16 :
(4 sc, dec) x 6 (30)
Round 17 :
(3 sc, dec) x 6 (24)
Round 18 :
(2 sc, dec) x 6 (18)
Round 19 :
(1 sc, dec) x 6 (12)
Info :
Stop stuffing the body now if you want the head to sit slightly above the body; add the final stuffing after the head is stitched on so you can adjust fullness to create a natural neck join. Leave a tail about 12-18 inches for sewing.
Info :
Fasten off leaving long tail for sewing. If you prefer, instead of closing the body completely you can leave the last 6 sts open, thread the head tail through and sew directly to the topmost rounds for a flatter join. The photo shows a slight seam where head meets body; choose the method you prefer.
— Cat Ears (Make 2) :
Round 3 :
(1 sc, inc) x 4 (12)
Round 4 :
(2 sc, inc) x 4 (16)
Round 5 :
Fold ear flat and sc through both layers across top edge (8), turn ear right side out.
Round 6 :
1 sc around the outer edge to tidy and create a rim (16)
Info :
Make two identical ears. Fasten off leaving long tails for sewing. Pin ears to top of head with the outer edge lying about 2-3 stitches in from the top seam so they splay slightly forward like in the photo.
— Cat Tail :
Round 3-6 :
1 sc in each st (12)
Round 7 :
(2 sc, dec) x 3 (9)
Round 8-10 :
1 sc in each st (9)
Round 11 :
(1 sc, dec) x 3 (6)
Round 12-14 :
1 sc in each st (6)
Round 15 :
6 sc in BLO to create a thinner inner ridge (6)
Round 16 :
Fasten off leaving long tail for sewing. To form the curl seen in the photo, give the tail a tight spiral by wrapping it around your finger and tack the top of the curl to the underside with a few stitches. Stuff tail lightly so it holds shape but remains flexible.
— Eye Ring (Make 2 per cat) :
Round 1 :
6 sc in mr using golden yarn (6)
Round 3 :
1 sc in each st (12)
Round 4 :
1 sc in each st BLO to form a slightly recessed pupil housing (12)
Round 5 :
Fasten off leaving tail for sewing. Embroider small black pupils at the center with a tiny satin stitch or use a black french knot. Alternatively attach 6mm safety eyes through the head and embroider a yellow ring over them (stitch carefully so washers don’t show).
— Cat Face Embroidery & Whiskers :
Info :
Use a tapestry needle and pale pink or light yarn for a tiny nose (tiny triangle or French knot). For the mouth stitch a short 'v' under the nose with white or pale yarn. For whiskers use 3 short strands of black embroidery thread inserted and secured behind the head interior or sewn through with a few tacking stitches so they flare out like the photo. Secure all ends inside the head to prevent unraveling.
— Assembling One Cat :
Info :
Sew ears to top of head centered about 6-8 sts apart depending on size. Position eyes between rounds 12-13, approx 8-10 sts apart. Sew tail to lower back of body, curving it so the curl faces outward. Attach head to body by sewing through top rounds of the body and bottom rounds of head using the long tails and whipstitch or ladder stitch. Weave in ends thoroughly.
— Flat Star Motif (Make 4) :
Round 1 :
6 sc in mr with golden yarn (6)
Round 3 :
1 sc in each st (12)
Round 4 :
'Point construction': *ch 3, sl st in base (skip 1), ch 3, sl st in base (skip 1)* repeat for 5 points across the circle to form point anchors. (This creates 5 small loops that will become star points)
Round 5 :
Working into each loop: (sc, hdc, 2 dc, hdc, sc) into each loop to create a full pointed star tip (5 points)
Round 6 :
Fasten off leaving a tail. Lightly stuff the star center flat with a small pinch of fiberfill so the star reads as slightly three-dimensional when hung. Use tail to sew star to garland cord at desired spacing.
Info :
If you prefer a more textured star, work one additional round of sc around the outline (12-15 sts) and work in BLO on that final round to create a small ridge before fastening off.
— Purple Spiral Corkscrew (Make 4 long spirals) :
Info :
Each spiral in the photo is a long curly cord made by crocheting a coiled tube. The method below creates a 16�0 inch spiral. Adjust chain length for shorter or longer spirals. Work tightly and stuff very lightly if you want the spirals to hold plump coils.
Round 1 :
Ch 80 (or desired length) with purple yarn (foundation chain for spiral)
Round 2 :
Working back along the chain, 2 sc in each chain across (160 sc) - this creates a constant bias that will naturally spiral when relaxed
Round 3 :
Work 1 sc in each st across (160) maintaining very tight tension
Round 4 :
Working in FLO, 1 sc in each st across (160) to create a slight ridge that encourages curling
Round 5 :
Fasten off leaving long tail. Run a strand of thin wire or pipe cleaner through the spiral if you want very stable poseable corkscrews. Otherwise, wrap the finished spiral around a dowel or finger to set, spray lightly with water and allow to dry to set the curl.
Info :
For a thicker spiral, work this pattern in two strands held together, or make a thicker chain (ch 100) and 2 sc in each chain. You can also sew a line of running stitches down the back to further emphasize the corkscrew shape when hanging.
— Braided Garland Cord :
Round 1 :
Make 3 long chains of purple yarn, each approx 60-80 inches depending on how long you want the garland. Tie ends and braid them together loosely.
Round 2 :
Tack the braid with a few spaced stitches using matching yarn to set the braid and prevent unravelling. Weave in ends.
Round 3 :
To create the scalloped knotted hanger like in the picture, work small loops of ch 6-10 every 6-8 inches along the braiding and secure them with a sl st. These loops are where you will tie or sew the spiral corkscrews and motifs.
Info :
Alternatively, you can compose the cord by alternating single crochet rounds around a central core (3-strand rope) to create a firmer cord. The photo shows a looser braided cord with decorative knot points where motifs attach; replicate that for the same look.
— Attaching Motifs to Cord :
Info :
Space motifs evenly: sample spacing in the photo is approx 10-14 inches apart. A suggested arrangement for the sample garland (left to right) is: spiral, cat, star, spiral, cat, star, spiral, cat, star, spiral. Use long tails from motifs to sew through the braid and around a few strands multiple times for security. Reinforce each attachment with a couple of stitches from the wrong side of the motif into the braid core to prevent sagging.
— Finishing Details & Reinforcement :
Info :
After all motifs are attached, press the spirals lightly with a damp cloth to set the shape if you used natural fibres. Trim any excess tails and weave all ends thoroughly inside the motifs. For wall-hung garlands add small hidden safety loops of thread inside the braid at the ends to hang onto hooks; ensure these loops are reinforced with stitches so they carry the weight of the motifs.
— Optional: Extra Texture Ridges & Belly Detail :
Info :
If you want the cat in the photo's textured ribbed belly, after the body rounds are complete, work 2-3 rounds in BLO with sc to create a ridge. You can also add a small ridge across the forehead by working a round of sc in BLO across rounds 10-11 of the head before decreasing to create a subtle brow line.
— Make 3 Cats, 4 Stars, 4 Spirals Summary :
Info :
Repeat the cat sequence (Head, Body, Ears, Tail, Eyes, Embroidery) to make three cats. Repeat the star pattern four times and make four spirals. Confirm motif counts, then lay them out along your table and measure spacing against your braid before final stitching to the garland cord.
— Care & Storage :
Info :
Spot clean with damp cloth and mild soap. Store flat or hung to avoid flattening the spirals. If you used wired spirals, wrap them carefully to avoid kinks.
This purple spiral Halloween garland is a delightful seasonal accent that brings charm and whimsy to any doorway or mantel. Each little black cat with golden eyes and tiny star companion tells a story, and the long curly spirals add movement and fun. Put the pieces together while enjoying a cozy autumn evening — the process is almost as satisfying as the finished display. 🧶🎃✨