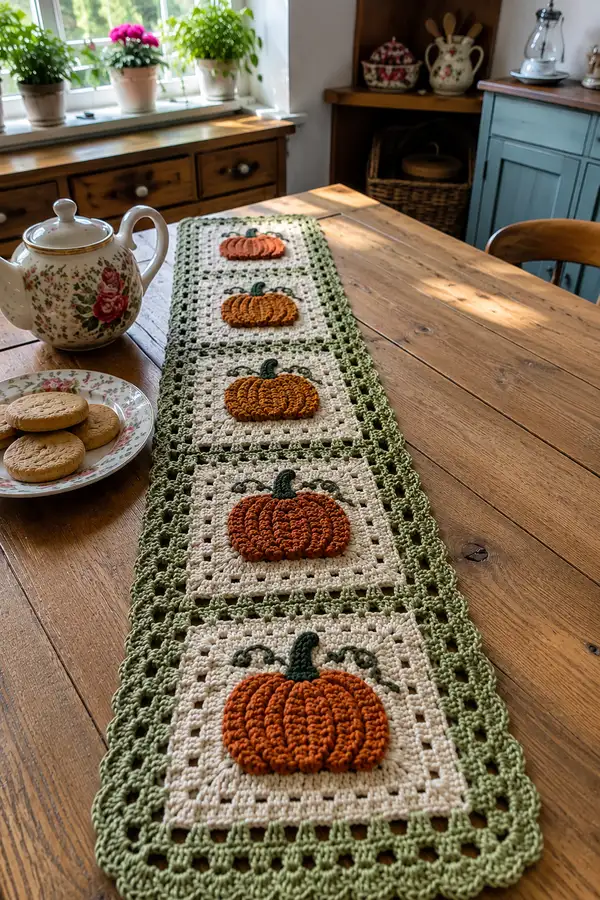
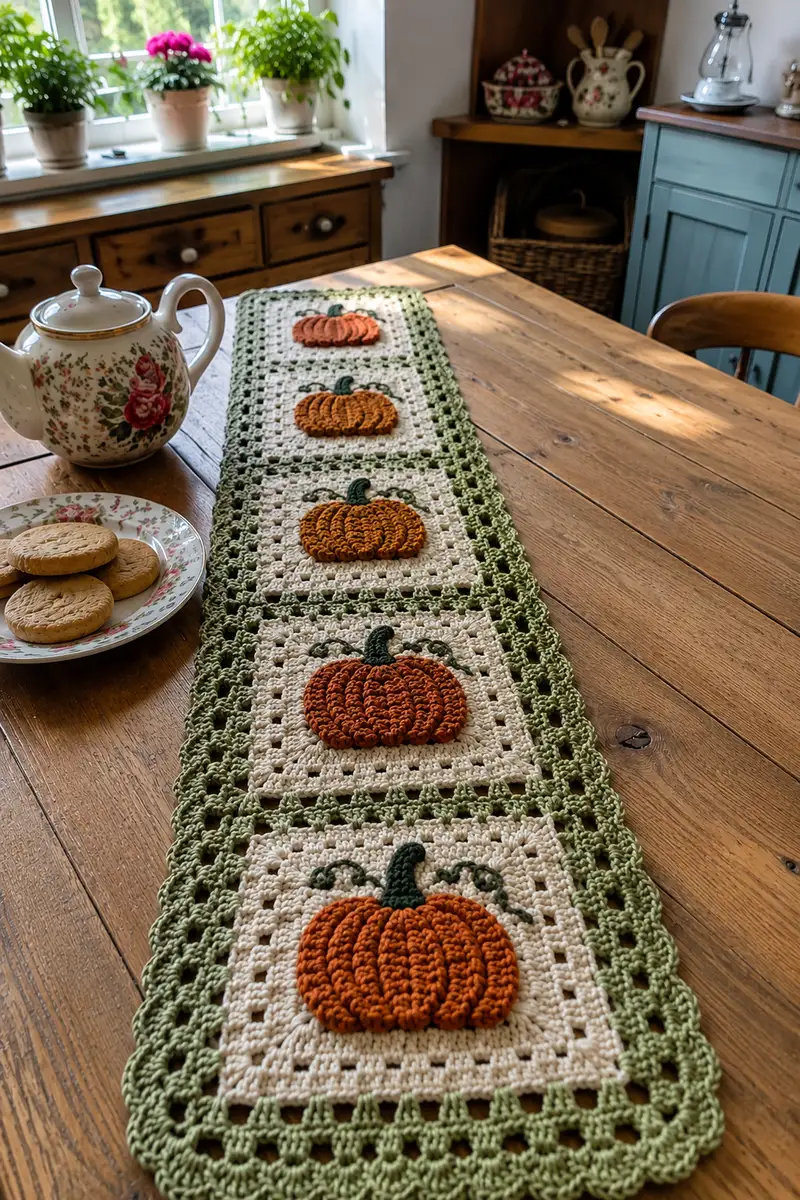
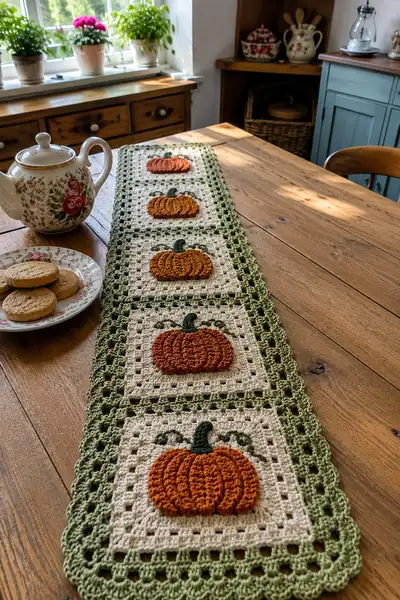
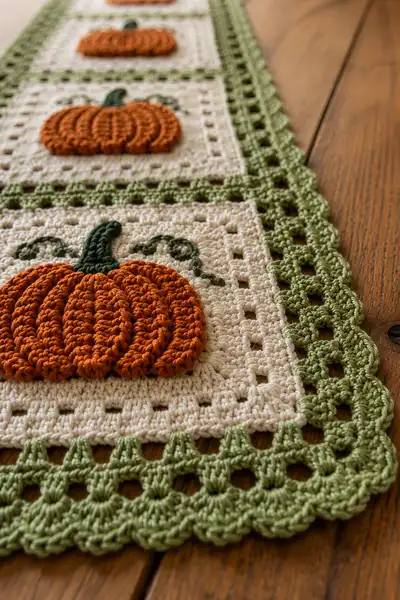
A warm, fall-inspired table runner made from repeating granny-style squares topped with textured 3D pumpkin appliques. Each cream square features a raised orange pumpkin with a dark green stem and curly vines, joined together and finished with a soft sage green scalloped border. Perfect to dress a dining table for autumn and harvest gatherings.
Progress Tracker
0% Complete
— Overview :
Info :
This pattern makes a long runner composed of repeated cream granny squares (4 squares in the sample photos) each topped with a 3D pumpkin applique. The finished sample measures approximately 40in (102cm) long by 9in (23cm) wide when using worsted weight yarn and a 4.0mm hook. Adjust number of squares to change length. Work each square and pumpkin in the round, join squares with slip-stitch or single-crochet join, then work a multi-round scalloped/shell border in sage green.
— Materials & Gauge :
Info :
Gauge is not critical for this decorative runner, but a 4" x 4" (10cm x 10cm) square worked in rounds with cream and a 4.0mm hook should measure approximately 12 sts x 12 rows. Maintain consistent tension between pumpkin and background to avoid puckering.
— Pumpkin Applique (Make 4) :
Round 1 :
6 sc in magic ring (6)
Round 3 :
(1 sc, inc) x 6 (18)
Round 4 :
(2 sc, inc) x 6 (24)
Round 5 :
(3 sc, inc) x 6 (30)
Info :
Change to smaller 3.5mm hook if you prefer a tighter pumpkin for more pronounced ribs. Keep tension slightly firm to ensure raised texture shows well.
Round 6 :
1 sc in each st around (30)
Round 7 :
(4 sc, fpdc puff) x 6 (30)
Info :
FPDC PUFF: Yarn over, insert hook from front to back around post of indicated stitch, yarn over, pull up loop, repeat 3 times (you have 7 loops), yarn over and pull through all loops, ch1 to close puff if desired. The fpdc puff will create a raised rib; work 6 ribs around the pumpkin spaced evenly as shown.
Round 8 :
1 sc in each st around, working around and between puff posts to maintain a neat edge (30)
Round 9 :
(3 sc, fpdc puff) x 6 (30)
Round 10 :
1 sc in each st around (30)
Info :
At this stage you will have two visible concentric rings of puff ribs. The goal is to build up verticalness – alternate rounds of single crochet and puff ribs. Keep stitches consistent so the motif stays circular and slightly flattened (pumpkin shape).
Round 11 :
(2 sc, fpdc puff) x 6 (30)
Round 12 :
1 sc in each st around (30)
Round 13 :
(1 sc, fpdc puff) x 6 (30)
Round 14 :
1 sc in each st around (30)
Info :
This sequence creates 6 vertical ribs. If you want more ribs (8), change the repeat to 5 sc between puff ribs and adjust counts: choose a repeat number that divides 30 evenly.
Round 15 :
Work a round of sc in BLO to create a slight ridge at the outer edge: 1 sc BLO in each st around (30)
Round 16 :
Slip stitch in each st around to create a tidy outer edge, fasten off leaving a 10in (25cm) tail for sewing (30)
Info :
Fasten off but leave a long tail for sewing the pumpkin securely to the square. If you prefer fewer ridges, skip one puff round.
— Pumpkin Stem & Vines (for each pumpkin) :
Round 1 :
Join dark green yarn to center top of pumpkin with sl st, ch1
Round 2 :
Work 6 sc in a small circle to form the base of the stem (6)
Round 3 :
(inc, 1 sc) x 2 (8)
Round 4 :
Turn the piece and work a short tube in back loops only: 1 sc BLO in each st around for 4 rounds to create a slightly curved stem (8)
Info :
Stuff the stem lightly with a small bit of fiberfill if you want it to stand away from the pumpkin; otherwise leave unstuffed for a flatter look.
Round 5 :
Fasten off leaving a long tail for sewing. With remaining dark green, embroider two curly vine tendrils on the cream square after applique: use chain stitch or surface slip stitch to make thin curly lines.
— Granny-Style Cream Square Background (Make 4) :
Round 1 :
Start with cream yarn: ch4, sl st to form ring (counts as ch4 loop). Ch3 (counts as first dc), work 2 dc into ring, ch2, *3 dc into ring, ch2* repeat 3 times, sl st to top of beginning ch3 to close corner (12 dc plus 4 ch-2 corners)
Round 2 :
Slip into next ch-2 space, ch3 (counts as dc), (2 dc, ch2, 3 dc) into same ch-2, *3 dc into next ch-2, (3 dc, ch2, 3 dc) into next ch-2* repeat around, sl st to top of beginning ch3 (each side now has 3-dc cluster blocks)
Round 3 :
Slip into corner ch-2, ch3, (2 dc, ch2, 3 dc) in same corner, *dc into each dc across side until corner, (3 dc, ch2, 3 dc) in next corner* repeat around, sl st to top of starting ch3
Round 4 :
Repeat Round 3, working dc clusters along each side and (3 dc, ch2, 3 dc) into each corner to expand square. This is now a classic granny-square expansion; the square will increase evenly on all sides.
Info :
Work 4 to 6 rounds of traditional granny cluster expansion to reach a small square approximately 4.5-5in. Count the number of 3-dc cluster groups per side to ensure even expansion. Blocking later will square the edges neatly.
Round 5 :
Repeat Round 3 (increase square size) — aim for 4 total cluster rounds (adjust to suit desired pumpkin placement)
Round 6 :
Switch to a round of even dc stitches around for a more solid field: join in any side, ch1, 1 sc in each dc and 1 sc in each ch space around to create a solid canvas row (counts vary depending on your square size; in sample each side has 12-15 sc)
Round 7 :
Work two additional rounds of sc in each stitch around to build a stable background for the applique (counts remain consistent each round)
Info :
Centering pumpkin: identify the center of the square by counting clusters or by folding lightly; place pumpkin approximately centered and slightly above the vertical midline for visual balance if you like. Mark the center with a removable stitch marker.
Round 8 :
Round of sc in BLO for a subtle inner ridge: 1 sc BLO in each st around
Round 9 :
Slip stitch round to smooth edges: sl st into each st around and fasten off leaving a 10in (25cm) tail to sew pumpkin in place
Info :
If you prefer a denser background, substitute rounds 6-7 with hdc or dc rounds to increase thickness and body for the pumpkin applique to sit on top without sinking into the square.
— Applique Placement & Sewing :
Round 1 :
Position pumpkin centered on cream square (use the center marker). Pin in place with sewing pins or hold with thin garment pins at 4 cardinal points.
Round 2 :
Using the long tail from the pumpkin, whipstitch or mattress stitch around the circle, catching the outer loops of the final fpdc puff rounds to anchor the pumpkin. Sew through the cream fabric only every 6-8 stitches to keep the edge neat.
Info :
To accentuate the ribs, sew between the puff ribs at top and bottom of each rib to slightly tuck the pumpkin in towards the square, creating a defined pumpkin profile. Secure tails and weave to the back for a tidy finish.
— Surface Embroidery: Vines & Tendrils :
Round 1 :
With dark green yarn and a small embroidery needle, anchor at one side of the stem and chain-stitch a short tendril (approx 12-16mm long) curling outward and then back to create spiral. Fasten and cut.
Round 2 :
Mirror the tendril on the other side of the stem. Optionally add small leaf stitches (tiny herringbone or lazy daisy) near the ends. Secure and weave ends.
Info :
Practice the surface stitches on a scrap before working the runner. Keep vine curves light and airy so they do not compete with the 3D pumpkin ribs.
— Making All Blocks :
Round 1 :
Repeat the Cream Square and Pumpkin Applique instructions to make the number of blocks desired. The sample uses 4 blocks placed end to end. Make each block identical in size and stitch count for an even join.
Round 2 :
Block count tip: Lay blocks flat and square them by gentle wet blocking if needed. Trim loose threads and ensure corners align before joining.
Info :
Blocking: Lightly dampen each square and pin on a blocking board to a perfect square. Allow to dry fully before joining to reduce puckering and mismatched edges.
— Joining Squares into a Strip :
Round 1 :
Arrange squares in desired order. With sage green yarn and 4.0mm hook, align two adjacent squares right sides up. Slip-stitch through both loops of each corresponding corner and along side by working 1 sc in each outer stitch across; for more decorative join, work single crochet through both layers for 1 row (counts depend on square size).
Round 2 :
When joining multiple squares, join each pair sequentially until a long strip is formed. For a seam that sits flatter, use the mattress stitch with yarn needle and the long tails left earlier.
Info :
Ensure seams are even: pin squares together along entire seam at 1in (2.5cm) intervals, then stitch. Check that pumpkins all face the same direction and are centered before final joining.
Round 3 :
Once joined into a strip, add a round of single crochet all around the joined strip in sage green to create a base for the outer border: 1 sc in each stitch around, work 3 sc in each corner to keep corners square (counts vary).
Info :
If you prefer invisible joins, you can sew blocks with a whipstitch from the back, catching only a few loops to create a nearly seamless front. This method hides join color but requires careful tension control.
— Decorative Inner Border (sage green) :
Round 1 :
With join round as base, ch3 (counts as dc) into same st, dc in each st around to create a neat dc round; work (dc, ch2, dc) in each corner space (counts vary).
Round 2 :
Work a round of dc in FLO to create a subtle inner ridge: 1 dc FLO in each st around, sl st to join
Round 3 :
Work an openwork granny-like row to echo the squares: *ch3, skip 2 sts, sc in next st* repeat around to create a framed grid effect (work counts as decorative spacing)
Info :
This inner decorative row keeps the border lightweight and lets the cream field breathe while framing each block. Alter spacing to match the spacing of your blocks if needed.
— Outer Scalloped Shell Edging (Sage Green) :
Round 1 :
Ch1, sc evenly around entire strip working 3 sc in each corner area and spacing sc to keep the edge flat (counts vary).
Round 2 :
Ch3 (counts as dc), *skip 2 sts, 5 dc shell in next st, skip 2 sts, sl st in next st* repeat around. Adjust shell placement at corners to keep shells centered (this creates the first shell row)
Round 3 :
Work a second shell row offset to the first: sl st to center stitch of shell, ch3, work another 5 dc shell into same center to create a layered scallop effect, sl st between shells to anchor (counts vary)
Round 4 :
Ch1, work 1 sc in each st behind shells to tidy back and slightly pull shells forward; fasten off and weave ends
Info :
For an extra-finished look, block the entire runner flat, gently stretching the scallops so they lie evenly. The layered shells create that pretty scalloped edge seen in the photographs.
Round 5 :
Optional decorative picot round: Join yarn to the back of shell tips and work *sc, ch3, sl st into base of ch3 (picot), sc* between shell tips for a delicate finish
— Variation: Ribbed Pumpkin Accent Increase (Optional) :
Round 1 :
If you want more dramatic ribs, after Round 13 of the pumpkin, add 2 more puff rounds alternating with sc rounds to build height: Round A (fpdc puff x6), Round B (sc), Round C (fpdc puff x6), Round D (sc)
Info :
This will increase pumpkin height and make ribs even more pronounced — good for close-up table displays. Ensure your background square is large enough to visually balance the taller pumpkin.
— Finishing Touches & Weaving In :
Round 1 :
Weave all tails through several nearby stitches on the back of the runner using a yarn needle. Tie nothing; simply weave ends back and forth to secure.
Round 2 :
Check all pumpkins for secure attachment by gently tugging; add a few extra secure tacking stitches around the base if needed. Remove any temporary pins.
Round 3 :
Gently press or block runner to an even rectangle by pinning to a blocking board and misting with water or using steam from a distance. Allow to dry fully.
Info :
Final sanding: If you used cotton yarn and like a soft sheen, a very light steam can relax stitches and even out the fabric. Keep steam a safe distance to avoid flattening puff ribs too much.
— Notes on Scaling and Repeats :
Info :
To lengthen the runner, make additional cream square blocks and join them in the same method. To make the runner narrower or wider, change the number of cluster rounds in the square to adjust block size, then rework borders to suit dimensions.
Info :
Stitch counts: many rounds above are described as repeats around (e.g. 6 puff ribs around a 30-st round). If you alter the size of your initial rounds, keep ribs evenly spaced by dividing the total stitch count by the number of ribs you want to maintain even spacing and rhythm.
Info :
Care instructions: handwash cold, reshape while damp, dry flat. Cotton and cotton blends may soften and relax slightly after washing; re-block if necessary.
Finishing this pumpkin-granny runner is a delight — each block brings a little autumn charm and the textured pumpkins really catch the light and attention. I love how the sage scalloped border frames the cream squares and ties the pumpkins together into a cozy harvest piece. This runner makes a lovely seasonal centerpiece for coffee tables, sideboards, or a long dining table. Enjoy every stitch of this seasonal project and share the cozy results! 🍁🧶