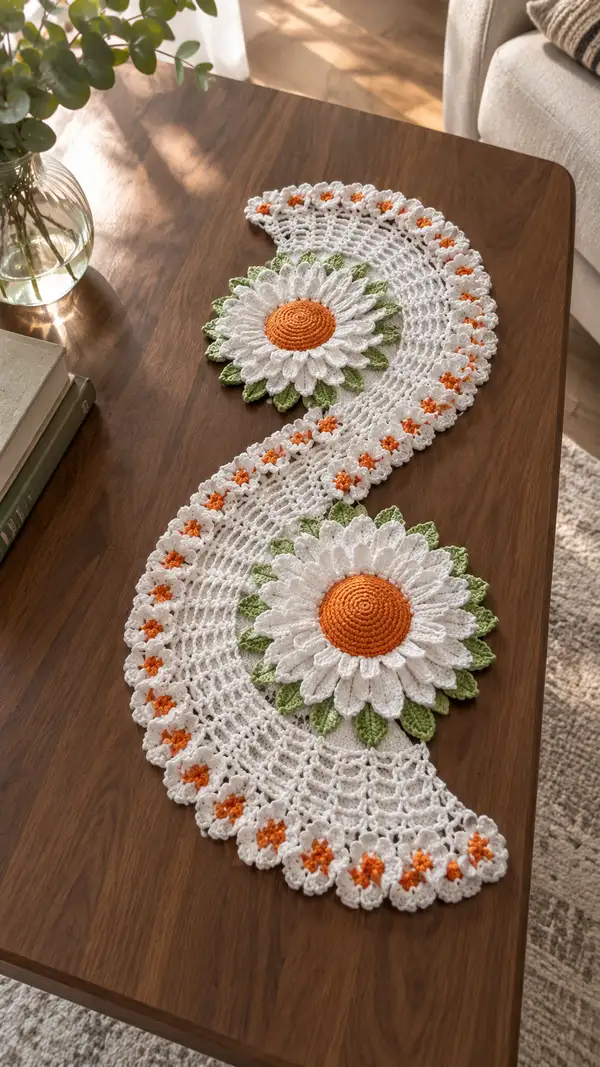
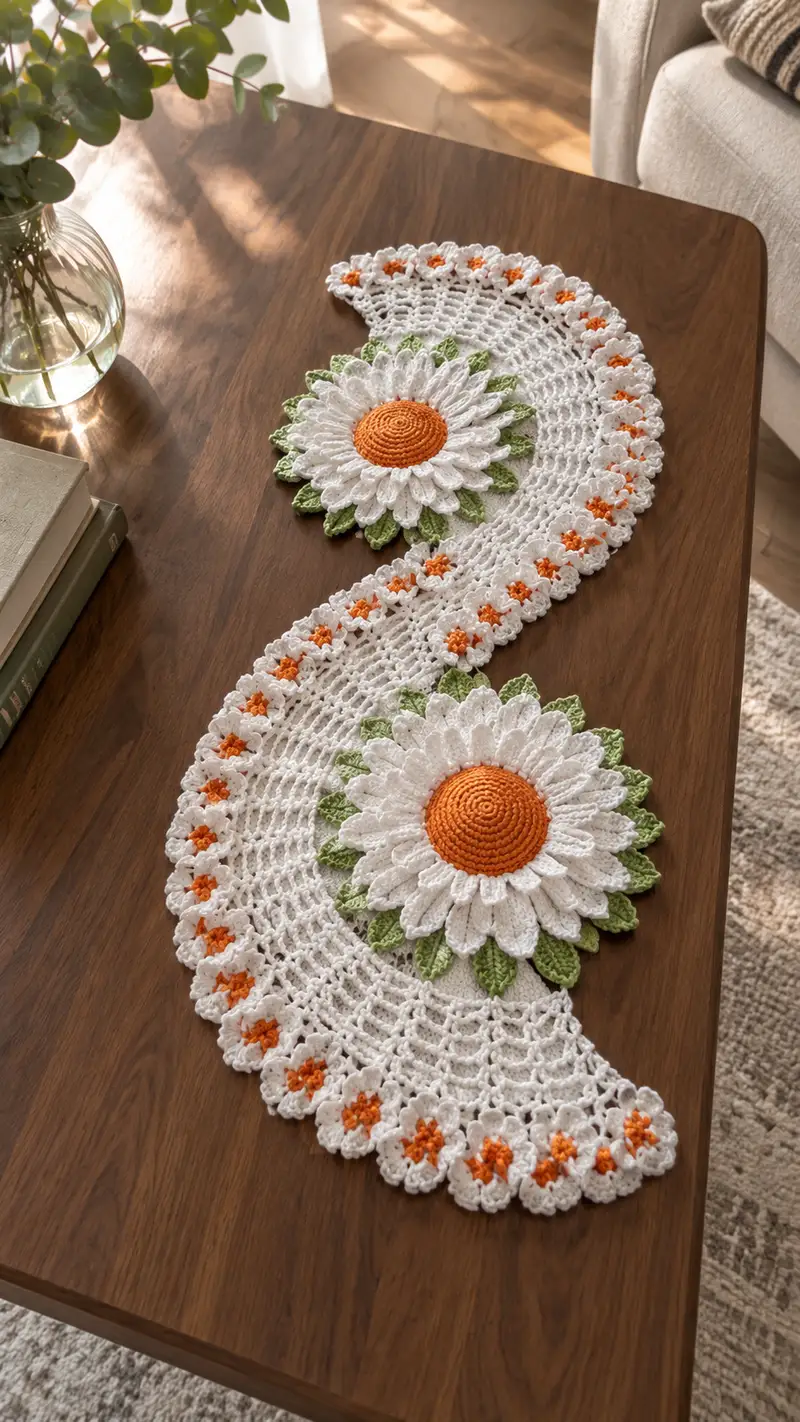
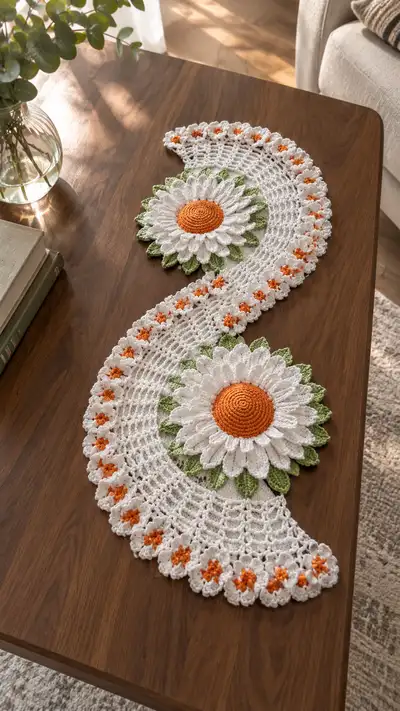
A charming crescent-shaped table runner featuring two large daisy medallions connected by a delicate lacy S-shaped panel. Bright orange centers, crisp white petals and soft green leaves create a fresh springtime look. The pattern includes floral edge motifs along the scalloped border for a finished, handcrafted touch. Works beautifully in cotton thread for a crisp, elegant table accent.
Progress Tracker
0% Complete
— Flower Medallion: Center Disc (make 2) :
Round 1 :
6 sc in magic ring (6)
Round 3 :
(1 sc, inc) x 6 (18)
Round 4 :
(2 sc, inc) x 6 (24)
Round 5 :
(3 sc, inc) x 6 (30)
Info :
Work these rounds tightly with a slightly smaller hook if using size 10 thread; the center should be firm to keep petals proud. Change to orange yarn before Round 1 and work rounds in bright orange.
Round 6 :
(4 sc, inc) x 6 (36)
Round 7 :
(5 sc, inc) x 6 (42)
Round 8 :
(6 sc, inc) x 6 (48)
Round 9 :
(7 sc, inc) x 6 (54)
Round 10 :
(8 sc, inc) x 6 (60)
Info :
At this point you have a flat disc approx. 6.5-7.5 cm across depending on thread. If you prefer a smaller center reduce increases on rounds 9-10 accordingly.
Round 11-14 :
1 sc in each st (60)
Round 15 :
(8 sc, dec) x 6 (54)
Round 16 :
(7 sc, dec) x 6 (48)
Info :
Stuff lightly if you want a slightly domed center—use just a pinch of fiberfill. Work decreases evenly to keep the disk flat but slightly convex.
Round 17 :
(6 sc, dec) x 6 (42)
Round 18 :
1 sc in each st (42)
Round 19 :
Work 1 sc in each st BLO (42)
Info :
Fasten off leaving a long tail for sewing. The BLO round creates a slight ridge for the petal base to attach to, which helps petals sit neatly around the disc.
— Petal Foundation & Attachment (make 2 medallions) :
Round 1 :
Join white yarn with sl st to any st on the BLO ridge of the center disc. Ch 2 (counts as first hdc), *skip 1 st, (hdc, ch 2, hdc) in next st; rep from * around to create 21 base ch-2 loops—adjust to match 21 or 22 loops evenly spaced depending on your final count (21 loops = 42 base sts) (21 loops)
Info :
Count and adjust your loops so petals will be evenly spaced. If your center had 42 stitches, aim for 21 loops, creating a petal every two stitches. Use stitch markers to mark every 5th loop to keep track.
Round 2 :
Work into each ch-2 loop: (sl st, ch 1, 1 sc) to create a small anchor picot base across every loop (21 sc)
Round 3 :
Petal round — In each base anchor: (ch 3, 1 dc, ch 2, 1 tr, ch 2, 1 dc, ch 3) sl st into base anchor to finish petal. Rep around (21 petals)
Info :
This creates a tall layered petal. Keep tension even. Block each petal into shape after finishing a medallion to set the curve and volume—pin each petal outward and mist to hold shape.
Round 4 :
Working behind the petals, join white in the back loops and work 1 sc in each base loop to secure petals and create a neat underside (21 sc)
Round 5 :
Second petal layer (optional depth) — Work between previous petals: *ch 3, (2dc, tr, 2dc) in same space, ch 3, sl st into next space; rep around to create smaller petals staggered between large ones (21 mini petals)
Round 6 :
Fasten off white and weave in ends. Make sure petals are staggered and layered; block again if needed to set shapes.
Info :
If you want fuller daisies, repeat Round 5 with slightly smaller stitch groups (hdc/dc clusters) to build a third layer of micro petals.
— Leaf Layer (green) around each medallion (make 2) :
Info :
Attach green yarn at the base of any petal on the underside to work leaves that tuck under petals. You will make one leaf for every 2 petals (approx 10-11 leaves per medallion).
Round 1 :
Ch 1, sc in same st, ch 6, turn, 1 hdc in 2nd ch from hook, 1 dc, 1 tr, 1 dc, 1 hdc in last ch, sl st back to the base to form the leaf. Rep around to make 11 leaves. (11 leaves)
Round 2 :
Work 1 sc around base and then along leaf edge: in each leaf work (1 sc, 1 sc BLO on the long edge) to create a textured center, sl st to base to finish leaf. Rep around (11 leaves)
Round 3 :
Edge the leaves with a small picot for texture: join green at tip of a leaf, (sc, ch 3, sl st in tip) then sc back along leaf; rep for each leaf. Fasten off and weave tails. (11 picoted leaves)
Info :
Space the leaves evenly so they peek out between petals. Blocking the medallion and leaves together flattens the assembly and aligns the leaves under petals for a neat look.
— Small Edge Flower Motifs (multiple repeat motifs for border) :
Info :
These little flowers make the scalloped edge dotted with orange centers. Make as many as needed to edge the runner—this pattern makes roughly 22-28 small flowers for a runner of the photographed size.
Round 1 :
With orange yarn, make mr, ch 1, 6 sc in mr (6). Pull tight and sl st to first sc. Fasten off orange, change to white.
Round 2 :
Join white in any sc, *(ch 2, 3 dc in same st, ch 2, sl st in next sc)* repeat around to create 6 tiny petal clusters. Sl st to join (6 petals)
Round 3 :
Fasten off leaving long tail for sewing. Block lightly to open petals. Attach small flowers along scalloped edge later using tails and whip stitch.
Info :
Make extra small flowers — they are quick and can be used to lengthen the runner or accent other projects. Attach centers to have the orange exposed within the white petals, as shown in the photo.
— Crescent Mesh Panel (S-shaped connecting panel) :
Info :
This lacy S-panel is worked flat and curved by increasing and decreasing shell groups. Work the panel after both medallions are completed so you can measure spacing. Use stitch markers to map the S-curve: you will create variable repeats for the outer and inner arcs.
Foundation Row :
Ch 120 (or measure desired runner length and adjust foundation to suit two medallion spacing), sc in 2nd ch from hook and across (119 sc) — this is your base row and forms the foundation for the first set of mesh rounds.
Round 1 :
Ch 3 (counts as first dc), *sk 2 sc, (5 dc) in next sc, sk 2 sc, dc in next sc; rep from * across to create repeated shells separated by single dcs. End with dc in last sc. (Shell count will be approx 30-32 depending on foundation chain)
Round 2 :
Ch 3, turn, dc in each dc of shells and dc in the single dcs; in each 5-dc shell work 5 dc to keep shell density even. (maintain shell count from previous round)
Info :
Create the first arc by adding increases: at the points where you want the panel to flare outward, work (2 dc, ch 2, 2 dc) into the single dc separation to widen the fabric. Mark these increase points with stitch markers.
Round 3 :
Repeat Round 2 across, increasing at marked arc points: replace single dc with (2dc, ch2, 2dc) to create extra width. This adds an extra ch-2 space per marked point. (shell count maintained, stitch count increases)
Round 4 :
Work a net row: ch 4 (counts as tr and ch 1), *sk 2 dc, tr in next dc, ch 1; rep across, ending with tr in last dc. This open row makes visible S-curve movement.
Round 5 :
Ch 3, *sk 1 tr, in each ch-1 space work (1 dc, ch 2, 1 dc) to form small shells between tr-posts; rep across. This rebuilds shell motif with airy spaces. (shells approx matching previous shell count)
Info :
To shape the S, you will now work rows with alternating increases on the outer arc and decreases on the inner arc. Count shells per arc and mark inner/outer edges so decreases do not make holes.
Round 6 :
Create 2 rows of steady shell pattern—1 dc in each dc, 5 dc in each shell. (steady texture row)
Round 7 :
Outer arc increase row: where outer arc is marked, work (3 dc, ch 2, 3 dc) in the dc that separates shells; in neutral zones, work (2 dc, ch 2, 2 dc). This expands the outer edge gradually. (shell separation increases)
Round 8 :
Inner arc decrease row: where inner arc is marked, work (1 dc, ch 2, 1 dc) or simply dc to tighten—the goal is to compress this edge gradually. Keep middle bands even with 1 sc/dc rows.
Round 9-14 :
Repeat pattern of 2 flat rows (shell preservation) followed by one shaping row alternating outer increases and inner decreases. After Round 14 you should see a pronounced S-curve formed by the difference in width along the outer and inner edges.
Info :
Keep stitch counts recorded for each row segment (outer arc count vs inner arc count). If you want a longer or deeper S-curve, continue the shaping repeats until satisfied—this runner used 14 shaping rows to achieve the photographed curve.
Round 15 :
Even row: 1 sc in each st across to stabilize after shaping. This also creates a clear base for attaching the small edge flower motifs.
Round 16 :
Work a decorative fan row across: *sk 2 sc, (5 dc) in next sc, sk 2 sc, sl st in next sc; rep across to create fans that form the basis of the scalloped edge. (fan count approx 30)
Info :
At the points where the medallions will attach, leave a gap of 8-12 chains or a small panel so medallion edges will overlap the mesh and can be sewn on securely. Mark attachment spots with stitch markers relative to the medallions you made.
Round 17-22 :
Repeat mesh rounds 5-10 to add height and density to the panel. Work in pattern to keep the flow of shells: 2 steady rows, 1 shaping row. After Round 22 the panel will have good body and hold a curve when blocked. (counts depend on foundation)
Round 23 :
Work 1 sc in each st BLO across to create a subtle ridge at the join line where small flowers will be attached. This helps keep small flower centers sitting proud rather than sinking into mesh.
Info :
If your runner is shorter or longer than the photo, add or remove sets of repeating shaping rounds in groups of 3 (two body rows + 1 shaping row) to keep proportions consistent.
— Scalloped Outer Edge & Small Flower Attachment :
Round 1 :
With white yarn and while holding the panel flat, pick up sts along the outermost fan-row: *in fan base work (sl st, ch 3, 5 dc, ch 3, sl st) to form full scallop; rep across outer edge (scallop count matches fan count, about 30)
Round 2 :
Edge each scallop with picots: *join at scallop center, (sc, ch 3, sl st in ch 3) then sc across rim; rep across to create crisp points. This produces the visible rounded scallops shown in the photo.
Round 3 :
Attach small flowers: using long tails from small flower motifs, sew each flower into the center of alternating scallops. Space them evenly—in the photographed runner every scallop contains a small flower at the wider points; use stitch markers to space them as you go.
Info :
Sew each small flower by matching its base round to the scallop valley; weave the tail through the underside with several passes to secure it firmly. Tidy knots are hidden under petals.
Round 4 :
After all small flowers are attached, work a finishing sc round across the outer edge to anchor petals and motifs: 1 sc in each st around the outer edge and across the seam where you sewed flowers. Fasten off and weave ends. (complete outer sc round)
— Joining Medallions to Mesh Panel :
Info :
Position each finished medallion on the mesh where marked earlier. The petals should overlap the mesh slightly so the green leaf ring sits against the mesh body and the petals spread over the S-curve for a natural look.
Step :
Pin medallion in place, adjusting the inner and outer edges so the medallion looks centered relative to the mesh curve. Use pins to hold both rear leaves and front petals in proper position.
Step :
Sew medallion to mesh by whip stitching through the medallion underside (leaf base) and the mesh surface. Make stitches every 3-4 mm around the attachment circle to ensure a flat, secure join. Hide knots under leaves.
Info :
Work slowly and check symmetry frequently. If a petal flips awkwardly after sewing, release a few stitches, adjust the petal, and resew for a natural arrangement.
— Inner Edge & Finishing Rounds :
Round 1 :
For the inner curve of the S, tidy the inside edge with 1 sc in each st to give a clean margin and prevent curling. Work evenly—if edge wants to pucker reduce tension or add small ch-spaces every 10 sts to relieve strain.
Round 2 :
Decorative inner picot row: *sc 3, (ch 3, sl st in 1st ch) repeat along inner edge to create a delicate picot scallop which echoes the outer scallop. Fasten off and weave ends.
Info :
Weave in all tails on the reverse side using the tapestry needle. Block the entire runner flat—pin outer scallops, fan points and petals so they sit correctly. Mist or use steam to block, leaving to dry fully.
Round 3 :
Final inspection: check for loose motifs, resew any small flowers needing extra secure stitches, tack down leaf tips discreetly for a tidy silhouette.
Info :
Trim any visible short tails and re-check symmetry after blocking. If petals still curl, a small amount of starch sprayed and shaped will help keep them permanently shaped.
Completing this crescent daisy table runner feels so satisfying — the layered petals and green leaves bring a garden-fresh energy to any table. Each delicate scallop and tiny orange-centered flower gives the runner a refined, handmade charm. Blocking and finishing really make the lace sing. 🧶🌼 Enjoy using this piece to brighten your home or to gift as a thoughtful, handmade accent. Happy stitching! ✨