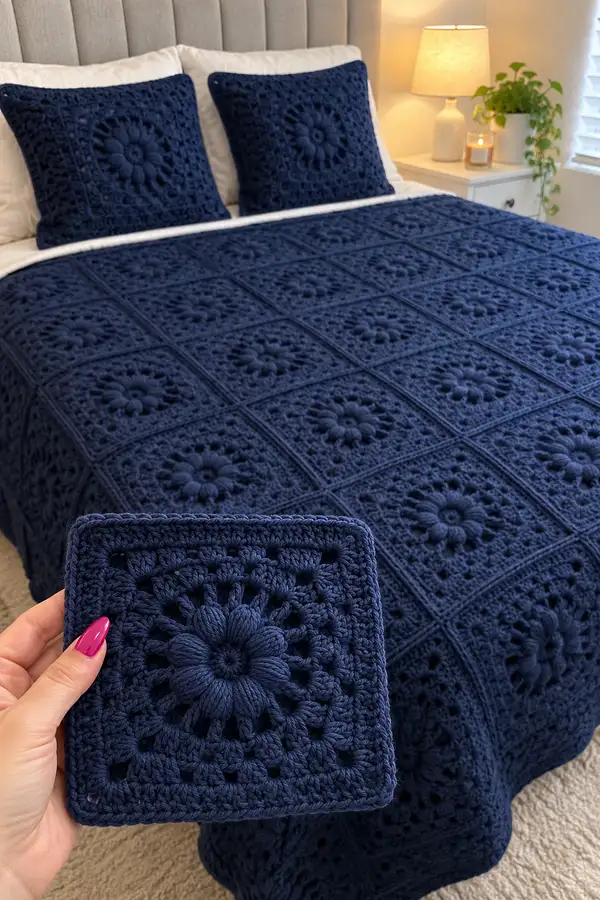
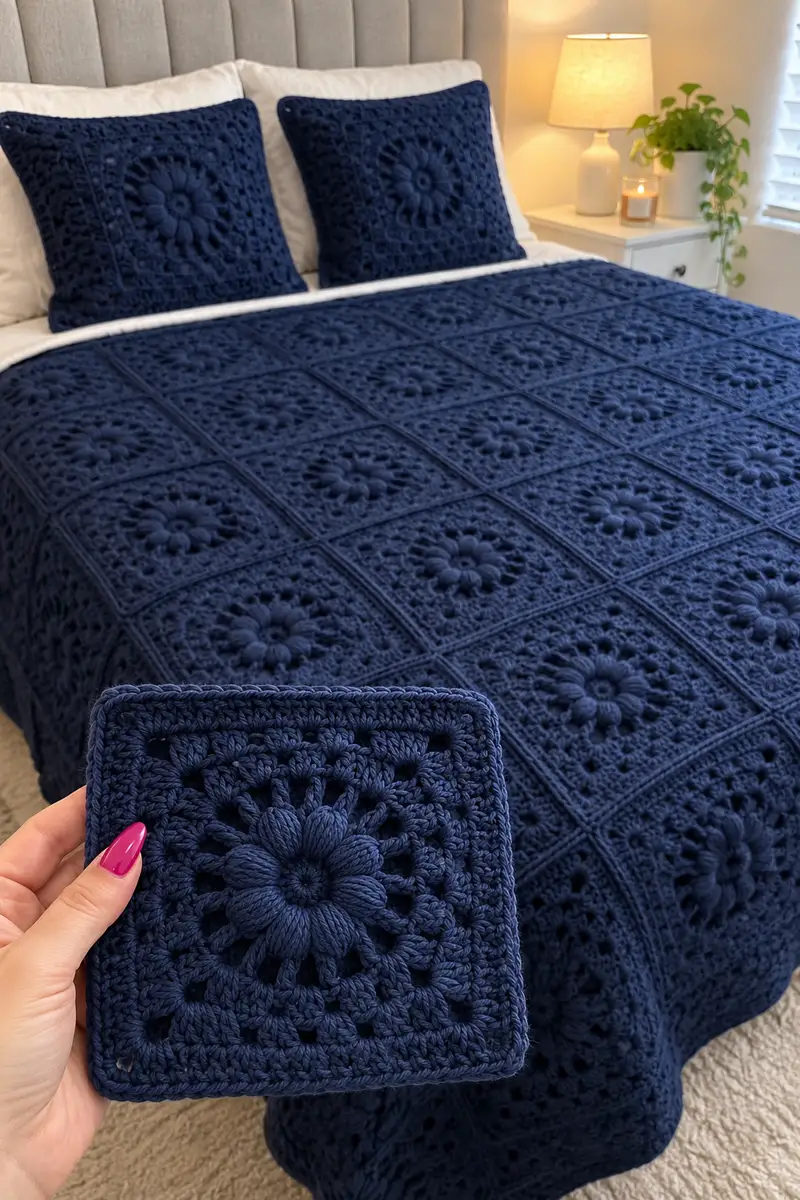
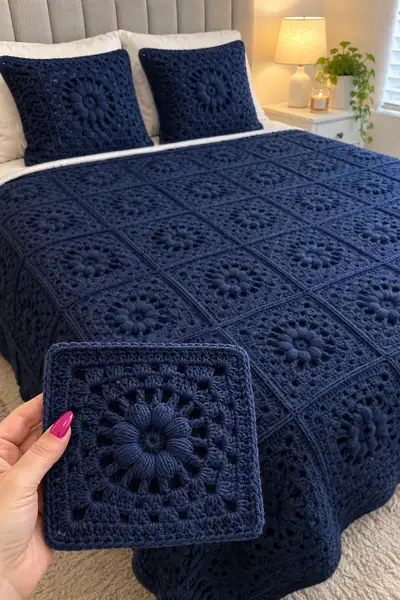
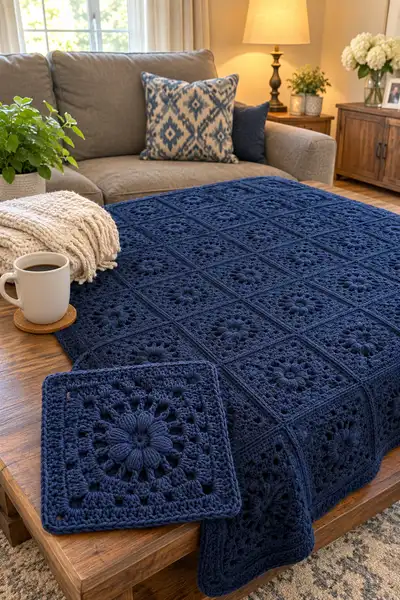
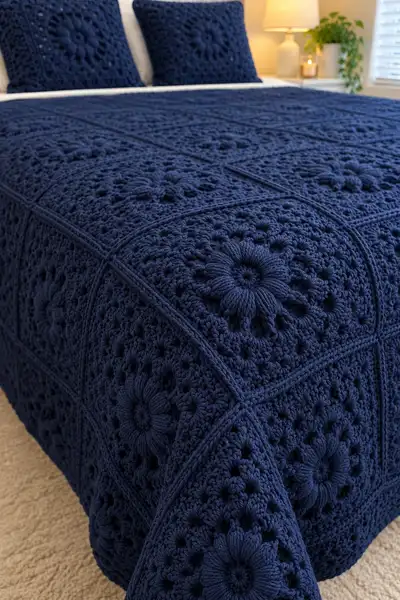
A luxurious deep navy bedspread made from textured puff-flower granny squares. Each square features a raised puff-petal flower center surrounded by classic granny rounds to form a neat square. The finished spread in the photos is richly textured, hotel-style, and perfect for a cozy, sophisticated bedroom.
Progress Tracker
0% Complete
— Motif (Puff Flower Granny Square) :
Gauge and finished square :
Approximate gauge: One completed square measures about 10 x 10 inches (25 x 25 cm) when worked tightly using bulky yarn and a 6.5 mm hook. Gauge may vary; block each square to match final layout.
Special stitch - Puff (standard 5-loop puff) :
Yarn over, insert hook into indicated stitch, yarn over and pull up a loop; repeat this sequence 5 times in the same stitch (you will have 11 loops on hook). Yarn over, pull through all loops, ch 1 to close the puff (ch 1 does not count as a stitch) unless otherwise specified. Adjust to 4 loops for smaller yarn if preferred; maintain consistency across the project.
Info :
Work each motif in the round without fastening off unless instructed. Keep tension even, and use stitch markers for round starts. Block squares to ensure evenness before joining.
Round 1 :
Work a magic ring. Ch 3 (counts as dc), 11 dc into ring. Pull ring tight and join with sl st to top of ch 3. (12)
Info :
This small tight round forms the base for the puff petals. Keep the ring snug so the center is neat.
Round 2 :
Ch 1. Work 12 puff stitches around the ring, placing 1 puff into each dc from Round 1. After the 12th puff, join with sl st into the first puff top. (12 puffs)
Info :
Standard puff: (yo, insert, pull up loop) x5 then yo and pull through all loops, ch1 to close. The ch1 at the end separates petals and gives definition.
Round 3 :
Ch 1, sl st into the top of the first puff to position. *Sc in top of next puff, ch 3; rep from * around, sc in top of last puff, sl st to first sc to join. (12 sc, 12 ch-3 sps)
Info :
The ch-3 spaces will act as expansion points and later become places to stitch clusters and corners for the square shaping.
Round 4 :
Slip into first ch-3 sp. Ch 3 (counts as dc), 2 dc in same ch-3 sp, *ch 1, 3 dc in next ch-3 sp; rep from * around until you have worked 12 groups of 3 dc separated by ch1. Join with sl st to top of ch 3. (36 dc, 12 ch-1 sps)
Round 5 :
Ch 1. Sc into same st as join, *ch 3, skip next 2 dc, sc into center dc of next 3-dc group; rep from * around to create 12 ch-3 loops and 12 sc. Join with sl st to first sc. (12 sc, 12 ch-3 sps)
Info :
Round 5 sets up the first ring of openwork that helps the square begin to expand. Keep these chain loops even so subsequent rounds sit flat.
Round 6 :
Working into the ch-3 sps from previous round: Join with ch 3 in first ch-3 sp, 2 dc in same ch-3 sp, *ch 1, 3 dc in next ch-3 sp; rep from * around. Join with sl st to top of ch 3. (36 dc, 12 ch-1 sps)
Round 7 :
Ch 1, sc in same st, *(ch 3, sc) into ch-1 space between 3-dc groups, then sc in center dc of next 3-dc group; rep from * around. Join with sl st to first sc. This builds a ring of small arches around the flower. (12 sc, 12 ch-3 sps)
Info :
At the end of Round 7 the square is still circular; the next rounds begin forming the corners by increasing at four evenly spaced points (every 3rd ch-3 arch).
Round 8 :
Slip into first ch-3 sp. Ch 3 (counts as dc), 2 dc in same sp, *dc in next ch-3 sp, (3 dc, ch 2, 3 dc) in next ch-3 sp for corner, dc in next ch-3 sp; rep from * twice more so you have four corners. After final rep, join with sl st to top of ch 3. Stitch count varies since corners add ch-2 sps (approx 48 dc, 4 ch-2 corner sps).
Info :
This round makes the first clear corner points; count your corners - there must be four. If you miscount you will not get a square later on.
Round 9 :
Ch 1, sc into same st, *ch 3, sc in each dc across to next corner ch-2 sp, ch 3, sc into corner ch-2 sp, ch 3, sc in each dc across; rep from * around. You will form larger arches between corners and small ch-3 spaces that will accept next-round clusters. Keep stitch count even around each side.
Round 10 :
Slip into first large ch-3 arch. Ch 3, 2 dc in same arch, dc in each of the next available arches across to next corner, (3 dc, ch 2, 3 dc) into corner ch-2 sp; rep across each side. Join with sl st. (This round adds rows of dc and repeats corner increases; expect about 72 dc divided across sides plus corner groups.)
Info :
Work evenly across each side so that the number of dcs between corners matches on all four sides. If a side looks shorter, adjust by adding or subtracting a dc pair in the next ch-1 space to keep symmetry.
Round 11 :
Ch 1. Sc into same st, *ch 3, skip 2 dc, sc into next dc across the side across to corner, then in the corner ch-2 sp work: (sc, ch 3, sc) to create a small corner ridge; rep from * around and join. This builds small arches to accept the next expansion round.
Round 12 :
Join with ch 3 into first ch-3 corner sp: work (3 dc, ch 2, 3 dc) into each corner ch-3 from previous round. Between corners, work 3 dc clusters into each ch-3 arch, ch 1 between cluster groups as needed to keep sides even. Join. (Square shape is now well established; stitch counts will be approx 96 dc including corner groups.)
Info :
If your square is not yet flat, check that corner sets are centered and that you have added ch-1 or ch-2 spaces where necessary to maintain an even tension across sides. Blocking will also help even out small differences.
Round 13 :
Ch 1. Sc into same st. Work in pattern along each side: *(2 dc, ch 1, 2 dc) in each mid-side ch-1 sp to create shell clusters providing fullness across the side; in each corner work (2 dc, ch 2, 2 dc). Rep on all sides and join with sl st. (This builds a defined square edge; count shells so there is equal number on every side.)
Round 14 :
Ch 1. Working around the square evenly, sc in each st across side and 2 sc in each ch-1 between shells, placing (sc, ch 1, sc) in corner ch-2 sps to keep corners flexible. Join. (This evens the stitch count around the square edge so it reads as a square rather than a scallop.)
Info :
Many patterns use this stabilizing round to create a neat frame for later joining and border work. Make sure each side has the same number of sc stitches; this will make joining simpler.
Round 15 :
To create a defined border ridge that shows in the final bedspread, work one round of sc in BLO: Ch 1, sc in each st BLO around, placing 2 sc in each corner (sc, ch 1, sc) to keep corners square. Join and fasten off, leaving a 12-14 inch tail for sewing if you prefer whip-join. (Stitch count equals the number of sc around; this creates a crisp framed edge.)
Round 16 :
Optional final round for square cleanup: With right side facing, join yarn at any side, ch 1, sc evenly around working 3 sc into each corner ch-1 or ch-2 to round corners, join with sl st and fasten off. Weave in ends and block square to 10" if needed.
Info :
Make a test square and block to the target measurement, then adjust hook size if necessary to ensure all squares will be same size when worked. This motif as written is 16 rounds long and gives a richly textured 10" square.
— Make Multiple Squares (Layout) :
Info :
Layout plan for a queen-size bed shown in photos: 7 x 7 squares = 49 squares. Adjust grid for throw or twin by reducing columns/rows. Make all squares using the same tension and block them flat to equal dimensions before joining.
Step :
Make 49 identical squares, following Rounds 1-16. Keep tails long enough for joining if you prefer sewing method; otherwise fasten off and weave in ends for join-as-you-go (JAYG).
Info :
Number your squares as you finish them and lay them on the floor or bed to plan the final layout. Flip some squares if you want the puff flowers to all face the same direction relative to the bed. Consistency of puff direction gives a professional look.
— Joining Squares (Join-As-You-Go recommended) :
Info :
Join as you go gives a seamless join and saves time. You will join squares in rows of 7, then join the rows together. Alternatively, whip stitch through the BLO ridges for a raised join as seen in the photos.
Round 1 (JAYG join) :
Work each square until final round before Round 15. For the last round of the square you are adding to the assembled piece, join in the corner and work the final sc rounds while slip-stitching into corresponding scs of the neighbor square at each seam. For joining each side: when reaching a side edge, instead of working sc in the corner ch-2, sl st into the neighbor's corresponding stitch to join. Continue around joining as you meet edges. Use same color yarn for join for a subtle ridge. (This step does not change the square stitch count; it replaces some sc with sl st joins.)
Info :
When joining, keep tension consistent so join is as flat as the rest of the square. Work slowly along each seam ensuring that corner points align exactly.
Round 2 (Row joining) :
Join squares left to right forming rows of 7. Once 7 squares are joined into a row, join rows together by placing row B on top of Row A and seam row B to exposed edges of row A with sl st or whip stitch through the BLO ridges for a raised look. Continue until all 7 rows are joined. (Final bedspread will be 7 squares wide by 7 squares long.)
Info :
Blocking rows flat before joining rows will make seam alignment easier. Use pins to align square corners exactly and work joins with the right sides facing each other if doing whip stitch; for JAYG you will be working with right sides facing.
Round 3 (Seam reinforcement) :
Once all squares are joined, turn whole piece to wrong side and use mattress stitch or small whip stitches through back loops only along each seam to reinforce the join. This prevents seam stretching over time. Weave in reinforcement yarn tails securely. (No change in visible stitch count.)
Info :
If you prefer a raised ridge along joins like the reference photos, use a slip-stitch ridge worked in the joining color across the seam on the right side after all the squares are assembled. Work a neat sl st into each stitch of the seam; keep tension slightly firmer to create a defined ridge.
— Border and Edging (Frame the bedspread) :
Info :
After all squares are joined into the full bedspread, work a multi-round border around the entire piece to create a finished edge. The border both stabilizes and adds weight so the spread drapes nicely.
Border Round 1 :
With right side facing, join yarn anywhere along a side. Ch 1, sc evenly around the entire perimeter, working 3 sc in each corner (sc, ch 1, sc) to keep corners square. Join with sl st to first sc. (This creates a neat edge and evens the stitch count for the next rounds.)
Border Round 2 :
Ch 1, sc in each st around in BLO. Work 3 sc in each corner ch-1. Join with sl st. (This BLO round creates a subtle ridge line that is visible in the reference spreads.)
Info :
BLO rounds make a subtle ledge that visually separates squares from the border. It is also where many people align the visible seam-ridge so the bedspread reads uniformly.
Border Round 3 :
Ch 3 (counts as dc), work (dc, ch 1, dc) into each third sc to create small shell spaces across each side, and work (dc, ch 2, dc) in each corner to keep corners flexible. Join with sl st. (This begins the ornate outer frame.)
Border Round 4 :
Ch 1, sc in each stitch and into ch 1 sps, placing 3 sc into each corner ch-2 sp. Join and fasten off if desired. (This evens stitches and prepares for additional decorative ridging.)
Border Round 5 :
Optional puff-ridge round for texture: Join yarn and work a round of puff stitches spaced across each side: *sc 4, puff in next sc; rep across*; in corners work (sc 2, puff, sc 2). Join and weave in ends. This round adds surface texture that echoes the puff center motifs.
Border Round 6-10 :
Work 4-5 rounds of sc in the round to build weight for the border, working 3 sc into corners each round. Keep tension slightly firmer than the body so the border stabilizes the whole spread. After the final round, fasten off and weave in ends. (Each round will have the same stitch count as previous sc round.)
Info :
For a dramatic border, add two more rounds of shell stitch (3 dc in same st, skip 2, sc) alternating with sc rounds. This produces a framed, tailored look similar to the photos.
— Pillow Shams (Make 2) :
Info :
Two matching pillow shams are pictured. Each sham uses one square as the front panel, combined with a backing panel and a simple flap or zipper closure. You can also make full-square envelope shams by making two identical squares and seaming three sides.
Sham Front - Round 1-16 :
Make 2 squares following the Motif rounds 1-16 exactly. These will be the front decorative panels. Block and press to match bedspread squares.
Sham Back (Option A - Envelope) :
Make two 10" squares in sc or rows that will form a back with overlap. For each sham, make one square the same as front, and a second rectangular panel of 10" x 16" (work rows of sc until the panel measures 16"). Edge with 1 round of sc and join to create envelope backing with a 6" overlap for closure.
Sham Back (Option B - Single Zip) :
Make a full backing square and add a zipper during assembly. Sew zipper into the seam leaving ends finished with a short seam for a professional look.
Info :
Pillow shams will read large and textured because of the puff center; use a slightly overstuffed insert or a firm pillow form to show the texture well.
— Surface Crochet & Final Ridging :
Round 1 :
Optional raised ridge: With right side facing, use yarn and a 6.5 mm hook to work a single round of sc along seam lines to emphasize the square borders. Work sc in each stitch along seams and work sl st across seam join points for a continuous rope like ridge. Join and fasten off. (This does not alter overall bedspread size.)
Round 2 :
If desired, embroider a thin chain or surface slip-stitch line centered across seams to give the look in the photos where joins are accentuated. Maintain even tension for a clean look.
Info :
Surface crochet takes patience; test on a spare square before working across the whole bedspread. Keep your hands relaxed to maintain an even ridge height.
— Final Finishing and Blocking :
Info :
After all joins and border rounds are complete, soak the completed bedspread in lukewarm water with a small amount of wool wash if the yarn permits. Gently squeeze out water (do not wring), lay flat on blocking mats and pin the edges square. Allow to dry fully before use. Blocking evens stitches and settles the puff petals into a uniform profile.
Care :
Hand wash or gentle machine wash in cold water on delicate cycle if the yarn label allows. Lay flat to dry to maintain shape. Use steam lightly to freshen texture but test a scrap first.
Info :
Weave in all ends at least 2-3 inches into wrong side of squares and trim. Inspect seams and reinforce any loose joins with mattress stitch from the wrong side.
— Notes and Variations :
Info :
You can make smaller throws by reducing the number of squares (for example a 4x4 = 16 square throw). Use the same motif but adjust the number of squares and yarn quantities. Try switching to worsted yarn and a 5.5 mm hook to reduce finished square size and overall yardage.
Variation - Two-Color Flowers :
Work Rounds 1-2 in contrast color for the petal center, change to main color at Round 3 when you begin framing the petals. Carry yarn inside carefully or fasten off and weave ends; color change will create a highlighted flower center.
Info :
Keep a sample square and measure after blocking to calculate how many squares you need for your specific bed size. Adjust border rounds to alter final dimensions if needed.
Completing this deep navy puff-flower granny bedspread is such a rewarding experience—each square stacks into a beautiful, textured whole. The puff petals add a touch of luxury and the modular construction makes the project manageable in sections. Whether you keep it for your own bed or gift it to someone special, this piece will become a treasured handmade accent. 🧶✨ Enjoy every stitch and the calm satisfaction of watching the blanket grow! 💤