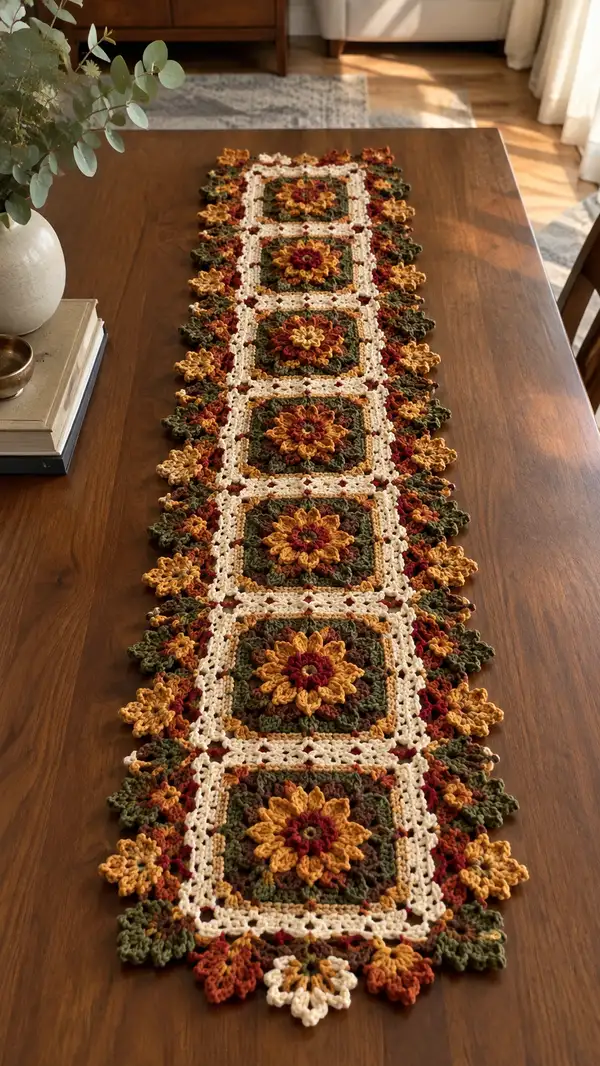
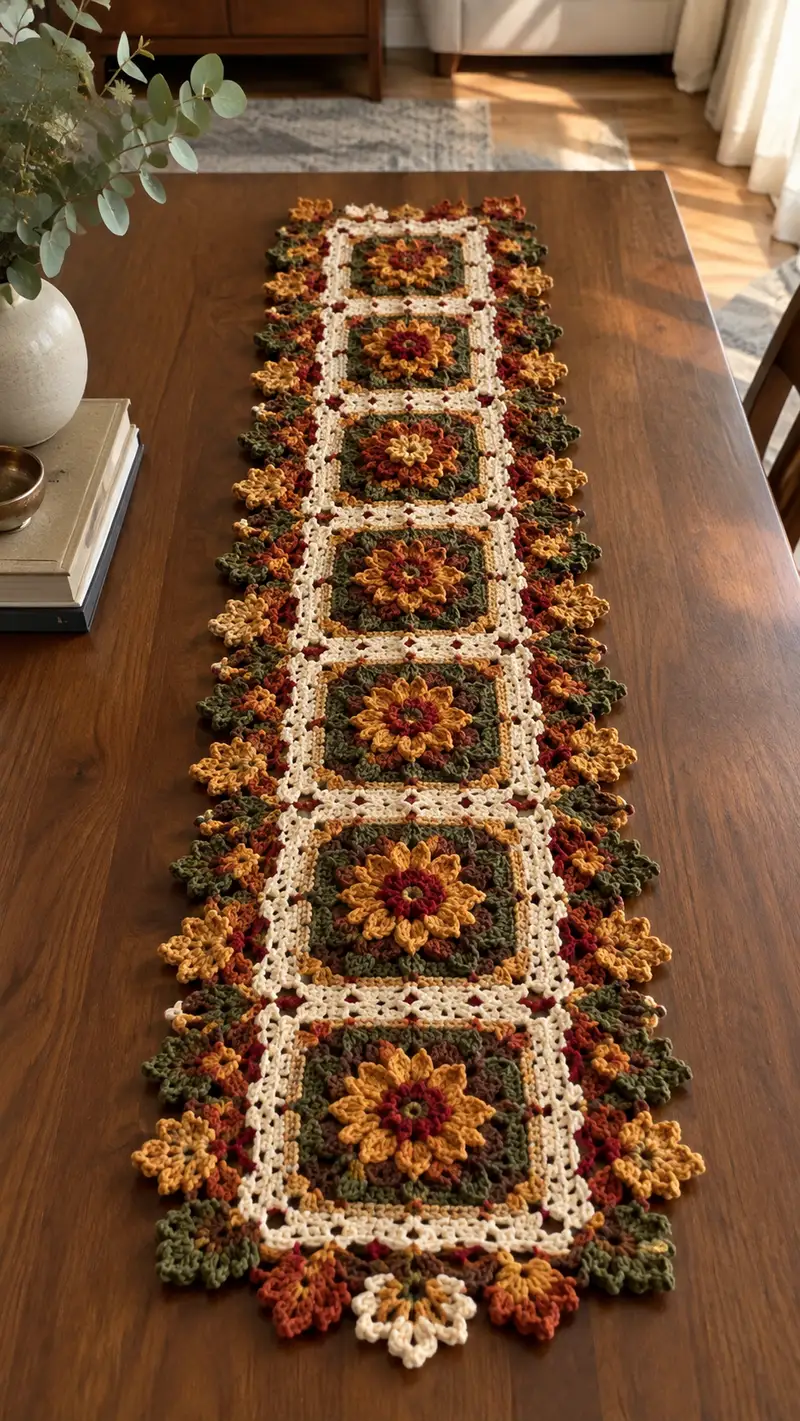
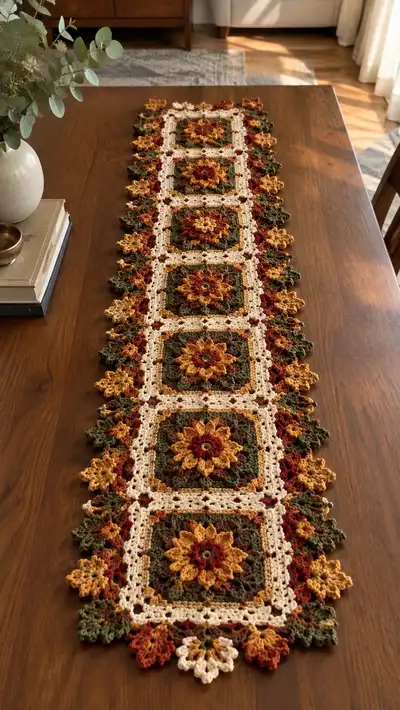
A warm, autumn-inspired table runner featuring layered sunflower motifs joined into a long rectangular runner. Rich mustard, olive, rust, burgundy and cream yarns create dimensional petals and a lacy square frame. The design uses 3D petals, textured clusters and a delicate cream lattice to highlight the floral centers—perfect for seasonal decor or a cozy everyday centerpiece.
Progress Tracker
0% Complete
— Notes & Gauge :
Info :
Gauge is not critical for table runner widths since the pattern is modular, but for reference: 16 sts x 10 rows = 10 cm in sc in worsted cotton using 4.0mm hook. Make one motif and block to measure desired size. The sample runner uses 6 sunflower squares joined longways resulting in roughly 12-14 inches wide by approximately 60 inches long. Adjust number of squares to length desired.
Info :
Color order used in photos: Center burgundy, small inner petal rust, main petals mustard, petal base/leaf olive, square frame cream, with burgundy connector pops. You can substitute any analog or contrasting palette.
— Sunflower Center & Layered Petals (Make 1 motif = one square center) :
Round 1 :
6 sc in magic ring (6)
Round 3 :
(1 sc, 1 inc) x 6 (18)
Round 4 :
(2 sc, 1 inc) x 6 (24)
Round 5 :
(3 sc, 1 inc) x 6 (30)
Info :
Change to burgundy for the very center before Round 6 if you'd like a contrasting center. Fasten off a tiny tail and weave in later if you prefer to stitch center onto the finished motif.
Round 6 :
(4 sc, 1 inc) x 6 (36)
Round 7 :
(5 sc, 1 inc) x 6 (42)
Round 8 :
(6 sc, 1 inc) x 6 (48)
Round 9-10 :
1 sc in each st around (48)
Info :
Rounds 1–10 form the compact center. The fabric at this stage is circular. Place a stitch marker to note the first stitch of Round 9. Keep tension slightly firm to support the layered petals that will be added.
Round 11 :
Petal anchor round: *3 sc, skip 1 st, sc in next st*; rep across to end (48)
Info :
Round 11 creates 12 anchor points (48 stitches with pattern). Each petal will be worked into the skipped stitch spaces or the stitch following them—this keeps petal spacing even (approximately every 4th stitch).
Round 12 :
Flower petal round (worked in mustard/gold): *[ch 2, 7 dc cluster into next st, ch 2, sl st into same st], sc into next 3 sc*; rep 12 times across (48 anchors maintained)
Info :
To make the 7 dc cluster: yarn over, insert hook, pull up loop, yarn over, pull through two, repeat so that 7 partial dcs are on hook, yarn over and pull through all loops to close into a puff/cluster. Alternatively work 7 dc together as a cluster or a puff stitch (wrap yarn around hook twice for extra fullness if desired). Keep clusters snug so petals stand upright.
Round 13 :
Secure petal round with 1 sc in each sc around (48)
Round 14 :
Transition round (change to rust/copper): *2 sc, inc* x12 (60)
Info :
Round 14 increases the round to create a little ring behind petals and gives the next larger ring to hold a second petal layer. Keep increases evenly spaced—this is (2 sc, inc) repeated 12 times so math: 48 + 12 = 60 stitches.
Round 15 :
1 sc in each st around (60)
Round 16 :
Second petal anchor: *4 sc, skip 1 st, sc in next st*; rep across (60)
Round 17 :
Second petal layer in mustard: *[ch 2, 9 dc cluster into next st, ch 2, sl st into same st], sc into next 4 sc*; rep 12 times (anchors maintain 60 positions)
Info :
The second petal layer is slightly larger (9-dc cluster) so it sits behind the first petal, producing a layered sunflower effect. Use the rust accent on Round 14 to create contrast between layers. Keep petal clusters consistent by pulling loops to same height before completing cluster.
Round 18 :
1 sc around securing petal bases (60)
Round 19 :
Transition round (change to olive for leafy base): *3 sc, inc* x12 (72)
Round 20-21 :
1 sc in each st around (72)
Info :
Rounds 19-21 build a stable circular foundation behind the petals that will be squared off into a granny-style square. The increase pattern (3 sc, inc) x12 raises the round count correctly: 60 + 12 = 72.
Round 22 :
Begin gentle shaping for square: *6 sc, inc* x12 (84)
Round 23-24 :
1 sc in each st (84)
Round 25 :
Form corner marker points in olive: *8 sc, (ch 3, skip next 2 sts, sc in next 8 sc) repeat four times across the round* (84)
Info :
Round 25 creates the first small ch-3 corner spaces that begin to square off the motif. The count remains stable at 84 stitches because ch-spaces do not add stitches to the sc count; they create space for the next round to work into corners.
Round 26 :
Work into ch-3 corner spaces to square: *sc in next 8 sc, (dc, ch 3, dc) in ch-3 sp, sc in next 8 sc, rep 4 times across* (84)
Round 27-28 :
1 sc around in olive to tidy edges (84)
Info :
At this point the central flower has been squared to a base that measures about the diameter of the finished square's center. Change to cream for a contrasting frame in the next rounds.
— Square Frame & Lattice (Continue one motif) :
Round 29 :
Change to cream yarn. Round of tidy sc: 1 sc in each st around (84)
Round 30 :
*sc in next 6 sc, ch 2, skip 2 sc*; rep around, placing ch-2 spaces evenly (84)
Info :
Round 30 creates the first lacy chain spaces that become part of the lattice between squares. Count remains 84 sc positions; chain spaces add openwork but do not change sc counts.
Round 31 :
Work cluster shell round in cream: *[dc, ch1, 2 dc] into next ch-2 sp, 1 sc in next 6 sc, rep around* (84)
Round 32 :
Even sc round: 1 sc in each st around (84)
Round 33 :
Form corner expansion: *sc in next 12 sc, (dc, ch 3, dc) in corner ch-3 sp, sc in next 12 sc, rep 4 times* (84)
Info :
Round 33 positions the four corners that will later align with other squares. If you plan to join squares by whipstitch or join-as-you-go, note these corner ch-3 spaces as alignment points for seaming the lattice.
Round 34-35 :
1 sc around (84)
Info :
Make as many of these sunflower-centered square motifs as you need for the runner length. The sample runner uses 6 motifs. Block each square lightly to flatten petal clusters and square the edges before joining.
— Make Additional Motifs :
Round 36 :
Repeat Rounds 1–35 for each additional motif; make 6 motifs for sample runner (each motif finished to same stitch count: 84 sc edge points)
Info :
Tip: Work motifs in batches of two to three to keep color-changing efficient. Keep a small bobbin or short tail for each color transition to weave in later. Block motifs now for consistent joining.
— Joining Motifs into Runner (Join-as-you-go method or sew) :
Round 37 :
Position two motifs with right sides together along one full side (align corner ch-3 spaces). Using cream yarn or matching lattice color, join with sl st through corresponding loops or use whip stitch through back loops only to create a flat seam. Join motifs in a row until you have the desired number; for the sample make 6 joined motifs (5 joins between 6 motifs).
Info :
If using join-as-you-go (JAYG), join during the final round of the last motif: when you reach a side that meets a completed motif, replace that side's dc clusters or sc with sl sts into the existing motif's corresponding sts as you work. For neat seams, align corners precisely; place pins at corners and midpoints before final seaming.
Round 38 :
After linear join is complete, work a unifying lattice row along the long seams in cream: with right side up, work 1 sc in each st along seam to cover joins and even tension (this is worked across the seam; stitch count will vary by seam length; work evenly without adding or subtracting at ends to match adjoining motif counts)
Info :
The lattice row conceals join stitches and creates a uniform visual rhythm between motifs. Add small burgundy pop stitches where four-corner spaces meet to mimic the photo: use burgundy to weave tiny 'x' stitches at 4-corner intersections.
— Inner Border & Lattice Detailing :
Round 39 :
With cream yarn, *dc in next 6 sc, ch 2, skip 2 sc*; repeat across entire runner edge to create a continuous lattice effect. Where you hit the corners, work (dc, ch 3, dc) into corner ch-3 spaces to turn.
Round 40 :
1 sc in each dc and ch-2 space around row to tidy lattice (counts will follow existing stitch positions; work 1 sc in each st and 1 sc in each ch-2 space)
Info :
Add burgundy tiny bobbles: where two squares meet at interior cross points, make small 3-dc cluster (burgundy) secured to the cream lattice—this adds the tiny red dots visible in the runner photo.
Round 41 :
Work decorative picot edging along the inner border: *sc in next 4 sc, (sc, ch 3, sl st in same sc to make picot)*; rep along both long sides of runner to prepare for outer floral edging (counts follow existing edge stitches)
Info :
This picot row is a guide line to stitch the outer floral clusters so they sit evenly around the edge. Keep picots evenly spaced; blocking will help make them uniform.
— Outer Floral Edge (Leafy & Petal Clusters) :
Round 42 :
Change to olive green. Around entire long side edge, work alternating leaf clusters: *[sc, ch1, 5 dc picot leaf in next st, ch1, sc]* across the edge and into corners; repeat symmetrically on opposite side.
Info :
Each 'leaf cluster' is worked into the picot or edge sc created in Round 41. The cluster should be slightly raised—work 5 dc close together into one stitch to form the leaf petal. Keep clusters aligned with central square centers for a balanced look.
Round 43 :
Secure leaf clusters: 1 sc across edge and around each cluster to hold shape (counts follow position of clusters)
Round 44 :
Change to rust/copper. Between every two olive leaves add a small rust 3-dc flower cluster: *ch 1, 3 dc cluster in next space, ch 1, sc in next sc*; rep across long edges
Info :
These alternating olive leaves and rust flower clusters create the multi-colored scalloped edge photographed. Work slowly and weave small tails as you go to avoid bulky joins; tidy with a second cream round if needed.
Round 45 :
With mustard, add small single-petal accent by working into the tip of each rust cluster: *ch 2, 3 hdc into top loop of rust cluster, sl st into base*; rep for each rust cluster across the edge (visual highlight)
Info :
These mustard highlights are shallow and decorative—use a smaller hook (3.5mm) if you want the accents more defined and slightly raised.
Round 46 :
Work 1 sc around the entire runner edge in cream to frame the outer motifs and even any unevenness from the floral clusters. Count will vary depending on total clusters; aim for a neat even stitch across the perimeter.
Info :
Blocking now will help set the floral clusters outward and define the scalloped profile. Use steam or wet-blocking on cotton yarn for best results. Pin out scallops evenly to the finished width you want.
— Final Scallop and Decorative Points :
Round 47 :
Final decorative scallops with burgundy contrast: *in each cream sc along outermost edge, work (sc, ch 3, sc) into every 3rd sc to create small scallop arcs; where you want an accent dot, insert a burgundy sl st or 3-dc puff in the center of scallop*.
Round 48 :
Secure and tidy with a final round of sc in cream around the entire perimeter; weave in all ends as you go or leave long tails to weave with a yarn needle for an invisible finish.
Info :
When weaving in ends, weave through several stitches following the curve of petals and clusters; don't cut ends too short. Use small neat stitches to sew any petal that may flap—secure at petal bases with a tiny whip stitch from the back.
Round 49 :
Optional: add small embroidered veins on olive leaves using matching olive yarn and a tapestry needle—simple straight stitched lines from base to tip two or three per leaf give a realistic texture.
Info :
Final finishing: steam or gently wet-block the assembled runner, pin scallops to a measured width, and leave to dry completely. This will flatten motifs, open lacy lattice, and set petals in place.
Round 50 :
Care & notes: machine wash gentle in cool water (if using cotton-blend yarn) and lay flat to dry. Avoid high heat for pure cotton to reduce shrinkage. Store flat or loosely rolled to preserve scalloped edges.
This sunflower table runner brings a little of the garden to your dining table with layered petals, leafy accents, and a delicate cream lattice. The modular design lets you make the runner as long or as short as you like, and the multi-color palette gives it seasonal warmth. I love how the petals cast tiny shadows and the scalloped border finishes it so neatly. 🧶🌻 Enjoy the satisfying rhythm of making each motif and seeing them bloom into a long, elegant runner. Happy crocheting! ✨