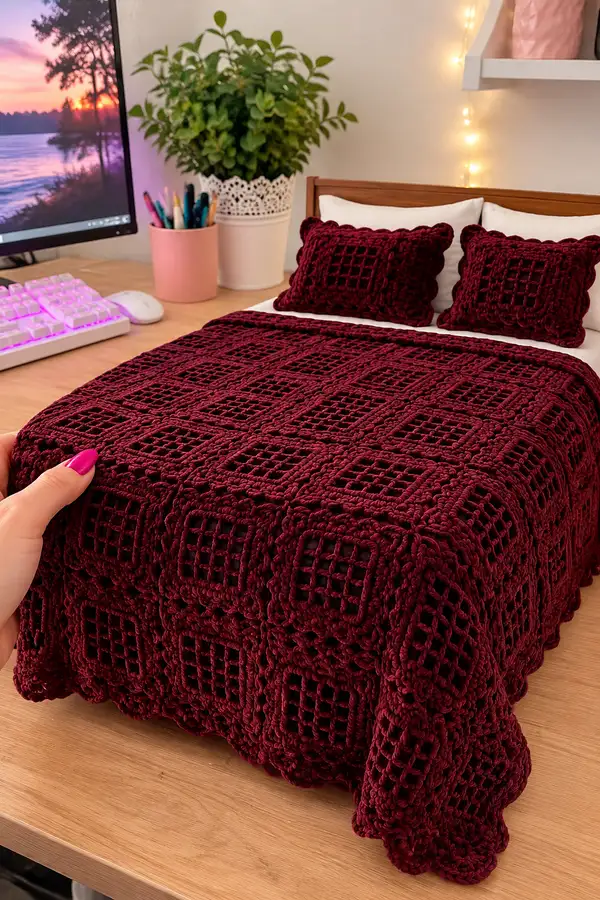
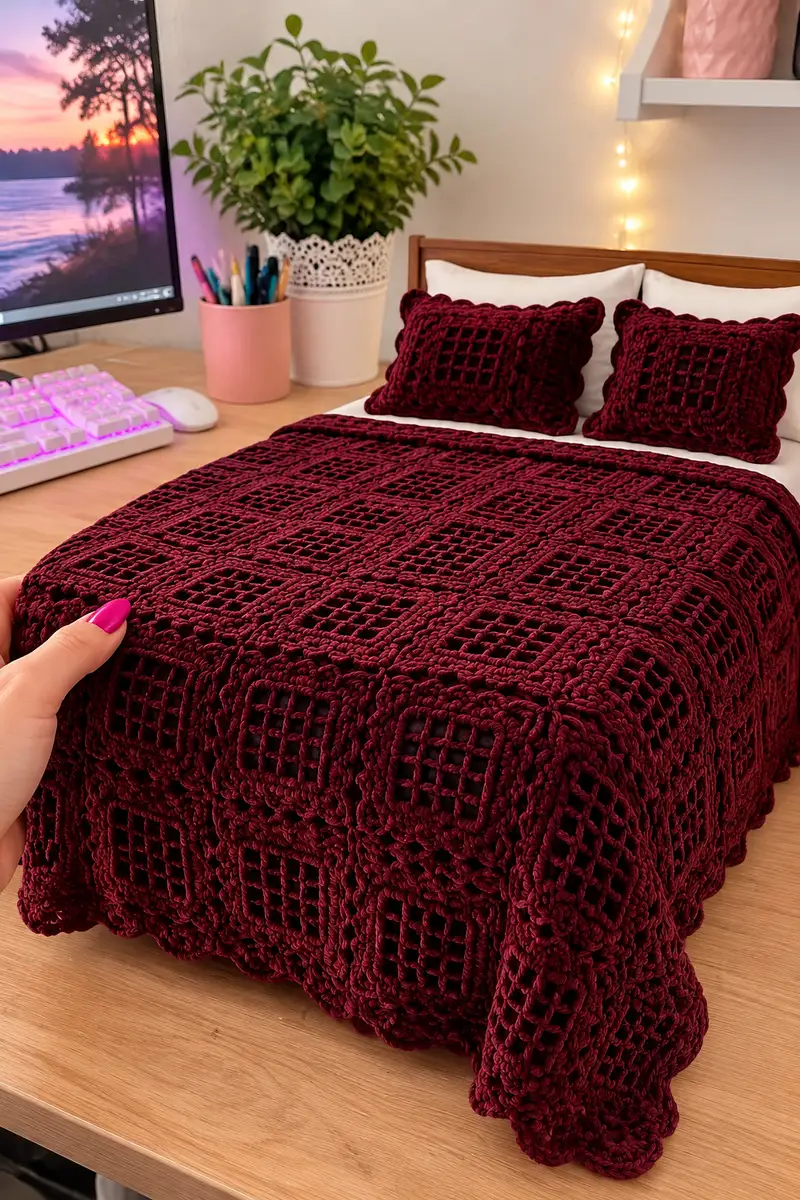
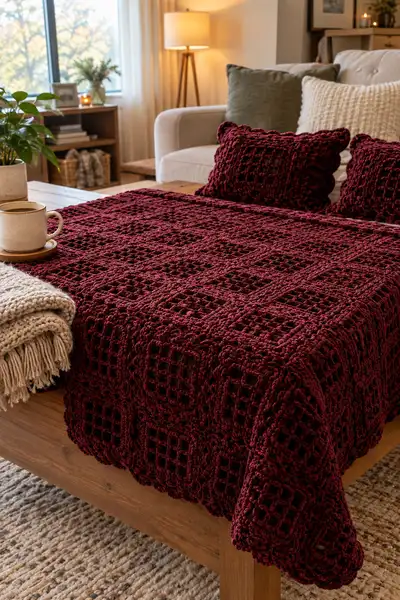
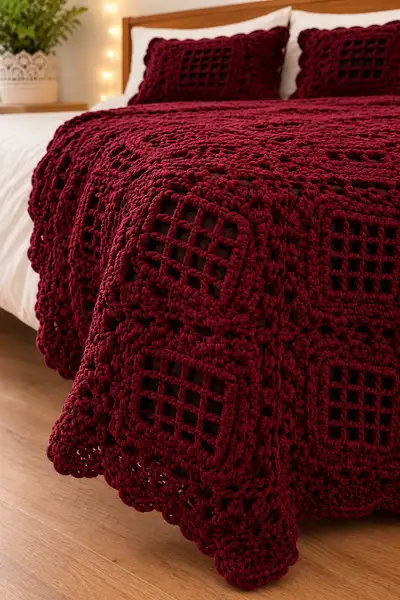
Create a regal, cozy deep-velvet bedspread built from chunky square motifs with raised bobble frames and a scalloped border. This pattern recreates the plush burgundy spread pictured using super-bulky velvet yarn and textured stitchwork for a luxurious drape. Includes motif, joining, border and matching pillow instructions with clear step-by-step guidance.
Progress Tracker
0% Complete
— Notes and Special Techniques :
Info :
This bedspread is constructed from square motifs joined into a rectangular layout to create an approximate finished size of 60" x 80" (throw/bedspread). Use super-bulky velvet yarn and 10mm hook to replicate the dense, plush look seen in the images. The core motif uses a lacy mesh center worked in rounds, surrounded by raised puff/bobble rounds and framed by several finishing rounds to square it up. The puff stitch used throughout is a short multi-loop puff that reads well on velvet; instructions for that stitch are included below.
Info :
Puff stitch technique: yo, insert hook into indicated stitch, yo and draw up loop (repeat 3 times so there are 7 loops on hook including initial yo), yo and pull through all loops, ch1 to secure puff. For denser puffs you may pull up only 2 loops before final yo, but keep puff counts consistent across the motif so texture matches.
— Square Motif :
Gauge/Finished motif :
One completed square motif measures approximately 12" x 12" blocked. Gauge will vary by tension and yarn. To achieve spread size ~60"x80" use a 5 x 7 grid = 35 motifs, or adjust motif count for alternate sizes.
Info :
Each motif is worked in continuous rounds (do not join with sl st unless noted). Use a stitch marker to mark the first stitch of each round to keep count. The pattern below provides specific stitch counts per round—follow them exactly to maintain square geometry.
Round 1 :
MR, ch3 (counts as first dc), (2 dc, ch2, 3 dc) into ring, ch1, sl st into top of initial ch3 to create a small 3-dc cluster corner. NOTE: This round creates the first corner cluster. (Corner count = 1 corner cluster)
Round 2 :
Turn motif to RS for counting. Working into spaces: ch3 (counts as dc), 2 dc into same ch-2 sp, ch2, 3 dc into same ch-2 sp (first corner made); *sk ring center, (3 dc, ch2, 3 dc) into next ch-2 sp* repeat 3 times total to form 4 corners; sl st to top of starting ch3. (Stitches = 4 corners of 3-dc each, with ch2 corners)
Info :
Round 2 completes a small classic 4-corner square. Keep tension relaxed in these early rounds so corners lie flat.
Round 3 :
Ch4 (counts as dc+ch1), *sk next 2 dc, dc in ch-1 space (if present) or dc in next dc, ch1; rep across to corner; at corner work (dc,ch2,dc) into the ch-2 corner space; rep from * around, ending with dc, ch1 then sl st to top of ch4. (This round begins the open mesh grid; counts vary slightly by placement but target approximate perimeter 28-36 dc and corner ch-2s)
Round 4 :
Ch4, *dc in next ch1 space, ch1; rep across each ch1 and dc spot to corner; in corner (dc,ch2,dc); rep from * around, sl st to top of ch4. (This round builds up a 2-row deep grid; keep counts even across sides)
Round 5 :
Ch4, *dc in next ch1 space, ch1; rep across—work 1 dc + ch1 into each ch1 space; at corner (dc,ch2,dc); rep from * around. (By end of Round 5 you should have established a consistent mesh of ch1 spaces along each side; sides will have 8-12 mesh spaces depending on tension.)
Info :
Check that all four sides have a similar number of mesh spaces. If one side is short, you may need to spread out meshes evenly by substituting occasional dc into an adjacent dc instead of a ch-space to equalize stitch count. The goal is a square shape—adjust spacing carefully and make notes for repeat motifs.
Round 6 :
Ch3 (counts as dc), dc into same st, *ch3, sk next 2 stitches (this creates a larger open block), dc into next ch1 space (or dc), ch1; rep across until corner; at corner (2 dc, ch2, 2 dc) into ch-2 space; rep from * around; sl st to top of initial ch3. (This round introduces ch3 mesh cells for the central latticed window.)
Round 7 :
Ch3, (2 dc) into same st, *ch1, sk 1 st, dc in next ch3 sp, ch1, dc in next ch1 sp; rep across to corner; at corner (2 dc, ch2, 2 dc); rep from * around. (Begin shaping the central open grid to be visually similar to 6x6 window.)
Round 8 :
Ch3, dc into same st, *ch2, dc in next dc (this forms a square mesh grid), rep across to corner. In corners work (dc, ch2, dc) into ch-2 corner spaces; join with sl st. (At this stage central window is stabilized by alternating ch and dc.)
Info :
Now we switch to forming the textured frame. The next rounds build raised puffs around the window forming an inset box. Keep stitch marker at the first stitch as you will count exact numbers for puff placement to ensure consistent seam joins later.
Round 9 :
Ch1, sc into same st and around entire perimeter working 1 sc into each dc and 1 sc into each ch-space; at corners work (sc, ch2, sc) to maintain a defined corner. (Count target: approximately 48 sc around depending on mesh counts; this creates a clean base for puffs.)
Round 10 :
Info :
Change to puff stitch rounds. Puff stitches will be placed in groups to create a raised chain frame; maintain even spacing so join rows meet the same where motifs connect. Keep your yarn tails secure as velvet can slip during joining.
Round 10 :
Ch1, *puff in next 3 sc (see puff technique above), ch1, sc in next sc; rep from * across each side; at corners work (puff, ch2, puff) into the corner sc to create a raised corner cluster; sl st to join. (Total puffs per side: approx 8-10 depending on motif mesh; overall round total about 32-40 puff clusters.)
Round 11 :
Ch1, sc across through each puff and ch-space working 1 sc into the ch-1 spaces between puffs and 2 sc around each puff if needed to stabilize; at corners work sc,ch2,sc. (This round flattens and stabilizes puffs and creates a base for additional frames.)
Round 12 :
Ch3, *hdc in next sc, ch1, hdc in next sc; rep across; at corners (hdc, ch2, hdc) into corner; sl st to join. (This will start visually framing the puff clusters with a low ridge.)
Info :
If you prefer a more pronounced raised frame, repeat another puff round (Round 10 variation) before continuing. For pictured depth one puff round with two stabilizing rounds gives the deep framed look.
Round 13 :
Ch3, (hdc,ch1,hdc) evenly across each side in the sc foundation; at corners work (2 hdc, ch2, 2 hdc). This evens each side and prepares motif for outer shell rounds.
Round 14 :
Ch3, dc into each hdc and into each ch1 space around; at corner work (dc, ch2, dc). (Aim for an even total of dc per side so that outer rounds grow squarely—adjust one or two extra dc in a side if necessary.)
Round 15 :
Ch1, sc into each dc and into each ch-space; corners sc,ch2,sc. (This round smooths edges prior to decorative shell edging.)
Round 16 :
Info :
Outer scallop building: The pictured motif shows a chunky scalloped outer frame formed by elongated puff clusters and large shells. We build this in two rounds to maintain a sculptural edge that joins neatly with neighboring squares.
Round 16 :
Ch3, (2 dc, ch2, 3 dc) into corner ch2 space to create a pronounced corner shell; along each side: *sk 2 sc, (3 dc in next sc) ch1* repeat to create spaced shells; at each corner continue shell pattern; sl st to join. (This yields spaced shells along each side that will be connected by a final puff ring.)
Round 17 :
Ch1, sc into shell spaces and ch1 spaces; at each shell work 5 sc across the shell body to anchor; corners sc,ch2,sc. (Count: roughly 60-76 sc around depending on shell density.)
Round 18 :
Ch1, puff into the center of each shell (puff as described) and ch1 between each puff; at corners work (puff,ch2,puff). This adds the final tufted outer row that makes motifs read as boxy tiles when joined.
Info :
Fasten off leaving a 10-12" tail for weaving and/or joining to adjacent motifs. Weave in the starting tail into the body of the square for a neat finish. Block each square lightly by pinning to measurements on a flat surface; velvet is delicate—use low tension pinning, do not steam aggressively.
— Motif Repeat Notes :
Info :
Make the required number of motifs to reach your desired spread size. For the sample 60" x 80" spread, make 35 motifs (5 across x 7 down) of 12" square motifs. For a smaller lapghan, use 3 x 4 or 4 x 5 grids. Remember motif size will vary with gauge—measure and adjust motif count accordingly.
— Joining Motifs (Join-As-You-Go or Sew Together) :
Info :
You may join motifs by sewing with the long tail and a tapestry needle (mattress/stitch whip stitch), or join-as-you-go (JAYG) with single crochet or slip-stitch seams. The pictured bedspread uses a nearly invisible join with single crochet across the back so the raised fronts read uninterrupted; instructions for both are provided.
Join Method A - Single Crochet Seam (Backside) :
Lay two motifs RS up, align edges. With WS facing you, insert hook through the back loop only of both motif edges and work 1 sc through both loops across the side until corner. At corner work 1 sc into corner ch2 spaces to secure. For the entire bedspread, join in rows: join pieces horizontally first across each row, then join rows vertically to form the full rectangle. This creates a slightly raised seam on the WS but keeps RS clean.
Info :
When joining as you go, attach a new motif to the completed row by aligning and single crocheting through both edges each time you work the outermost sc round of the fresh motif; pick up the sc on the edge motif at the corner first, then proceed side-by-side.
Join Method B - Slip Stitch Invisible Join :
With RS facing up, place motifs together and work sl st through both loops of each stitch across the back loops only. This produces a flatter join than sc and reduces visible bulk. Keep tension looser in slip stitches to avoid pulling motifs inwards.
Info :
Whichever join you choose, check alignment frequently. If shell edges of adjacent motifs meet, offset so shells nest slightly into the neighbor to mimic the continuous raised pattern seen in the photos. Use pins or clips to hold motifs in place while you work seams to avoid shifting velvet yarn.
— After Joining: Full Spread Border Preparation :
Info :
After joining all motifs into the rectangle, work a unifying border around the entire spread. This border stabilizes joins and creates a scalloped finished edge that mirrors motif frames. The border is worked in rounds around the joined rectangle. Use the same yarn and hook to ensure uniform look.
Border Round 1 :
RS facing, join yarn at any corner. Ch1, sc evenly around the entire blanket working 1 sc in each join and along each motif outer sc; in corners work (sc,ch2,sc) to keep corners square. (Count will vary with spread size; mark beginning and end of each side to keep corners centered.)
Border Round 2 :
Ch3, dc into each sc across; at corners work (dc, ch2, dc). This raises the border and starts smoothing joins to a visual flat plane. Sl st to join.
Info :
Work the next rounds to echo motif outer scallops and puffs so entire blanket reads as a continuous tufted surface rather than patchwork. Keep your tension consistent to avoid buckling along seams.
Border Round 3 :
Ch1, sc into each dc and into each ch-space; at corners sc,ch2,sc. (This will be the base for the large scallop/puff row.)
Border Round 4 :
Ch3, (2 dc, ch2, 3 dc) into corner ch2 spaces; along each side *skip 3 sc, (3 dc in next sc), ch1* repeat to create scallops spaced across lengths; sl st to join.
Border Round 5 :
Ch1, sc into each dc and sc across scallop groupings, placing 5 sc across each scallop to anchor shells; corners sc,ch2,sc. (This gives a sturdy base for the finishing puff ring.)
Border Round 6 :
Ch1, *puff in center of each scallop, ch1* around; at corners work (puff,ch2,puff); sl st to join. Fasten off and weave in ends. This creates the plush scalloped final edge as seen in images.
Info :
If you wish to create a deeper scallop, repeat Border Rounds 4-6 once more, building another scallop row stacked on the first. The pictured spread shows robust scallops—two stacked scallop rounds look especially luxurious.
— Matching Pillow Covers (Make 2) :
Info :
The matching pillows are essentially single motifs with fuller stuffing or a cushion insert. The pictured pillows appear slightly rectangular rather than square; instructions here provide both square and rectangular finishing options. Use the same motif pattern, but finish with denser stuffing or a back panel piece to create an envelope or zip closure.
Pillow Motif (Front) Round 1-18 :
Work one motif as instructed above through Round 18. This forms the decorative front panel. Fasten off leaving long tail for sewing to backing.
Pillow Backing - Option A (Solid Panel) :
Ch38 (for approx 12" x 16" rectangle—adjust chain for desired size), row1: hdc in 3rd ch from hook and across; row2-12: ch2, turn, hdc across. Fasten off leaving long tail. Attach backing to motif RS together using invisible whip stitch around edges leaving a small opening for an insert, then close.
Info :
Alternatively make a second motif for the pillow back to match the front exactly; join both edges with single crochet or mattress stitch to create a decorative finished pillow cover.
Pillow Finishing :
Sew the front and back together with the RS facing out. Insert pillow form or stuff with polyester fill to desired firmness then finish closing seam. For a cleaner edge, add a final round of sc around the pillow after sewing to tidy the join and produce a framed appearance like the photo.
Info :
For the plushest look, use an overstuffed pillow form and slightly tighter joining stitches so the scalloped edges sit up and create the tufted border effect.
— Alternate Sizes and Adjustments :
Info :
To make a larger bedspread (full/queen), increase motif count and/or make motifs larger by adding 1-2 additional outer shell rounds (repeat Round 16-18 type shell/puff sequences). To make smaller, decrease the number of motifs. Adjust yarn requirements proportionally—each extra motif adds one motif-worth of yardage (approx 65-95 yards per 12" motif in super-bulky depending on puff density).
— Finishing and Care :
Info :
Weave in all ends by threading yarn tail through several rounds on the WS using a large tapestry needle. Velvet yarn can shed if aggressively washed; hand wash or machine wash on delicate (mesh bag) and air dry flat. Avoid high-heat drying to preserve plushness. Lightly brush nap with soft brush if needed to restore pile.
This deep velvet bedspread pattern is a truly special project—combining airy lattice centers with rich, raised puff frames for an incredibly tactile, designer-quality finish. The ultra-plush scalloped edges and matching pillows make a striking bedroom statement while still being a rewarding, meditative crochet project. Whether you’re gifting this as a luxe home item or keeping it to cozy up your own space, the result is worth every stitch. 🧶✨🛏️