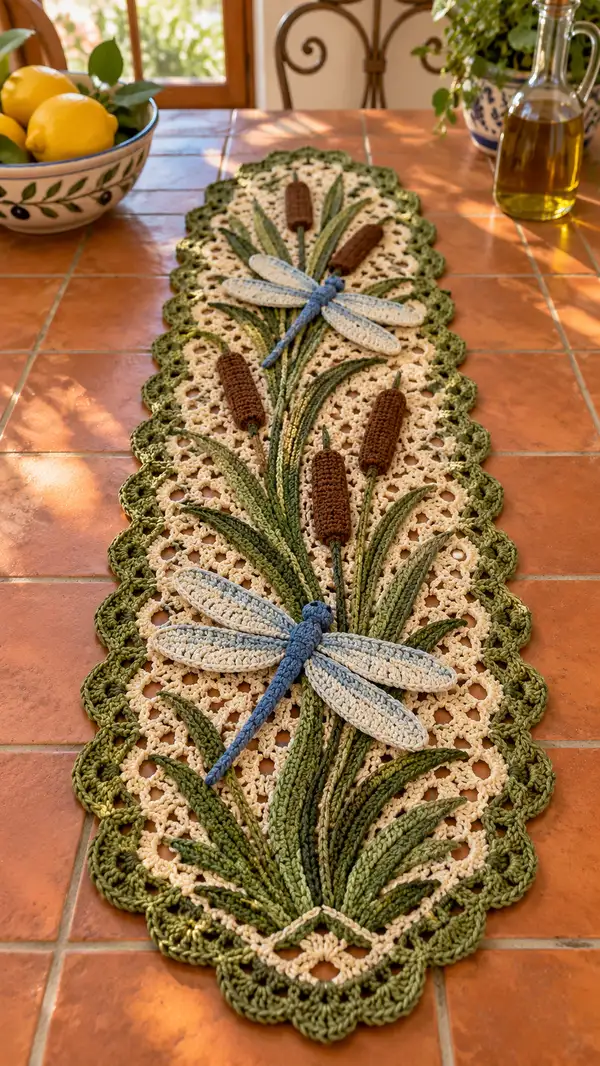
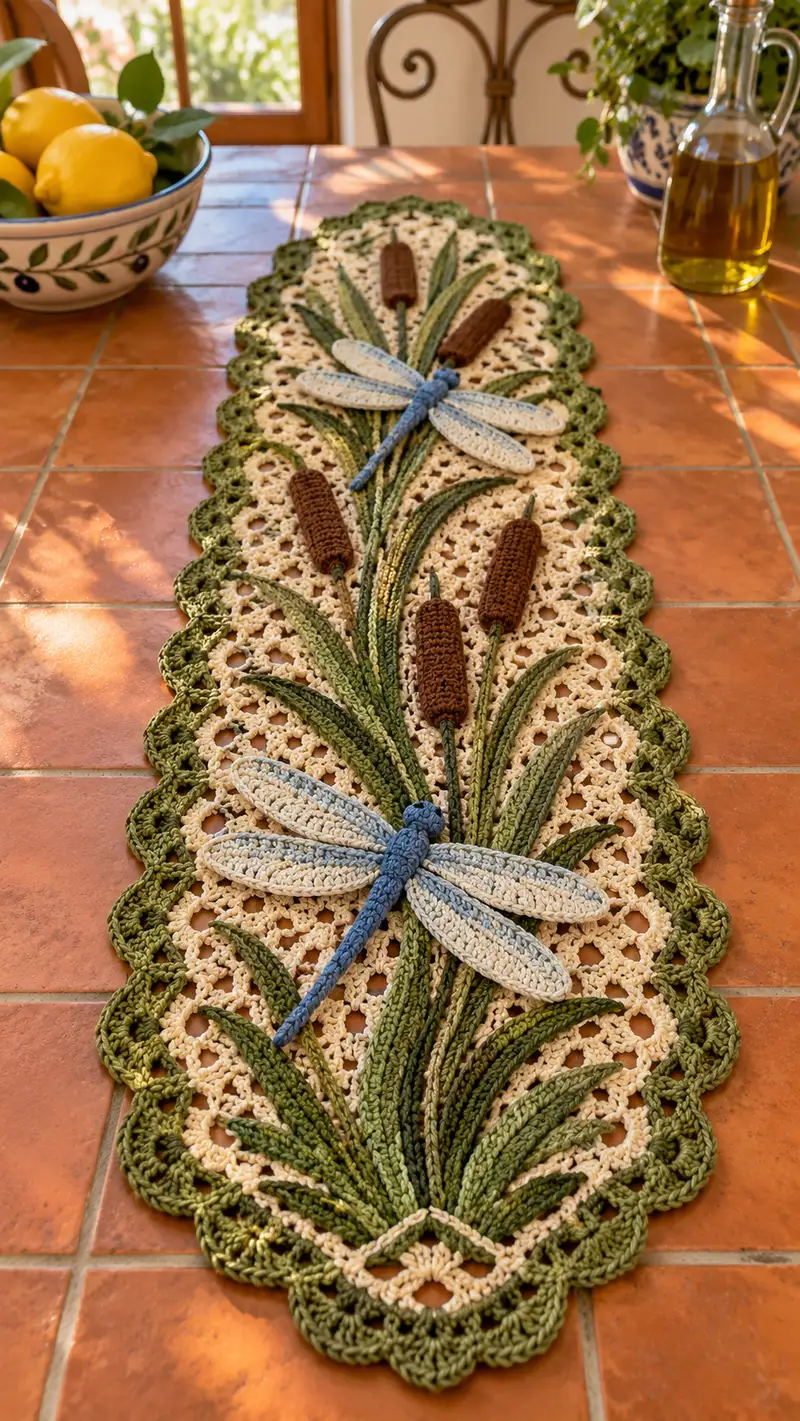
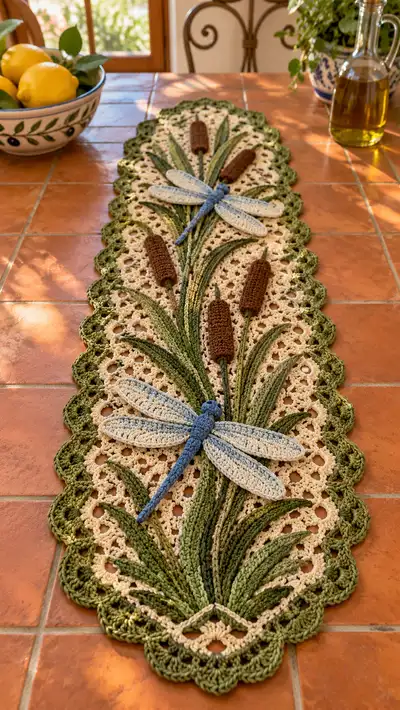
Create a charming, nature-inspired table runner featuring raised cattails, graceful dragonflies, and long textured blades of grass. This elongated oval runner uses a lacy cream background with an olive scalloped border and dimensional appliques worked separately and sewn on. Beautiful as a centerpiece or kitchen accent, the pattern combines filet-style rounds, crocheted appliques, and simple assembly instructions to deliver a professional-looking project.
Progress Tracker
0% Complete
— Notes and Gauge :
Info :
This runner is worked in worsted weight yarn with a 4.0mm hook for the background and 3.5-4.0mm for appliques. Gauge is flexible for decorative use; however, aim for a firm fabric so stuffing does not show through appliques. The finished runner in the photo measures approximately 38cm (15in) wide by 110-120cm (43-47in) long. Adjust chain length or rounds for different sizes.
Info :
All rounds are worked continuously unless otherwise noted. Use stitch markers at the beginning of each round and at the two 'endcaps' of the oval so increases stay aligned. When weaving in ends, leave tails long for sewing appliques securely.
— Base Oval Lacy Panel :
Setup :
Using cream yarn, ch 30. Do not turn; we will work around the chain to make an oval base.
Round 1 :
1 sc in 2nd ch from hook and in each ch across (29 sc), work 3 sc in last ch, continue on opposite side of foundation chain working 1 sc in each ch across (29 sc), work 3 sc in last ch (the first chain). Join with sl st to first sc. (64)
Round 2 :
(9 sc, inc) x4 around. Work 9 sc along each long side then add an inc (2 sc in same stitch) at each rounded end. (68)
Round 3 :
(10 sc, inc) x4. Place increases at the same four 'corners'. (72)
Round 4 :
1 sc in each st around. (72)
Info :
Use stitch markers at the start of the round and at each corner increase to help keep increases aligned. Keep tension even; if the oval cups, go down one hook size; if it ruffles, go up one size or leave out one increase repeat in the next increase round.
Round 5 :
(11 sc, inc) x4. (76)
Round 6 :
1 sc in each st around. (76)
Round 7 :
(12 sc, inc) x4. (80)
Round 8 :
1 sc in each st around. (80)
Round 9 :
(13 sc, inc) x4. (84)
Round 10 :
1 sc in each st around. (84)
Round 11 :
(14 sc, inc) x4. (88)
Round 12 :
1 sc in each st around. (88)
Info :
From this point we will begin working an open mesh (lacy) motif over the oval to create the cream background. The mesh uses dc clusters and chain spaces; counts are maintained by replacing sc stitches with equivalent dc groups. Keep the stitch count equal to the previous round's total so the oval size remains consistent.
Round 13 :
*(ch2, sk 2 sts, 1 dc in next st) repeat across long sides; at endcap work 3 dc in one stitch, continue across opposite side similarly; adjust so total stitch count equals 88 by replacing three sc with 3-dc shell at each end. (88 cluster positions equivalent)
Round 14 :
Working into dc clusters and chain spaces: ch3 (counts as dc), 2 dc in next ch-sp, *ch2, 3 dc in next ch-sp; rep across; shells of 3 dc at endcaps. Keep count consistent (88).
Round 15 :
1 sc in each visible stitch and chain space to tidy the edge and realign counts before further mesh work. (88)
Round 16 :
*(ch3, sk next cluster, sc between clusters) rep across to build uniform openwork; ensure four corner shells remain unchanged. (88)
Round 17 :
Repeat Round 14 to deepen the mesh: ch3, 3 dc in each ch-sp, ch2 between shells, shells of 3 dc at rounded ends. (88)
Round 18 :
1 sc in each st around to stabilize the mesh and prepare for more defined openwork. (88)
Info :
At this stage block the flat oval: wet or steam-block lightly, pin to flatten the panel before adding appliques. Blocking will open the mesh and make sewing on elements easier and neater.
Round 19 :
Worked in cream: (ch3, sk2, dc in next sp) across long sides; at endcap, work (ch2, 5 dc) in the end shell to create a slightly larger rounded edge. Maintain equivalent stitch count by using 5-dc shell = 5 dc replacing previous 3 sc area; adjust preceding spaces to keep total equal to 88 clusters.
Round 20 :
1 sc evenly around working into stitches and chain spaces to compress any unevenness after the larger end shells. (88)
Round 21 :
Repeat the lacy shell-row to create the stable background: (ch3, 3 dc, ch2) repeat along long edges; shells at ends of 5 dc. (88)
Round 22 :
1 sc in each st around for a grounded round before attaching leaves and stems. (88)
Round 23 :
Ch3 (counts as dc), *sk next ch-sp, 3 dc in next ch-sp, ch2, 3 dc in next ch-sp; rep across long sides; endcaps remain as 5-dc shells. (88)
Round 24 :
1 sc in each st around. (88)
Info :
Decide your applique layout now: in the pictured runner there are two dragonflies and five cattails arranged symmetrically. Mark where stems and the central groups of leaves will sit using pins. Measuring from one end, mark at approximately 18-20cm from the end for the first group, the next at the center, and the last near the other end to mirror the layout.
Round 25 :
Start a delicate edging foundation round: *ch4, sk 2 dc, sl st into next sp across long sides; at endcaps do ch6 and sl st around shell center to maintain spacing. (This round creates small loops used later for scalloped edging). (Approx 88 loop positions)
Round 26 :
1 sc around through each loop and st to build a firm foundation for scallops. (88)
Round 27 :
1 sc in each st and 3 sc in each loop at the endcaps to ensure neat transitions. (88)
Round 28 :
Even round: 1 sc in each st around to equalize the fabric. (88)
Info :
At this point the base panel is complete and blocked. Keep it pinned while you crochet the border color (olive) to ensure the scalloped edge sits flat. Work the scalloped border into the foundation loops and edge stitches created above.
— Scalloped Olive Border :
Join olive yarn in any stitch on the edge with a sl st.
Round 29 :
*ch1, sc in next st, ch3, (5 dc) in next st, ch3, sc in next st; repeat across long sides. At endcaps work (sc, ch3, 7 dc, ch3, sc) to round the ends. This creates large scallops. (Counts remain at 88 scallop anchor points)
Round 30 :
Working across each 5-dc shell: sl st into center dc, ch1, sc into same dc; around 7-dc end shells work sc clusters to densify. End each scallop with sl st into anchor. (88)
Round 31 :
*In each scallop: (sc, hdc, 3 dc, hdc, sc) to form a defined shell; join with sl st and move to next scallop. (88 scallops anchors)
Round 32 :
1 sc evenly around the scallops to tidy edges and create a neat finish. (88)
Info :
Finish off and weave in ends invisibly on the wrong side. Keep the base pinned until all appliques are sewn and the final runner is lightly steam-blocked one last time to flatten seams.
— Cattail Heads (Make 5) :
Info :
Each cattail head is a small crocheted tube worked in the round with brown yarn. They are narrow, slightly tapered at the top and thicker in the middle. We'll work one cattail head pattern and repeat five times, varying lengths between 10-16 rounds depending on desired thickness.
Round 1 :
With brown yarn, mr, 6 sc in magic ring. (6)
Round 3 :
(1 sc, inc) x6 (18)
Round 4 :
(2 sc, inc) x6 (24)
Round 5 :
1 sc in each st around. (24)
Info :
If you want a thicker cattail body, stop increasing one round earlier or continue even rounds longer; for a more elongated look, add additional even rounds after Round 5 to create length before tapering.
Round 6 :
1 sc in each st around. (24)
Round 7 :
1 sc in each st around. (24)
Round 8 :
(2 sc, dec) x6 (18)
Round 9 :
1 sc in each st around. (18)
Round 10 :
(1 sc, dec) x6 (12)
Round 11 :
1 sc in each st around. (12)
Info :
Fasten off leaving a 20-30cm tail. Lightly stuff the cattail with polyester fill until firm but not rigid. Use the long tail to sew the cattail to the runner at the stem position. You can make cattails shorter or longer by adding or subtracting even rounds 5-7.
— Cattail Stems (Make 5) :
Round 1 :
With dark green, ch 20 (or desired stem length). Do not join. Working back along the chain: 1 sc in 2nd ch from hook and in each ch across (19). This creates a flat chain tube base for the stem. Fasten off leaving a long tail for sewing.
Info :
For a rounder stem, work a small i-cord: ch 6, join into a loop and sc closures for 12 rounds to create a narrow tube; stuff lightly and use a long tail to sew under the cattail head and along the runner to secure.
— Long Blade Leaves (Make multiple; pictured runner uses 18 leaves of various lengths) :
Info :
Leaves are worked flat from a foundation chain and tapered with increases and decreases to create long narrow blades. Make leaves in multiple greens. Vary lengths: short leaf ch 18, medium ch 26, long ch 36. We provide a full round-by-round for the long leaf; scale down for shorter leaves by skipping some middle repeats.
Long Leaf - Row 1 :
Ch 36. In 2nd ch from hook, sc across to end (35 sc). Turn. (35)
Long Leaf - Row 2 :
Ch1, sc in first 4 sts, hdc in next 4, dc in next 15, hdc in next 4, sc in last 4. (35)
Long Leaf - Row 3 :
Ch1, sc in first 3 sts, hdc in next 3, dc in next 21, hdc in next 3, sc in last 2. (35)
Long Leaf - Row 4 :
Ch1, sc2tog at base to begin taper, sc across middle 31 sts, sc2tog at tip to create a tapered end. (33)
Long Leaf - Row 5 :
Ch1, sc across 33 sts. (33)
Long Leaf - Row 6 :
Ch1, sc2tog at base, sc across 29 sts, sc2tog at tip. (31)
Long Leaf - Row 7 :
Ch1, sc across 31 sts. (31)
Long Leaf - Row 8 :
Ch1, sc2tog across center until 7 sts remain, then dec to finalize to a narrow tip and base; shape by adding or subtracting rows to achieve desired curve. Fasten off leaving long tail for sewing. (Variable)
Info :
For a ridged texture use BLO for several rows in the center of the leaf or work a raised sl st ridge by crocheting a row of sl sts in the center line. Starch lightly if you want leaves to be sturdier on display.
— Dragonfly Body (Make 2) :
Info :
Each dragonfly body is a segmented tube with gentle tapering to simulate a real dragonfly. Use blue yarn for the body and slightly darker blue for head/segment accent. We'll work the body in continuous rounds and stop to stuff lightly before closing and adding wings.
Round 1 :
With blue, mr, 6 sc in magic ring. (6)
Round 3 :
(1 sc, inc) x6 (18)
Round 4 :
(2 sc, inc) x6 (24)
Round 5 :
1 sc in each st around. (24)
Round 6 :
1 sc in each st around. (24)
Info :
Start stuffing lightly from this round onward; the body should be firm but flexible to lay naturally on the runner. Use small amounts of filling added gradually through the tube.
Round 7 :
(2 sc, dec) x6 (18)
Round 8 :
1 sc in each st around. (18)
Round 9 :
(1 sc, dec) x6 (12)
Round 10 :
1 sc in each st around. (12)
Round 11 :
Make a narrow elongated tail section: ch6, sl st into next stitch to form a short extension; alternatively continue 6 rounds of 1 sc around and dec gradually for a tapered tail. (12 / tail ext)
Round 12 :
Fasten off leaving long tail. Weave tail along underside for sewing. Add a small bit of stuffing at the head end if desired. Create a tiny embroidered head shape by wrapping yarn around the first 2–3 rounds externally and securing with small stitches to build a head bump.
Info :
For a more sculpted segmented look, embroider thin rings of darker blue around the body every 3 rounds using surface slip stitch or a thin yarn strand wrapped around the tube and anchored at intervals.
— Dragonfly Wings (Make 4 per dragonfly) :
Wing - Round 1 :
With light blue/cream, ch 12; join with sl st to form a loop. Round 1: ch3 (counts as dc), 2 dc in loop, ch2, 3 dc in loop, ch1, sl st to join. (6 dc in loop)
Wing - Round 2 :
Ch3, 2 dc in same sp, *ch2, 3 dc in next ch-space; rep across forming a small oval shell; at tip work ch3 and 5 dc to widen center; (approx 18 dc)
Wing - Round 3 :
Work a neat edging: *sc around edge of wing, in corners work (sc, hdc, 3 dc, hdc, sc) to shape. Fasten off leaving tail for sewing. Wing measures approximately 7–9cm long when blocked. (approx 18–22 edge sts)
Info :
Block wings by pinning flat and spraying with water or starch; press into shape so both wings match. Sew wings to the top two segments of the dragonfly body, spacing the two front wings slightly forward of the two hind wings so they overlap like in the photo.
— Assembly of Dragonfly :
Info :
Position the body on the runner pinned on the cream mesh. Place wings one pair at a time and tack each wing with a few small invisible stitches to the body rounds 4–6. Use a darker blue to add small sewn antennae at the head from two short ch-4 pieces stitched down.
Info :
Weave in all ends on the wrong side of the runner. You may choose to slightly stuff the body before sewing down to give lift and create a shadow effect that adds dimension to the runner.
— Leaf and Stem Attachment Details :
Info :
Layout: arrange grouped leaves radiating from a central stem line. Use pins to hold leaves in place while sewing. Sew along the central rib of each leaf with small whip stitches securing every 5–7mm; leave the outer edges free so they appear to lift off the background slightly.
Info :
Attach stems by sled sewing the long tail from the stem down through the mesh background; secure by back-stitching and knotting on the wrong side. Reinforce near cattail heads with a few extra passes so the heavy pieces do not pull free.
— Finishing Touches :
Info :
Once all appliques are sewn, gently steam-block the entire runner pinned to flatten and even out the scalloped edge. Check all sewn points for security and weave in any visible tails. Trim stray fibers and do a final press from the wrong side if needed.
Info :
If desired, add tiny surface embroidery for cattail seeds or subtle highlights on wings using metallic thread for a hint of shine. Use fabric glue sparingly only if any tiny bits need reinforcement.
This Dragonfly and Cattail Table Runner brings delicate garden charm indoors with layered texture and tiny three-dimensional accents. Each appliqued cattail and dragonfly lifts the cream lace background for a natural, artful centerpiece. The modular construction means you can adapt layout, colors, and size to suit your home. Enjoy the relaxing process of crocheting lace and decorative elements, and display your finished runner proudly. 🧶🌿🦋