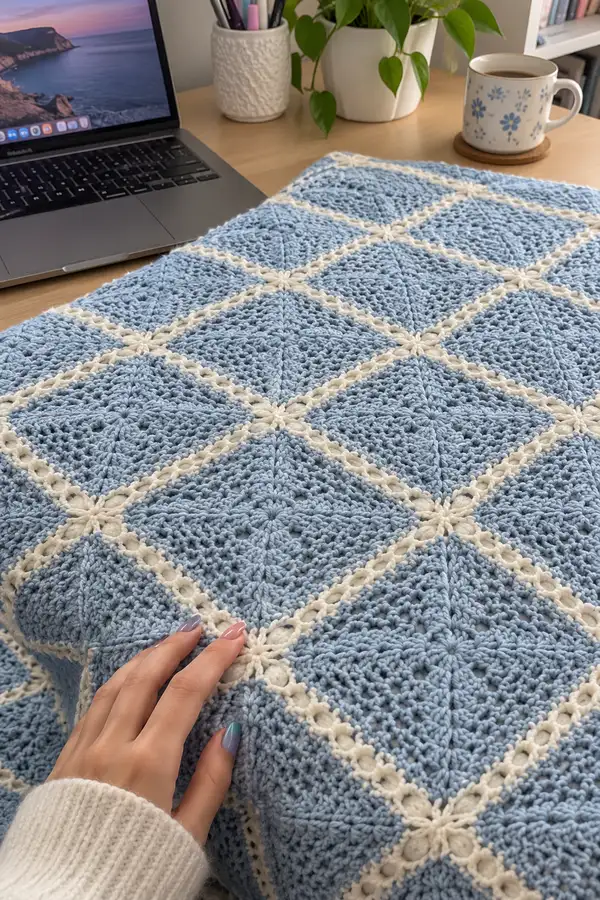
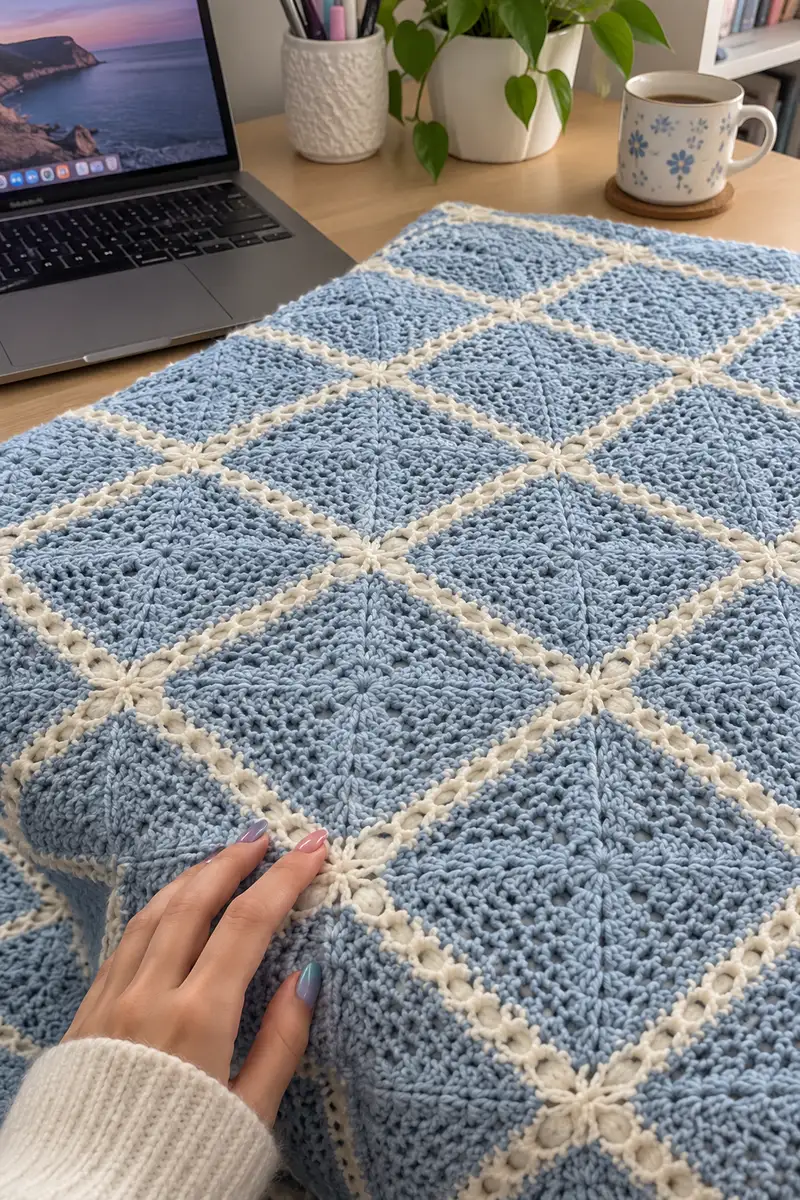
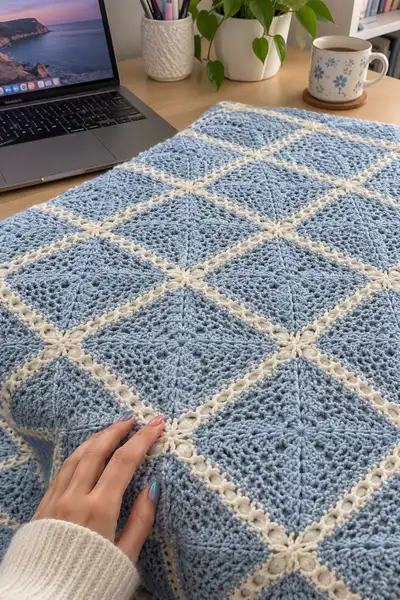
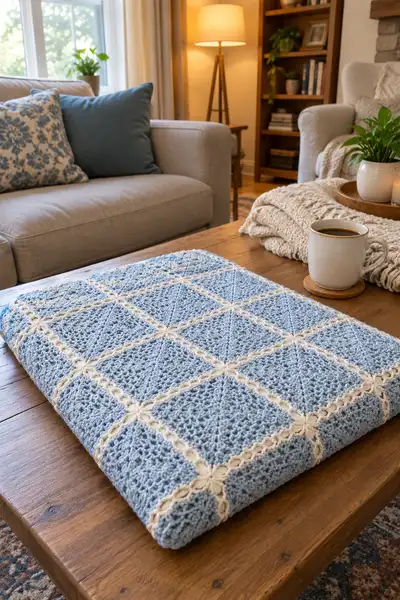
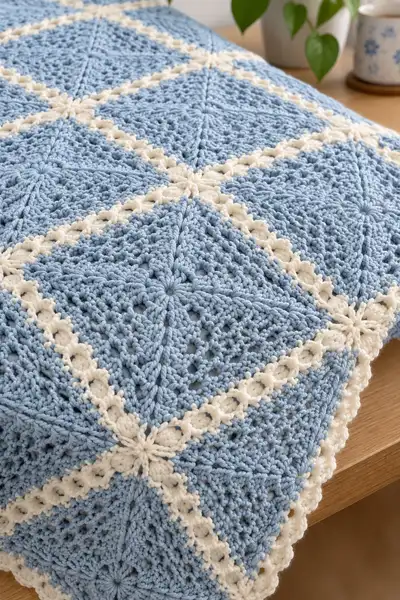
A soft, coastal-inspired bedspread worked in dusty blue with an ivory raised lattice. This elegant layout is built from textured square motifs joined with a delicate cream cross-lattice and finished with a scalloped border. The pattern gives clear step-by-step rounds, helpful tips for blocking and joining, and assembly notes to recreate the airy, vintage lace look for a throw, twin or full bed.
Progress Tracker
0% Complete
— Overview :
Info :
This bedspread is made from textured square motifs joined with a raised cream lattice and finished with a scalloped border. The pattern below describes one motif (worked in dusty blue ‘MC’), the joining lattice (worked in cream ‘CC’), and a multi-round border. Make as many motifs as needed for your bed size (suggested layout included in Assembly). Gauge: one completed motif measures approximately 18cm / 7in square blocked (this will vary with yarn/hook).
Info :
Pattern notation uses US terms. Maintain consistent tension and block individual squares before joining. Use the smaller hook for lattice and border to keep those stitches raised and crisp.
— Square Motif (make X) :
Notes :
Each motif is worked in continuous rounds from center out. I give exact stitch counts per round — keep a marker at round start. The motif is constructed to become a square by working four corner clusters starting at Round 13; prior rounds increase evenly in the round.
Round 1 :
With MC in hand, make a magic ring. Ch1, 8 sc in mr. Pull tight and join with sl st to first sc. (8)
Round 2 :
Ch1, 1 sc in same st, *inc (2 sc) in next st* repeat around. (16)
Round 3 :
Ch1, *1 sc in next st, inc in next st* x8. (24)
Round 4 :
Ch1, *2 sc, inc* x8. (32)
Round 5 :
Ch1, *3 sc, inc* x8. (40)
Round 6 :
Ch1, *4 sc, inc* x8. (48)
Info :
By now your piece is a round disk. To begin introducing texture and creating diagonal ridges, we will work front-loop-only rows and small clusters in the next rounds. Place markers at the 1st, 1/4, 1/2 and 3/4 positions (every 12 stitches) to identify four corner points later.
Round 7 :
Ch2 (counts as hdc), hdc in FLO in each st around. Sl st to top of ch2. (48)
Round 8 :
Ch3 (counts as dc), 1 dc in FLO of next st, *ch1, skip a st, dc in next 2 sts* repeat around, sl st to top of ch3. (This creates subtle chain-open texture along the radius; stitch count remains 48 considering dc placements.)
Round 9 :
Ch1, sc in first dc, *ch1, sc in next dc* repeat around working into visible dc posts from previous round; finish with sl st. (24 sc, 24 ch-1 sps counted as texture)
Info :
At rounds 7-9 you are developing texture; use your stitch marker to ensure the four corner markers (placed at Round 6) still align at roughly every 12 stitches. If needed, gently ease stitches while blocking later to reach exact corner alignment.
Round 10 :
Switch to dc clusters: Ch3, *skip next st, (2 dc, ch1, 2 dc) in next st (cluster), skip next st, dc in next st* around to form small star clusters across the surface. Finish with sl st. (Cluster count depends on spacing; maintain established rhythm across 48 base stitches.)
Round 11 :
Ch1, sc in each st and in each ch-1 space around. (48)
Round 12 :
Ch2, hdc in each st around (work in BLO to create a defined ridge at the next stage). Sl st to join. (48)
Info :
Round 13 begins the corner formation: we will convert the round into a square by inserting four corner clusters spaced evenly. You have 48 stitches — dividing by 4 gives 12 stitches per side. Each side will be worked across 12 sts then a corner cluster that adds 6 dc to create a square corner. After the round you will have 48 + (6 x 4) = 72 stitches.
Round 13 :
Ch3 (counts as dc), *dc in next 11 sts, (3 dc, ch2, 3 dc) in next st (corner cluster)* repeat 3 more times to create four corners; sl st to top of ch3. (72)
Info :
Each corner cluster (3 dc, ch2, 3 dc) increases total stitch count by 6. This makes the round expand out at the four corner points and begins squaring off the motif. Place fresh markers in the center of each corner cluster to help alignment during joining.
Round 14 :
Ch1, sc in each dc across each side and work sc, ch2, sc into the ch2 corner space (this maintains corner stability). Count = previous 72, but we will treat corners as 2 sc positions for evenness, so effectively (72) sc positions worked (72)
Round 15 :
Ch2, hdc in each st around working 1 hdc in each sc and into corner scs (maintain grain). Sl st to join. (72)
Round 16 :
Ch3, *2 dc in next 10 sts, (dc, ch1, dc) in corner ch2 sp, repeat* x4. This places a small open chain at each corner for extra shaping. (Given measured repeats, total stitches approx 80 — 2 dc groups add depth to sides; final count 80)
Info :
After Round 16 your square should show four visible corners. From here we will build texture into the square body maintaining these corner anchors so that the overall piece grows as a square, not a circle.
Round 17 :
Ch1, sc in each st and in each ch-1 space across the round maintaining stitch markers at corners. (80)
Round 18 :
Ch2, work into BLO for this round: hdc in each st BLO around to create a faint ridged line that will accent the diagonal star effect. Sl st to join. (80)
Round 19 :
Ch3, *skip 1 st, (dc, ch1, dc) in next st (small shell), dc in next st* repeat around forming a textured mesh surface. Sl st to join. (80)
Round 20 :
Ch1, sc in each st and ch-1 space around. (80)
Info :
Check the motif against a blocked sample — if corner points are not square, gently tug fabric so each corner marker is at the extreme corner. Block now for best joining results.
Round 21 :
Ch2, 1 hdc in each st around. (80)
Round 22 :
Ch3, *dc in next 9 sts, (3 dc, ch2, 3 dc) in corner ch-1/corner space* repeat 3 more times, sl st. This further strengthens corner definition. (80 + 24 = 104)
Round 23 :
Ch1, sc in each st across; where corner cluster exists work sc, ch2, sc in ch2 space. (104)
Round 24 :
Ch2, hdc in each st around working in FLO to pick up the stitch fronts and create fine ridging for the final square face. (104)
Round 25 :
Ch3, dc in each st around. This is the final textured face round. (104)
Round 26 :
Ch1, sc in each st and in ch-2 corner spaces. (104)
Round 27 :
Ch1, work crab stitch (reverse sc) along the outer edge if you prefer a slightly firm edge for joining; otherwise sc evenly around. (104)
Info :
Fasten off leaving a 40 cm tail for joining if you will use join-as-you-go techniques. Block the motif flat and square to 18 cm / 7 in if required. Make as many motifs as needed for your spread (assembly section gives layout suggestions). Each motif after blocking should measure consistently — adjust hook size if needed to meet gauge.
— Joining Rows (Cream Lattice) :
Notes :
The cream lattice is worked to create raised lines between squares. You can opt to join-as-you-go (JAYG) while working the final round of each motif or join them after blocking. The instructions below describe a join-as-you-go method using CC with a smaller hook (4.5mm or one size smaller than MC) to keep the lattice raised and firm.
Round 1 :
With CC and smaller hook, attach CC in any corner ch-2 space of a completed motif with sl st. Ch3 (counts as dc), (2 dc, ch2, 3 dc) in same corner to create a corner cluster that matches motif corners. (6 dc in corner cluster)
Round 2 :
Ch1, sc along the next side in the outer edge of the motif for 12 sts (or number matching your motif side), placing sc into each stitch; when you reach the midpoint between corners, ch3, skip 3 edge sts, and sc into the next stitch to create an open chain space — (this ch3 will form the open chain of the lattice). Continue sc to corner and work sc, ch2, sc into corner. The ch3 loop will later be joined to the adjacent motif’s ch3 loop to create a raised chain line.
Info :
Alternative: You can work a small puff stitch chain for a chunky raised line: ch1, *puff stitch in next st, ch1* across the side instead of simple sc and ch3 construction.
Round 3 :
On the adjacent motif, when you reach the corresponding midpoint ch3 loop, slip stitch into the ch3 and sc across to join motifs; then when working along a side where two motifs meet, join by working sc into each corresponding sc and sl st through the ch3 loop to create a decorative raised crosspoint. Repeat joining on all four sides per motif before moving on.
Round 4 :
Once you have a row of motifs joined by the ch3 loops, return to the CC lattice and work along both outer edges of the join: ch1, sc in each sc on either motif across the seam, and in the center of the seam work (3 dc, ch2, 3 dc) as a raised star at every crosspoint where four motifs meet (these star clusters are the cream petal points seen in the photos). This will create the raised ivory crosses at the intersections. Count: each join across a side will add approximately 12-16 CC stitches depending on your motif size.
Info :
Make sure the raised CC star at the intersection sits centered by aligning the four corner markers from each motif before stitching. Pin if needed to hold position while you work the raised cross.
Round 5 :
Ch2 and hdc evenly along the top of the join to lock the seam. Work in back loops only where you want a slightly recessed line next to the raised lattice. Repeat for every seam between motifs until your entire blanket is assembled into the desired layout.
Info :
If you prefer a neater invisible seam, use mattress stitch-like weaving with your yarn needle along the ch3 loops rather than surface crochet; both will produce the same raised look when you finish with the decorative star clusters at intersections.
— Border (worked after all motifs are joined) :
Notes :
Once your grid of motifs is joined, we create a multi-round border in CC and a final MC scallop. The border stabilizes the edge and provides the finished framed look seen in the images.
Round 1 :
With CC and smaller hook, join with sl st anywhere on the outer edge. Ch1, sc evenly around the entire perimeter working 3 sc into each corner ch-2 space to keep corners square. Count = perimeter depends on layout; keep stitch count divisible by 4 for symmetry.
Round 2 :
Ch2, hdc in each st around. Work 3 hdc in each corner sc from previous round. Sl st to join. (same total stitch count as Round 1)
Info :
This first CC border gives a clean frame for the raised lattice. If you'd like double thickness, repeat Round 2 in CC one more time to strengthen outer edge.
Round 3 :
Change to MC (dusty blue) with a sl st and ch1. Work sc in each stitch around to blend into the motif color. (perimeter stitch count unchanged)
Round 4 :
Ch3 (counts as dc), dc in next 2 sts, *skip 1 st, dc3 in next st* repeat around to form a shell texture across the border face. Work 3 dc shells into each corner space to keep even shaping. (shell count = perimeter/3 approx)
Round 5 :
Ch1, sc into each dc and 2 sc into each shell center to anchor the shells. Sl st to join. (perimeter same)
Round 6 :
Ch2, hdc in each st around in FLO to create a subtle ridge before the scallop. (perimeter same)
Round 7 :
Ch1, sc in next st, *skip 1, 5 dc in next st (scallop), skip 1, sc in next 2 sts* repeat around performing 5-dc scallops for the outer edge. Adjust so last repeat finishes neatly at the corner; 3-5 scallops per side is typical on smaller projects, more for full bedspread. (count depends on perimeter; each scallop uses 5 dc)
Info :
Make your final scallops bold or subtle — experiment on a scrap border to decide spacing for your bed size. If the edge waves, add an extra sc between scallops to tighten the curve.
Round 8 :
Ch1, sc in each stitch and across each scallop group placing 1 sc in top of scallop center to define each shell; finish with sl st, fasten off and weave in ends. (perimeter same)
— Final Edging (optional raised rope) :
Round 1 :
With CC and small hook, pick up at any corner and ch4, sl st in 3rd ch from hook to create a small loop, *ch3, sl st in next 2 sts* around the entire edge to create a raised bobble line that echoes the lattice. This is decorative and optional.
Round 2 :
Ch1, sc into each loop around to secure the rope; finish with sl st and fasten off. Weave in all ends. Block entire bedspread lightly using steam or a lightly misted spray to open the lace and set the square alignment.
Info :
Final pressing: If your yarn supports it, use a low steam from an iron with a pressing cloth to relax fibers and flatten motifs. For natural fibers, blocking will open the mesh most effectively; synthetic blends may respond better to a light steam only.
This Dusty Blue Lace Bedspread pattern combines modular square motifs with an elegant raised cream lattice for a timeless, cozy finish. Each square grows with pleasing texture and when joined becomes a soft, tactile grid that dresses any bed or sofa. The modular approach means you can scale the project easily — add more motifs for larger beds or work fewer squares for a lapghan. Enjoy the methodical flow of squares and the satisfying rhythm of joining; every intersection creates a delicate floral petal in cream. 🧶☁️ The finished bedspread is stylish, comforting, and makes a beautiful handmade gift. Happy crocheting!